การแนะนำ
This manual provides detailed instructions for the installation, operation, and maintenance of your YOUTHINK 12V 24V Auto Solar Charge Controller. This device is designed to manage the power flow from your solar panel to your battery, ensuring efficient charging and protecting your battery from overcharge and over-discharge. It features an industrial-grade master chip for precise control, a large LCD display for monitoring, and dual USB outputs for charging external devices.

ภาพ: ด้านหน้า view of the YOUTHINK Solar Charge Controller, showing the LCD screen, control buttons, USB ports, and terminal connections.
คุณสมบัติผลิตภัณฑ์
- High Accuracy Chip: Equipped with an industrial-grade master chip for precise charge and discharge parameter control. Supports light control and delay control functions.
- จอ LCD ขนาดใหญ่: Provides clear monitoring of charging and discharging data, including temperature, current, and accumulated electricity generated/discharged.
- เอาต์พุต USB คู่: Features two USB output interfaces with a maximum current of 2.5A, suitable for charging phones and other USB devices.
- ฟังก์ชั่นการป้องกันที่ครอบคลุม: Built-in overcurrent, short circuit, open circuit, and reverse connection protection. These are self-recovery features, ensuring the controller remains undamaged. Includes an anti-backflow circuit and ultra-low heat design.
- การประยุกต์ใช้ที่กว้าง: Suitable for various solar power systems, including solar RVs, household setups, and industrial field monitoring.
การติดตั้งและการตั้งค่า
Proper installation is crucial for the safe and efficient operation of your solar charge controller. Please follow these steps carefully:
- เตรียมความพร้อมสำหรับการติดตั้ง: Ensure all components (solar panel, battery, load) are disconnected. Choose a dry, well-ventilated location for the controller, away from direct sunlight and moisture.
- เชื่อมต่อแบตเตอรี่: First, connect the battery to the charge controller. Ensure correct polarity (+ to + and - to -). The controller will detect the battery voltage (12V or 24V) automatically.
- เชื่อมต่อแผงโซล่าเซลล์: Next, connect the solar panel to the charge controller. Again, observe correct polarity. The LCD display should show charging activity if the panel is receiving sunlight.
- เชื่อมต่อโหลด: Finally, connect your DC load (e.g., lights, fans) to the load terminals of the controller. Ensure correct polarity.
หมายเหตุด้านความปลอดภัยที่สำคัญ:
- Always connect the battery first and disconnect it last.
- ตรวจสอบให้แน่ใจว่าการเชื่อมต่อทั้งหมดแน่นสนิท เพื่อป้องกันการหลวมของหน้าสัมผัสและความร้อนสูงเกินไป
- Do not connect an inverter directly to the load terminals of the controller.
- The controller is designed for lead-acid batteries (OPEN, AGM, GEL). Do not use it with other battery types unless specified.

ภาพ: ด้านข้าง view of the YOUTHINK Solar Charge Controller, highlighting the input and output terminal connections for solar panels, battery, and DC load.
คำแนะนำการใช้งาน
The YOUTHINK solar charge controller features a user-friendly LCD display and three control buttons for easy operation.
ข้อมูลจอแสดงผล LCD:
The large LCD display cycles through various parameters, providing real-time data on your system's performance:
- ปริมาณแบตเตอรี่tage: เล่มปัจจุบันtage ของแบตเตอรี่ที่เชื่อมต่อ
- กระแสไฟชาร์จ: Current flowing from the solar panel to the battery.
- กระแสไฟปล่อย: Current drawn by the connected DC load.
- อุณหภูมิแบตเตอรี่: Internal temperature of the controller, indicative of ambient temperature.
- Accumulated Electricity Generated: Total energy harvested from the solar panel.
- Accumulated Electricity Discharged: Total energy consumed by the load.
ปุ่มฟังก์ชั่น:
The controller has three buttons:
- ปุ่มเมนู: Press to cycle through display modes and enter/exit parameter settings.
- ปุ่มขึ้น: Used to increase values or navigate up in menus.
- ปุ่มลง: Used to decrease values or navigate down in menus.
การตั้งค่าพารามิเตอร์:
To adjust parameters such as charge voltage, ปริมาตรการตัดการระบายtage, or load control mode:
- กดปุ่มค้างไว้ เมนู กดปุ่มค้างไว้ 5 วินาทีเพื่อเข้าสู่โหมดการตั้งค่าพารามิเตอร์
- ใช้ Up และ ลง buttons to navigate between parameters.
- กดปุ่ม เมนู button once to select a parameter for editing. The value will flash.
- ใช้ Up และ ลง ปุ่มเพื่อปรับค่า
- กดปุ่ม เมนู กดปุ่มอีกครั้งเพื่อยืนยันค่าใหม่
- กดปุ่มค้างไว้ เมนู button for 5 seconds to exit the setting mode.
เอาท์พุต USB:
The dual USB ports provide 5V/2.5A output for charging compatible devices. These ports are active when the controller is powered on.
การซ่อมบำรุง
To ensure the longevity and optimal performance of your YOUTHINK solar charge controller, regular maintenance is recommended:
- ตรวจสอบการเชื่อมต่อ: Periodically inspect all wiring connections to ensure they are secure and free from corrosion. Loose connections can cause voltagการลดลงของอุณหภูมิและความร้อนสูงเกินไป
- ทำความสะอาดตัวควบคุม: Keep the controller clean and free from dust and debris. Use a dry cloth to wipe the exterior. Do not use liquids or abrasive cleaners.
- การระบายอากาศ : Ensure the installation area remains well-ventilated to prevent overheating, especially during periods of high charging or discharging.
- การตรวจสอบแบตเตอรี่: Regularly check your battery for signs of damage, corrosion, or swelling. Ensure battery terminals are clean.
- สภาพแวดล้อม : ป้องกันตัวควบคุมจากอุณหภูมิที่สูงเกินไป แสงแดดโดยตรง และความชื้น
การแก้ไขปัญหา
หากคุณพบปัญหาเกี่ยวกับตัวควบคุมการชาร์จพลังงานแสงอาทิตย์ โปรดดูปัญหาทั่วไปและวิธีแก้ไขต่อไปนี้:
| ปัญหา | สาเหตุที่เป็นไปได้ | สารละลาย |
|---|---|---|
| No Display / Controller Not Working | แบตเตอรี่ไม่ได้เชื่อมต่อหรือต่อขั้วกลับด้าน; ระดับเสียงแบตเตอรี่tagอีต่ำเกินไป | ตรวจสอบการเชื่อมต่อและขั้วของแบตเตอรี่ ตรวจสอบให้แน่ใจว่าแบตเตอรี่มีแรงดันไฟฟ้าเพียงพอtage is above 8V for 12V systems or 16V for 24V systems. |
| แบตเตอรี่ไม่ได้ชาร์จ | Solar panel not connected or reverse polarity; Insufficient sunlight; Solar panel fault; Open circuit in wiring. | Check solar panel connections and polarity. Ensure adequate sunlight. Inspect solar panel and wiring for damage. |
| โหลดไม่ทำงาน | Load not connected or reverse polarity; Battery voltage too low (load cut-off); Overload protection activated. | Check load connections and polarity. Charge battery. Reduce load or check for short circuits. |
| พอร์ต USB ไม่ชาร์จ | Controller not powered; Device not compatible; USB cable fault. | Ensure controller is powered by battery. Try a different USB device or cable. |
| ความร้อนสูงเกินไป | Poor ventilation; Excessive load or charging current. | Ensure proper airflow around the controller. Reduce load or check for system imbalances. |
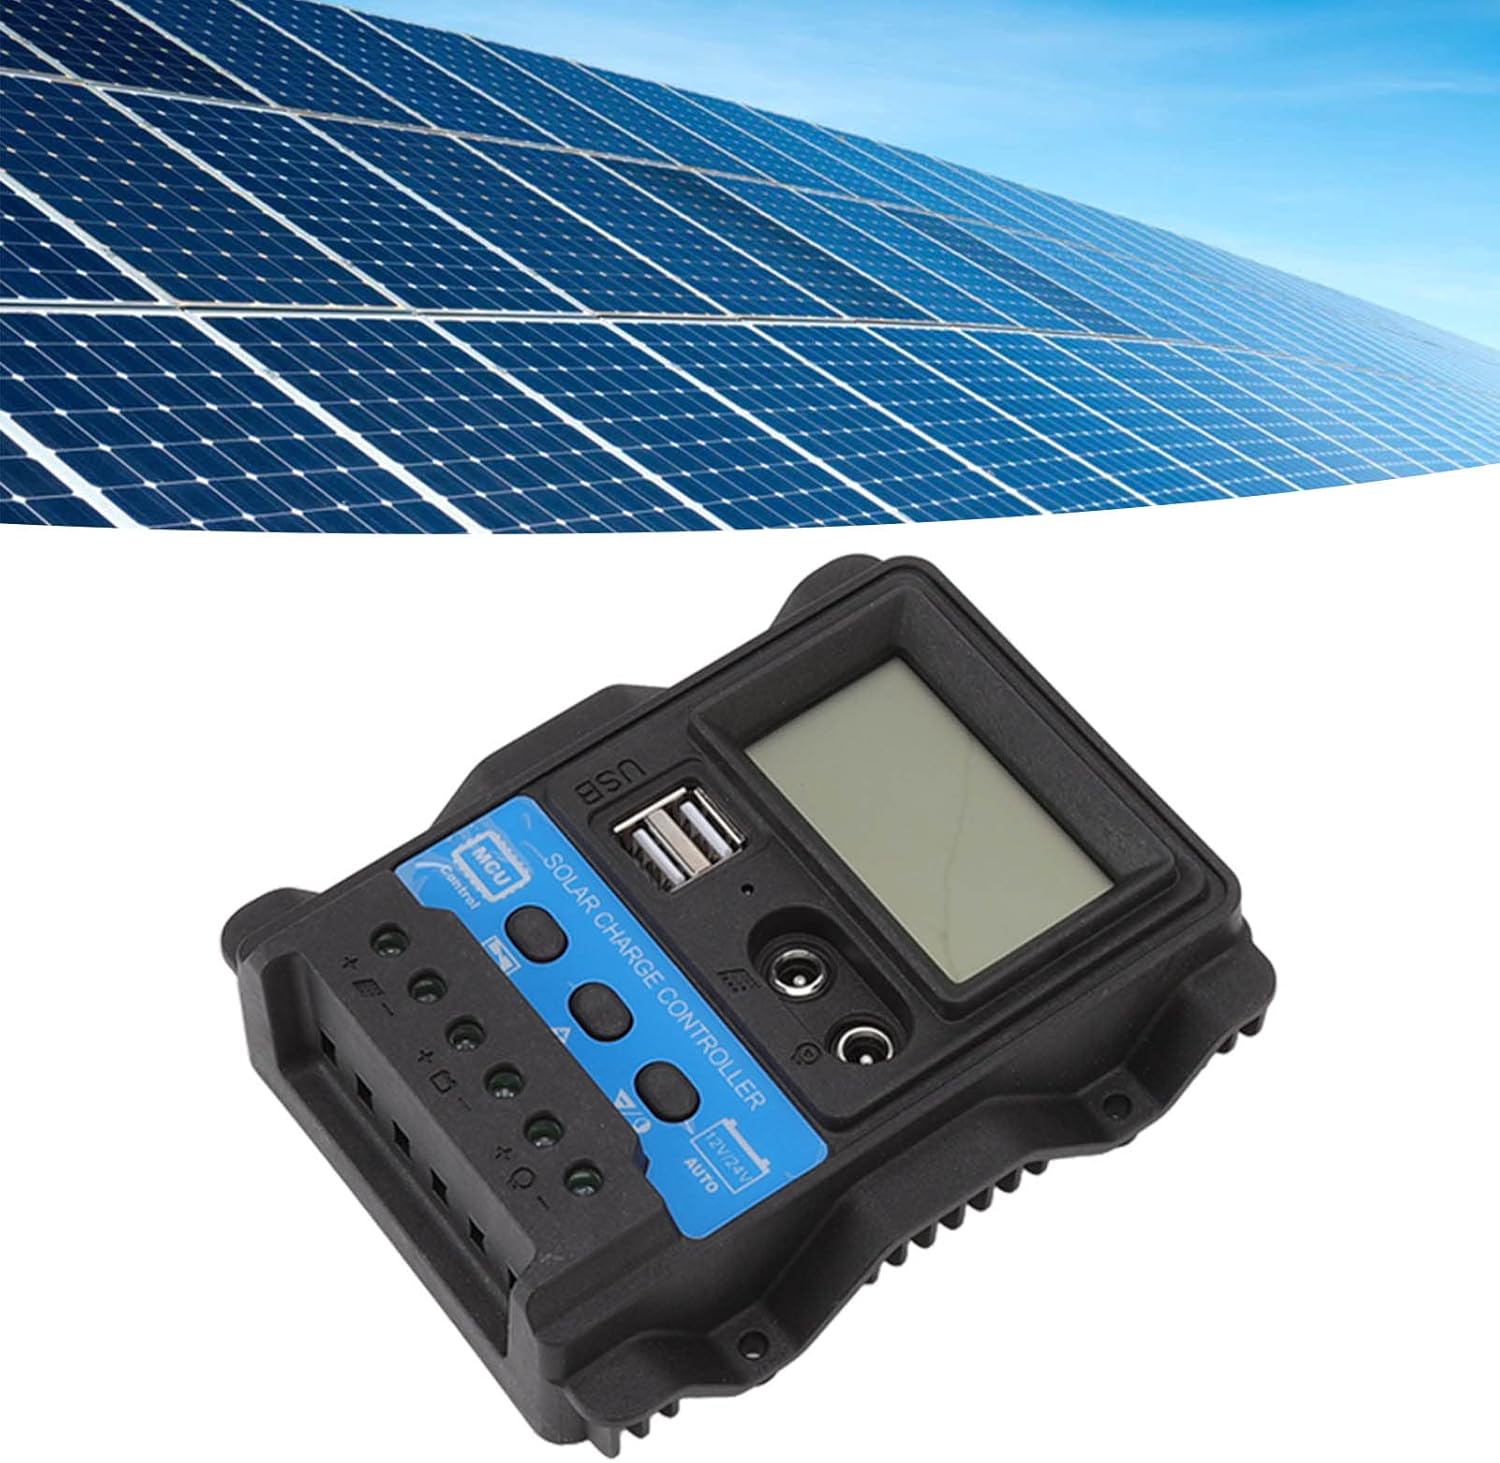
Image: The YOUTHINK Solar Charge Controller integrated into a solar power system with solar panels in the background.
ข้อมูลจำเพาะ
| พารามิเตอร์ | ค่า |
|---|---|
| แบบอย่าง | เค1688 |
| เล่มระบบtage | 12V / 24V Automatic Adaptation |
| Maximum Photovoltaic Voltage | 23V (for 12V system), 46V (for 24V system) |
| Lifting Voltage | 14.4V (12V system), 28.8V (24V system) |
| ปริมาณการชาร์จtage | 13.7V (default, adjustable) (12V system), 27.4V (default, adjustable) (24V system) |
| การตัดจำหน่ายฉบับที่tage | 10.7V (default, adjustable) (12V system), 21.4V (default, adjustable) (24V system) |
| การกู้คืนการปลดปล่อย Voltage | 12.6V (default, adjustable) (12V system), 25.2V (default, adjustable) (24V system) |
| การชาร์จการกู้คืนฉบับที่tage | 13V (12V system), 26V (24V system) |
| Light Control Light On Threshold | 8V for photovoltaic panel (with delay) (12V system), 16V for photovoltaic panel (with delay) (24V system) |
| Light Control Light Off Threshold | 8V for photovoltaic panel (with delay) (12V system), 16V for photovoltaic panel (with delay) (24V system) |
| วัสดุ | เอบีเอส |
| ขนาด | 12.5 x 10 x 3 ซม. (4.92 x 3.94 x 1.18 นิ้ว) |
| น้ำหนักสินค้า | ประมาณ. 202 ก. (7.13 ออนซ์) |
| เอาท์พุต USB | Dual USB, 5V/2.5A Max |
การรับประกันและการสนับสนุน
YOUTHINK products are designed for reliability and performance. For specific warranty details and technical support, please refer to the warranty card included with your product or contact YOUTHINK customer service through the retailer where the product was purchased. Please have your model number (K1688) and purchase date available when contacting support.