
1. ข้อมูลด้านความปลอดภัยที่สำคัญ
Please read all instructions carefully before operating the appliance and retain them for future reference. Always follow basic safety precautions to reduce the risk of fire, electric shock, or injury. This appliance is for indoor use only. Do not operate the unit with a damaged cord or plug. Ensure the power source matches the voltage requirements of the unit. Do not block air inlets or outlets. Always unplug the unit before cleaning or performing maintenance. Keep children and pets away from the unit during operation.
2. เนื้อหาบรรจุภัณฑ์
ตรวจสอบว่ารายการทั้งหมดที่ระบุไว้ด้านล่างนี้รวมอยู่ในแพ็คเกจของคุณ:
- เครื่องปรับอากาศแบบพกพา
- รีโมทคอนโทรล (ต้องใช้แบตเตอรี่ AAA 2 ก้อน ไม่รวมอยู่ด้วย)
- ท่อไอเสีย
- Window Sealing Board Kit (includes extension piece for larger windows)
- ท่อระบายน้ำ
- คู่มือการใช้งาน
- คู่มือเริ่มต้นอย่างรวดเร็ว
- คู่มือการดาวน์โหลดแอป
- Butterfly Nuts (for window kit assembly)
3. การตั้งค่าและการติดตั้ง
3.1 Exhaust Hose Assembly
The exhaust hose requires minor assembly. Lift off one end of the exhaust pipe. Align the cork-threaded end of the hose with the exhaust pipe and turn it several times until it is firm and secure. The hose should be able to expand without the ends detaching, indicating correct assembly.
3.2 การติดตั้งชุดหน้าต่าง
The window kit may require careful handling during assembly. To attach the butterfly nuts, separate the butterfly bolt and insert the bottom piece through the hole on the window kit. Align the grooves on the back side of the window kit with the bolt and slide it over. Flip it over, place the washer, and then the butterfly nut. Keep it slightly loose initially to allow adjustment for your window's length. Once the appropriate length is found, tighten the nuts to secure the kit. The adjustable 3-section sealing board adapts to taller and wider windows, ensuring a snug fit and maximum efficiency.
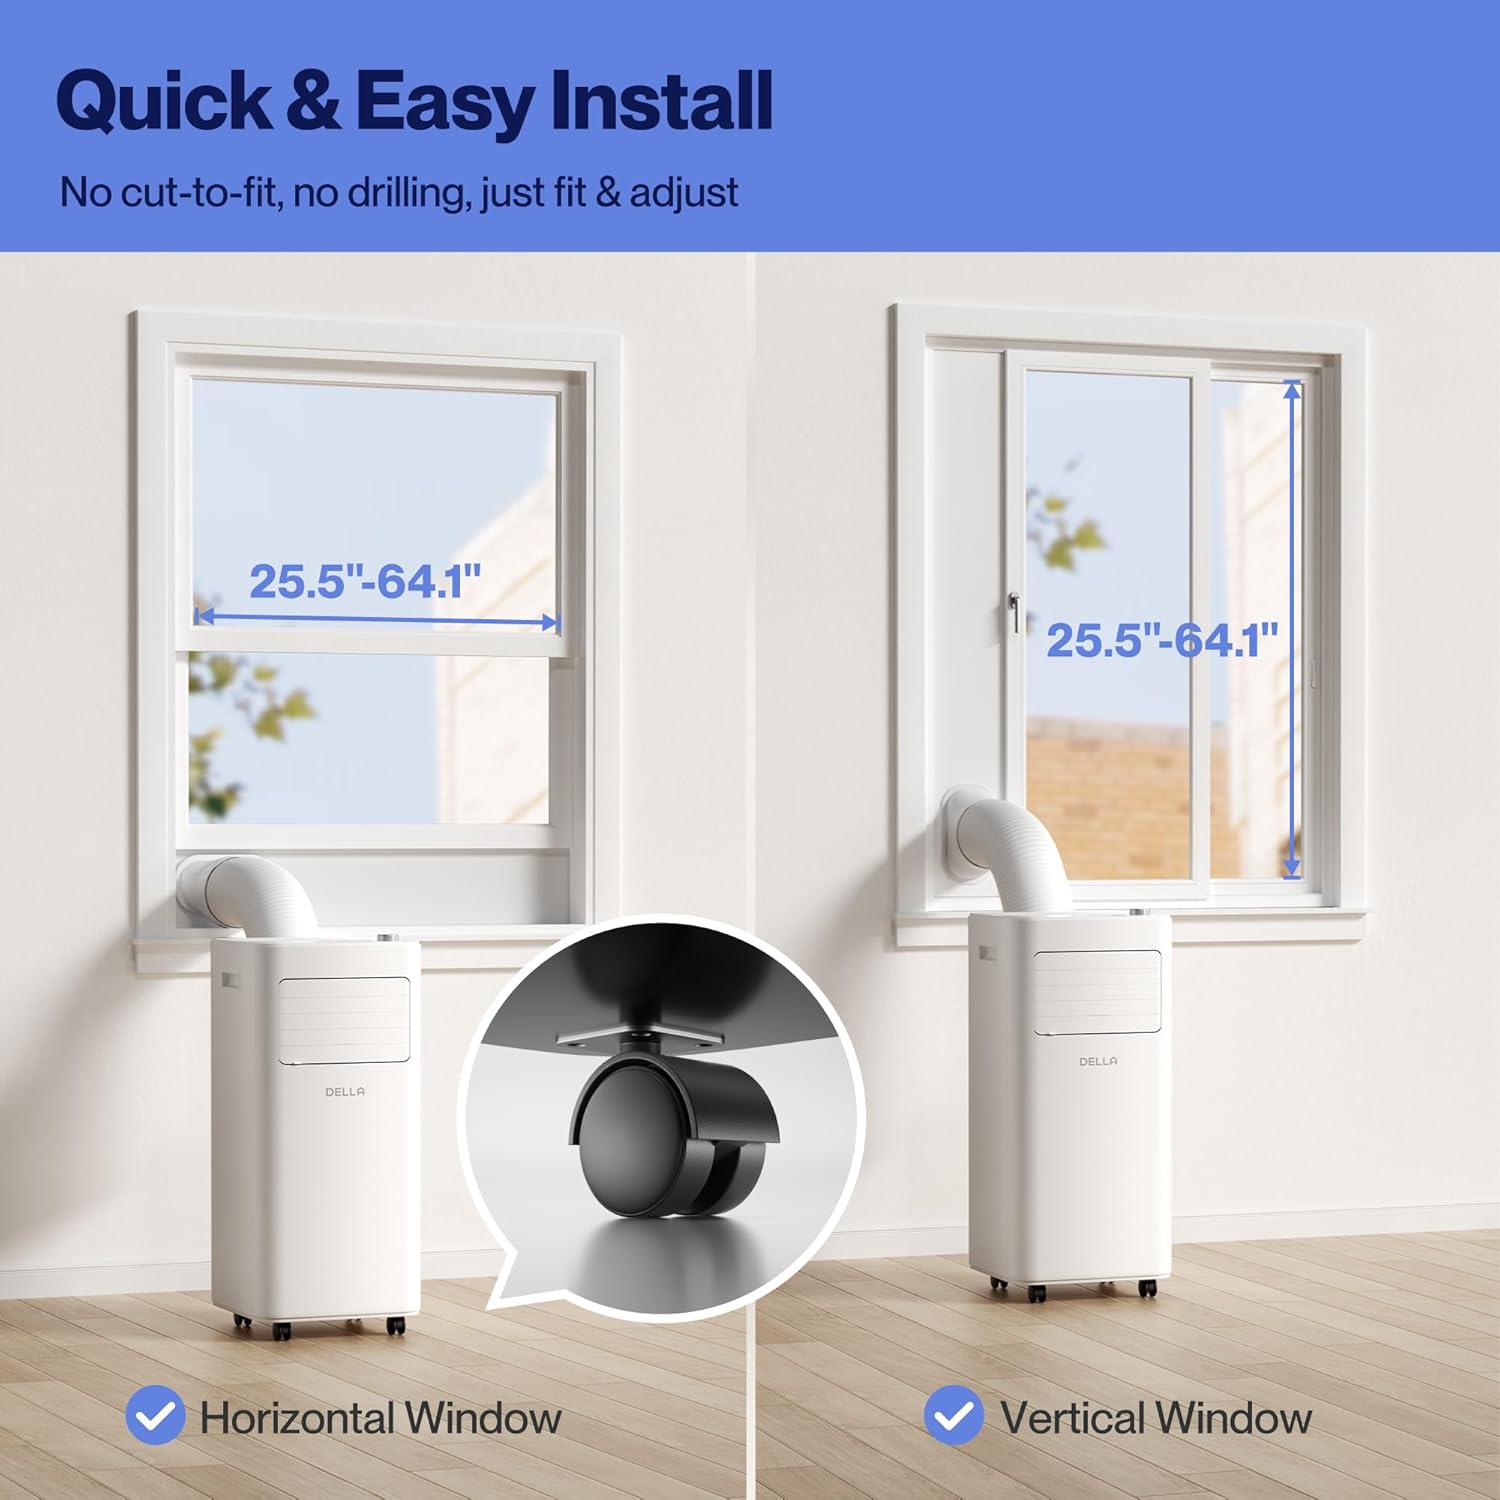
Figure 3.2.1: The portable AC unit is compatible with both horizontal and vertical window types, with adjustable window kits for easy installation.
3.3 Unit Placement and Power Connection
Position the portable AC unit in a location that allows for proper air circulation and exhaust venting. This compact unit (12.2 x 12.2 x 27.6 inches, 47.4 lbs) is ideal for dorms, apartments, cabins, campers, offices, bedrooms, or living rooms. Ensure there is approximately 19 inches of clearance for the exhaust hose. Connect the unit to a three-prong outlet directly; do not use extension cords or surge protectors. The power cord can be stored in a dedicated section at the back of the unit to protect it from damage.

Figure 3.3.1: The compact dimensions of the portable AC unit, measuring 12.2 inches deep, 12.2 inches wide, and 27.6 inches high.
4. การใช้งานเครื่อง
Before turning on the AC unit, manually open the louvers on the front. The control buttons on the top panel are touch-sensitive. A gentle touch will activate them. The unit features a bright LED display and indicator lights for each function.

Figure 4.1: The intuitive top-mounted control panel with LED display for easy operation.
4.1 โหมดการทำงาน
This AC unit comes with four separate modes: Dry (Dehumidify), Fan, Heat, and Cool.
- โหมดลดความชื้น (Dry Mode): In this mode, the unit removes up to 48 pints/day of moisture. Ensure the exhaust hose and continuous drainage hose are installed. Only a low fan speed option is available, and there are no adjustable temperature or humidity levels as the unit automatically dehumidifies based on its own parameters.
- โหมดพัดลม: The unit acts as a regular fan, circulating air around the room. Two fan speed options are available: low and high.
- โหมดความร้อน: (Available on specific models) Adjust the temperature using the dial on the right, from 61°F (16°C) up to 90°F (32°C). Fan speed can also be adjusted between low and high.
- โหมดเย็น: The 10000 BTU unit cools rooms up to 250 sq. ft. The cooling temperature range is 61°F (16°C) to 90°F (32°C). Ensure the exhaust hose is attached for effective operation. Temperature and fan speed (low/high) are adjustable.
4.2 ฟังก์ชั่นจับเวลา
Press the Timer button to set an operating duration. The time can be adjusted using the dial, from 1 hour up to 24 hours.
4.3 โหมดสลีป
Sleep mode dims the lights on the display and operates at a low fan speed to ensure quieter operation. To activate or deactivate, press the Sleep button. The display brightness will return upon deactivation.
4.4 ล็อคป้องกันเด็ก
To activate the child lock, push and hold the Lock button for 3 seconds. While active, none of the unit's settings can be changed. To deactivate, push and hold the Lock button again for 3 seconds.
4.5 Smart Features (WiFi & App Control)
The unit is WiFi-enabled and compatible with Alexa and Google Home. Download the free Della+ App to control your comfort from anywhere. The app also features Geo Fencing, which can detect when you are a certain distance from home and automatically turn on the unit to your preset parameters before you arrive.

Figure 4.5.1: Control your Della AC unit remotely using the Della+ App, compatible with Alexa and Google Assistant.

Figure 4.5.2: Smart Geo Location allows your AC to cool your home automatically as you approach.
4.6 การควบคุมระยะไกล
The remote control provides access to all the functions available on the unit's top panel, allowing you to operate the AC from a distance. Additionally, the remote includes a button to switch the temperature display between Celsius and Fahrenheit.
5. การบำรุงรักษา
5.1 การทำความสะอาดตัวกรอง
The unit has two mesh filters (upper and lower) located at the back. They can be removed with a gentle pull. Keep these filters clean by vacuuming away any debris. If they are very dirty, soak them in warm water with a mild detergent. Ensure the filters are thoroughly dried before reinstalling them.
5.2 การระบายน้ำ
The unit has two drainage points: an upper and a lower drain. When the unit's internal water reservoir is full, unplug it and drain it. For manual drainage, use the bottom plug. Take the unit to a suitable drainage site, pull the plug, and allow it to drain. For continuous drainage during Dry mode, use the upper drain. Install the drainage hose into the upper drain and direct the other end into a bucket or water reservoir to collect the continuously drained water.
6 การแก้ไขปัญหา
If the unit is not operating as expected, consider the following common issues:
- หน่วยไม่เปิด: Ensure the power cord is securely plugged into a three-prong outlet. Check if there's a power outagหรือเบรกเกอร์วงจรตัดการทำงาน
- Insufficient cooling/dehumidifying: Verify that the exhaust hose is properly installed and not blocked. Clean the air filters if they are dirty. Ensure windows and doors in the room are closed to prevent outside air from entering.
- ตัวบ่งชี้ระดับน้ำเต็ม: If the water full indicator lights up, the internal reservoir needs to be drained. Refer to section 5.2 for drainage instructions.
- เสียงผิดปกติ: A slight humming sound is normal during operation. If the noise is excessive or unusual, ensure the unit is on a flat, stable surface and that no foreign objects are obstructing the fan or internal components.
- การควบคุมระยะไกลไม่ทำงาน: Check if the remote control batteries (2 AAA) need replacement. Ensure there are no obstructions between the remote and the unit's sensor.
- Smart features connectivity issues: Ensure your Wi-Fi network is active and the unit is within range. Refer to the app's troubleshooting guide for specific connectivity steps.
7. ข้อมูลจำเพาะ
| คุณสมบัติ | รายละเอียด |
|---|---|
| หมายเลขรุ่น | 048-OPAC-6 |
| ความสามารถในการทำความเย็น | 10000 BTU ASHRAE (6000 BTU SACC) |
| พื้นที่ให้บริการ | พื้นที่สูงสุดถึง 250 ตร.ฟุต |
| ช่วงอุณหภูมิในการทำความเย็น | 61°F (16°C) ถึง 90°F (32°C) |
| ความจุเครื่องลดความชื้น | สูงสุด 48 ไพนต์ต่อวัน |
| ระดับเสียงรบกวนในการทำงาน | 54 เดซิเบล(เอ) |
| ขนาดสินค้า (ลึก x กว้าง x สูง) | 12.2 x 12.2 x 27.6 นิ้ว |
| น้ำหนักสินค้า | 47.4 ปอนด์ |
| เล่มที่tage | 115 โวลต์ |
| ความยาวสายไฟ | 70.8 นิ้ว |
| ความยาวท่อไอเสีย | 47 นิ้ว |
| สารทำความเย็น | อาร์ 410เอ |
8. การรับประกันและการสนับสนุน
For detailed warranty information, technical support, or further assistance, please refer to the complete User Manual PDF available for download or contact Della customer support. The User Manual PDF can be found at: https://manuals.plus/m/a5f6305f89008d3f720ca6a319c919257f899e0c58f4899f90946e105a108530