1. ข้อมูลด้านความปลอดภัยที่สำคัญ
Please read this manual thoroughly before operating the ABBREE AR-M7 CB Radio. Retain this manual for future reference.
- แหล่งจ่ายไฟ: Use only the specified 13.8V DC power supply. Incorrect voltagอาจทำให้เครื่องเสียหายและทำให้การรับประกันเป็นโมฆะ
- เสาอากาศ: Ensure the antenna is properly connected before transmitting to prevent damage to the radio's final ampชีวิต.
- การติดตั้ง: Install the radio in a secure location, away from direct sunlight, excessive heat, dust, and moisture.
- การดำเนินการ: อย่าเปิดวิทยุขณะขับรถ หากวิทยุทำให้คุณเสียสมาธิในการควบคุมรถอย่างปลอดภัย
- การซ่อมบำรุง: Do not attempt to open or repair the unit yourself. Refer all servicing to qualified technicians.
2. เนื้อหาบรรจุภัณฑ์
ตรวจสอบว่ามีรายการทั้งหมดอยู่ในแพ็คเกจของคุณ:
- ABBREE AR-M7 CB Radio Unit
- ไมโครโฟนมือ
- สายไฟ DC
- ตัวยึด
- Screw and Accessory Kit
- คู่มือการใช้งาน (เอกสารนี้)

รูปที่ 2.1: เนื้อหาแพ็คเกจที่รวมอยู่
If any items are missing or damaged, please contact your retailer or ABBREE customer support.
3. สินค้าหมดview
The ABBREE AR-M7 is a compact, dual-mode AM/FM CB radio designed for reliable communication. It features a full-color LCD display and essential functions for various mobile applications.
3.1 แผงควบคุมและช่องต่อด้านหน้า

รูปที่ 3.1: แผนผังและฟังก์ชันของแผงด้านหน้า
- อินเทอร์เฟซไมโครโฟน: Connects the hand microphone.
- ปุ่มเพาเวอร์: Press to turn the radio on or off.
- MT/LOCK Button: Mute function / Keypad lock.
- จอแสดงผล LCD: Shows channel, frequency, mode, and other status indicators.
- SQ/M1 Button: Squelch function / Store memory channel function button.
- VOX/M2 Button: Voice Operated Exchange function / Store memory channel function button.
- ASQ/M3 Button: Automatic Squelch Control / Store memory channel function button.
- ปุ่มปรับช่องสัญญาณ: Rotate to select channels.
- CH/M3 Button: Channel switch / Store memory channel function button.
- A/F Button: Modulation switch (AM/FM).
- TSQ/M4 Button: CTCSS/DCS function / Store memory channel function button.
- ปุ่มสแกน: Scan channel function button.
- ปุ่ม EMG: Emergency channel button (CH9/19).
3.2 ขั้วต่อแผงด้านหลัง
- อินเทอร์เฟซเสาอากาศ: Connects to the external CB antenna.
- Power Cable Port: Connects the DC power cable.
- แจ็คลำโพงภายนอก: สำหรับเชื่อมต่อลำโพงภายนอก (อุปกรณ์เสริม)
4. การตั้งค่าและการติดตั้ง
4.1 การติดตั้งวิทยุ
Use the provided mounting bracket and screws to secure the radio in a suitable location within your vehicle. Ensure the location allows for proper ventilation and easy access to controls.
4.2 การเชื่อมต่อสายไฟ
Connect the supplied DC power cable to the radio's power port and to your vehicle's 13.8V DC power source. Ensure correct polarity (red to positive, black to negative) to prevent damage.
4.3 การเชื่อมต่อเสาอากาศ
Connect your CB antenna to the antenna interface on the rear of the radio. Ensure the connection is secure. Never transmit without a properly connected antenna.
4.4 การเชื่อมต่อไมโครโฟน
Plug the hand microphone into the microphone interface on the front panel. Ensure it clicks into place securely.

Figure 4.1: Connecting the Hand Microphone
5. การทำงานพื้นฐาน
5.1 เปิด/ปิดเครื่อง
กดปุ่มค้างไว้ พลัง button to turn the radio on or off. The LCD display will illuminate upon power-on.
5.2 การควบคุมระดับเสียง
หมุน ลูกบิดช่อง (when not in channel selection mode) or use the UP/DOWN buttons on the microphone to adjust the audio volume.
5.3 การเลือกช่องสัญญาณ
หมุน ลูกบิดช่อง to select your desired operating channel (1-40). Alternatively, use the UP/DOWN buttons on the microphone.

Figure 5.1: 40 Channel Capacity
5.4 การควบคุมสเกลช์ (SQ/ASQ)
Squelch eliminates background noise when no signal is present.
- ระบบตัดเสียงรบกวนแบบแมนนวล (SQ): กดปุ่ม SQ/M1 button. Rotate the Channel Knob to adjust the squelch level. A higher number means stronger squelch.
- ระบบสเควล์ชอัตโนมัติ (ASQ): กดปุ่ม ASQ/M3 button to activate or deactivate automatic squelch. This feature automatically adjusts the squelch level for optimal reception.
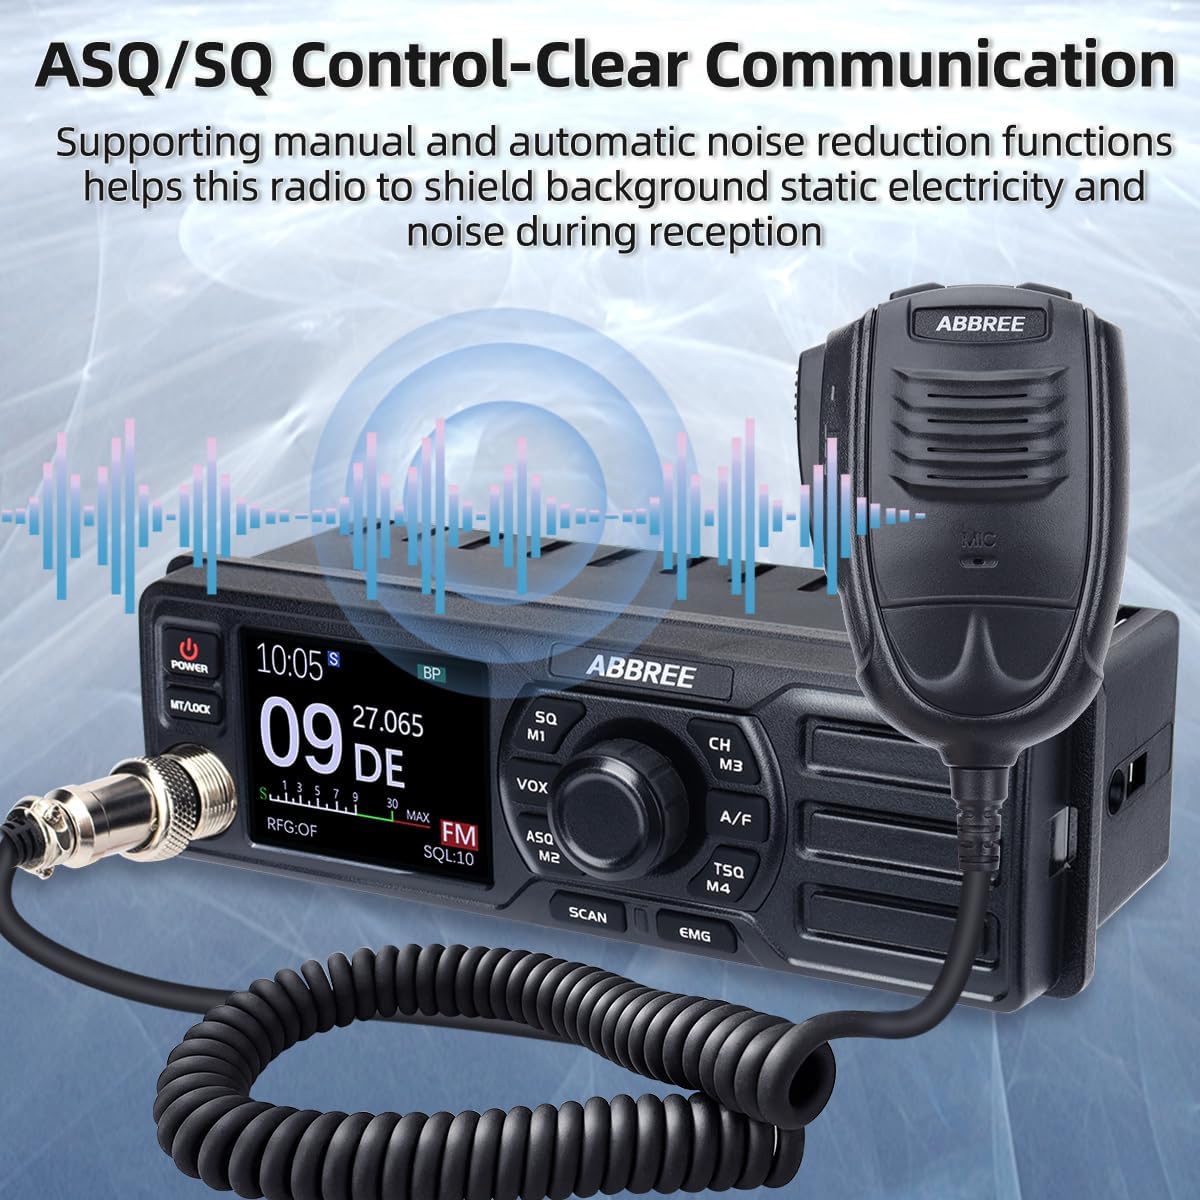
Figure 5.2: ASQ/SQ Control for Clear Communication
6. คุณสมบัติขั้นสูง
6.1 การเลือกโหมด AM/FM
กดปุ่ม A / F ปุ่มสำหรับสลับระหว่าง AM (Amplitude Modulation) and FM (Frequency Modulation) modes. The selected mode will be displayed on the LCD.
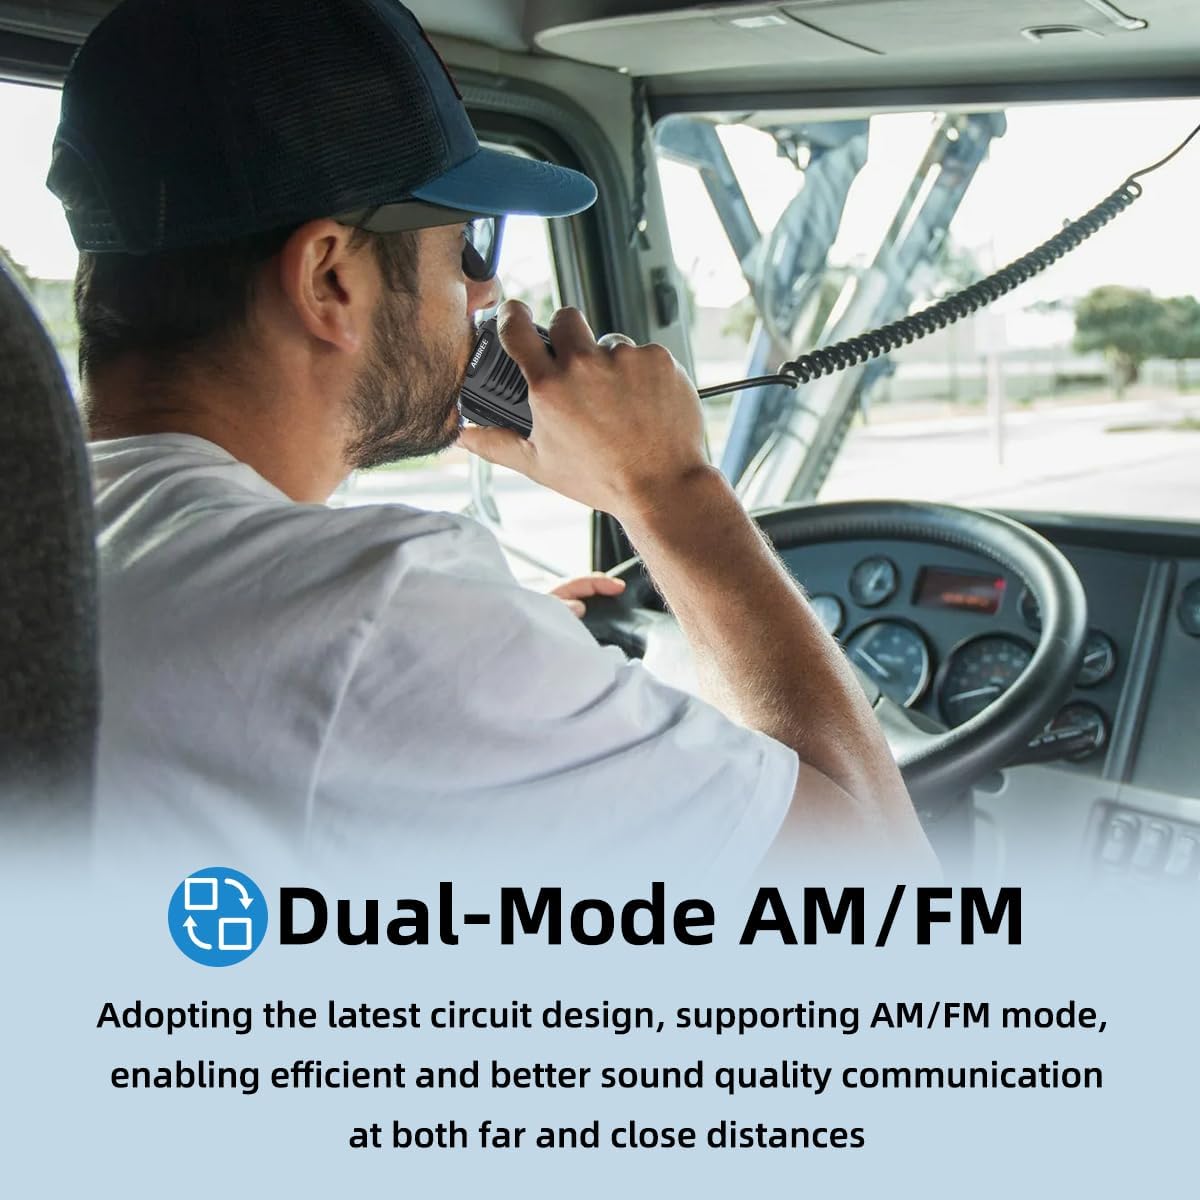
Figure 6.1: Dual-Mode AM/FM Operation
6.2 ช่องสัญญาณฉุกเฉิน (CH9/19)
กดปุ่ม อีเอ็มจี button for instant access to emergency channels. Channel 9 is typically used for emergency communications, and Channel 19 for truck drivers. Press again to return to the previous channel.

Figure 6.2: Instant Access to Emergency Channels
6.3 ฟังก์ชัน VOX (การแลกเปลี่ยนด้วยเสียง)
The VOX function allows hands-free transmission. When activated, the radio will transmit automatically when it detects your voice.
- กดปุ่ม VOX/M2 button to activate or deactivate VOX.
- Adjust VOX sensitivity through the menu settings (refer to the full manual for detailed menu navigation).

รูปที่ 6.3: การสื่อสารแบบแฮนด์ฟรีด้วย VOX
6.4 ฟังก์ชั่นการสแกน
กดปุ่ม สแกน button to initiate channel scanning. The radio will scan through active channels and stop when a signal is detected. It will resume scanning after a short delay or when the signal disappears.
6.5 CTCSS/DCS (Tone Squelch)
CTCSS (Continuous Tone-Coded Squelch System) and DCS (Digital Coded Squelch) are used to filter out unwanted conversations.
- กดปุ่ม TSQ/M4 button to access CTCSS/DCS settings.
- Select the desired tone or code from the available options.
6.6 TOT (ตัวจับเวลาหมดเวลา)
The Time-Out Timer limits the duration of a single transmission to prevent accidental long transmissions and channel hogging. If the transmission exceeds the set time, the radio will stop transmitting automatically.
6.7 RFG (RF Gain)
RF Gain adjusts the sensitivity of the receiver. Lowering the RF Gain can help reduce background noise from weak signals or distant stations, improving clarity for stronger, closer signals.
7. การบำรุงรักษา
Proper maintenance ensures the longevity and optimal performance of your AR-M7 CB Radio.
- การทำความสะอาด: ใช้ผ้าแห้งนุ่มเช็ดทำความสะอาดภายนอกวิทยุ ห้ามใช้สารทำความสะอาดที่มีฤทธิ์กัดกร่อนหรือตัวทำละลาย
- สิ่งแวดล้อม: Keep the radio away from extreme temperatures, direct sunlight, and excessive moisture.
- การเชื่อมต่อ: ตรวจสอบการเชื่อมต่อสายเคเบิลทั้งหมด (สายไฟ สายเสาอากาศ สายไมโครโฟน) เป็นระยะ เพื่อดูว่าแน่นหนาดีหรือไม่ และมีร่องรอยการสึกหรอหรือไม่
8 การแก้ไขปัญหา
If you experience issues with your AR-M7 CB Radio, refer to the following common problems and solutions:
| ปัญหา | สาเหตุที่เป็นไปได้ | สารละลาย |
|---|---|---|
| วิทยุไม่สามารถเปิดได้ | No power connection; incorrect voltage; ฟิวส์ขาด | Check power cable connection; ensure 13.8V DC supply; check vehicle's fuse box. |
| ไม่มีสัญญาณหรือสัญญาณอ่อนมาก | Antenna not connected; squelch too high; incorrect channel/mode. | Ensure antenna is connected; adjust squelch level (SQ/ASQ); verify channel and AM/FM mode. |
| ไม่สามารถส่งต่อได้ | Microphone not connected; antenna issue; TOT activated. | Check microphone connection; ensure antenna is properly connected; wait for TOT to reset or reduce transmission time. |
| เสียงรบกวนพื้นหลังมากเกินไป | Squelch too low; RF Gain too high; electrical interference. | Increase squelch level; adjust RF Gain; check for nearby electrical interference sources. |
If the problem persists after attempting these solutions, please contact ABBREE customer support for assistance.
9. ข้อมูลจำเพาะ
| คุณสมบัติ | ข้อมูลจำเพาะ |
|---|---|
| แบบอย่าง | เออาร์-เอ็ม7 |
| ช่วงความถี่ | 26.965-27.405เมกะเฮิรตซ์ |
| ช่องทางการ | 40 ช่อง CB |
| โหมดปรับเปลี่ยน | เอเอ็ม/เอฟเอ็ม |
| กำลังขับ | 4 วัตต์ |
| อินพุต Voltage | กระแสตรง 13.8 โวลต์ |
| ขนาด (กว้าง x สูง x ลึก) | 7.3 x 3 x 2.2 นิ้ว (ประมาณ 185 x 76 x 56 มม.) |
| น้ำหนัก | ประมาณ 2.92 ปอนด์ (1.32 กก.) |
| การให้คะแนนการคุ้มครองระหว่างประเทศ | IP65 |

Figure 9.1: Compact Dimensions of the AR-M7
10. การรับประกันและการสนับสนุน
ABBREE products are designed for reliability and performance. For warranty information, technical support, or service inquiries, please contact your authorized ABBREE dealer or visit the official ABBREE webเว็บไซต์.
Please have your model number (AR-M7) and purchase information ready when contacting support.