
1. บทนำ
This manual provides detailed instructions for the setup, operation, and maintenance of your TELLUR Shade Wireless Mouse (Model 491261). This mouse features multi-device connectivity, silent click buttons, RGB lighting, and adjustable DPI settings for enhanced productivity and comfort across various operating systems.
2. เนื้อหาบรรจุภัณฑ์
ตรวจสอบว่ามีรายการทั้งหมดอยู่ในแพ็คเกจของคุณ:
- 1 x TELLUR Shade Wireless Mouse
- 1 x Nano receiver (USB-A)
- สายชาร์จ Type-C 1 เส้น
- 1 x คู่มือผู้ใช้ (เอกสารฉบับนี้)

Image: The TELLUR Shade Wireless Mouse, accompanied by its USB Nano receiver and Type-C charging cable, illustrating the complete package contents.
3. สินค้าหมดview
Familiarize yourself with the components of your TELLUR Shade Wireless Mouse:

ภาพ: จากบนลงล่าง view of the TELLUR Shade Wireless Mouse, highlighting the left and right silent click buttons, the main scroll wheel, DPI adjustment button, and the multi-device switch button.
- ปุ่มคลิกซ้าย: การทำงานที่เงียบ
- ปุ่มคลิกขวา: การทำงานที่เงียบ
- Scroll Wheel (Main): สำหรับการเลื่อนหน้าจอในแนวตั้ง
- ปุ่มปรับ DPI: Cycles through DPI settings (800/1200/1600/2400/3200).
- Multi-Device Switch Button: Toggles between connected devices (1, 2, 3, 4).
- ปุ่มไปข้างหน้า: นำทางไปข้างหน้าใน web เบราว์เซอร์หรือ file นักสำรวจ
- ปุ่มย้อนกลับ: นำทางย้อนกลับใน web เบราว์เซอร์หรือ file นักสำรวจ
- Horizontal Scroll Wheel: For horizontal scrolling.
- Windows Home Button: Minimizes all windows to show the desktop; pressing again restores them.
- พอร์ตชาร์จ USB-C: Located on the front for recharging the internal battery.
- สวิตช์ไฟ: On/Off switch on the bottom of the mouse.
- พื้นที่จัดเก็บข้อมูลตัวรับสัญญาณนาโน: ช่องด้านล่างสำหรับเก็บตัวรับสัญญาณ USB
4. การตั้งค่า
4.1. การชาร์จเมาส์
Before initial use, ensure the mouse is fully charged. Connect the provided Type-C charging cable to the USB-C port on the front of the mouse and the other end to a USB power source (e.g., computer USB port, USB wall adapter).

ภาพ: ด้านข้าง view of the TELLUR Shade Wireless Mouse, clearly showing the USB-C charging port located at the front for convenient recharging.
The RGB lighting may indicate charging status. A full charge typically provides approximately 20 days of average use.
4.2. การเชื่อมต่อกับอุปกรณ์
The TELLUR Shade Wireless Mouse supports up to 4 devices simultaneously via Bluetooth and a 2.4GHz USB Nano receiver. Turn on the mouse using the power switch on the bottom.
4.2.1. 2.4GHz Wireless Connection (USB Nano Receiver)
- Locate the USB Nano receiver stored in the compartment on the bottom of the mouse.
- Plug the Nano receiver into an available USB-A port on your computer.
- Press the Multi-Device Switch Button on the mouse to select one of the 2.4GHz channels (usually indicated by a specific LED color or number).
- The mouse should automatically connect. If not, ensure the mouse is powered on and try replugging the receiver.
4.2.2. การเชื่อมต่อบลูทูธ (BT1, BT2, BT3)
- Press the Multi-Device Switch Button to select one of the Bluetooth channels (BT1, BT2, or BT3). The corresponding indicator light will flash.
- Press and hold the Multi-Device Switch Button for 3-5 seconds until the indicator light flashes rapidly. This puts the mouse into pairing mode.
- บนอุปกรณ์ของคุณ (คอมพิวเตอร์ แท็บเล็ต สมาร์ทโฟน) ไปที่การตั้งค่าบลูทูธ และค้นหาอุปกรณ์ใหม่
- Select "TELLUR Shade Mouse" or a similar name from the list of available devices.
- เมื่อจับคู่เสร็จแล้ว ไฟแสดงสถานะบนเมาส์จะหยุดกะพริบและติดสว่างอยู่สองสามวินาทีก่อนจะดับลง
Repeat these steps for additional Bluetooth devices on BT2 and BT3 channels.
5. คู่มือการใช้งาน
5.1 การสลับระหว่างอุปกรณ์
To switch between connected devices, simply press the Multi-Device Switch Button. The mouse will cycle through the 2.4GHz channel and the three Bluetooth channels (BT1, BT2, BT3).
5.2. การปรับค่าความไว DPI
Press the DPI Adjustment Button to cycle through the available DPI settings: 800, 1200, 1600, 2400, and 3200 DPI. Each press will change the cursor speed, allowing you to find your preferred sensitivity.
5.3. การควบคุมแสง RGB
The mouse features customizable RGB lighting. To change the RGB lighting mode or turn it off, simultaneously press the Forward and Backward buttons located on the side of the mouse. Continue pressing to cycle through different lighting effects or to disable the lighting.

ภาพ: ระยะใกล้ view of the TELLUR Shade Wireless Mouse, highlighting the side buttons (Forward and Backward) and the integrated RGB lighting strip.
5.4. Using the Windows Home Button
The dedicated Windows Home Button (often located near the thumb rest) allows for quick desktop access. Pressing this button will minimize all open windows, revealing your desktop. Pressing it again will restore the previously open windows.
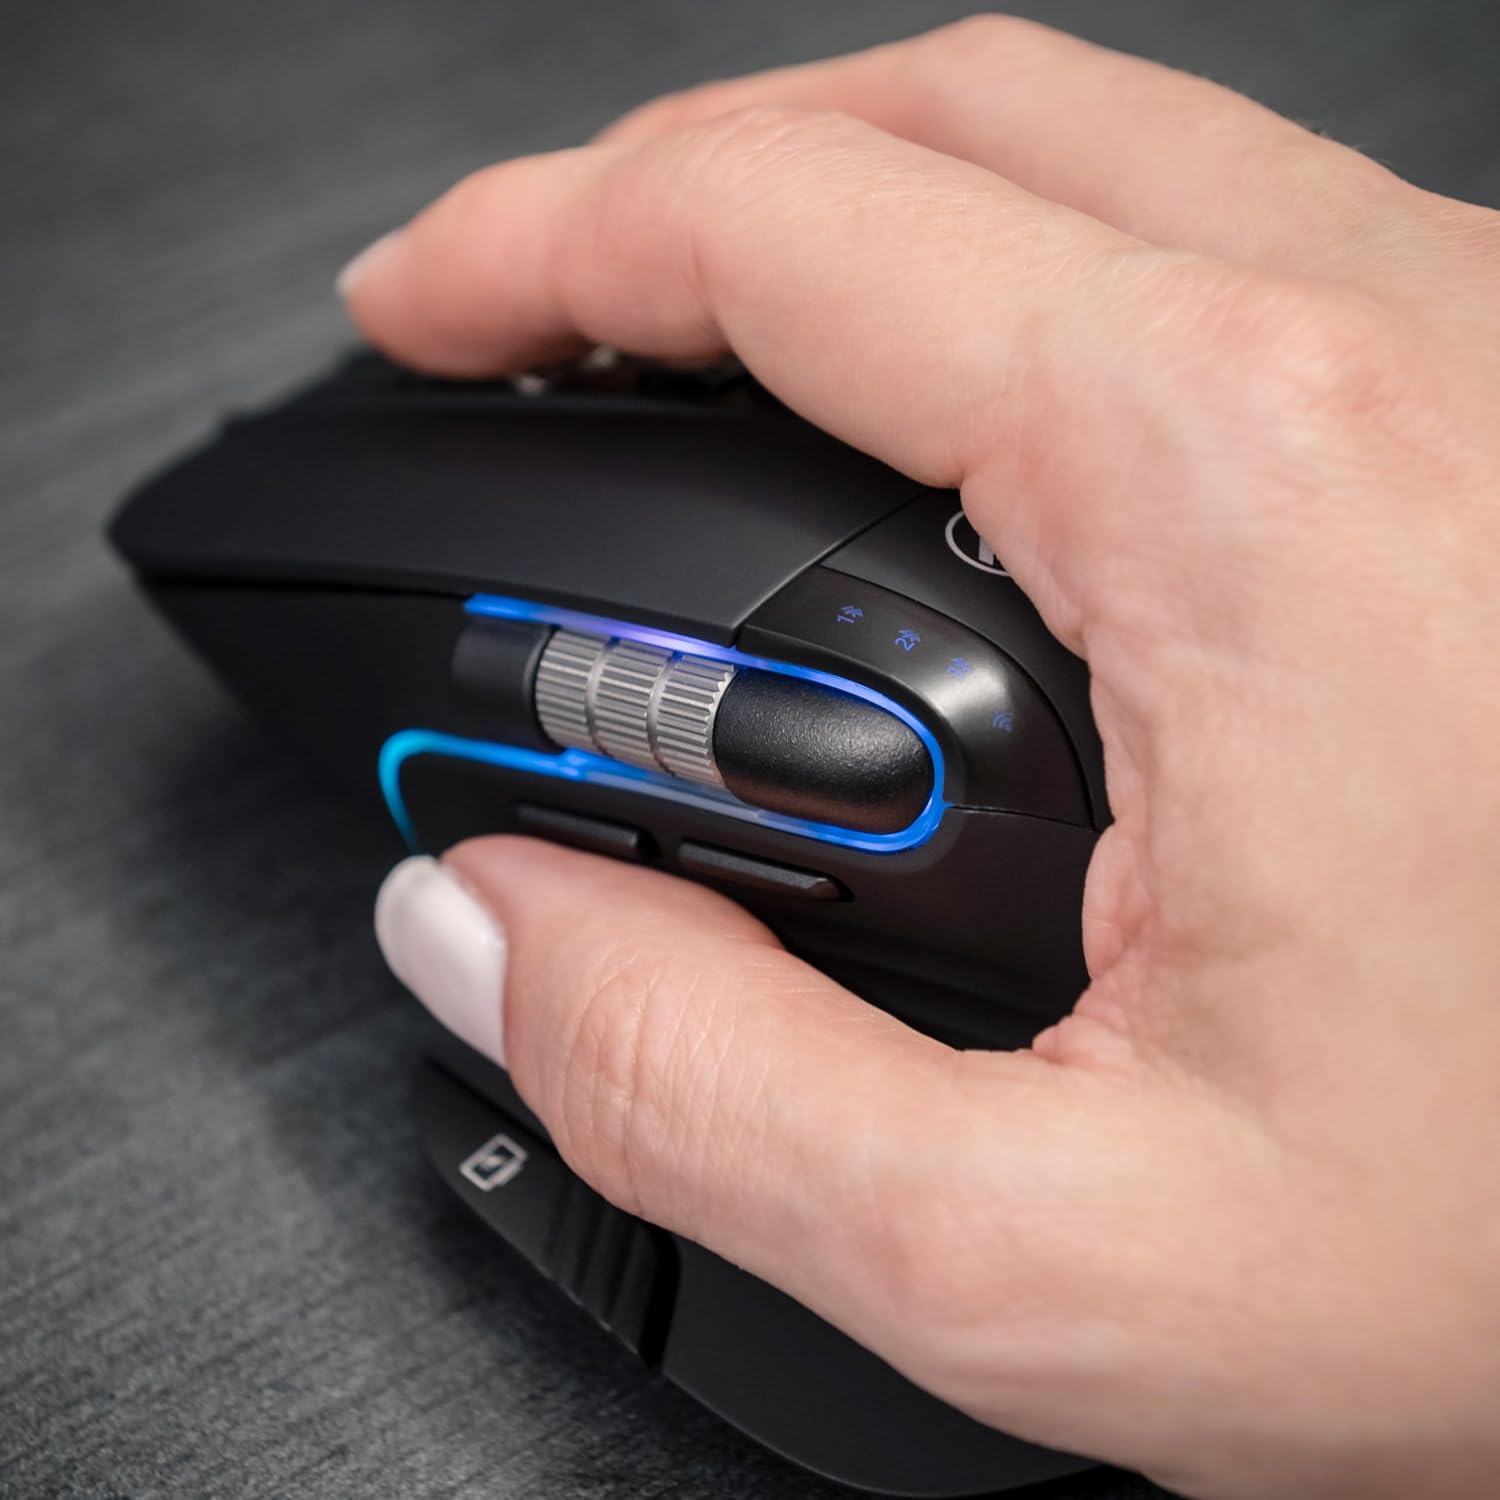
Image: A hand operating the TELLUR Shade Wireless Mouse, demonstrating the ergonomic grip and the placement of the Windows Home button accessible by the thumb.
6. การบำรุงรักษา
- การทำความสะอาด: ใช้ผ้านุ่มและแห้งเช็ดทำความสะอาดเมาส์ สำหรับคราบฝังแน่น ให้เช็ดเบาๆamp สามารถใช้ผ้าได้ แต่ต้องแน่ใจว่าไม่มีความชื้นเข้าไปในอุปกรณ์
- พื้นที่จัดเก็บ: เมื่อไม่ได้ใช้งานเป็นเวลานาน ให้ปิดเมาส์เพื่อประหยัดพลังงานแบตเตอรี่ เก็บไว้ในที่แห้งและเย็น
- การดูแลแบตเตอรี่ ควรหลีกเลี่ยงการปล่อยให้แบตเตอรี่หมดจนเกลี้ยงบ่อยๆ ควรชาร์จแบตเตอรี่เมื่อไฟแสดงสถานะแบตเตอรี่เหลือน้อย
- หลีกเลี่ยงเงื่อนไขที่รุนแรง: อย่าให้เมาส์สัมผัสกับอุณหภูมิที่สูงหรือต่ำเกินไป แสงแดดโดยตรง หรือความชื้นสูง
7 การแก้ไขปัญหา
7.1. เมาส์ไม่ตอบสนอง
- ตรวจสอบให้แน่ใจว่าเมาส์เปิดอยู่
- ตรวจสอบระดับแบตเตอรี่และชาร์จเมาส์หากจำเป็น
- Verify that the correct connection channel (2.4GHz, BT1, BT2, or BT3) is selected using the Multi-Device Switch Button.
- For 2.4GHz connection, ensure the Nano receiver is securely plugged into a working USB port. Try a different USB port.
- For Bluetooth connection, ensure Bluetooth is enabled on your device and try re-pairing the mouse.
- รีสตาร์ทเครื่องคอมพิวเตอร์หรืออุปกรณ์ของคุณ
7.2. การเชื่อมต่อแบบไม่ต่อเนื่อง
- Ensure the mouse is within the effective range (up to 10 meters).
- ลดการรบกวนจากอุปกรณ์ไร้สายอื่นๆ (เช่น เราเตอร์ Wi-Fi, อุปกรณ์ Bluetooth อื่นๆ)
- ควรหลีกเลี่ยงการใช้เมาส์บนพื้นผิวโลหะ เนื่องจากอาจรบกวนสัญญาณไร้สายได้
7.3. ปัญหาเกี่ยวกับการเคลื่อนที่ของเคอร์เซอร์
- ทำความสะอาดเซ็นเซอร์ออปติคอลที่ด้านล่างของเมาส์
- ใช้เมาส์บนพื้นผิวที่สะอาดและไม่สะท้อนแสงหรือแผ่นรองเมาส์
- Adjust the DPI setting using the DPI Adjustment Button.
7.4. ไฟ RGB ไม่ทำงาน
- ตรวจสอบให้แน่ใจว่าเมาส์เปิดอยู่
- Press the Forward and Backward buttons simultaneously to cycle through lighting modes or to turn it on if it was previously off.
- Check battery level; low battery might disable RGB lighting to conserve power.
8. ข้อมูลจำเพาะ
| ยี่ห้อ | เทลลูร์ |
| ชื่อรุ่น | TLL491261 |
| หมายเลขรุ่น | 491261 |
| เทคโนโลยีการเชื่อมต่อ | Bluetooth, 2.4GHz Wireless (via Nano receiver) |
| การตรวจจับการเคลื่อนไหว | ออฟติคอล |
| ความไวของ DPI | 800/1200/1600/2400/3200 DPI |
| จำนวนปุ่ม | 8 (including silent click, DPI, multi-device switch, forward/backward, horizontal scroll, Windows Home) |
| การวางแนวมือ | ถนัดทั้งสองมือ |
| คุณสมบัติพิเศษ | Silent Click, RGB Light, Multi-device (4 devices), Lightweight, Portable |
| อุปกรณ์ที่รองรับ | Personal Computer, Laptop, Smartphones, Tablets |
| การรองรับระบบปฏิบัติการ | Windows, Mac, iOS, Android, Linux |
| ช่วงสาย | สูงสุด 10 เมตร |
| แหล่งพลังงาน | ใช้แบตเตอรี่ (ชาร์จได้ผ่าน USB-C) |
| อายุการใช้งานแบตเตอรี่โดยเฉลี่ย | ประมาณ 20 วัน |
| วัสดุ | พลาสติก |
| น้ำหนักสินค้า | 0.29 กิโลกรัม |
9. การรับประกันและการสนับสนุน
For warranty information and technical support, please refer to the warranty card included with your product or visit the official TELLUR webไซต์ โปรดเก็บใบเสร็จรับเงินของคุณไว้เป็นหลักฐานการซื้อสำหรับการเรียกร้องการรับประกันใดๆ
โดยทั่วไปแล้ว ข้อมูลการติดต่อเพื่อขอรับการสนับสนุนจะพบได้ในเว็บไซต์ของผู้ผลิต webไซต์หรือบนบรรจุภัณฑ์ผลิตภัณฑ์