
PJ058W2, PJ058S1, C058GWW1-0
LCD Projector Display Module
คู่มือการใช้งาน
Models: PJ058W2, PJ058S1, C058GWW1-0
1. สินค้าหมดview
This manual provides comprehensive instructions for the installation, operation, and maintenance of the LCD Projector Display Module. This module is a critical component designed for compatibility with various projector models, including AUN F30, F30UP, Alfawise X, and 3200X series projectors. It serves as a replacement or upgrade part for the projector's display system.
The display module is available in several specific models: PJ058W2, PJ058S1, and C058GWW1-0. Each model is designed to integrate seamlessly with its intended projector system, ensuring optimal display performance.
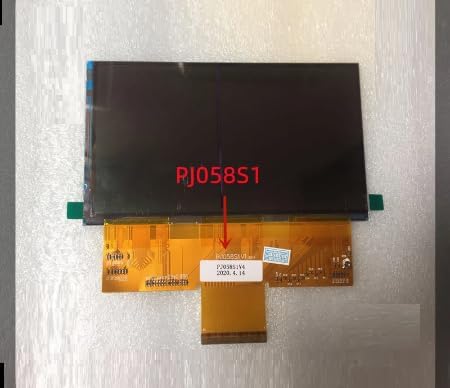
Figure 1: General front view of the LCD Projector Display Module, representing the series including PJ058W2, PJ058S1, and C058GWW1-0.
2. การตั้งค่าและการติดตั้ง
Proper installation of the LCD display module is crucial for its functionality and longevity. It is recommended that installation be performed by a qualified technician.
2.1 รายการตรวจสอบก่อนการติดตั้ง
- Ensure the projector is powered off and disconnected from all power sources.
- Gather necessary tools: small Phillips head screwdriver, anti-static wrist strap, clean microfiber cloth.
- Work in a clean, dust-free environment to prevent contamination of the display.
- Identify the specific model of your projector and the corresponding display module (PJ058W2, PJ058S1, or C058GWW1-0).
2.2 ขั้นตอนการติดตั้ง
- เปิดโปรเจคเตอร์อย่างระมัดระวังasing according to your projector's service manual.
- Locate the existing LCD display module.
- Gently disconnect the ribbon cables and any other connectors attached to the old module. Note their orientation.
- Remove the old display module.
- Align the new display module (PJ058W2, PJ058S1, or C058GWW1-0) with the mounting points.
- Carefully connect the ribbon cables and other connectors to the new module, ensuring they are securely seated and correctly oriented. Avoid bending or creasing the ribbon cables.
- Secure the new display module in place.
- Close the projector casing. ตรวจสอบให้แน่ใจว่าขันสกรูทุกตัวแน่นสนิทดีแล้ว
- Reconnect the projector to power and test its functionality.

Figure 2: PJ058S1 LCD Display Module, showing the flexible ribbon cable connection.
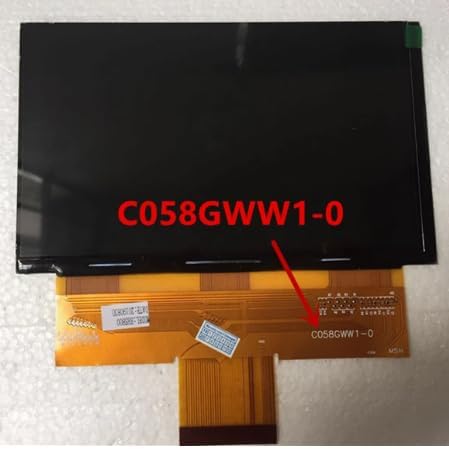
Figure 3: C058GWW1-0 LCD Display Module, illustrating its compact design and connector.
3. Operating the Display Module
The LCD Projector Display Module functions as an internal component of your projector. Its operation is directly controlled by the projector's main board and software. There are no user-operable controls directly on the module itself.
3.1 Post-Installation Operation
- After successful installation, power on your projector.
- Observe the projected image. The new display module should render a clear and stable image.
- If the image appears distorted, discolored, or is not displayed, refer to the Troubleshooting section.
- No specific calibration is typically required for the display module itself, as it relies on the projector's internal calibration.
4. การบำรุงรักษา
To ensure the longevity and optimal performance of your LCD Projector Display Module, follow these maintenance guidelines:
4.1 การทำความสะอาด
- The display module is an internal component and should not require frequent cleaning.
- If the projector casing is open for other maintenance, and the display module is exposed, use a soft, lint-free microfiber cloth to gently wipe any dust from its surface.
- Do NOT use liquid cleaners, solvents, or abrasive materials directly on the display module.
- Ensure no dust or debris enters the projector's optical path during any maintenance.
4.2 พื้นที่จัดเก็บ
- If the module is stored as a spare part, keep it in its original anti-static packaging.
- Store in a cool, dry place, away from direct sunlight, extreme temperatures, and high humidity.
- ควรหลีกเลี่ยงการทำโมดูลตกหรือถูกกระแทกอย่างรุนแรง
5 การแก้ไขปัญหา
If you encounter issues after installing the LCD Projector Display Module, refer to the following common problems and their potential solutions:
| ปัญหา | สาเหตุที่เป็นไปได้ | สารละลาย |
|---|---|---|
| No image displayed / Black screen |
|
|
| Distorted or discolored image |
|
|
| Lines or dead pixels on screen |
|
|
If the problem persists after attempting these solutions, please contact our customer support for further assistance.
6. ข้อมูลจำเพาะผลิตภัณฑ์
| คุณสมบัติ | รายละเอียด |
|---|---|
| หมายเลขรุ่น | PJ058W2, PJ058S1, C058GWW1-0 |
| ประเภทหน้าจอ | ทีเอฟทีแอลซีดี |
| ขนาดหน้าจอ | < 7 นิ้ว |
| ประเภทสินค้า | Tablet LCD / Projector Display Module |
| ความเข้ากันได้ | AUN F30, F30UP, Alfawise X, 3200X Projectors |
| ยี่ห้อ | ทั่วไป |
| สี | สีดำ |
| ต้นทาง | จีนแผ่นดินใหญ่ |
7. การรับประกันและการสนับสนุน
7.1 ข้อมูลการรับประกัน
All products come with a รับประกัน 12 เดือน นับจากวันที่ซื้อ การรับประกันนี้ครอบคลุมถึงข้อบกพร่องจากการผลิตและรับรองว่าผลิตภัณฑ์ปราศจากข้อบกพร่องในด้านวัสดุและฝีมือการผลิตภายใต้การใช้งานปกติ
The warranty does not cover damage caused by improper installation, misuse, accident, unauthorized repair, or modification.
7.2 การสนับสนุนลูกค้า
If you encounter any problems with your product, such as defective or incorrect items, please do not hesitate to contact us. Our customer support team is dedicated to assisting you.
We aim to respond to all inquiries within 24 ชั่วโมง. Please provide your order details and a clear description of the issue when contacting support to facilitate a quicker resolution.
For support, please visit the product page where you made your purchase and use the messaging system to reach us. Alternatively, refer to the contact information provided by your retailer.
Ask a question about this manual
Ask about setup, troubleshooting, compatibility, parts, safety, or missing instructions. Manuals+ will review the question and use this page’s manual context to help answer it.