
1. บทนำ
This manual provides detailed instructions for the safe and efficient use of your YiLaie LED Wall Light (Model EL-FQL-2-1). Please read this manual thoroughly before installation and operation, and retain it for future reference.

Image: The YiLaie LED Wall Light installed in different indoor environments, showcasing its adaptable design.
2. สินค้าหมดview
2.1 คุณสมบัติหลัก
- ใช้พลังงานจากแบตเตอรี่: Built-in 4000 mAh battery for wireless operation.
- ระบบควบคุมแบบสัมผัส ปรับความสว่างได้: Stepless dimming from 10% to 100% brightness with memory function.
- หมุนได้ 360 °: Magnetic ball mount allows for flexible light direction adjustment.
- ติดตั้งง่าย: Can be installed without drilling using adhesive pads or with screws for rough surfaces.
- การออกแบบพกพา: Light unit is removable from its magnetic base for portable use.

Image: Features comparison, emphasizing the 4000mAh battery capacity, rectangular design, and eye-protection of the YiLaie LED Wall Light.
2.2 เนื้อหาบรรจุภัณฑ์
ตรวจสอบให้แน่ใจว่ามีรายการทั้งหมดอยู่ในบรรจุภัณฑ์:
- แอลอีดีแอลamp
- Magnetic Swivel Head Base
- สายชาร์จ Type-C
- Double-sided Adhesive Pads
- Expansion Screws (for alternative mounting)
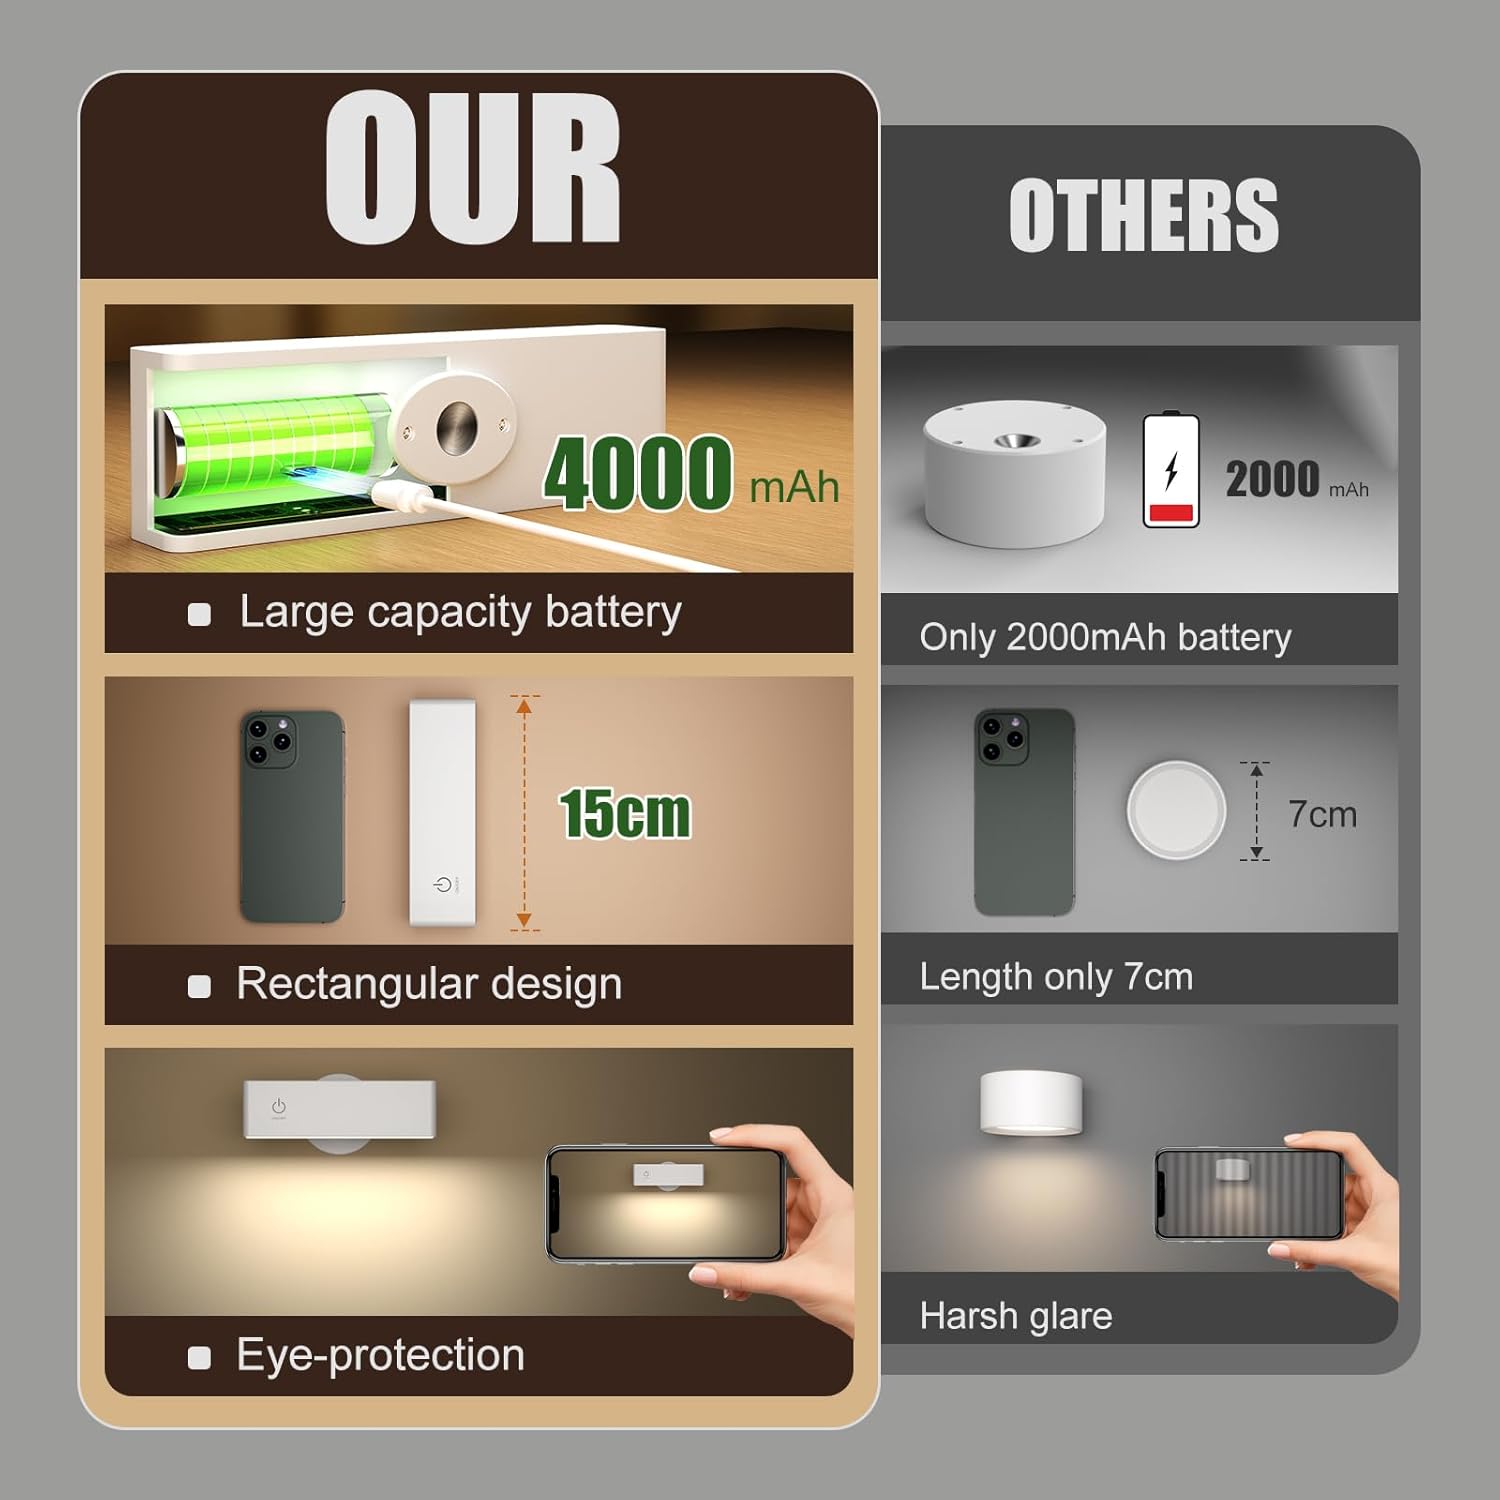
Image: Components of the YiLaie LED Wall Light, showing the main light unit, magnetic mounting base, and a Type-C charging cable.
3. การตั้งค่าและการติดตั้ง
The YiLaie LED Wall Light offers flexible installation options. Choose the method best suited for your wall surface.
3.1 ตัวเลือกการติดตั้ง

Image: Illustration of the two mounting methods: adhesive for smooth surfaces and screws for rough surfaces, highlighting the 360° rotation feature.
- For Smooth and Flat Walls (Adhesive Pads):
- Clean the desired wall surface thoroughly to ensure it is dry and free of dust or grease.
- Peel the protective film from one side of the double-sided adhesive pad and attach it firmly to the back of the magnetic swivel head base.
- Peel the protective film from the other side of the adhesive pad and press the magnetic base firmly onto the cleaned wall surface. Hold for at least 30 seconds to ensure strong adhesion.
- Allow the adhesive to set for a few hours (ideally 24 hours) before attaching the lamp.
- For Rough Walls (Expansion Screws):
- ทำเครื่องหมายตำแหน่งที่ต้องการติดตั้งบนผนัง
- Drill two holes at the marked positions, matching the screw holes on the magnetic swivel head base.
- ใส่สกรูขยายเข้าไปในรูที่เจาะ
- Align the magnetic base with the screws and secure it tightly.
3.2 การติด Lamp
Once the magnetic swivel head base is securely mounted, simply place the LED lamp onto the magnetic ball. The strong magnet will hold it in place. You can then adjust the lamp's angle by rotating it 360° to direct the light as needed.
4. คู่มือการใช้งาน
The YiLaie LED Wall Light features intuitive touch control for power and brightness adjustment.
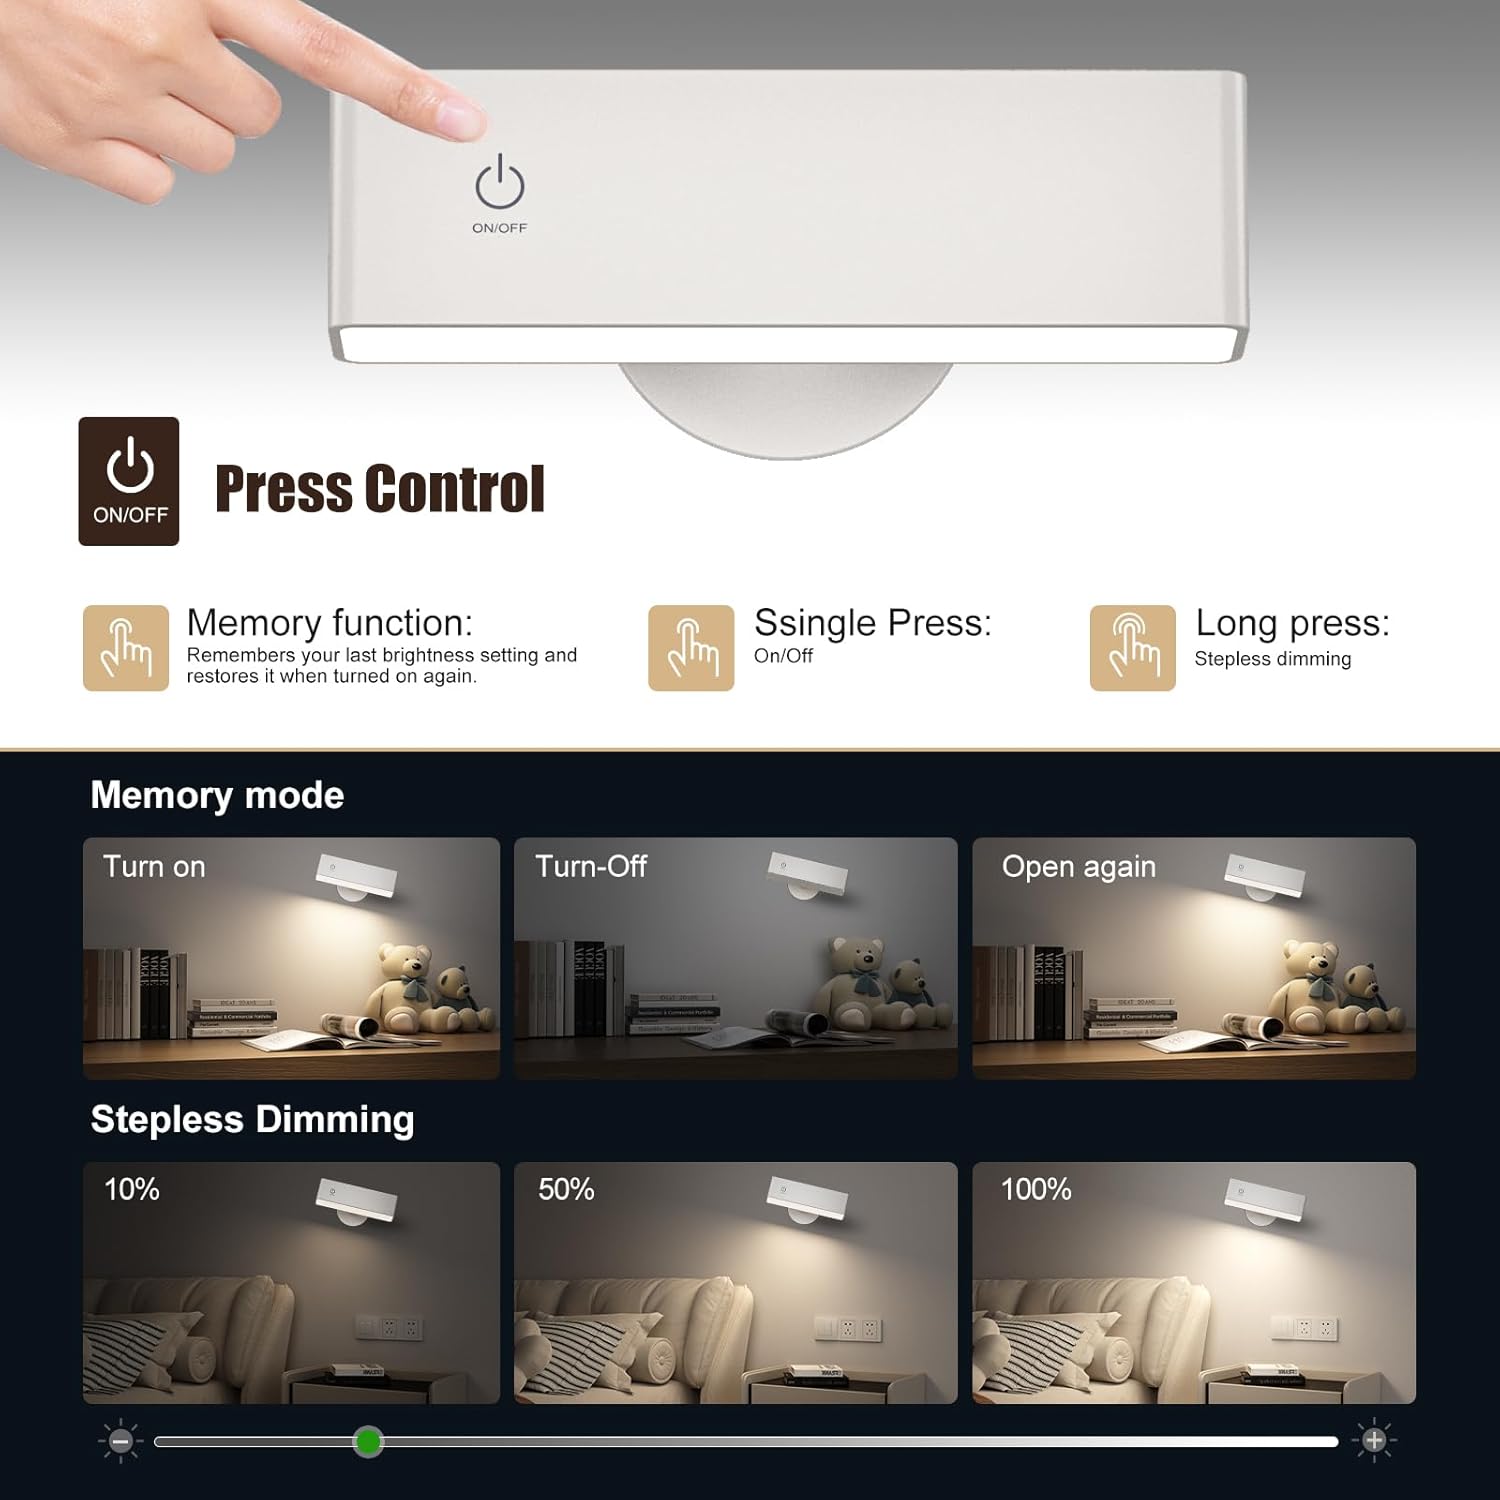
Image: Visual guide to the touch control features, including single press for power and long press for dimming, along with the memory function.
- เปิด/ปิดเครื่อง: Lightly touch the power symbol (On/Off icon) on the lamp surface to turn the light on or off.
- การหรี่แสงแบบไม่ต่อเนื่อง: When the light is on, press and hold the power symbol to continuously adjust the brightness from 10% (lowest) to 100% (highest). Release your finger when the desired brightness is reached.
- ฟังก์ชั่นหน่วยความจำ: ลamp will remember its last brightness setting. When you turn the light off and then on again, it will resume the previously set brightness level.
5. การชาร์จแบตเตอรี่
The YiLaie LED Wall Light is equipped with a built-in 4000 mAh rechargeable battery.
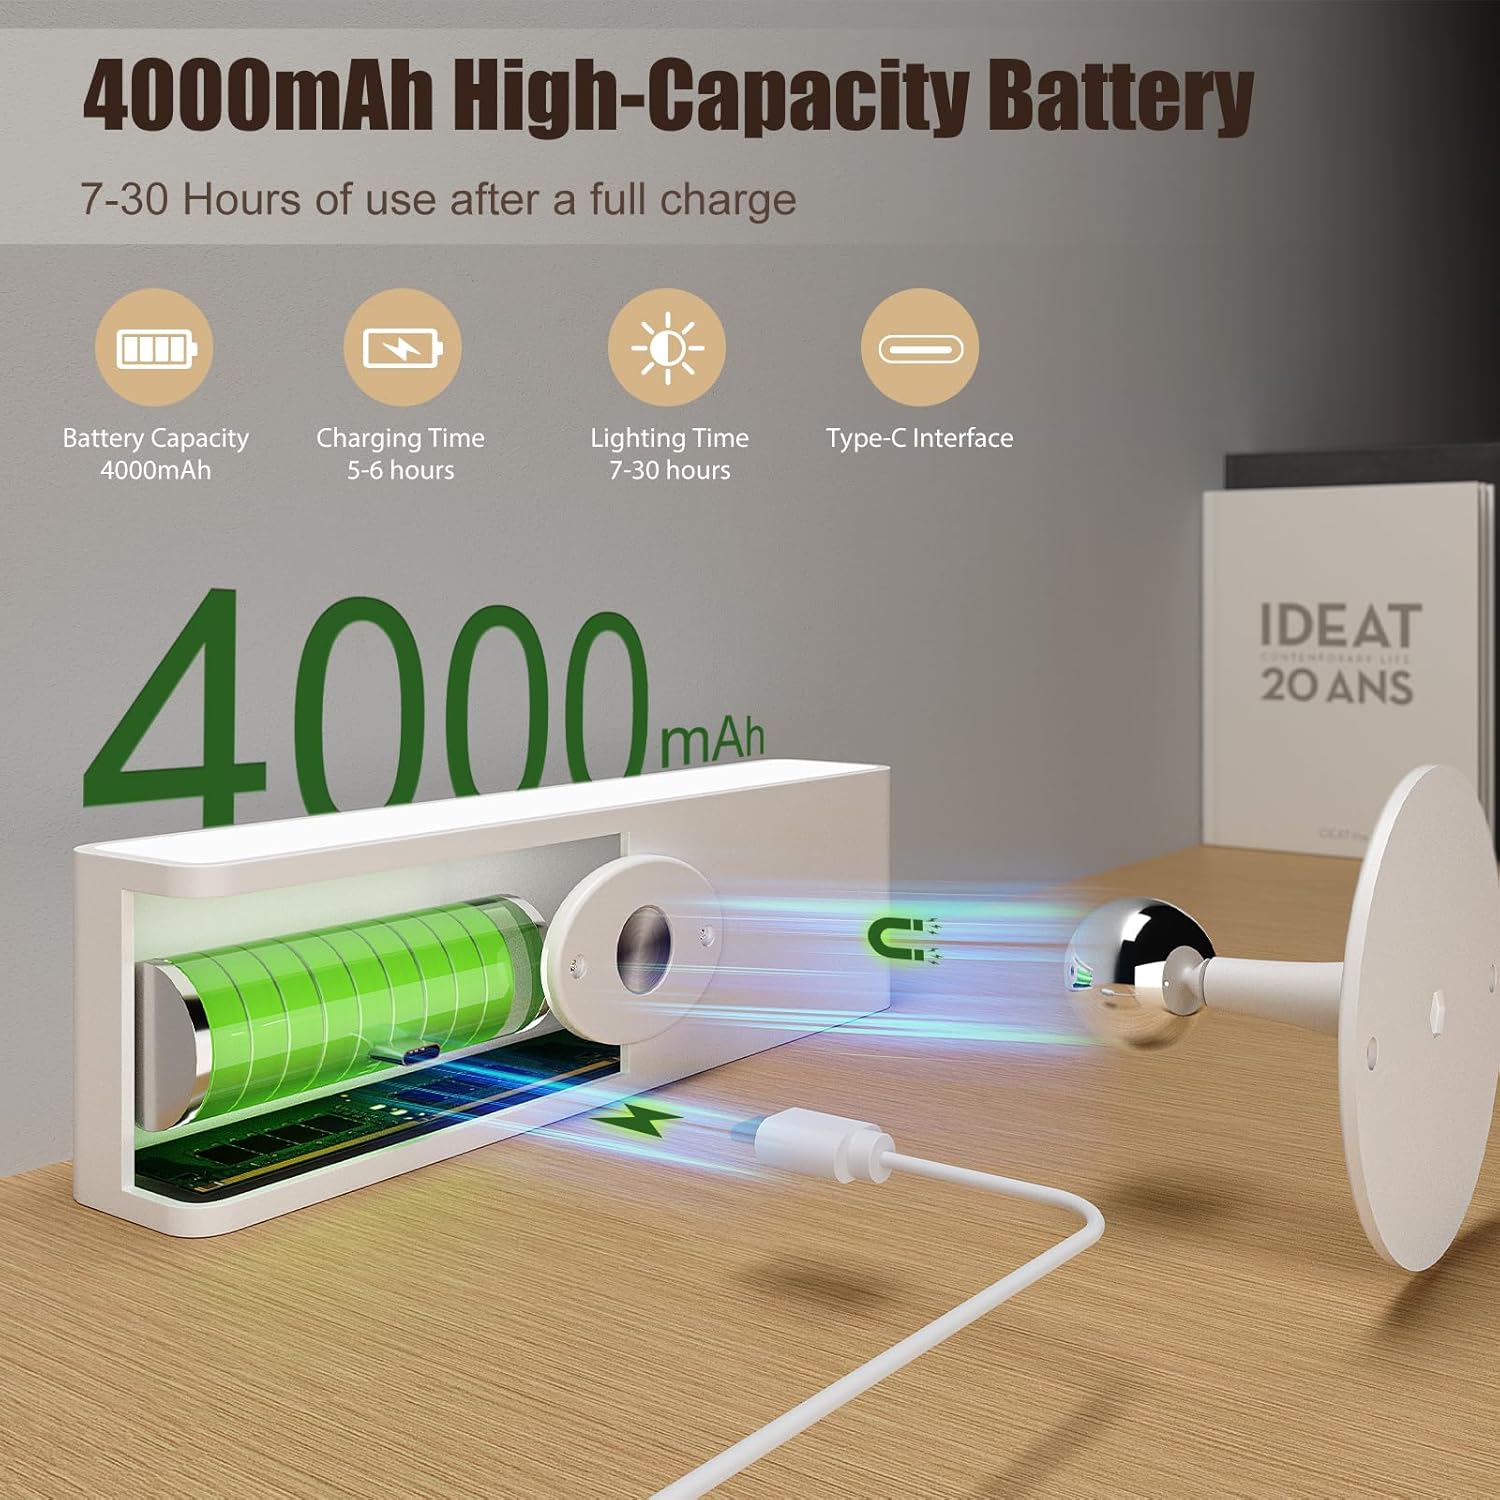
Image: The LED wall light connected to a Type-C charging cable, illustrating its 4000mAh battery and charging interface.
- พอร์ตชาร์จ: Locate the Type-C USB charging port on the lamp.
- การเชื่อมต่อ: Connect the provided Type-C charging cable to the lamp and plug the other end into a standard USB power adapter (not included) or a computer USB port.
- ไฟแสดงสถานะการชาร์จ: ลamp may have an indicator light to show charging status (refer to product for specific indicator behavior).
- เวลาในการชาร์จ: โดยทั่วไปการชาร์จเต็มจะใช้เวลาประมาณ 5-6 ชั่วโมง
- อายุการใช้งานแบตเตอรี่: A fully charged battery provides approximately 7 hours of light at the highest brightness setting and up to 30 hours at the lowest brightness setting.
บันทึก: Use a compatible 5V USB power source for charging. Avoid using damaged cables or chargers.
6. การบำรุงรักษา
To ensure the longevity and optimal performance of your YiLaie LED Wall Light, follow these maintenance guidelines:
- การทำความสะอาด: เช็ดลamp surface with a soft, dry cloth. Do not use abrasive cleaners, solvents, or harsh chemicals, as these can damage the finish.
- การดูแลแบตเตอรี่ To prolong battery life, avoid fully discharging the battery frequently. Charge the lamp regularly, even if not in constant use. If storing for an extended period, charge the battery to about 50% every few months.
- พื้นที่จัดเก็บ: เก็บ lamp ในสถานที่แห้งและเย็น ห่างจากแสงแดดโดยตรงและอุณหภูมิที่สูงหรือต่ำมาก
- ฐานแม่เหล็ก: Ensure the magnetic base and the lamp's magnetic attachment point are kept clean and free of debris to maintain a strong connection.
7 การแก้ไขปัญหา
If you encounter any issues with your YiLaie LED Wall Light, please refer to the following troubleshooting steps:
| ปัญหา | สาเหตุที่เป็นไปได้ | สารละลาย |
|---|---|---|
| ไฟไม่เปิด | แบตเตอรี่หมด ระบบควบคุมแบบสัมผัสไม่ตอบสนอง | ชาร์จ lamp fully using the provided Type-C cable. Ensure your finger makes full contact with the touch sensor. |
| แสงสลัวหรือกระพริบ | แบตเตอรี่อ่อน การตั้งค่าความสว่างไม่ถูกต้อง | เติมเงิน Lamp. Press and hold the touch sensor to increase brightness. |
| Lamp ไม่คิดค่าใช้จ่าย | สายเคเบิลหรืออะแดปเตอร์ชำรุด สิ่งกีดขวางพอร์ตชาร์จ | ลองใช้สาย Type-C และอะแดปเตอร์แปลงไฟ USB ตัวอื่นดู Check the charging port for any debris and gently clean if necessary. |
| Lamp falls from the wall. | Adhesive not strong enough. Rough wall surface for adhesive. Magnetic base not securely mounted. | Ensure the wall surface is clean and smooth before applying adhesive. For rough surfaces, use the expansion screws for a more secure mount. Re-mount the magnetic base following installation instructions carefully. |
8. ข้อมูลจำเพาะ
| คุณสมบัติ | รายละเอียด |
|---|---|
| ยี่ห้อ | ยี่หลาย |
| หมายเลขรุ่น | EL-FQL-2-1 |
| วัสดุ | โพลีคาร์บอเนต |
| สี | สีขาว |
| แหล่งพลังงาน | ใช้พลังงานจากแบตเตอรี่ |
| ความจุของแบตเตอรี่ | 4000 มิลลิแอมป์ |
| เวลาในการชาร์จ | Approx. 5-6 hours (via Type-C USB) |
| ระยะเวลาการส่องสว่าง | 7 hours (highest brightness) - 30 hours (lowest brightness) |
| เล่มที่tage | 5 โวลต์ |
| วัดtage | 2 วัตต์ |
| ฟลักซ์ส่องสว่าง | 300 ลูเมน (สูงสุด) |
| อุณหภูมิสี | 4000 Kelvin (Warm colours) |
| วิธีการควบคุม | การควบคุมแบบสัมผัส |
| ประเภทการติดตั้ง | Wall Mount (Magnetic, Adhesive/Screws) |
| ขนาดรายการ (ยาว x กว้าง x สูง) | กว้าง 15 ยาว 4.3 สูง 3.2 เซนติเมตร |
| น้ำหนักสินค้า | 555 กรัม |
9. การสนับสนุนลูกค้า
For any questions, concerns, or assistance with your YiLaie LED Wall Light, please contact our customer service. We are committed to providing support and will respond to your inquiries within 24 hours.
ข้อมูลการติดต่อ (เช่น อีเมล, webโดยทั่วไปผู้ผลิตจะจัดให้มีไซต์) ไว้ที่นี่