
1. บทนำ
Thank you for choosing the LEDLUX 72-inch Ceiling Fan with Light. This manual provides essential information for the safe installation, operation, and maintenance of your new ceiling fan. Please read these instructions thoroughly before beginning installation and retain them for future reference.
ข้อมูลด้านความปลอดภัยที่สำคัญ
- ควรตัดกระแสไฟที่เบรกเกอร์หลักทุกครั้งก่อนทำการติดตั้งหรือซ่อมบำรุง
- การเดินสายไฟฟ้าทั้งหมดต้องเป็นไปตามมาตรฐานไฟฟ้าของประเทศและท้องถิ่น หากคุณไม่คุ้นเคยกับการเดินสายไฟ โปรดปรึกษาช่างไฟฟ้าที่มีคุณสมบัติเหมาะสม
- Ensure the installation site can support the fan's weight (approximately 15-20 kg).
- ห้ามงอตัวยึดใบมีดระหว่างการติดตั้งหรือทำความสะอาด
- ควรกันเด็กให้อยู่ห่างจากพัดลมขณะใช้งาน
2. เนื้อหาบรรจุภัณฑ์
ตรวจสอบว่าส่วนประกอบทั้งหมดมีอยู่ก่อนเริ่มการติดตั้ง:
- การประกอบตัวเรือนมอเตอร์
- Fan Blades (9 pieces)
- Downrods (4.5", 12", 24" options)
- กันสาด
- ตัวยึด
- ชุดไฟ LED
- Remote Control with Receiver
- ชุดอุปกรณ์ฮาร์ดแวร์ (สกรู แหวนรอง ตัวเชื่อมสายไฟ)
- คู่มือการใช้งาน

Image: All components of the LEDLUX 72-inch ceiling fan laid out on a white surface.
3. ข้อมูลจำเพาะ
| ยี่ห้อ | แอลอีดีลักซ์ |
| แบบอย่าง | 72-inch Ceiling Fan with Light |
| สี | สีดำ |
| ขนาด | 72 นิ้ว |
| จำนวนใบมีด | 9 |
| วัสดุใบมีด | พลาสติก |
| ประเภทมอเตอร์ | มอเตอร์ DC (หมุนได้สองทิศทาง) |
| จำนวนความเร็ว | 6 |
| ประเภทตัวควบคุม | รีโมทคอนโทรล |
| วัดtage | 65 วัตต์ |
| ระดับเสียง | 45 เดซิเบล |
| การใช้งานภายใน/ภายนอกอาคาร | ในร่ม |
| Downrod Options | 4.5", 12", 24" |

Image: Diagram showing the dimensions of the 72-inch ceiling fan and available downrod lengths.
4. คู่มือการติดตั้ง
Follow these steps for proper installation. It is recommended to have a qualified electrician perform the installation.
4.1 Assemble the Fan Blades
- ติดตั้งใบพัดแต่ละใบเข้ากับตัวมอเตอร์โดยใช้สกรูที่ให้มา ตรวจสอบให้แน่ใจว่าขันแน่นดีแล้ว

Image: Close-up of a hand using a drill to attach a fan blade to the motor housing.
4.2 Prepare the Downrod
- Select the appropriate downrod length for your ceiling height.
- Feed the fan wires through the downrod.
- Secure the downrod to the motor housing using the provided pin and screws.
4.3 การต่อสายเครื่องรับสัญญาณ
- Connect the receiver wires to the corresponding fan wires and household wiring using wire nuts. Ensure all connections are secure.
- Carefully tuck the wired receiver into the mounting bracket.
Video: This video demonstrates the step-by-step installation process for the LEDLUX ceiling fan with light, including blade assembly, downrod attachment, and electrical wiring connections.
4.4 Mount the Fan
- ติดตั้งขายึดเข้ากับกล่องรวมสายบนเพดาน
- แขวนชุดพัดลมเข้ากับขายึด
- Secure the canopy to the mounting bracket with screws.

Image: Diagrams illustrating installation on flat, sloped, and high ceilings.
4.5 Install the Light Kit
- Connect the light kit wires to the fan's light wires.
- Attach the LED light panel to the fan motor housing.
- Secure the light cover.
5. คู่มือการใช้งาน
Your LEDLUX ceiling fan is controlled by the included remote control. Ensure the remote has fresh batteries installed.
5.1 ฟังก์ชั่นการควบคุมระยะไกล
- เปิด/ปิดพัดลม: กดปุ่มไอคอนพัดลมเพื่อเปิดหรือปิดพัดลม
- ความเร็วพัดลม: Use the '1' through '6' buttons to adjust the fan speed. '1' is the lowest speed, '6' is the highest.
- เปิด/ปิดไฟ: กดปุ่มไอคอนรูปหลอดไฟเพื่อเปิดหรือปิดไฟ
- อุณหภูมิสี: Press the 'CCT' button to cycle through 3 color temperatures: 3000K (Warm White), 4500K (Natural White), and 6000K (Cool White).
- ฟังก์ชั่นจับเวลา: Set the fan to turn off automatically after 1H, 2H, 4H, or 8H using the respective timer buttons.
- มอเตอร์แบบย้อนกลับ: Press the 'F/R' button to change the direction of the fan blades.

Image: Remote control with labeled functions for fan speed, light, timer, and reverse.
5.2 มอเตอร์ DC แบบกลับทิศทางได้
The DC motor allows for reversible blade rotation, providing comfort in different seasons:
- โหมดฤดูร้อน (หมุนทวนเข็มนาฬิกา): สร้างกระแสลมพัดลงด้านล่าง ทำให้เกิดความรู้สึกเย็นสบาย
- โหมดฤดูหนาว (ตามเข็มนาฬิกา): สร้างกระแสลมขึ้นด้านบน ช่วยหมุนเวียนอากาศอุ่นที่ติดอยู่บริเวณเพดาน
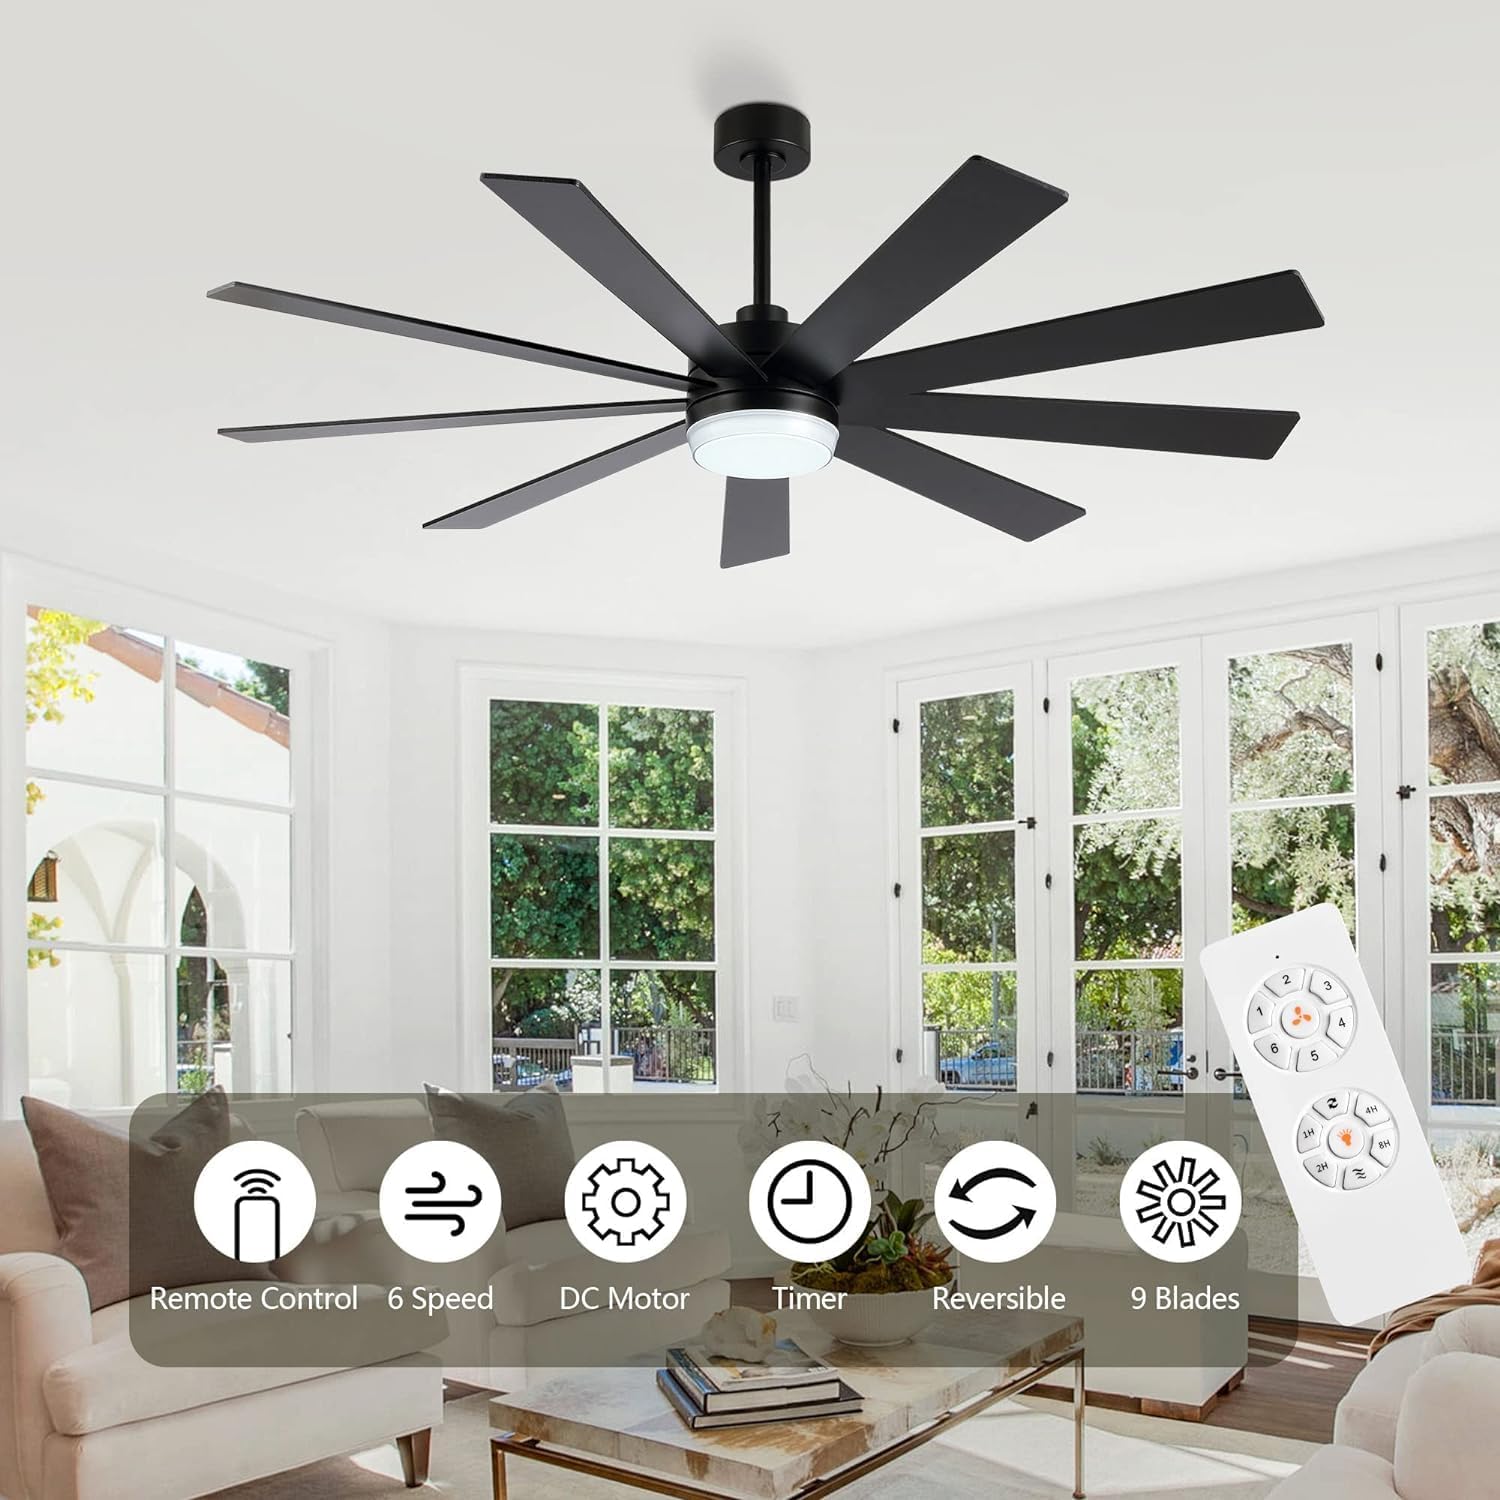
Image: Fan blade direction for summer (cooling) and winter (air circulation) modes.
5.3 Light Color Temperature
The integrated LED light offers three color temperature options to suit your preference:
- 3000K: Warm White, ideal for a cozy atmosphere.
- 4500K: Natural White, suitable for general illumination.
- 6000K: Cool White, bright and invigorating.
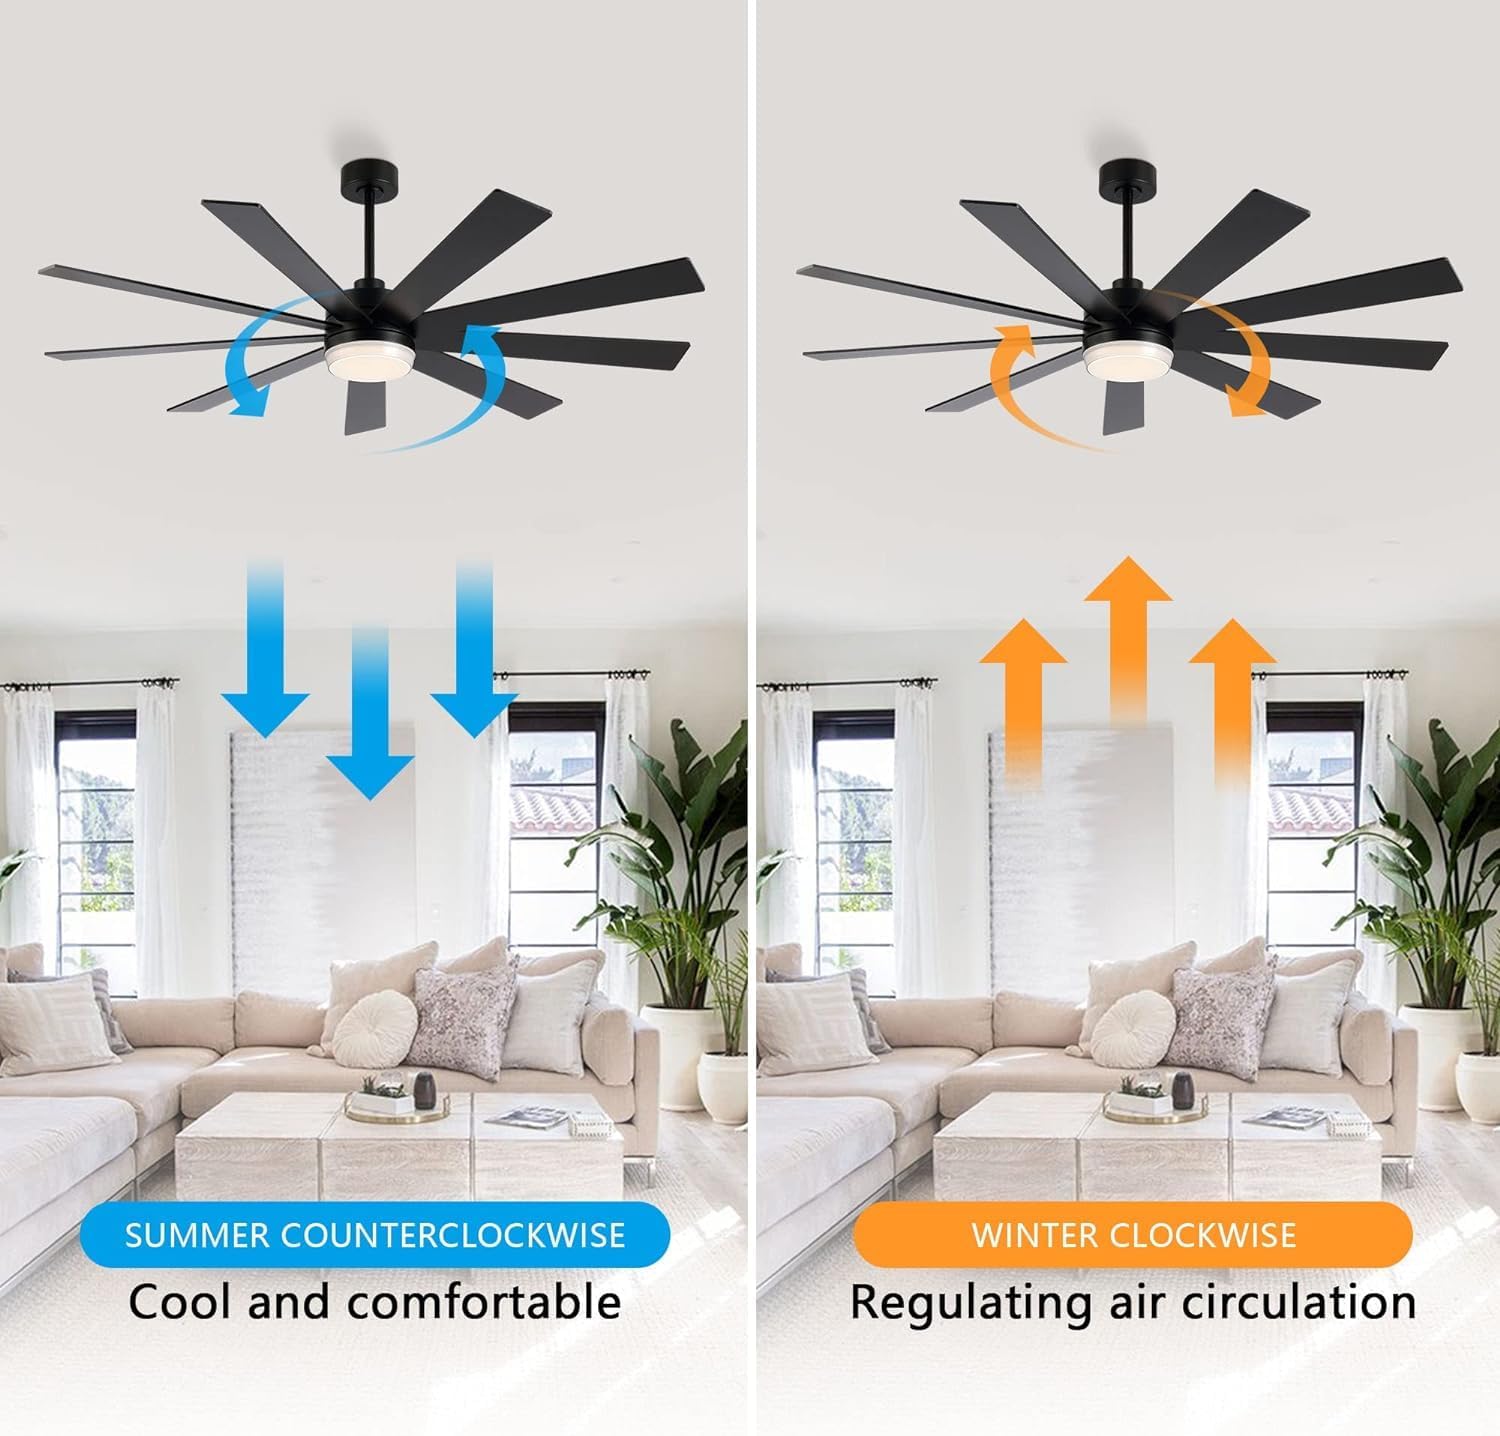
Image: Ceiling fan light demonstrating 3000K, 4500K, and 6000K color temperatures.
6. การบำรุงรักษา
การบำรุงรักษาตามปกติจะช่วยให้พัดลมเพดานของคุณมีประสิทธิภาพสูงสุดและมีอายุการใช้งานยาวนาน
6.1 การทำความสะอาด
- ควรปิดสวิตช์ไฟของพัดลมที่เบรกเกอร์หลักทุกครั้งก่อนทำความสะอาด
- ใช้แบบนุ่มๆamp ผ้าสำหรับทำความสะอาดใบพัดลมและตัวเรือนมอเตอร์ ห้ามใช้น้ำยาทำความสะอาดที่มีฤทธิ์กัดกร่อนหรือตัวทำละลาย
- Periodically check all screws for tightness. Re-tighten as necessary.
6.2 การปรับสมดุลใบพัด
If the fan wobbles, ensure all blade screws are tight. If wobbling persists, a blade balancing kit (not included) may be used to correct the issue.
7 การแก้ไขปัญหา
ก่อนเริ่มทำการซ่อมแซมใดๆ โปรดตรวจสอบให้แน่ใจว่าได้ตัดกระแสไฟที่เบรกเกอร์แล้ว
| ปัญหา | สาเหตุที่เป็นไปได้ | สารละลาย |
|---|---|---|
| พัดลมไม่เริ่มทำงาน | ไม่มีไฟไปที่พัดลม สายไฟต่อหลวม แบตเตอรี่รีโมทคอนโทรลเหลือน้อย | ตรวจสอบเบรกเกอร์วงจร; ตรวจสอบว่าการเชื่อมต่อสายไฟทั้งหมดแน่นหนาดีแล้ว; เปลี่ยนแบตเตอรี่รีโมทคอนโทรล |
| ไฟไม่ทำงาน | Loose wire connection to light kit; Faulty LED light kit. | Check light kit wiring; Contact customer support for replacement if faulty. |
| พัดลมสั่น | สกรูใบหลวม ใบพัดไม่สมดุล ขายึดหลวม | Tighten all blade screws; Use a blade balancing kit; Ensure mounting bracket is securely fastened to the ceiling. |
| การทำงานมีเสียงดัง | Loose screws; Motor housing rubbing against canopy; Incorrect installation. | Check and tighten all screws; Ensure proper clearance between motor housing and canopy; Re-check installation steps. |
8. การรับประกันและการสนับสนุน
LEDLUX stands behind the quality of its products.
8.1 ข้อมูลการรับประกัน
- รับประกันมอเตอร์ 10 ปี: The DC motor is covered by a 10-year free replacement warranty.
- 3-Year Full Warranty: All other parts of the ceiling fan are covered by a 3-year warranty.
Image: LEDLUX Warranty details: 3-Year Full Warranty and 10-Year Motor Warranty.
8.2 การสนับสนุนลูกค้า
For any installation, pre-sales, or after-sales questions, please contact our professional service team via Amazon mail. We are committed to resolving your issues within 24 hours.