1. บทนำ
The REPTITRIP PT02 Reptile Dimming Thermostat is designed to provide precise and stable temperature control for various heating equipment in reptile enclosures, incubators, and plant breeding setups. Utilizing PID technology, it accurately adjusts output power to maintain a consistent temperature, minimizing fluctuations that can stress animals. This manual provides detailed instructions for the safe and effective use of your thermostat.
2. คุณสมบัติของผลิตภัณฑ์
- PID Technology: Accurately controls device output power for stable and efficient temperature regulation, reducing sudden temperature changes. (Note: Not for use with T5 lamps, เรืองแสง lamps, LED ลamps, or sun lampส.)
- การตรวจสอบอุณหภูมิแบบเรียลไทม์: Features a temperature probe that detects ambient temperature and adjusts output power accordingly. Control range: 68°F to 113°F (20°C to 45°C).
- Enhanced Reptile Health: Prevents temperature fluctuations and drastic lighting changes, contributing to the health and vitality of reptiles such as bearded dragons, lizards, ball pythons, chameleons, corn snakes, and turtles.
- การใช้งานที่หลากหลาย: Compatible with heating lamps, heating pads, and other equipment. Suitable for reptiles, amphibians, egg hatching, and plant seedlings. Maximum output load: 260W.
- จอแสดงผล LCD: Shows real-time output power and environmental temperature for clear monitoring. LCD backlight turns off after 20 seconds to minimize disturbance at night. Switchable between °F and °C.
- ใช้งานง่าย: Simply set the desired temperature, and the thermostat will maintain it. Ensure the temperature probe is placed correctly in the area requiring control.
3. ข้อมูลด้านความปลอดภัย
โปรดอ่านและทำความเข้าใจคำแนะนำด้านความปลอดภัยทั้งหมดก่อนใช้งานอุปกรณ์นี้ การไม่ปฏิบัติตามอาจส่งผลให้เกิดการบาดเจ็บหรือความเสียหายต่อผลิตภัณฑ์ได้
- Do not exceed the maximum output load of 260W.
- Ensure the thermostat is connected to a properly grounded power outlet.
- Keep the device and its probe away from water or excessive moisture.
- Do not use this thermostat with T5 lamps, เรืองแสง lamps, LED ลamps, or sun lamps. It is designed for dimmable heating elements only.
- Regularly inspect the power cord and probe for any signs of damage. Discontinue use if damage is found.
- เก็บให้พ้นจากมือเด็กและสัตว์เลี้ยง
4. เนื้อหาบรรจุภัณฑ์
- REPTITRIP PT02 Dimming Thermostat Unit
- หัววัดอุณหภูมิ
- คู่มือการใช้งาน
5. สินค้าหมดview
Familiarize yourself with the components and display of your REPTITRIP PT02 thermostat.

Image: Labeled diagram of the REPTITRIP PT02 thermostat showing the Timer Display, Power Meter, Current Temperature, Output Power, Setting Temperature, Switching °F/°C, Temp Setup Button, and On/Off & Timer Setup Button.
- จอแสดงผล LCD: Shows current time, power meter, current temperature (PV), set temperature (SV), and output power percentage.
- ปุ่มลบ (-): ลดค่าต่างๆ ระหว่างการตั้งค่า
- ปุ่มบวก (+): ค่าต่างๆ จะเพิ่มขึ้นระหว่างการตั้งค่า
- ปุ่ม ตลท.: Enters setting mode for time and temperature.
- ปุ่ม OK/เปิด/ปิด: Turns the device on/off and confirms settings.
- หัววัดอุณหภูมิ: ตรวจจับอุณหภูมิโดยรอบ
6. คำแนะนำในการตั้งค่า
- Placement of Temperature Probe:
Carefully place the temperature probe in the area where you want to control the temperature. Ensure it is not directly touching the heating element or submerged in water unless specifically designed for such use. The probe detects if the current temperature reaches the set target.

Image: A temperature probe is shown placed within a reptile enclosure, illustrating proper positioning for accurate temperature detection.
- เปิดเครื่อง:
Plug the thermostat into a standard 120VAC, 60Hz power outlet. Press the OK ปุ่มเพื่อเปิดเครื่อง

Image: A finger pressing the 'OK' button on the thermostat to power it on.
- ตั้งเวลาปัจจุบัน:
กดปุ่ม ชุด button. The time display will flash. Use the - และ + buttons to adjust the hour and minute. Press OK เพื่อยืนยันการตั้งค่าแต่ละรายการ

Image: The thermostat display showing the time setting interface, with a finger pressing the 'SET' button.
- เชื่อมต่ออุปกรณ์ทำความร้อน:
Plug your heating lamp or heat pad into the thermostat's output socket. Ensure the heating device is compatible with dimming control and does not exceed the 260W maximum load.
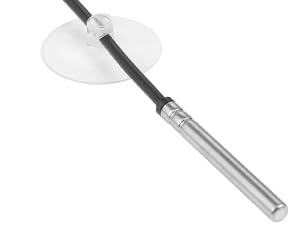
Image: The thermostat unit with its output socket connected to both a heat mat and a heat lamp, demonstrating its versatility.
7. คู่มือการใช้งาน
- Setting Target Temperature (SV):
เมื่ออุปกรณ์เปิดอยู่ ให้กดปุ่ม ชุด button once. The set temperature (SV) will flash. Use the - และ + buttons to adjust the desired temperature. Press OK to confirm the setting. The thermostat will now work to maintain this temperature.

Image: A finger pressing the '+' button to increase the set temperature on the thermostat display.
- Switching Temperature Units (°F/°C):
หากต้องการสลับระหว่างฟาเรนไฮต์และเซลเซียส ให้กดปุ่มค้างไว้ ชุด button for approximately 3 seconds until the unit flashes. Use the - or + button to select your preferred unit, then press OK เพื่อยืนยัน.
- ทำความเข้าใจกับจอแสดงผล:
The display shows the current temperature (PV), the set temperature (SV), and the output power percentage. The power meter bars indicate the current power output to the heating device. As the ambient temperature approaches the set temperature, the output power will gradually decrease (dimming) to maintain stability.
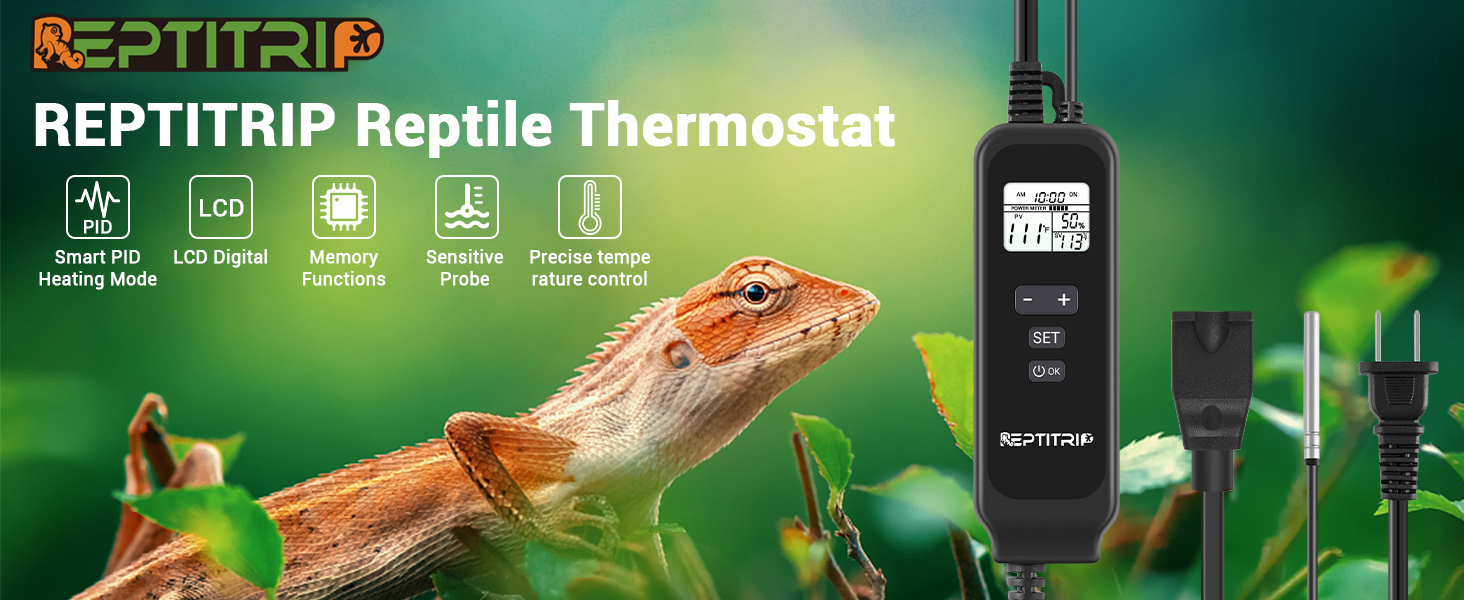
Image: A graphical representation of the PID dimming thermostat operation, showing how output power (represented by light bulb brightness) is adjusted to maintain a stable set temperature.
- Timer Function (if applicable):
The thermostat supports a timer function for a set duration. To activate, press the OK button to turn on the device. Press ชุด to enter the time setting mode. Adjust the hours using the - และ + ปุ่ม กด OK to confirm. The device will maintain the set temperature for the specified duration. Note: The device does not have an internal clock for setting a specific start time; the timer begins when activated.

Image: The thermostat display showing a timer set for 12 hours and a target temperature of 104°F, indicating the device will maintain this temperature for the set duration.
8. การบำรุงรักษา
- การทำความสะอาด: Disconnect the thermostat from power before cleaning. Wipe the unit with a soft, dry cloth. Do not use abrasive cleaners or immerse the unit in water.
- การดูแลโพรบ: รักษาหัววัดอุณหภูมิให้สะอาดและปราศจากสิ่งสกปรก หลีกเลี่ยงการงอหรือทำให้สายหัววัดเสียหาย
- พื้นที่จัดเก็บ: When not in use, store the thermostat in a cool, dry place away from direct sunlight.
9 การแก้ไขปัญหา
| ปัญหา | สาเหตุที่เป็นไปได้ | สารละลาย |
|---|---|---|
| เทอร์โมสตัทไม่เปิด | ไม่มีไฟ การเชื่อมต่อหลวม | Check power outlet and ensure the thermostat is securely plugged in. Press the OK button to power on. |
| Temperature not reaching set target or fluctuating significantly. | Heating element too weak/strong, probe improperly placed, incompatible heating device. | Ensure heating element wattage is appropriate for the enclosure size. Reposition the probe away from direct heat or cold spots. Verify heating device compatibility (not for T5, fluorescent, LED, or sun lampส). |
| Display shows incomplete information (e.g., only '9' instead of '90'). | จอแสดงผลทำงานผิดปกติ | Unplug the device, wait 30 seconds, and plug it back in. If the issue persists, contact customer support. |
| Heating element is always on/off, not dimming. | Incompatible heating element, thermostat malfunction. | Ensure the connected heating element is dimmable. Some heating elements are only on/off. If using a dimmable element and the issue persists, contact customer support. |
10. ข้อมูลจำเพาะ
| คุณสมบัติ | ข้อมูลจำเพาะ |
|---|---|
| ยี่ห้อ | รีปติทริป |
| หมายเลขรุ่น | PT02 |
| สี | สีดำ |
| อำนาจ/วัดtage | 260 watts (Max Output Load) |
| เล่มที่tage | 120 โวลต์ |
| วัสดุ | อะคริโลไนไตรล์ บิวทาไดอีน สไตรีน (ABS) |
| คุณสมบัติพิเศษ | หรี่แสงได้ |
| น้ำหนักสินค้า | 249 กรัม |
| ช่วงการควบคุมอุณหภูมิ | 68°F ถึง 113°F (20°C ถึง 45°C) |
| ประเภทการควบคุมอุณหภูมิ | Automatic (PID Thermostatic Control) |
| เทคโนโลยีการเชื่อมต่อ | มีสาย |
| ส่วนประกอบที่รวมอยู่ | Dimmer Switch, Temperature sensor |
| แหล่งพลังงาน | สายไฟ |
11. การรับประกันและการสนับสนุน
REPTITRIP products are designed for reliability and performance. For warranty information, technical support, or any questions regarding your PT02 Dimming Thermostat, please contact REPTITRIP customer service through the retailer where you purchased the product or visit the official REPTITRIP website for contact details. Please have your model number (PT02) and purchase information ready when contacting support.