
การแนะนำ
Thank you for choosing the ROCAM Digital Projection Alarm Clock, Model CR1024. This device combines a digital alarm clock with a 270° rotatable projection feature, FM radio, dual alarm settings, and a USB charging port. Please read this manual carefully to ensure proper use and to fully enjoy all its features.

Image: The ROCAM Digital Projection Alarm Clock displaying time, date, temperature, and humidity, positioned on a bedside table next to a cup of coffee and a notebook.
คุณสมบัติผลิตภัณฑ์
- การฉายภาพที่หมุนได้ 270°: Project time onto your wall or ceiling with adjustable angle and focus.
- 5-Level Dimmable LED Display: Adjust the brightness of the main display to your preference.
- FM Radio & Sleep Timer: Enjoy your favorite radio stations and set a sleep timer for automatic shutdown.
- Dual Alarm with Weekend/Weekday Mode: Set two independent alarms with customizable schedules (Mon-Sun, Mon-Fri, Sat-Sun, One-Time).
- USB-C Power Input & USB-A Charging Output: Power the clock via USB-C and charge external devices like smartphones via USB-A.
- แบตเตอรี่สำรอง: รักษาการตั้งค่าเวลาและสัญญาณเตือนไว้แม้ไฟดับtag(ไม่รวมแบตเตอรี่)
- จอแสดงผลอุณหภูมิและความชื้น: Shows indoor temperature (°C/°F) and humidity.
- ฟังก์ชั่นไฟกลางคืน: Integrated night light for soft illumination.
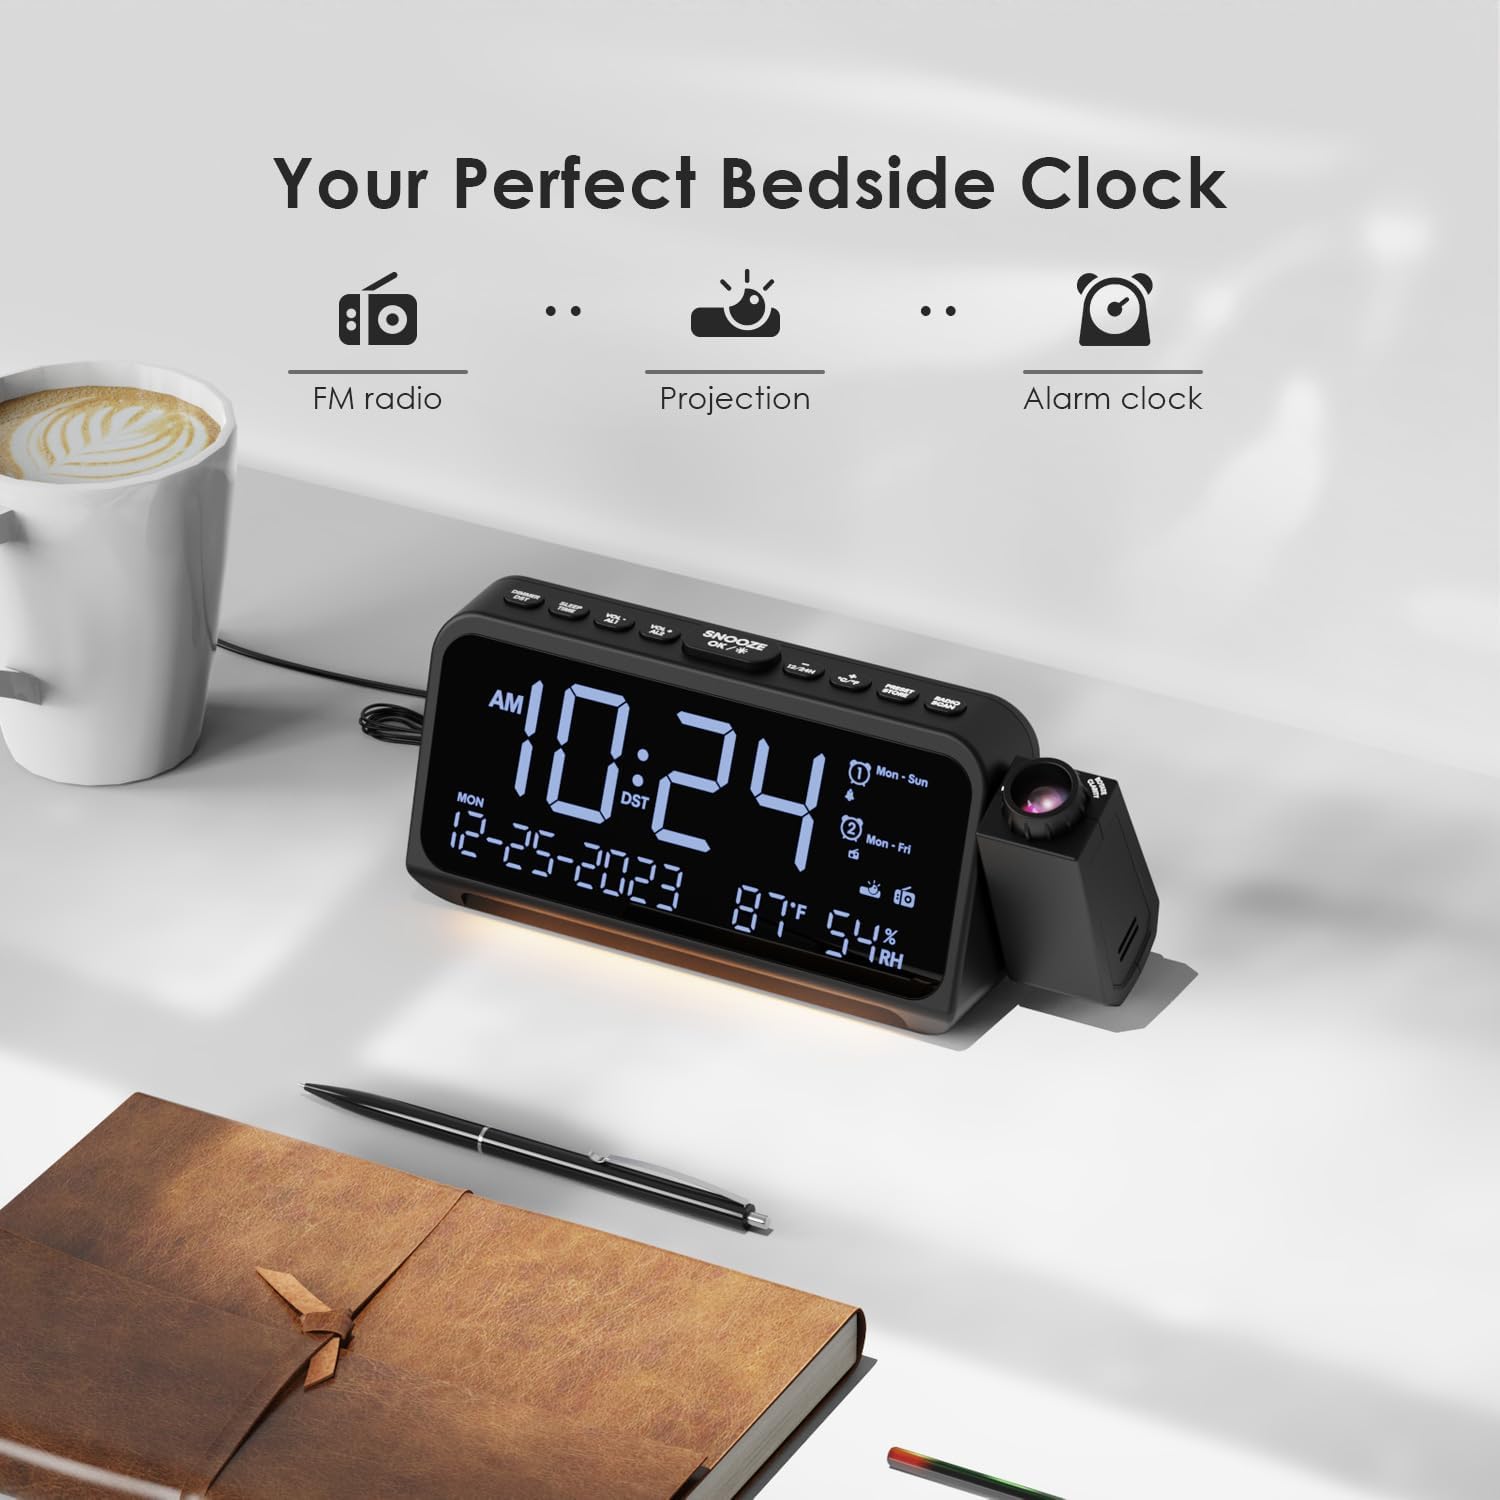
Image: Visual representation of the clock's main functions: FM radio, projection, and alarm clock.
เนื้อหาแพ็คเกจ
กรุณาตรวจสอบแพ็คเกจสำหรับรายการต่อไปนี้:
- ROCAM Digital Projection Alarm Clock (CR1024)
- สายไฟ USB Type-C
- อะแดปเตอร์แปลงไฟ
- คู่มือการใช้งาน
Note: 1 CR2 battery is required for backup functionality and is not included in the package.

Image: The alarm clock, USB-C cable, power adapter, and user manual laid out, with product dimensions (20cm x 8.7cm x 3.81cm) and weight (240g) indicated.
สินค้าเกินview
ปุ่มแผงด้านบน:
- เลื่อนปลุก/ตกลง/*: Snooze alarm, confirm settings, or activate night light.
- VOL-/AL1: Decrease volume, set Alarm 1.
- VOL+/AL2: Increase volume, set Alarm 2.
- 12/24 ชม.: สลับระหว่างรูปแบบเวลา 12 ชั่วโมงและ 24 ชั่วโมง
- °C/°F: สลับระหว่างการแสดงอุณหภูมิในหน่วยเซลเซียสและฟาเรนไฮต์
- PRESET/STORE: Save FM radio presets.
- RADIO/SCAN: Turn FM radio on/off, scan for stations.
- ตั้งเวลา: เข้าสู่โหมดตั้งเวลา
- ตั้งปลุก: เข้าสู่โหมดการตั้งค่าการเตือน
Side Panel & Rear:
- เลนส์ฉายภาพ: ฉายภาพเวลาลงบนพื้นผิว
- โฟกัสล้อ: ปรับความคมชัดของภาพที่ฉาย
- การหมุนฉายภาพ: Allows 270° adjustment of the projection angle.
- ปุ่มติ่มซำ: Adjusts projection brightness.
- ปุ่มเปิด/ปิด: Turns the projection on/off.
- Type-C Input (5V-2A): การเชื่อมต่อสายไฟหลัก
- USB-A Output (5V-1A): สำหรับชาร์จอุปกรณ์ภายนอก
- เสาอากาศ FM: ยืดออกเพื่อการรับสัญญาณวิทยุที่ดีขึ้น
- ช่องใส่แบตเตอรี่: For CR2 backup batteries.

ภาพ: รายละเอียด view of the top control buttons and the projection unit, highlighting the dual alarm settings.

Image: The back of the alarm clock, illustrating the Type-C power input and the USB-A output port for charging other devices.
การตั้งค่า
1. การเชื่อมต่อไฟฟ้า:
- Connect the provided USB Type-C cable to the Type-C input port on the back of the alarm clock.
- Plug the other end of the USB cable into the power adapter, then plug the adapter into a standard wall outlet.
- หน้าจอจะสว่างขึ้น แสดงว่านาฬิกาเปิดใช้งานแล้ว

Image: The alarm clock is shown connected to a wall outlet via its USB-C power cable and adapter.
2. Battery Backup Installation:
- หาช่องใส่แบตเตอรี่ที่อยู่ด้านล่างของนาฬิกา
- เปิดฝาครอบช่อง
- Insert 1 CR2 battery (not included) according to the polarity markings (+/-).
- Close the battery compartment cover. This battery will preserve time and alarm settings during a power outage.

Image: The bottom of the alarm clock with the battery compartment open, showing where to insert CR2 batteries.
คำแนะนำการใช้งาน
1. การตั้งเวลาและวันที่:
- กดปุ่มค้างไว้ ตั้งเวลา button. The hour digits will start flashing.
- ใช้ เล่ม+ or ฉบับ- ปุ่มสำหรับปรับชั่วโมง กด ตั้งเวลา เพื่อยืนยันอีกครั้ง
- ทำซ้ำขั้นตอนนี้สำหรับนาที ปี เดือน และวัน
- กด 12/24 ชม. to switch between 12-hour and 24-hour format.
- กด ° C / ° F to switch between Celsius and Fahrenheit for temperature display.
2. Setting Alarms (Alarm 1 & Alarm 2):
- กดปุ่มค้างไว้ ตั้งปลุก button. The Alarm 1 icon and hour digits will flash.
- ใช้ เล่ม+ or ฉบับ- to set the desired alarm hour. Press ตั้งปลุก เพื่อยืนยัน.
- ทำซ้ำเป็นเวลาหลายนาที
- Select alarm mode (Mon-Sun, Mon-Fri, Sat-Sun, One-Time) using เล่ม+ or ฉบับ-. กด ตั้งปลุก เพื่อยืนยัน.
- Choose alarm sound: buzzer or FM radio. Use เล่ม+ or ฉบับ- เพื่อเลือก กด ตั้งปลุก เพื่อยืนยัน.
- To set Alarm 2, briefly press ตั้งปลุก again and repeat the steps.
- To activate/deactivate an alarm, briefly press AL1 or AL2. The alarm icon will appear/disappear on the display.
Image: The clock display showing options for setting two alarms with different ringtone choices and day modes (Mon-Sun, Mon-Fri, Sat-Sun, One-Time).
3. ฟังก์ชั่นการงีบหลับ:
เมื่อสัญญาณเตือนดังขึ้น ให้กดปุ่ม เลื่อนปลุก/ตกลง/* กดปุ่มเพื่อปิดเสียงเตือนชั่วคราวเป็นเวลา 9 นาที เสียงเตือนจะดังขึ้นอีกครั้งหลังจากหมดเวลาปิดเสียง
4. Display Brightness (Dimmer):
กดปุ่ม เลื่อนปลุก/ตกลง/* button repeatedly to cycle through 5 levels of display brightness (L-1 to L-5) or turn the display off.

Image: The clock display showing five different brightness levels (L-1 to L-5) for the main LED screen.
5. การตั้งค่าการฉายภาพ:
- เปิด/ปิด: กดปุ่ม ปุ่มเปิดปิด on the side of the projection unit to turn the projection on or off.
- ปรับความสว่าง: กดปุ่ม ติ่มซำ button on the side of the projection unit to cycle through 5 levels of projection brightness.
- ปรับมุม: Rotate the projection unit up to 270° to direct the time onto your desired surface (wall or ceiling).
- ปรับโฟกัส: หมุน โฟกัสล้อ on the projection unit to sharpen the projected image.

Image: The digital time '10:24' projected in red onto a dark wall, demonstrating the projection feature.

Image: The projection unit rotating 270 degrees, showing how the projected time can be adjusted for optimal viewการไอเอ็นจี

Image: The projected time showing five distinct brightness levels, from level 1 (dimmest) to level 5 (brightest).
6. การใช้งานวิทยุ FM:
- ขยายเสาอากาศ FM เพื่อการรับสัญญาณที่ดีขึ้น
- กดปุ่ม RADIO/SCAN button to turn the FM radio on.
- กดค้างไว้ RADIO/SCAN to automatically scan and save available stations.
- ใช้ เล่ม+ or ฉบับ- to manually tune to a station or cycle through saved presets.
- กด PRESET/STORE to save the current station as a preset.
- กด RADIO/SCAN again to turn the FM radio off.

Image: The clock displaying an FM radio frequency (108.0 MHz) and options for a sleep timer (OFF, 15, 30, 60, 90 minutes).
7. ตั้งเวลาปิดเครื่อง:
When the FM radio is on, press the เลื่อนปลุก/ตกลง/* button repeatedly to set a sleep timer (15, 30, 60, 90 minutes, or OFF). The radio will automatically turn off after the selected duration.

Image: A hand pressing a button on the clock, with sleep timer options (P01, P06, P12, P15, P20) displayed, indicating timed radio playback.
8. USB Charging Output:
Connect your smartphone or other USB-powered device to the USB-A output port (5V-1A) on the back of the clock to charge it. Ensure the alarm clock is powered via its USB-C input.
การซ่อมบำรุง
- การทำความสะอาด: เช็ดนาฬิกาด้วยผ้าแห้งเนื้อนุ่ม ห้ามใช้สารทำความสะอาดที่มีฤทธิ์กัดกร่อนหรือตัวทำละลาย
- การเปลี่ยนแบตเตอรี่: หากนาฬิกาเดินช้าลงในระหว่างที่ไฟฟ้าดับtage, replace the CR2 backup battery.
- การจัดวาง: Avoid placing the clock in direct sunlight, high temperatures, or high humidity.
การแก้ไขปัญหา
| ปัญหา | สารละลาย |
|---|---|
| หน้าจอแสดงผลนาฬิกาว่างเปล่า | Ensure the USB-C power cable is securely connected to both the clock and a working power outlet. Check if the display brightness is set to OFF. |
| สัญญาณเตือนภัยไม่ดัง | Verify that the alarm is activated (alarm icon visible). Check the alarm volume. Ensure the alarm mode (Mon-Sun, Mon-Fri, etc.) is correctly set for the current day. |
| ภาพฉายไม่ชัด | หมุน โฟกัสล้อ on the projection unit until the image is clear. Ensure the projection surface is within optimal range. |
| การรับสัญญาณวิทยุ FM ไม่ดี | Fully extend the FM antenna. Try repositioning the clock to improve signal. Perform an auto-scan to find stronger stations. |
| พอร์ตชาร์จ USB ไม่ทำงาน | Ensure the alarm clock is powered by the USB-C input. Check the charging cable and the device being charged. |
ข้อมูลจำเพาะ
- หมายเลขรุ่น: CR1024
- ขนาด : 20 x 3.81 x 8.7 ซม. (กว้าง x ยาว x สูง)
- น้ำหนัก: 240 กรัม
- กำลังไฟเข้า: USB Type-C, 5V-2A
- เอาท์พุต USB: USB Type-A, 5V-1A
- แบตเตอรี่สำรอง: แบตเตอรี่ CR2 จำนวน 1 ก้อน (ไม่รวมอยู่ในชุด)
- ช่วงความถี่ FM: 87.5 - 108 เมกะเฮิรตซ์
การรับประกันและการสนับสนุน
ROCAM products are designed for reliability and performance. This product comes with a standard manufacturer's warranty. For specific warranty details, please refer to the warranty card included in your package or contact ROCAM customer support.
If you encounter any issues or have questions regarding your ROCAM Digital Projection Alarm Clock, please contact our customer support team. Contact information can typically be found on our official webไซต์หรือบนบรรจุภัณฑ์ผลิตภัณฑ์


