
Cuifati H310 LGA 1151 Micro ATX DDR4 Motherboard
Cuifati H310 LGA 1151 Micro ATX DDR4 Motherboard Instruction Manual
Model: Cuifati H310 LGA 1151 Micro ATX DDR4 Motherboard
แบรนด์: คุยฟาติ
1. บทนำ
This manual provides comprehensive instructions for the Cuifati H310 LGA 1151 Micro ATX DDR4 Motherboard, covering installation, operation, maintenance, troubleshooting, and detailed technical specifications. Please read this manual thoroughly before installing or operating your motherboard to ensure proper functionality and longevity.
คุณสมบัติหลัก:
- Wide CPU Compatibility: Supports 8th and 9th generation Intel Core CPUs (LGA 1151 socket).
- หน่วยความจำ DDR4 แบบ Dual Channel: Features two DDR4 DIMM slots, supporting up to 32GB total memory at speeds of 1066, 1333, and 1600MHz.
- แหล่งจ่ายไฟที่เสถียร: Equipped with a three-phase power supply and all solid-state capacitors for reliable power delivery to motherboard components.
- High-Speed Chipset: Utilizes the Intel H310 chipset for stable and efficient performance across various computing tasks.
- กราฟิกแบบรวม: Includes an integrated graphics processor with DVI, HDMI, and VGA display ports for multi-monitor setups.

รูปที่ 1: จากบนลงล่าง view of the Cuifati H310 LGA 1151 Micro ATX DDR4 Motherboard.
2. การตั้งค่าและการติดตั้ง
Follow these steps carefully to install your Cuifati H310 motherboard and its components.
2.1 เค้าโครงเมนบอร์ด

Figure 2: Detailed layout of the Cuifati H310 motherboard with key components labeled, including power connectors, memory slots, PCIe slots, and I/O interfaces.
2.2 การติดตั้งซีพียู
- ค้นหาซ็อกเก็ต CPU LGA 1151 บนเมนบอร์ด
- Gently push down the load lever and pull it away from the socket to open the CPU retention frame.
- Align the triangular mark on your Intel LGA 1151 CPU with the corresponding mark on the socket. Carefully place the CPU into the socket without forcing it.
- ปิดกรอบยึดและดันคันโยกโหลดกลับเข้าสู่ตำแหน่งล็อค
- ติดตั้งพัดลมระบายความร้อน CPU ตามคำแนะนำของผู้ผลิต

รูปที่ 3: ระยะใกล้ view of the LGA 1151 CPU socket on the motherboard, ready for CPU installation.
2.3 การติดตั้งหน่วยความจำ (RAM)
- ค้นหาช่อง DIMM DDR4 สองช่อง
- เปิดคลิปที่ปลายทั้งสองด้านของช่องใส่หน่วยความจำ
- จัดตำแหน่งรอยบากบนโมดูลหน่วยความจำ DDR4 ให้ตรงกับคีย์ในช่อง DIMM
- ใส่โมดูลหน่วยความจำเข้าไปในช่องให้แน่นจนกระทั่งตัวล็อกเข้าที่ ตรวจสอบให้แน่ใจว่าตัวล็อกทั้งสองปิดสนิทแล้ว

Figure 4: Illustration highlighting the DDR4 memory slots, supporting dual-channel architecture.
2.4 Storage Device Installation (SATA)
- Locate the four SATA 3.0 (6Gb/s) ports on the motherboard.
- เชื่อมต่อปลายด้านหนึ่งของสายเคเบิลข้อมูล SATA เข้ากับพอร์ต SATA บนเมนบอร์ด
- เชื่อมต่อปลายอีกด้านหนึ่งของสายเคเบิลข้อมูล SATA เข้ากับฮาร์ดไดรฟ์ SATA หรือ SSD ของคุณ
- เชื่อมต่อสายไฟ SATA จากหน่วยจ่ายไฟ (PSU) เข้ากับอุปกรณ์จัดเก็บข้อมูล
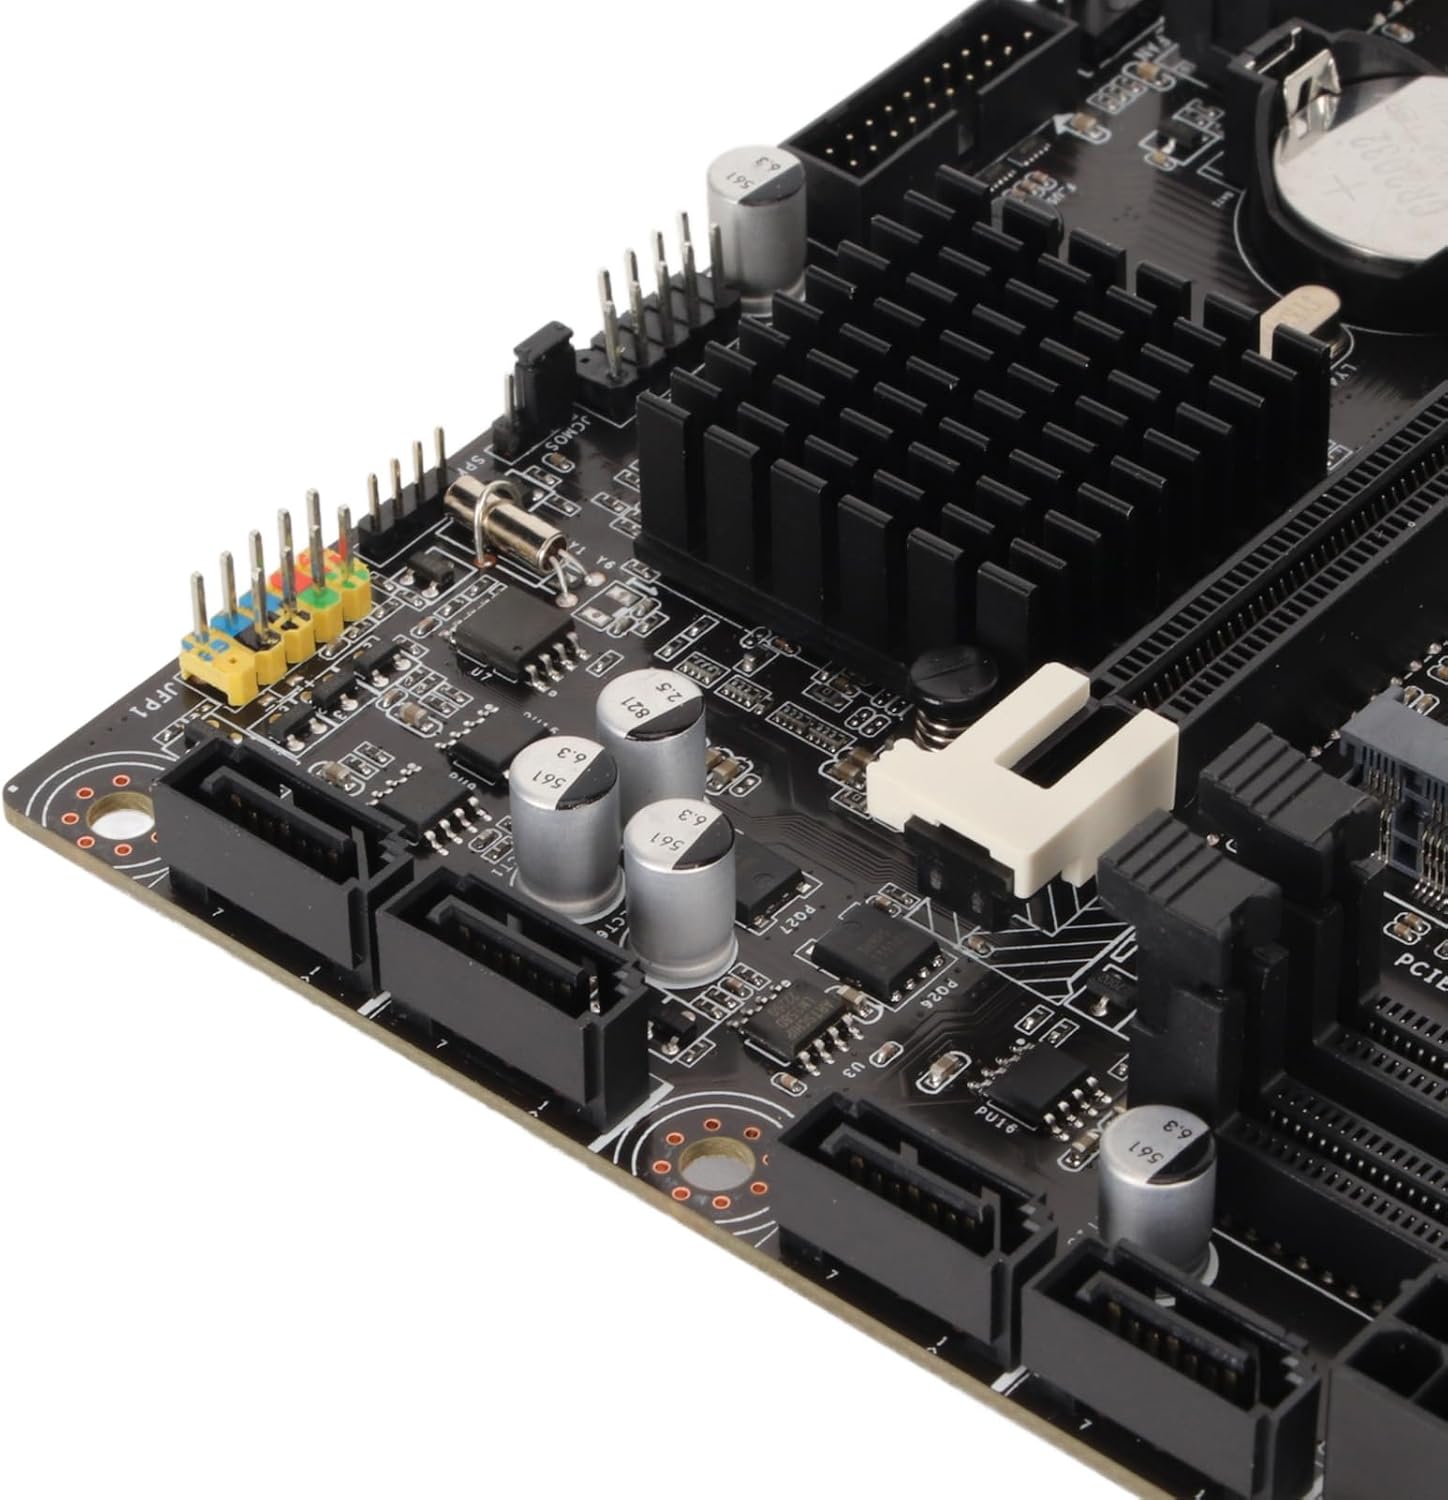
รูปที่ 5: ระยะใกล้ view of the four SATA 3.0 ports on the motherboard, used for connecting storage devices.
2.5 การติดตั้งการ์ดกราฟิก (PCIe)
- Locate the PCIe x16 slot (the longest PCIe slot).
- ถอดฝาครอบช่องขยายที่สอดคล้องกันออกจากเคสพีซีของคุณ
- Align your graphics card with the PCIe x16 slot and press down firmly until it is securely seated and the retention clip locks.
- ยึดการ์ดจอเข้ากับเคสคอมพิวเตอร์ด้วยสกรู
- เชื่อมต่อสายไฟ PCIe ที่จำเป็นจาก PSU ไปยังการ์ดจอ
2.6 การต่อสายไฟ
- เชื่อมต่อขั้วต่อไฟหลัก ATX 24 พินจากพาวเวอร์ซัพพลาย (PSU) เข้ากับเมนบอร์ด
- เชื่อมต่อขั้วต่อไฟ ATX 12V 8 พินจากพาวเวอร์ซัพพลาย (PSU) เข้ากับเมนบอร์ด
2.7 I/O Shield Installation
Before mounting the motherboard into your PC case, ensure you install the I/O shield into the case's rear opening. This protects the rear ports and prevents dust ingress.

Figure 6: Rear I/O panel of the Cuifati H310 motherboard, showing various ports including USB, LAN, and audio jacks.
3. คู่มือการใช้งาน
3.1 การบูตครั้งแรกและการตั้งค่า BIOS
- หลังจากประกอบคอมพิวเตอร์เสร็จแล้ว ให้เชื่อมต่อจอภาพ คีย์บอร์ด และเมาส์
- เปิดระบบของคุณ ในระหว่างการเริ่มต้นระบบ ให้กดปุ่มซ้ำๆ เดล key (or as indicated on screen) to enter the BIOS/UEFI setup.
- In the BIOS, configure settings such as boot order, date/time, and enable XMP for your RAM if applicable. Save changes and exit.
- Install your operating system (e.g., Windows 10) from a bootable USB drive or DVD.
3.2 การติดตั้งไดรเวอร์
After installing your operating system, install the necessary drivers for your motherboard components. These typically include chipset drivers, audio drivers, LAN drivers, and integrated graphics drivers. Drivers can usually be found on the Cuifati support website or on an included driver CD/USB drive.
3.3 Integrated Graphics Output
The motherboard supports multiple display outputs (DVI, HDMI, VGA). You can connect up to three monitors simultaneously using these ports, provided your CPU has integrated graphics capabilities.

รูปที่ 7: ระยะใกล้ view of the DVI, HDMI, and USB ports on the rear I/O panel.
4. การบำรุงรักษา
- รักษาความสะอาด: Regularly clean your PC case and motherboard to prevent dust buildup, which can lead to overheating and component failure. Use compressed air to gently remove dust.
- อัปเดต BIOS: Periodically check the Cuifati website for BIOS updates. BIOS updates can improve system stability, compatibility, and performance. Follow the update instructions carefully.
- การอัปเดตไดรเวอร์: อัปเดตไดรเวอร์ของคุณอยู่เสมอเพื่อให้มั่นใจถึงประสิทธิภาพที่เหมาะสมและความเข้ากันได้กับซอฟต์แวร์และฮาร์ดแวร์ใหม่
5 การแก้ไขปัญหา
หากคุณพบปัญหาเกี่ยวกับเมนบอร์ด โปรดพิจารณาขั้นตอนการแก้ไขปัญหาทั่วไปต่อไปนี้:
- ไม่มีพลังงาน/ไม่บูต:
- ตรวจสอบให้แน่ใจว่าสายไฟทั้งหมด (ATX 24 พิน, ATX 12V 8 พิน) เชื่อมต่อแน่นหนาดีแล้ว
- Verify your PSU is switched on and functioning correctly.
- Check front panel connections (power button, reset button).
- ไม่มีจอแสดงผล:
- Confirm your monitor is connected to the correct graphics output (integrated or dedicated GPU).
- ถอดและเสียบการ์ดจอและโมดูล RAM ใหม่
- If using a dedicated GPU, ensure it is properly powered.
- ความไม่เสถียรของระบบ/การขัดข้อง:
- ตรวจสอบอุณหภูมิ CPU และ GPU
- ตรวจสอบให้แน่ใจว่าโมดูล RAM ติดตั้งอย่างถูกต้องและใช้งานร่วมกันได้
- อัปเดต BIOS และไดรเวอร์
- BIOS Q-Flash Plus Button: The motherboard features a BIOS Q-Flash Plus button on the rear I/O panel, allowing you to update the BIOS without a CPU, RAM, or graphics card installed. Refer to the manufacturer's website for detailed instructions on using this feature.
6. ข้อมูลจำเพาะ
| คุณสมบัติ | รายละเอียด |
|---|---|
| ยี่ห้อ | กุยฟาติ |
| ซ็อคเก็ตซีพียู | แอลจีเอ 1151 |
| โปรเซสเซอร์ที่เข้ากันได้ | Intel Core i3/i5/i7/i9 8th/9th Gen |
| ประเภทชิปเซ็ต | อินเทล H310 |
| เทคโนโลยีหน่วยความจำ RAM | DDR4 |
| ความเร็วสัญญาณนาฬิกาหน่วยความจำ | 1600 MHz (Supports 1066, 1333, 1600MHz) |
| ความจุ RAM สูงสุด | Up to 32GB (2 x 16GB DIMM slots) |
| อุปกรณ์ที่รองรับ | เครื่องคอมพิวเตอร์ส่วนบุคคล |
| แพลตฟอร์ม | วินโดวส์ 10 |
| อินเทอร์เฟซการจัดเก็บข้อมูล | 4 x SATA 3.0 (6Gb/s) ports |
| การแสดงผลเอาท์พุต | DVI, HDMI, VGA |
| พอร์ต USB (ด้านหลัง) | 4 x USB 2.0, 2 x USB 3.2 Gen 1, 1 x USB 3.2 Gen 2, 1 x USB 3.2 Gen 1 Type-C |
| แลน | 1x กิกะบิตอีเทอร์เน็ต |
| เสียง | เสียงความละเอียดสูงในตัว |
| น้ำหนักสินค้า | 1.13 ปอนด์ |
| ขนาดแพ็คเกจ | 10.24 x 7.87 x 1.97 นิ้ว |
| หมายเลขรุ่น | Cuifati0ohk6rbtdm |
7. การรับประกันและการสนับสนุน
For warranty information, technical support, and the latest driver/BIOS downloads, please visit the official Cuifati webไซต์นี้ โปรดเก็บใบเสร็จรับเงินที่ซื้อไว้เพื่อใช้เรียกร้องการรับประกัน
For additional product information and visual guides, please refer to the product overview วิดีโอด้านล่าง:
วิดีโอ 1: ผลิตภัณฑ์อย่างเป็นทางการview for the Cuifati H310 Motherboard. This video provides a visual guide to the motherboard's features and components.
Ask a question about this manual
Ask about setup, troubleshooting, compatibility, parts, safety, or missing instructions. Manuals+ will review the question and use this page’s manual context to help answer it.