
การแนะนำ
Thank you for choosing the Portal 3-4 Person Dome Tent. This manual provides essential information for the safe and efficient setup, operation, and maintenance of your tent. Please read these instructions carefully before use and retain them for future reference.
เต็นท์รุ่นนี้ออกแบบมาสำหรับคamping, travel, trekking, and garden use, offering protection from the elements with its 4000mm waterproof rating.
ข้อมูลด้านความปลอดภัย
- Keep all flame and heat sources away from the tent fabric. The tent is made of flame-resistant fabric, but it is not fireproof.
- Do not use fuel-burning appliances inside the tent.
- Ensure proper ventilation to avoid suffocation.
- Do not pitch the tent under trees with dead branches or in areas prone to rockfalls or landslides.
- Secure the tent properly with all stakes and guy ropes to prevent collapse in windy conditions.
- Avoid setting up the tent near open water sources without proper precautions.
เนื้อหาแพ็คเกจ
ก่อนประกอบ โปรดตรวจสอบว่ามีชิ้นส่วนครบทุกชิ้น:
- Tent body (inner tent)
- Rainfly (outer tent)
- Fiberglass tent poles (typically 2-3 main poles)
- หมุดยึดเต็นท์
- ผู้ชายเชือก
- กระเป๋าใส่ของ
Note: The exact number of poles, stakes, and ropes may vary slightly.
คำแนะนำการตั้งค่า
เวลาประกอบโดยประมาณ: 10 นาที
ขั้นตอนที่ 1: เตรียมพื้นที่
Choose a flat, clear area free of sharp objects. Lay out the tent body (inner tent) on the ground.
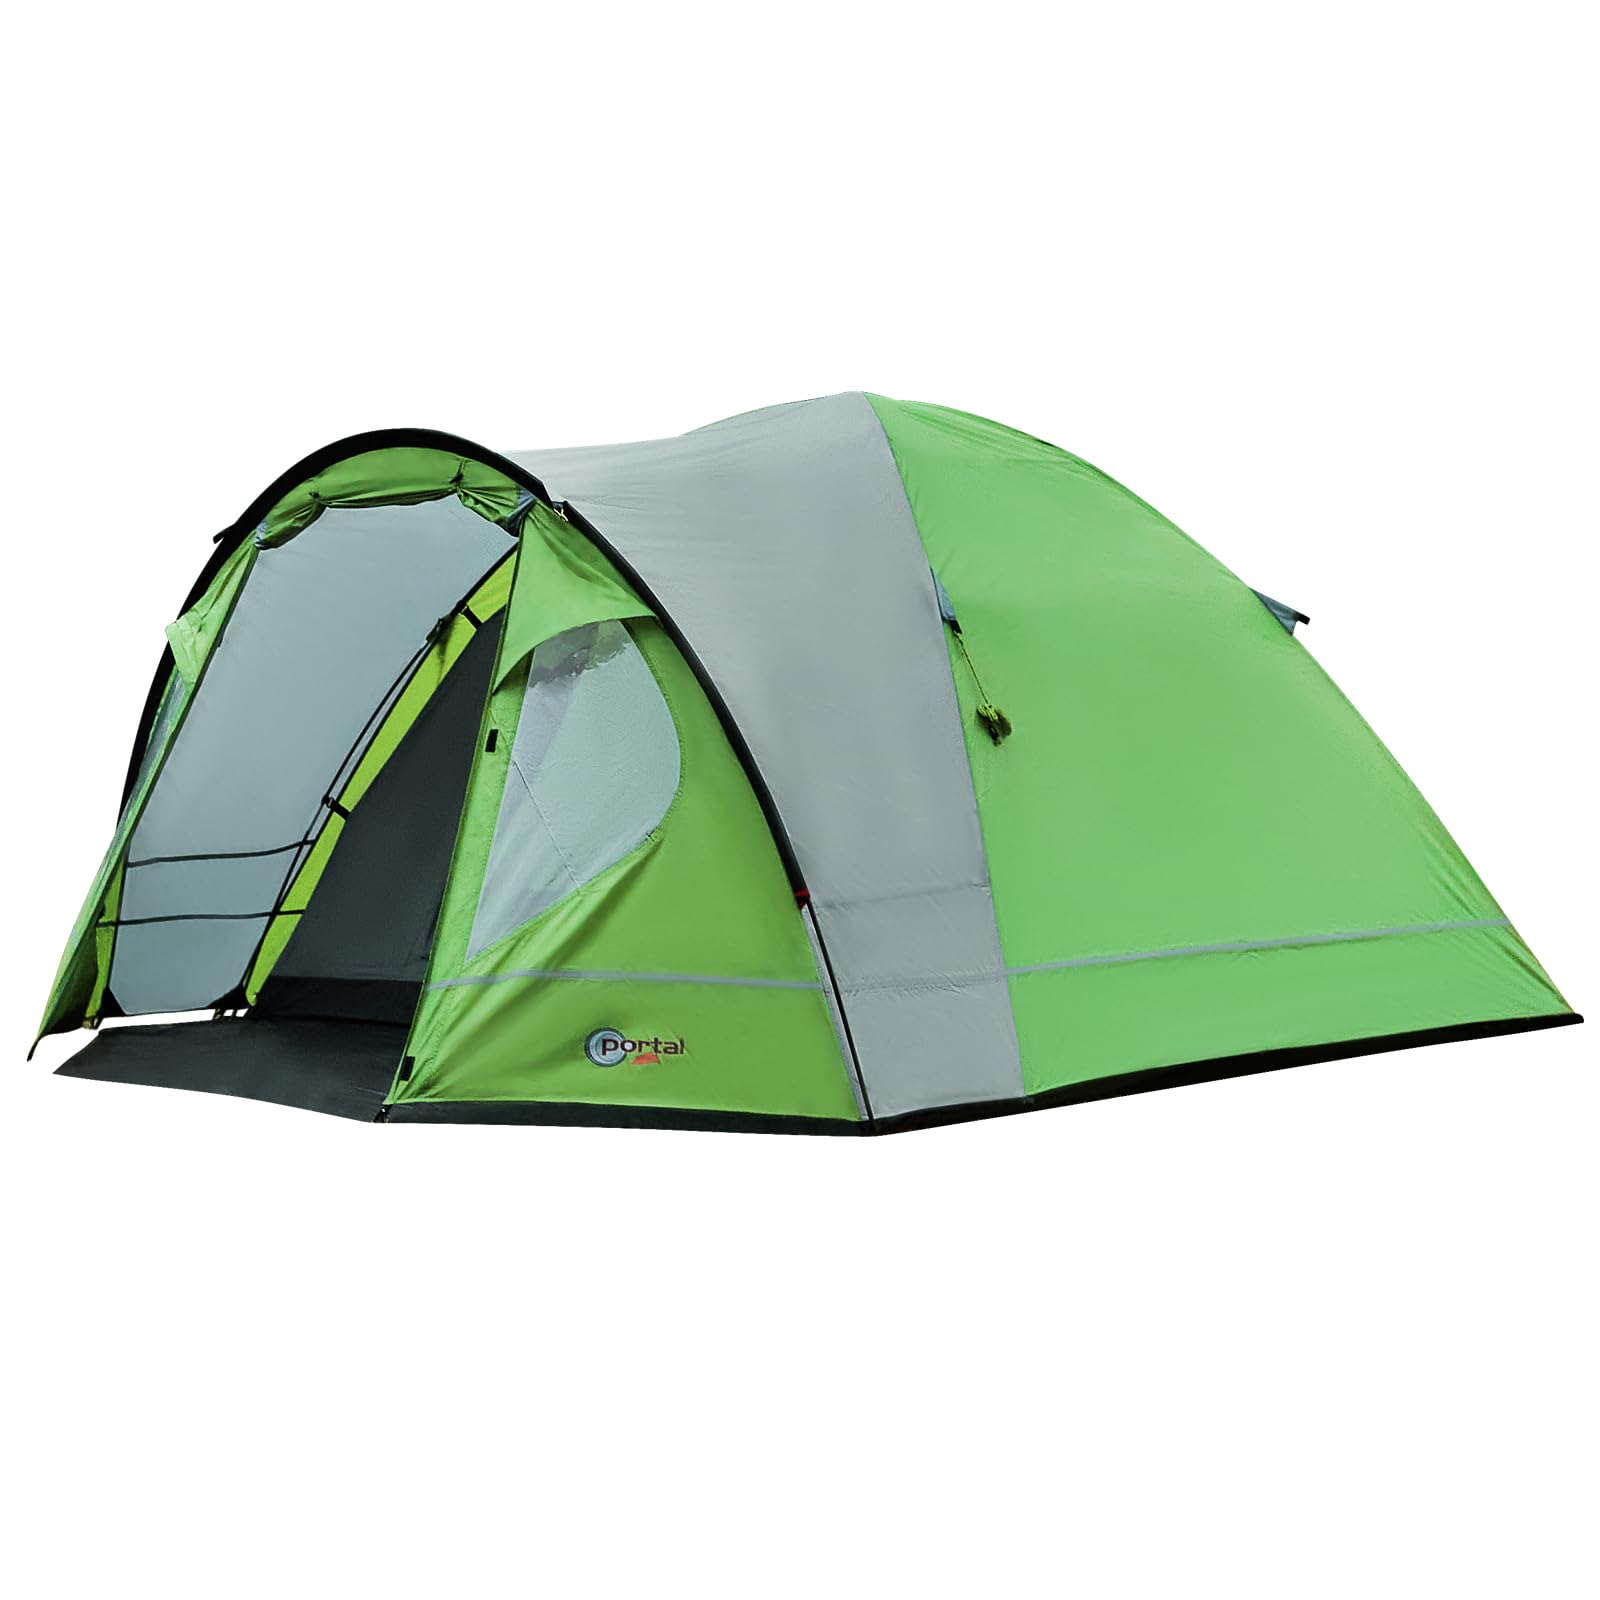
Image: The tent components, including the tent body, poles, and rainfly, are spread out on a grassy area near a body of water, ready for assembly.
ขั้นตอนที่ 2: ประกอบเสา
Connect the fiberglass pole sections by inserting them into each other. Ensure all sections are fully seated.

Image: A diagram illustrating the tent's dimensions (240cm width, 210cm length, 130cm height) and packed size (66x20x22cm), along with weight (5.4kg) and waterproof rating (4000mm).
Step 3: Insert Poles into Tent Body
Slide the assembled poles through the sleeves on the tent body. Once through, insert the ends of the poles into the grommets located at the corners of the tent base. Secure the tent body to the poles using the attached clips or ties.
Step 4: Attach the Rainfly
Drape the rainfly over the erected tent body. Align the doors and vents. Secure the rainfly to the tent body and poles using the attached buckles, hooks, or ties. Ensure the rainfly is taut and evenly distributed over the tent.
Step 5: Stake Down the Tent and Guy Ropes
Secure the tent corners to the ground using stakes. Extend the guy ropes from the designated points on the rainfly and stake them firmly into the ground at an appropriate angle (approximately 45 degrees) to provide stability, especially in windy conditions.
สำหรับคำแนะนำแบบภาพประกอบ โปรดดูวิดีโอการตั้งค่าด้านล่าง:
Video: A step-by-step demonstration of how to set up the Portal 3-4 Person Dome Tent, including pole assembly, attaching the rainfly, and securing the tent with stakes and guy ropes.
คำแนะนำการใช้งาน
Entry and Exit
Use the zippered doors for entry and exit. Always zip the doors closed when not in use to prevent insects and moisture from entering.
การระบายอากาศ
The tent features mesh windows and vents to promote airflow and reduce condensation. Open these as needed for optimal ventilation. The tent's design allows for good sight and ventilation.

ภาพ: ก. view from inside the tent, looking out through the open mesh door, revealing a scenic landscape with mountains and a lake, highlighting the tent's ventilation and view.
Awning/Anteroom Use
The tent includes an awning area (anteroom) which can be used for storing gear, shoes, or as a sheltered space. This area is approximately 2.4 square meters.

Image: The anteroom of the tent, showing ample space for storing camping equipment, shoes, or luggage, with a small table and blanket inside.
การซ่อมบำรุง
การทำความสะอาด
Clean the tent with a soft sponge and mild soap. Do not use harsh detergents, bleach, or solvents, as these can damage the fabric's waterproof coating.
การอบแห้ง
Always ensure the tent is completely dry before packing it away. Packing a wet tent can lead to mildew, odors, and damage to the waterproof coating. Hang the tent in a shaded, well-ventilated area to dry.
พื้นที่จัดเก็บ
Store the clean, dry tent in its carry bag in a cool, dry place away from direct sunlight and extreme temperatures.
การกันซึม
The tent features a 4000mm PU waterproof coating. Over time, this coating may degrade. Re-apply a suitable tent waterproofing spray if you notice reduced water repellency.

Image: Close-up of water droplets beading and running off the tent fabric, demonstrating its 4000mm waterproof capability.
การแก้ไขปัญหา
Condensation Inside Tent
Condensation is natural and occurs when warm, moist air inside the tent meets cooler air outside. To minimize condensation, ensure adequate ventilation by opening vents and mesh windows.
น้ำรั่ว
Check for proper rainfly placement and tension. Ensure all zippers are fully closed. Inspect seams for damage; seam sealer can be applied if necessary. Verify that the tent is pitched on level ground to prevent water pooling.
Tent Instability in Wind
Ensure all tent stakes are firmly driven into the ground and all guy ropes are properly tensioned and secured. Adjust guy ropes to distribute tension evenly. Consider using heavier-duty stakes in very soft or sandy soil.
ข้อมูลจำเพาะ
| คุณสมบัติ | รายละเอียด |
|---|---|
| หมายเลขรุ่น | HW-4012-GR |
| ความจุ | 3-4 ท่าน |
| ขนาดเมื่อกางออก (ยาว x กว้าง x สูง) | 240 cm x 210 cm x 130 cm (Sleeping Area) |
| Anteroom Dimensions (L x W) | 100 cm x 240 cm (2.4 m²) |
| ขนาดบรรจุ | 64 ซม. x 20 ซม. x 18 ซม. |
| น้ำหนัก | 5.1 กก. |
| ระดับการกันน้ำ | 4000 mm PU |
| ผ้าเต็นท์ | โพลีเอสเตอร์ 190T |
| วัสดุเสา | ไฟเบอร์กลาส |
| วัสดุพื้น | โพลีเอสเตอร์ |
| รวมส่วนประกอบ | Tent, Rainfly, Poles, Stakes, Guy Ropes, Carry Bag |
| เวลาประกอบ | ประมาณ 10 นาที |
การรับประกันและการสนับสนุน
For warranty information or technical support, please refer to the contact details provided at the point of purchase or visit the official Portal webไซต์ โปรดเก็บใบเสร็จรับเงินไว้เป็นหลักฐานการซื้อ
สำหรับทรัพยากรเพิ่มเติมและข้อมูลผลิตภัณฑ์ คุณสามารถเยี่ยมชมได้ที่ หน้าผลิตภัณฑ์.