
1. บทนำ
ขอบคุณสำหรับการซื้อasing the ELAC Varro Dual Reference DS1200 Powered Subwoofer. This manual provides essential information for the proper setup, operation, and maintenance of your new subwoofer. Please read these instructions thoroughly before use to ensure optimal performance and safety.
2. คำแนะนำด้านความปลอดภัย
- แหล่งพลังงาน: เชื่อมต่อซับวูฟเฟอร์เข้ากับเต้ารับไฟฟ้ากระแสสลับที่มีระดับเสียงที่ระบุเท่านั้นtage (100-240V AC, 50/60Hz).
- การระบายอากาศ : Ensure adequate ventilation around the subwoofer. Do not block any ventilation openings. Maintain a minimum distance of 4 inches (10 cm) from walls or other objects.
- การจัดวาง: Place the subwoofer on a stable, level surface. Avoid placing it near heat sources, direct sunlight, or in areas with high humidity or dust.
- น้ำและความชื้น: Do not expose the subwoofer to water or moisture. Do not place objects filled with liquids, such as vases, on or near the unit.
- สาย: Protect power cords from being walked on or pinched. Do not pull the power cord to disconnect from the outlet.
- การบริการ: อย่าพยายามให้บริการผลิตภัณฑ์นี้ด้วยตนเอง ส่งต่อการบริการทั้งหมดไปยังช่างบริการที่ผ่านการรับรอง
- การทำความสะอาด: ถอดสายไฟออกก่อนทำความสะอาด ใช้ผ้านุ่มและแห้ง ห้ามใช้น้ำยาทำความสะอาดหรือสเปรย์ฉีด
3. เนื้อหาบรรจุภัณฑ์
ตรวจสอบว่ามีสินค้าทั้งหมดอยู่ในบรรจุภัณฑ์:
- ELAC Varro Dual Reference DS1200 Powered Subwoofer
- สายไฟ
- คู่มือการใช้งาน (เอกสารนี้)
4. สินค้าหมดview
ด้านหน้า View

รูปที่ 4.1 : ด้านหน้า view of the ELAC Varro DS1200 subwoofer, showcasing the 12-inch HEX surround woofer and gloss black finish.

รูปที่ 4.2 : ด้านหน้า view of the ELAC Varro DS1200 subwoofer with the protective grille attached, maintaining its sleek appearance.
แผงด้านหลังและช่องเชื่อมต่อ

Figure 4.3: Rear panel of the ELAC Varro DS1200 subwoofer, detailing the input/output options and controls.
The rear panel provides all necessary connections for integrating the subwoofer into your audio system. Key connections include:
- อาร์ซีเออินพุต: Standard unbalanced inputs for connecting to most AV receivers or pre-ampลิตเตอร์
- Balanced XLR Inputs: Professional-grade balanced inputs for longer cable runs and reduced noise interference.
- ช่องรับสัญญาณระดับลำโพง: อนุญาตให้เชื่อมต่อโดยตรงจากคุณ amplifier's speaker outputs, useful for systems without dedicated subwoofer outputs.
- ทริกเกอร์ 12V: For automatic power on/off synchronization with other components.
- พอร์ตอีเธอร์เน็ต: For third-party control systems and network connectivity.
- พอร์ต USB: สำหรับการอัพเดตเฟิร์มแวร์
- ช่องจ่ายไฟ: For connecting the included power cord.
ด้านข้าง View
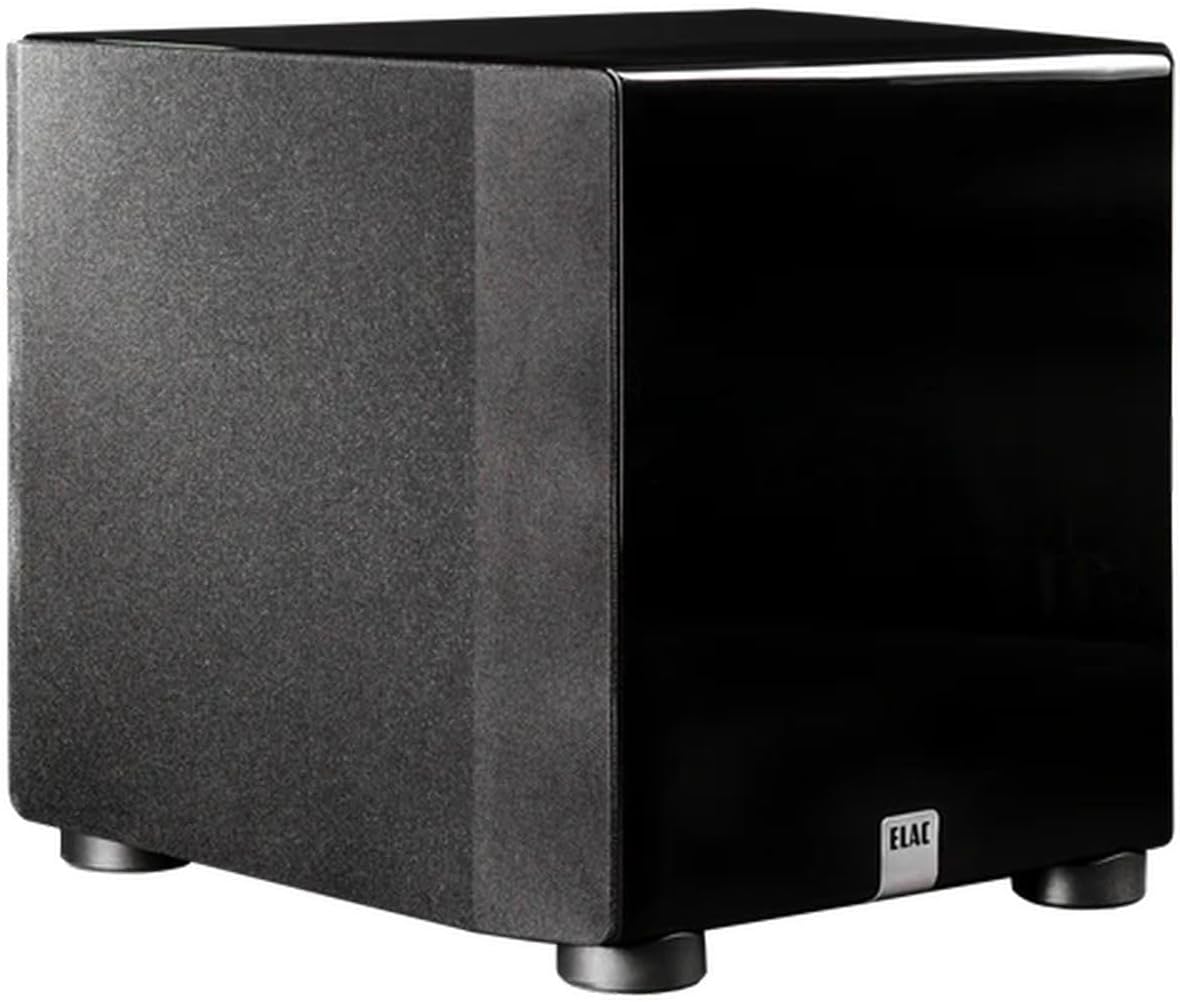
รูปที่ 4.4: ด้านข้าง view of the ELAC Varro DS1200 subwoofer, highlighting its compact design with the grille in place.
5. การตั้งค่า
5.1 การจัดวาง
Subwoofer placement significantly impacts bass performance. Experiment with different locations in your room to find the best balance of output and smoothness. Common placement options include:
- ตำแหน่งมุม: Often provides the most output but can sometimes lead to boomy bass.
- Front Wall Placement: Near the main speakers, can improve integration with the front soundstage.
- Mid-Room Placement: Can offer smoother bass response but may require more power.
Consider using the 'subwoofer crawl' method: place the subwoofer in your primary listening position, play bass-heavy music, and crawl around the room to find where the bass sounds best. That location is often ideal for the subwoofer.
5.2 การเชื่อมต่อกับระบบของคุณ
โปรดตรวจสอบให้แน่ใจว่าอุปกรณ์เสียงทั้งหมดปิดอยู่ก่อนทำการเชื่อมต่อ
RCA/XLR Connection (Recommended for AV Receivers)
- Connect an RCA or XLR cable from your AV receiver's 'Subwoofer Out' or 'LFE Out' to the corresponding RCA or XLR input on the DS1200 subwoofer.
- If using a stereo pre-amplifier with a dedicated subwoofer output, connect it similarly.
Speaker-Level Connection (For Amp(แอมพลิฟายเออร์ที่ไม่มีช่องต่อซับวูฟเฟอร์)
- เชื่อมต่อสายลำโพงจากของคุณ amplifier's left and right speaker outputs to the 'Speaker Level Input' terminals on the DS1200.
- Then, connect your main speakers to the 'Speaker Level Output' terminals on the DS1200. Ensure correct polarity (+ to + and - to -).
5.3 การเชื่อมต่อสายไฟ
- Connect the included power cord to the power inlet on the rear of the subwoofer.
- เสียบปลายอีกด้านของสายไฟเข้ากับเต้ารับไฟฟ้ากระแสสลับที่เหมาะสม
6. ปฏิบัติการ
6.1 การเปิดเครื่องครั้งแรก
After making all connections, switch on the power to the subwoofer. The power indicator light will illuminate. If your receiver has an auto-setup feature (e.g., Audyssey, MCACC, YPAO), run it now to calibrate the subwoofer with your system.
6.2 การปรับแต่งพื้นฐาน
For initial listening, set the subwoofer's volume to a moderate level. Adjust the crossover frequency and phase settings as needed. For precise control and optimization, utilize the ELAC Varro App.
7. App Control and Auto EQ
The ELAC Varro DS1200 features advanced control and room correction capabilities via a dedicated smartphone application.
7.1 การดาวน์โหลดแอพ
Download the 'ELAC Varro' app from the Apple App Store (for iOS devices) or Google Play Store (for Android devices).
7.2 Connecting to the Subwoofer
- ตรวจสอบให้แน่ใจว่าได้เปิดใช้งานบลูทูธของสมาร์ทโฟนของคุณแล้ว
- Open the ELAC Varro app. The app will search for available ELAC subwoofers.
- Select your DS1200 from the list to establish a connection.
7.3 คุณสมบัติของแอป
แอปนี้ช่วยให้คุณควบคุมการตั้งค่าซับวูฟเฟอร์ได้อย่างครอบคลุม รวมถึง:
- การควบคุมระดับเสียง: Precise adjustment of output level.
- ความถี่ครอสโอเวอร์: Set the upper frequency limit for the subwoofer.
- การควบคุมเฟส: Adjust the phase to ensure seamless integration with your main speakers.
- พารามิเตอร์ EQ: Fine-tune specific frequency bands to address room acoustics.
- อีควอไลเซอร์อัตโนมัติ: Utilizes your smartphone's microphone to measure and automatically correct the subwoofer's response for your room, optimizing bass performance.
8. การบำรุงรักษา
8.1 การทำความสะอาด
To clean the subwoofer, first disconnect it from the power outlet. Use a soft, dry, lint-free cloth to wipe the surfaces. Avoid using abrasive cleaners, solvents, or chemical sprays, as these can damage the finish.
8.2 การดูแลทั่วไป
Periodically check all cable connections to ensure they are secure. Avoid placing heavy objects on the subwoofer or exposing it to extreme temperatures.
9 การแก้ไขปัญหา
If you experience issues with your ELAC Varro DS1200 subwoofer, refer to the following common problems and solutions:
| ปัญหา | สาเหตุที่เป็นไปได้ | สารละลาย |
|---|---|---|
| ไม่มีเสียงจากซับวูฟเฟอร์ |
|
|
| เสียงเบสที่บิดเบี้ยวหรือดังเกินไป |
|
|
| App cannot connect to subwoofer |
|
|
If the problem persists after trying these solutions, please contact ELAC customer support.
10. ข้อมูลจำเพาะ
The following are the technical specifications for the ELAC Varro Dual Reference DS1200 Powered Subwoofer:
- แบบอย่าง: Varro Dual Reference DS1200
- ประเภทลำโพง: ซับวูฟเฟอร์แบบมีไฟ
- เส้นผ่านศูนย์กลางวูฟเฟอร์: คู่ 12 นิ้ว
- Ampพลังงาน lifier: กำลังขับ 1200 วัตต์ RMS (กำลังขับสูงสุด 2400 วัตต์)
- การตอบสนองความถี่: 17Hz-150Hz (Anechoic) / 14Hz-150Hz (In-Room)
- เทคโนโลยีการเชื่อมต่อ: Wired (RCA, XLR, Speaker Level, Ethernet, USB)
- วิธีการควบคุม: การควบคุมแอพ
- คุณสมบัติเพิ่มเติม: App Control, Auto EQ, 12V Trigger
- สี: กลอสสีดำ
- ขนาดสินค้า (ลึก x กว้าง x สูง) : ขนาดโดยประมาณ 25" x 22.25" x 25" (63.5 ซม. x 56.5 ซม. x 63.5 ซม.)
- น้ำหนักสินค้า: 98 ปอนด์ (44.45 กก.)
- แหล่งพลังงาน: สายไฟ
- อินพุต Voltage: 12 Volts (for trigger)
- ยูพีซี: 853720006698

Figure 10.1: Approximate dimensions of the ELAC Varro DS1200 subwoofer.
11. การรับประกันและการสนับสนุน
11.1 การรับประกันแบบจำกัด
The ELAC Varro Dual Reference DS1200 Powered Subwoofer comes with a รับประกันจำกัด 1 ปี. This warranty covers defects in materials and workmanship under normal use. Please retain your proof of purchase for warranty claims. The warranty does not cover damage caused by misuse, accident, unauthorized modification, or improper installation.
11.2 การสนับสนุนลูกค้า
For technical assistance, warranty inquiries, or service requests, please visit the official ELAC website or contact your authorized ELAC dealer. Please have your model number (DS1200) and serial number ready when contacting support.