1. บทนำ
Thank you for choosing the ATTACK SHARK X2 Wireless Gaming Mouse. This manual provides detailed instructions for setting up, operating, and maintaining your mouse to ensure optimal performance. The X2 mouse features a transparent shell, 3-mode connectivity (2.4GHz wireless, Bluetooth 5.0, USB-C wired), adjustable DPI, 3D RGB lighting, and a rechargeable battery.

Image 1.1: The ATTACK SHARK X2 Wireless Gaming Mouse, showcasing its transparent design and vibrant RGB lighting. A USB receiver is also visible.
2. สินค้าหมดview
2.1 เนื้อหาบรรจุภัณฑ์
- เมาส์เกมมิ่งไร้สาย ATTACK SHARK X2
- สายชาร์จ USB-C
- ตัวรับสัญญาณ USB 2.4GHz (เก็บไว้ในตัวเมาส์)
- คู่มือการใช้งาน
2.2 ส่วนประกอบของเมาส์

ภาพที่ 2.1: ด้านล่าง view of the X2 mouse, highlighting the USB receiver slot, mode switch, and light effect switch.
- ปุ่มคลิกซ้าย
- ปุ่มคลิกขวา
- ล้อเลื่อน (also functions as a button)
- ปุ่ม DPI (below scroll wheel)
- ปุ่มเดินหน้า (ด้านซ้าย)
- ปุ่มย้อนกลับ (ด้านซ้าย)
- สวิตช์โหมด (bottom of mouse: OFF / 2.4G / Bluetooth)
- สวิตช์เอฟเฟกต์แสง (ด้านล่างของเมาส์)
- ช่องเสียบตัวรับสัญญาณ USB (ด้านล่างของเมาส์)
- พอร์ตชาร์จ USB-C (ด้านหน้าของเมาส์)
3. การตั้งค่าและการเชื่อมต่อ
3.1 การชาร์จเมาส์
The X2 mouse features an 800mAh rechargeable battery. Before first use, or when the battery is low, connect the mouse using the provided USB-C cable.
- Connect the USB-C end of the cable to the mouse's charging port.
- Connect the USB-A end to a power source (e.g., computer USB port, USB wall adapter).
- โดยทั่วไปการชาร์จเต็มจะใช้เวลาประมาณ 4 ชั่วโมง
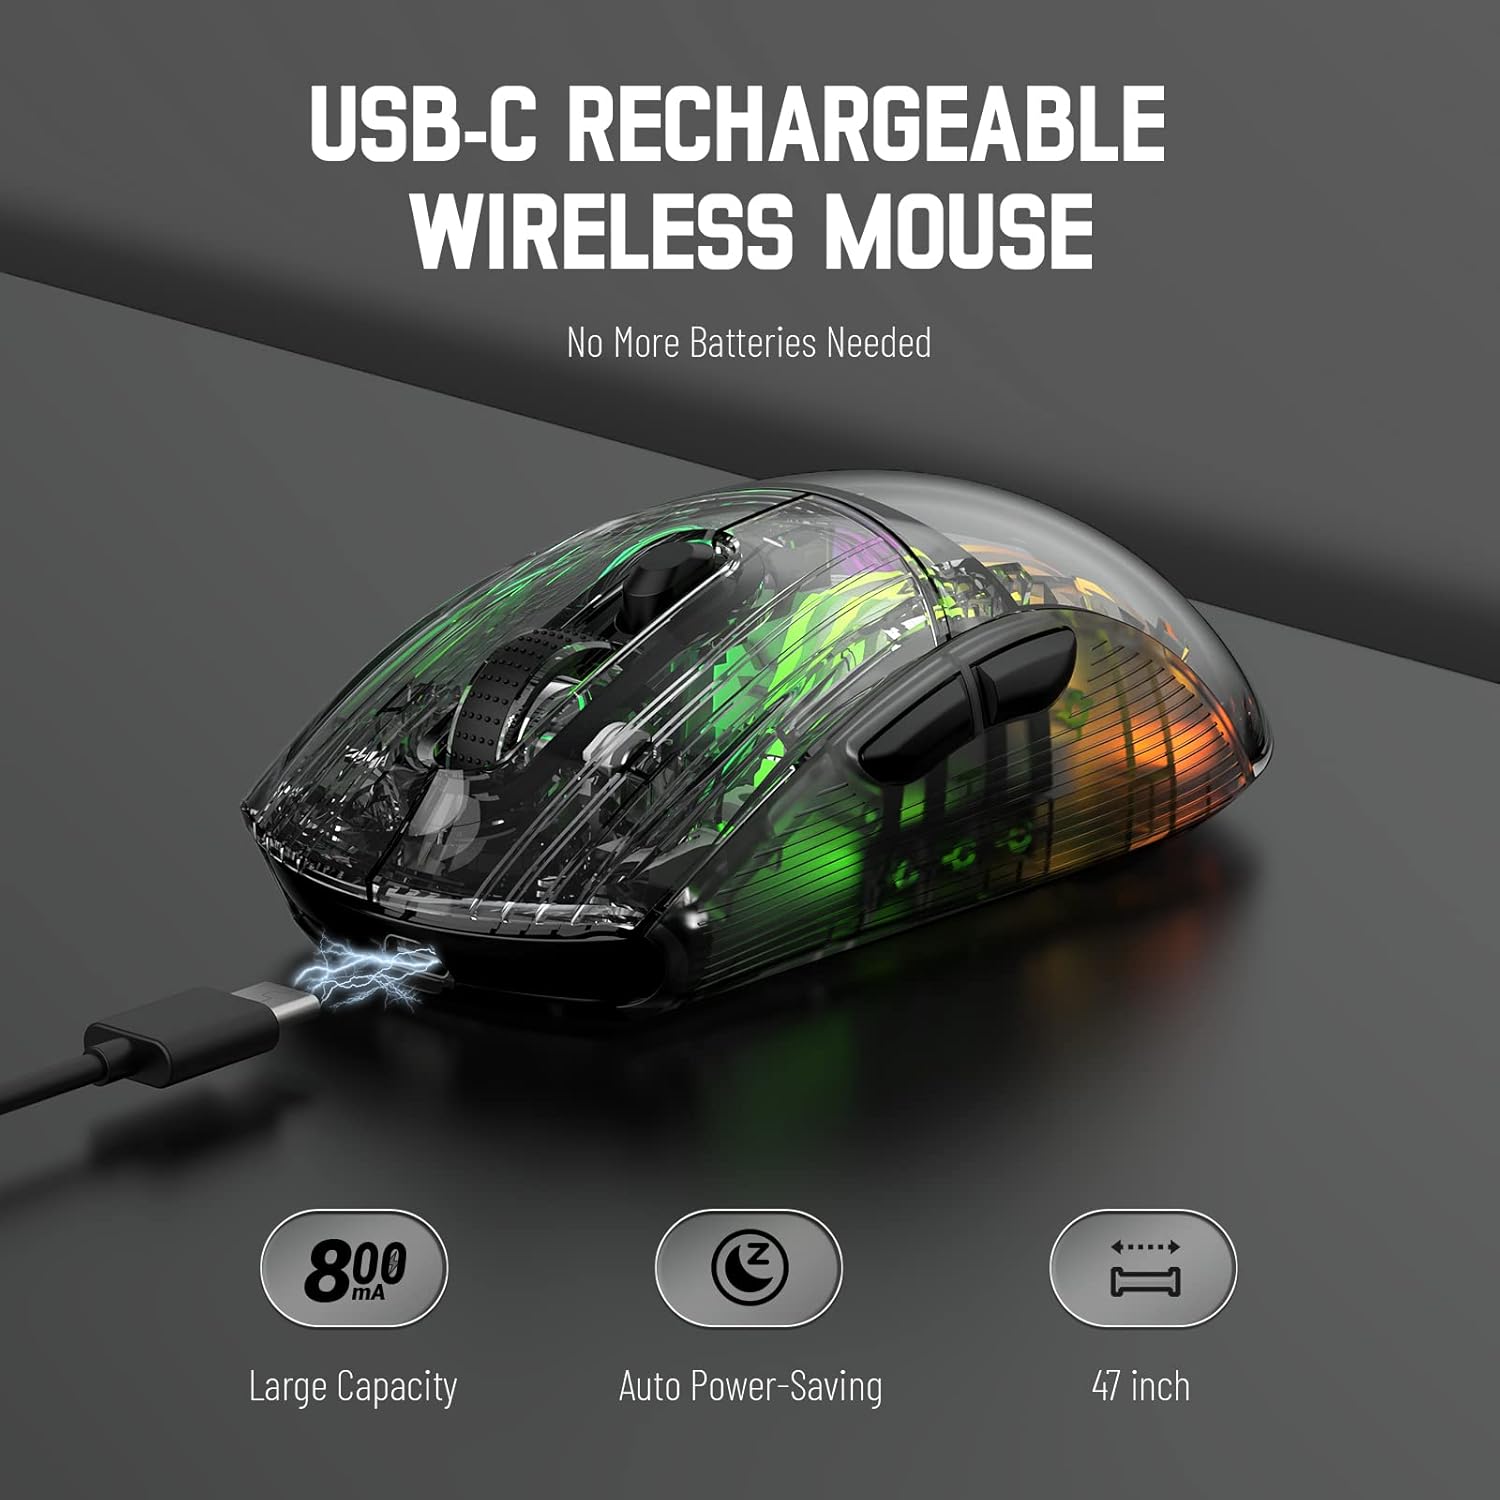
Image 3.1: The X2 mouse connected via its USB-C cable, illustrating the charging process.
3.2 การเชื่อมต่อไร้สาย 2.4GHz
For a stable and responsive wireless connection, use the 2.4GHz USB receiver.
- ค้นหาตัวรับสัญญาณ USB ที่เก็บไว้ในช่องด้านล่างของเมาส์
- Push the mode switch on the bottom of the mouse to the "2.4G" position.
- เสียบตัวรับสัญญาณ USB เข้ากับพอร์ต USB ที่ว่างอยู่บนคอมพิวเตอร์หรืออุปกรณ์ของคุณ
- The computer should automatically detect and install the necessary drivers. The mouse is ready for use once installation is complete (typically plug-and-play).
- If the mouse is unresponsive, try plugging the receiver into a different USB port.
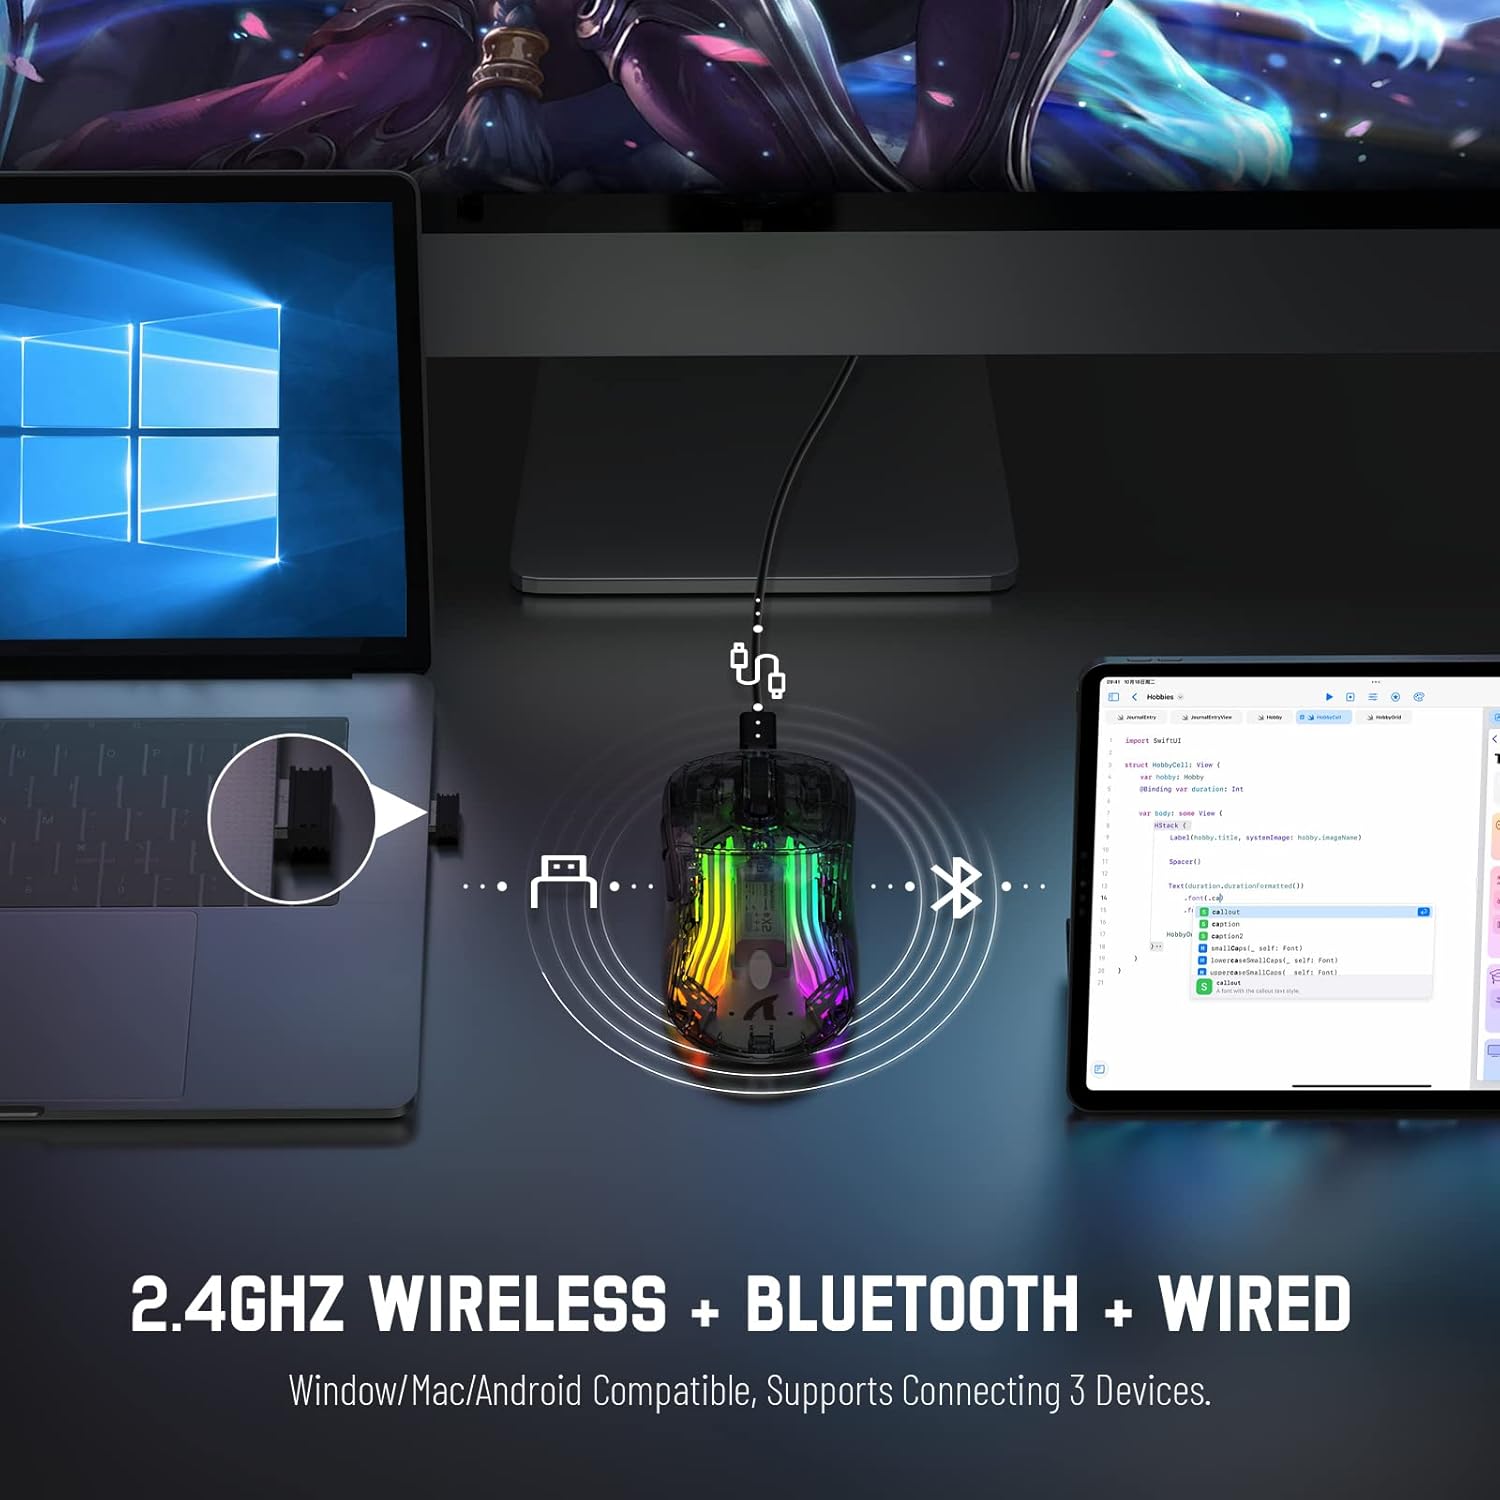
Image 3.2: Illustration of the 2.4GHz wireless connection, showing the USB receiver plugged into a laptop.
3.3 การเชื่อมต่อบลูทูธ 5.0
Connect your X2 mouse via Bluetooth for devices that support it, such as laptops, tablets, or smartphones.
- Push the mode switch on the bottom of the mouse to the "Bluetooth" position.
- กดปุ่มค้างไว้ ปุ่มคลิกซ้าย + ปุ่มล้อเลื่อน + ปุ่มคลิกขวา simultaneously for approximately 3-4 seconds. The blue light on the mouse will flash rapidly, indicating it is in pairing mode.
- บนอุปกรณ์ของคุณ ให้ไปที่การตั้งค่าบลูทูธ แล้วเปิดใช้งานบลูทูธ
- ค้นหา available devices. Select "X2 Mouse" from the list to connect.
- Once connected, the blue light will stop flashing and remain solid or turn off, depending on the lighting mode.
3.4 การเชื่อมต่อผ่านสาย USB-C
For a direct and reliable connection, use the USB-C cable in wired mode.
- Connect the USB-C end of the cable to the mouse's charging port.
- Connect the USB-A end to an available USB port on your computer or device.
- The mouse will function immediately as a wired mouse (plug-and-play).
4. คู่มือการใช้งาน
4.1 การปรับ DPI
The mouse features 5 adjustable DPI levels to suit various tasks and gaming preferences. The game chip used is PixArt 3212.
- กดปุ่ม ปุ่ม DPI (located below the scroll wheel) to cycle through the available DPI settings.
- Available DPI levels: 800 / 1200 / 1400 / 2000 / 2400.
4.2 การควบคุมแสง RGB
The X2 mouse features 3D RGB lighting with 11 different light colors and various effects.
- กดปุ่ม สวิตช์เอฟเฟกต์แสง (located on the bottom of the mouse) to cycle through the different RGB lighting modes and colors.

Image 4.1: The X2 mouse displaying its 3D RGB lighting, complementing a gaming setup.
4.3 การจัดการพลังงาน
The mouse is designed with auto power-saving features to conserve battery life.
- The mouse will enter a sleep mode after a period of inactivity.
- To wake the mouse, simply move it or click any button.
- When the battery is low, the mouse's indicator light may flash red.
4.4 การคลิกแบบเงียบ
The X2 mouse features silent click buttons, reducing noise during use.

ภาพที่ 4.2: โปรด้านข้างfile of the X2 mouse, emphasizing its ergonomic shape and silent click functionality.
5. การบำรุงรักษา
5.1 การทำความสะอาด
- โปรดถอดเมาส์ออกจากอุปกรณ์ก่อนทำความสะอาด
- ใช้ผ้าแห้งนุ่มและไม่เป็นขุยเช็ดพื้นผิวของเมาส์
- สำหรับสิ่งสกปรกฝังแน่น ให้เช็ดออกเล็กน้อยampชุบผ้าด้วยน้ำหรือน้ำยาทำความสะอาดอ่อนๆ หลีกเลี่ยงสารเคมีรุนแรง
- ห้ามให้ของเหลวเข้าไปในตัวหนู
5.2 พื้นที่จัดเก็บ
- เก็บเมาส์ไว้ในที่แห้งและเย็น หลีกเลี่ยงแสงแดดโดยตรงและอุณหภูมิที่สูงหรือต่ำเกินไป
- When not in use, ensure the mode switch is set to "OFF" to conserve battery life.
- Keep the USB receiver stored in its designated slot on the bottom of the mouse to prevent loss.
6 การแก้ไขปัญหา
6.1 เมาส์ไม่ตอบสนอง
- ตรวจสอบแบตเตอรี่: ตรวจสอบให้แน่ใจว่าเมาส์ชาร์จเต็มแล้ว เชื่อมต่อผ่านสาย USB-C เพื่อชาร์จ
- สวิตช์โหมดตรวจสอบ: Verify the mode switch on the bottom of the mouse is set to the correct connection mode (2.4G, Bluetooth, or OFF for wired).
- การเชื่อมต่อ 2.4GHz: ตรวจสอบให้แน่ใจว่าเสียบตัวรับสัญญาณ USB เข้ากับพอร์ต USB ที่ใช้งานได้แน่นดีแล้ว ลองใช้พอร์ต USB อื่น
- การเชื่อมต่อบลูทู ธ : Re-enter pairing mode (Left + Scroll + Right buttons for 3-4 seconds) and re-pair with your device. Ensure Bluetooth is enabled on your device.
- การเชื่อมต่อแบบมีสาย: Ensure the USB-C cable is securely connected to both the mouse and the device.
6.2 การเชื่อมต่อที่ไม่ต่อเนื่อง
- ระยะทาง: Ensure the mouse is within the effective range (up to 50ft for 2.4GHz).
- การรบกวน: Move the mouse and receiver away from other wireless devices or large metal objects that may cause interference.
- ระดับแบตเตอรี่: Low battery can affect connection stability. Charge the mouse.
6.3 ไฟ RGB ไม่ทำงาน
- Check Light Switch: Press the Light Effect Switch on the bottom of the mouse to cycle through modes or turn lights on.
- ระดับแบตเตอรี่: Ensure the mouse has sufficient charge, as low battery might disable lighting to conserve power.
7. ข้อมูลจำเพาะ
| คุณสมบัติ | ข้อมูลจำเพาะ |
|---|---|
| แบบอย่าง | X2 |
| การเชื่อมต่อ | 2.4GHz ไร้สาย, บลูทูธ 5.0, USB-C แบบมีสาย |
| ระดับ DPI | 800 / 1200 / 1400 / 2000 / 2400 (PixArt 3212 Chip) |
| ปุ่ม | 7 (Left, Right, Scroll Wheel, DPI, Forward, Backward, Light Effect Switch) |
| แสงสว่าง | 3D RGB Lighting (11 light colors) |
| แบตเตอรี่ | 800mAh ชาร์จใหม่ได้ |
| เวลาในการชาร์จ | ประมาณ 4 ชั่วโมง |
| ระยะการทำงาน | Up to 50ft (2.4GHz) |
| ความเข้ากันได้ | Windows 7/8/10/XP, Vista 7/8, Mac OS, Linux (PC, Laptop, Tablet, PS4, PS5, Xbox One) |
| น้ำหนักสินค้า | 6.4 ออนซ์ |
| ขนาด | 6.89 x 4.61 x 1.81 นิ้ว (บรรจุภัณฑ์) |
8. การรับประกันและการสนับสนุน
ATTACK SHARK products are designed and manufactured to high-quality standards. For warranty information or technical support, please refer to the warranty card included with your product or contact the seller directly through your purchase platform. Please retain your proof of purchase for any warranty claims.
For further assistance, please visit the official ATTACK SHARK store on Amazon: ร้านค้า ATTACK SHARK