
1. บทนำ
This manual provides detailed instructions for the operation and maintenance of your MakerHawk TC816 Digital Temperature Controller Thermostat Timer. This versatile device is designed for precise temperature and timing control across various applications, including reptile enclosures, incubators, terrariums, freezers, refrigerators, home brewing, and more. Please read this manual thoroughly before use to ensure safe and optimal performance.
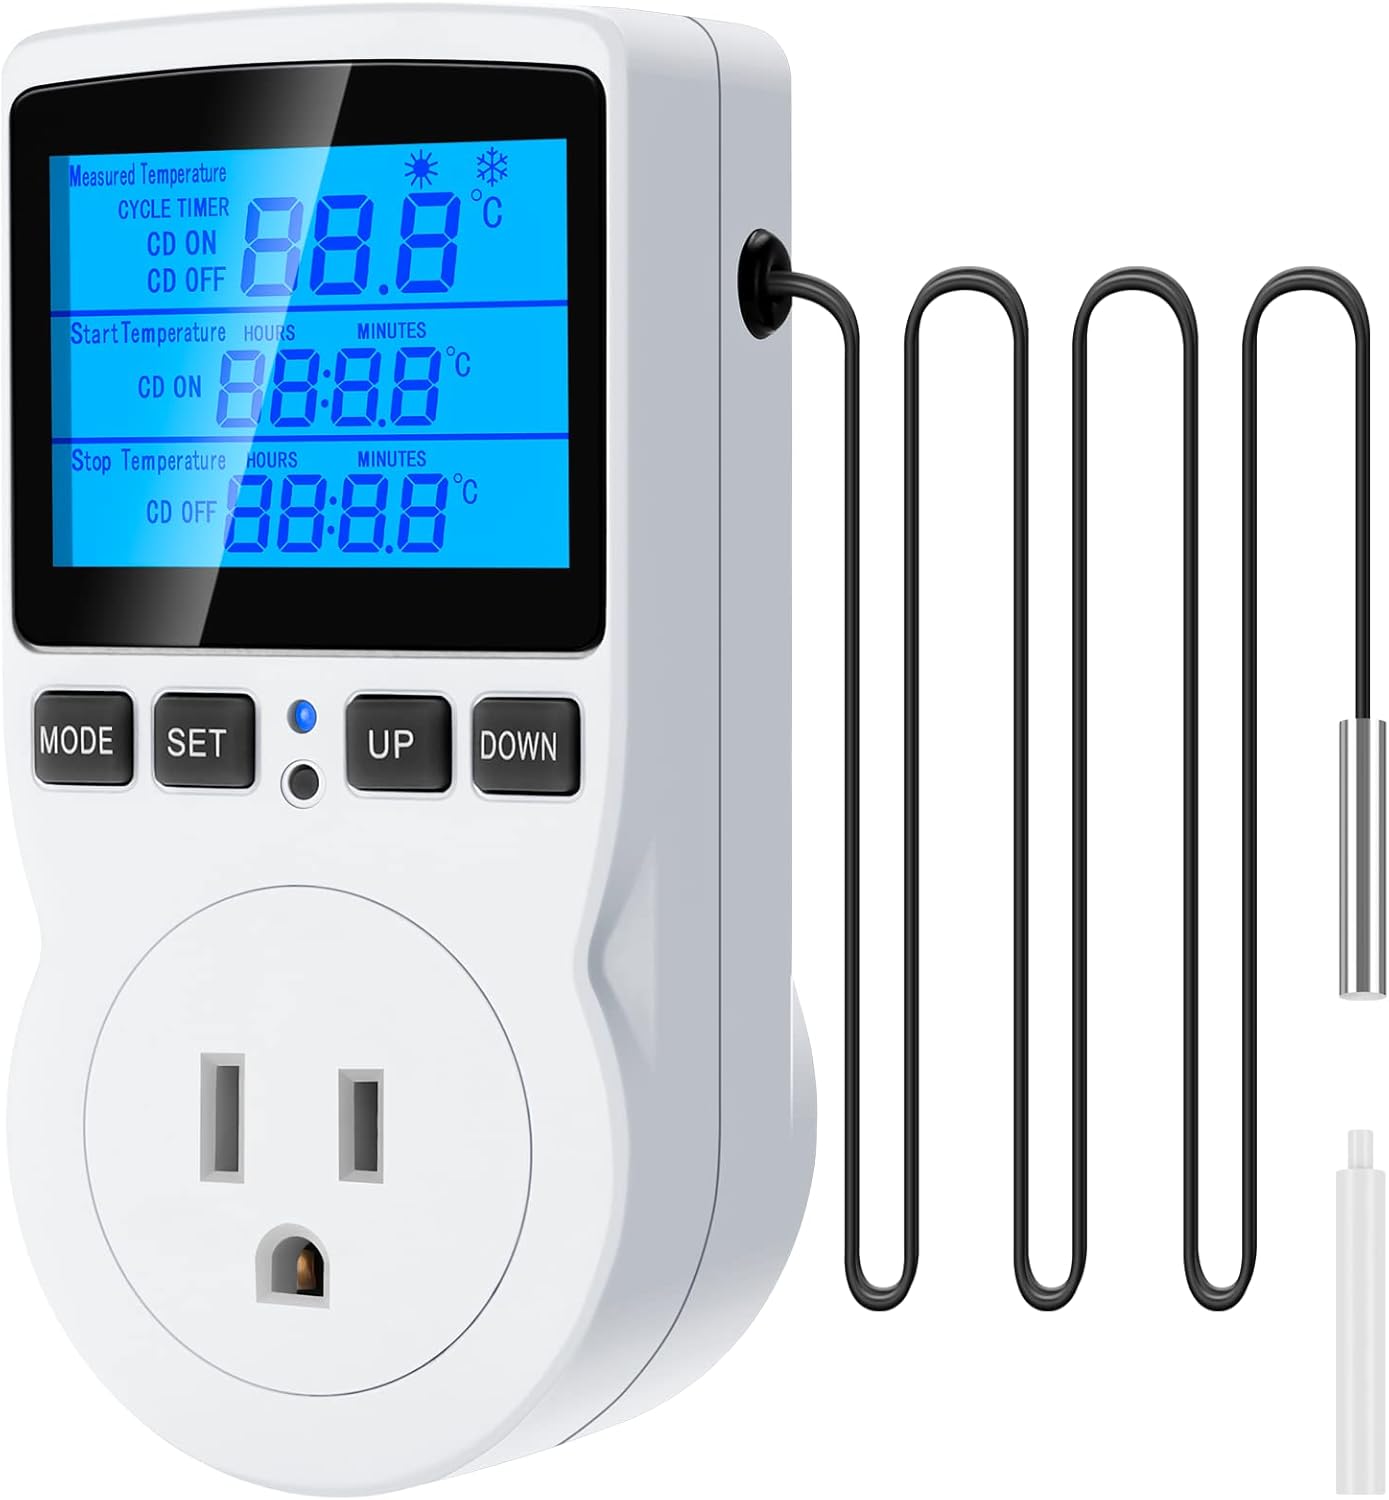
Figure 1: MakerHawk TC816 Digital Temperature Controller with sensor probe.
2. ข้อมูลด้านความปลอดภัย
เพื่อให้การใช้งานปลอดภัยและป้องกันความเสียหาย โปรดปฏิบัติตามข้อควรปฏิบัติด้านความปลอดภัยดังต่อไปนี้:
- แหล่งพลังงาน: Ensure the device is connected to a 120V AC power supply. The maximum load is 15A/1800W. Do not exceed these limits.
- การเชื่อมต่อที่ปลอดภัย: The plug features highly conductive copper plates for efficient power transfer and rust resistance. Ensure it is fully inserted into a compatible outlet.
- ความปลอดภัยของเด็ก: The safety socket is designed to prevent accidental insertion by children. Keep the device out of reach of young children.
- ความปลอดภัยของวัสดุ: อุปกรณ์ casing is made from PC flame-retardant material, offering high-temperature flame resistance.
- สภาพแวดล้อม : Avoid exposing the device to extreme temperatures, humidity, or direct water contact.
- การวางตำแหน่งโพรบ: Ensure the temperature sensor probe is correctly placed in the environment you wish to monitor and control.
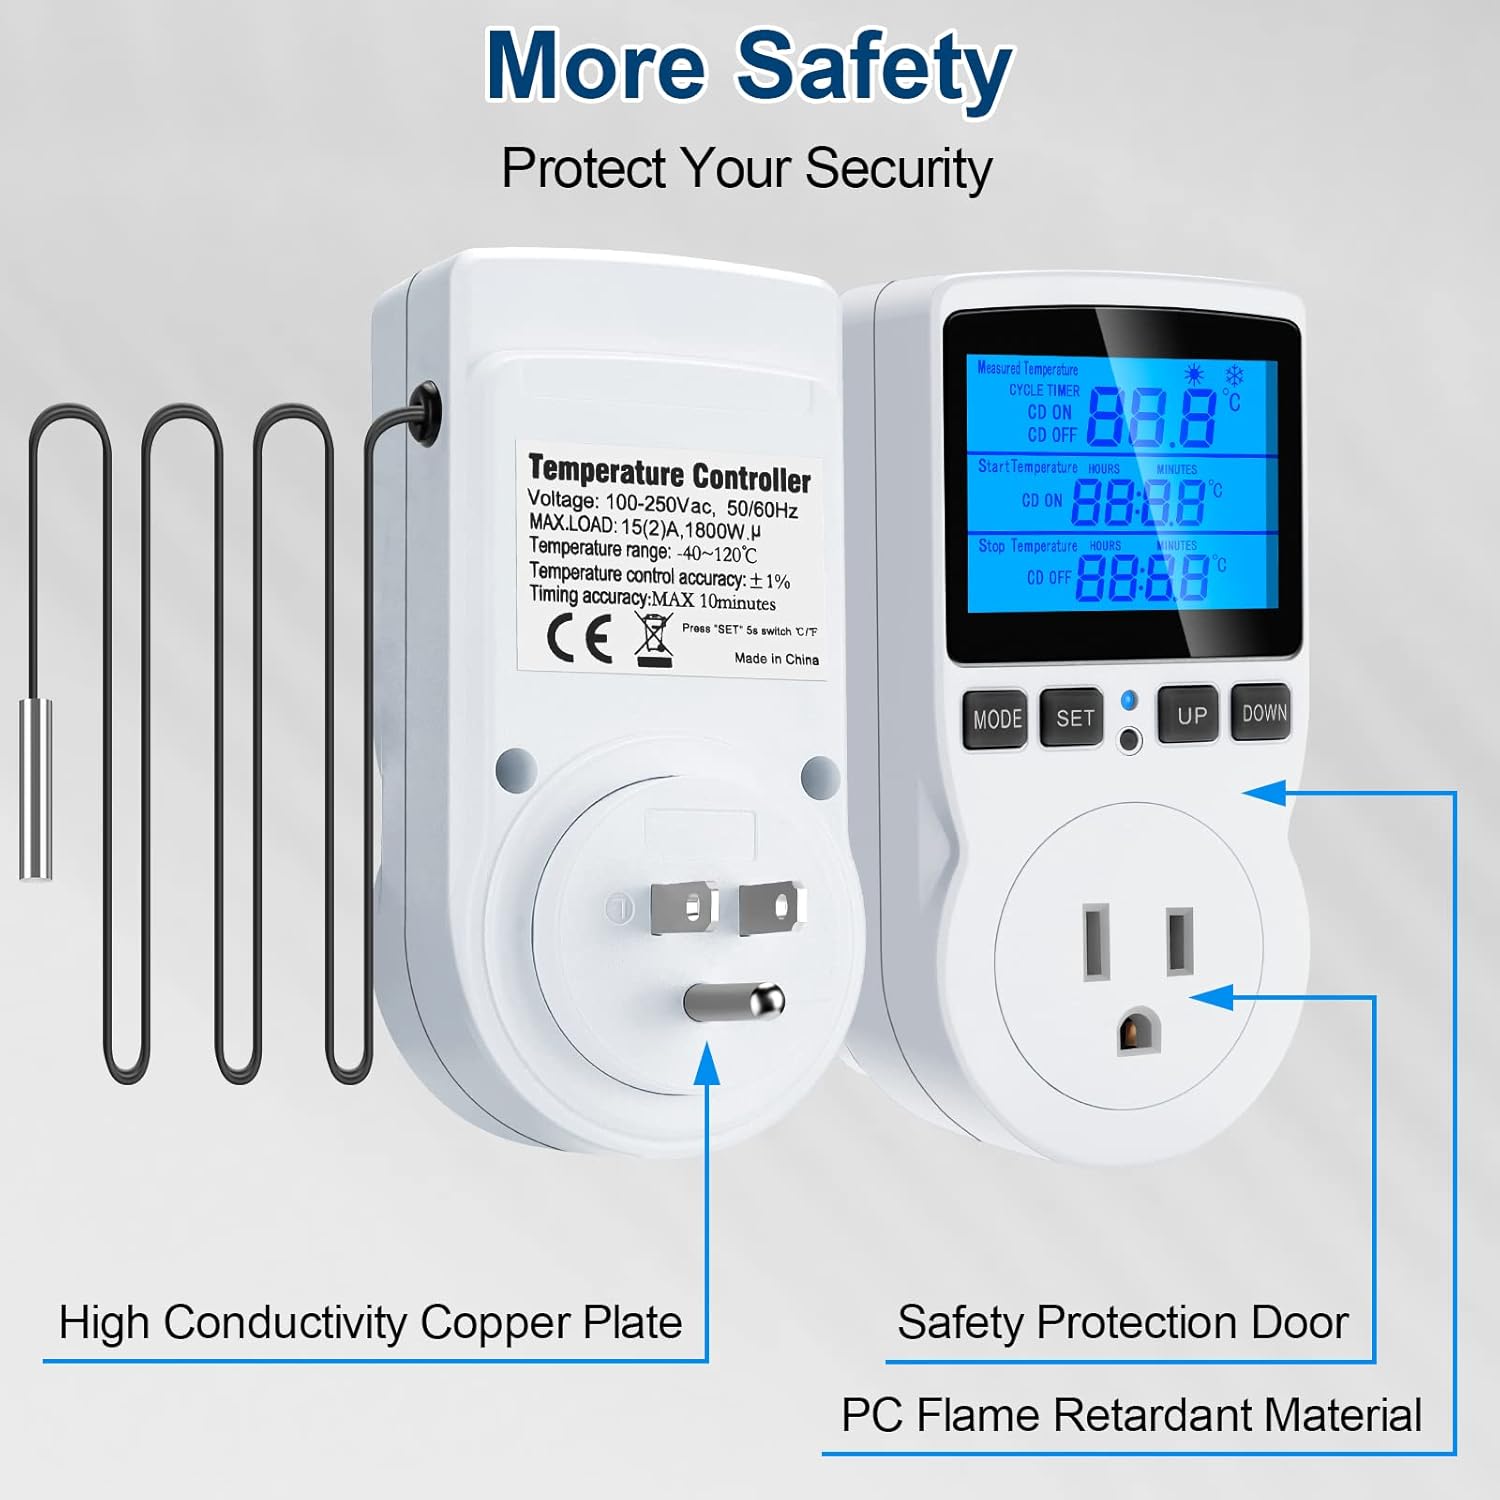
Figure 2: Illustration of safety features including high conductivity copper plate, safety protection door, and strong flame retardant material.
3. สินค้าหมดview
The MakerHawk TC816 features a clear LCD display and intuitive button controls for easy operation. Key components include:
- จอแสดงผล LCD: Shows measured temperature, set temperatures, and timer settings.
- ปุ่มควบคุม: MODE, SET, UP, DOWN for navigation and setting adjustments.
- หัววัดเซ็นเซอร์: 1.7m NTC temperature sensor for accurate readings.
- ปลั๊กแบบสหรัฐอเมริกา: Standard 3-prong plug for power input.
- Controlled Outlet: For connecting heating or cooling devices.
- ปุ่มรีเซ็ต: Small button for factory reset (requires a tool).
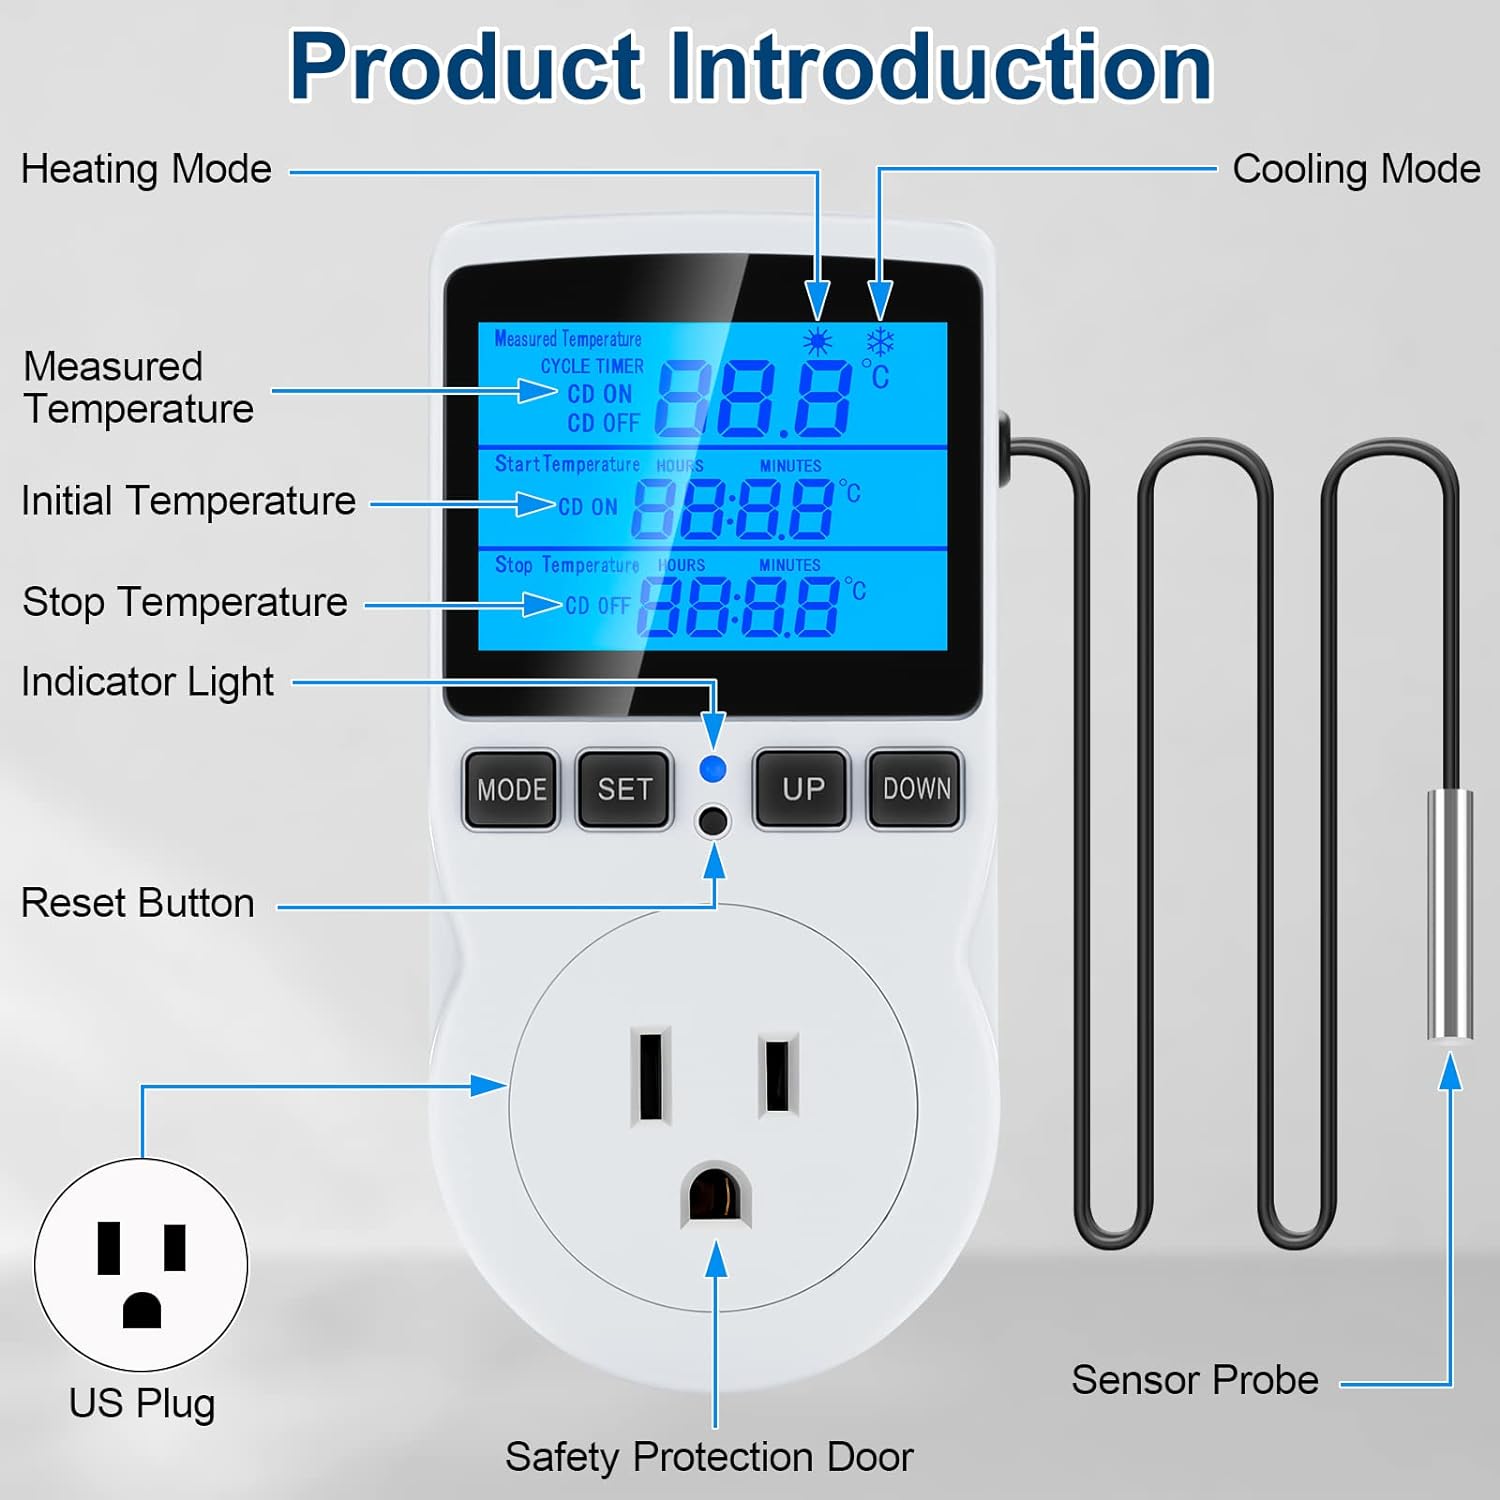
Figure 3: Detailed product diagram highlighting the display, buttons, sensor probe, and power outlet.
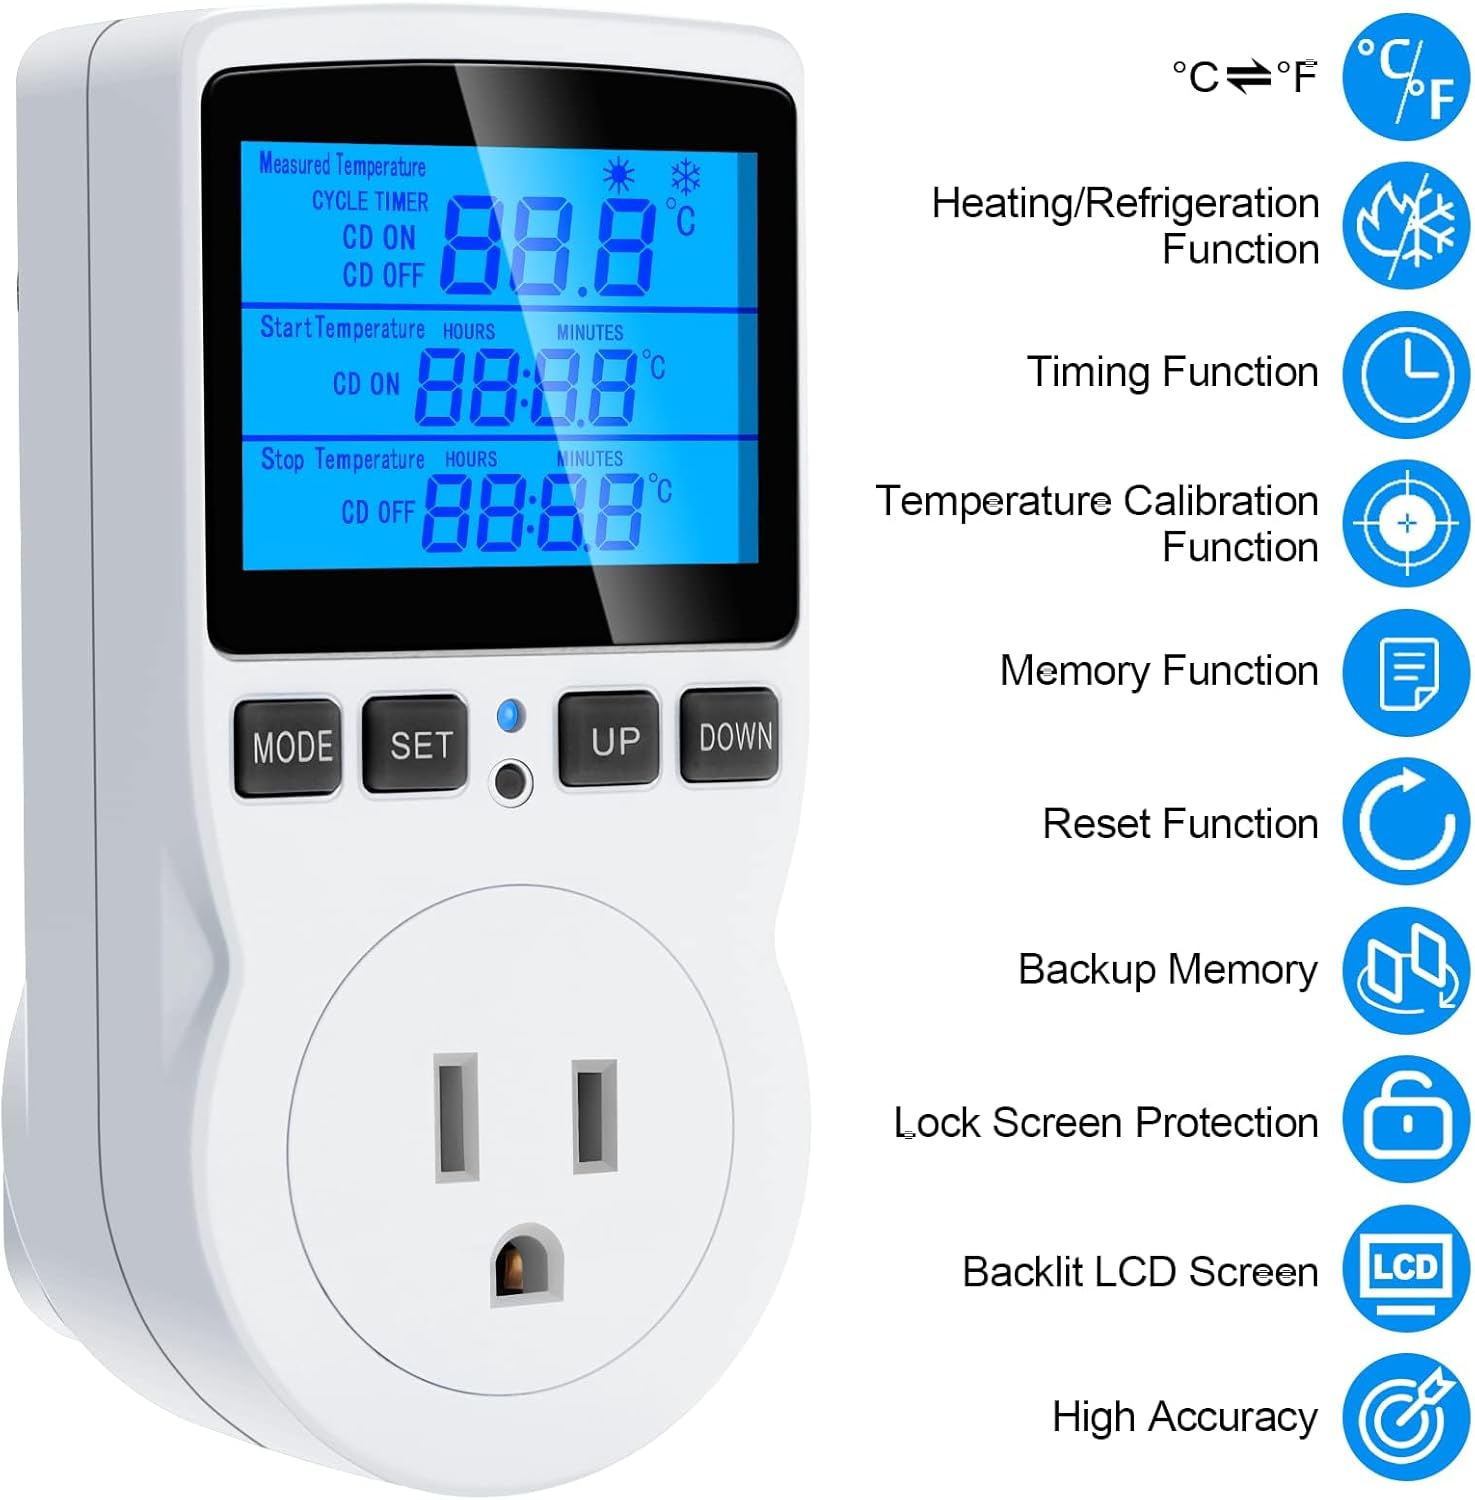
รูปที่ 4: เกินview of key features including heating/refrigeration, timing, temperature calibration, memory, reset, backup memory, lock screen, backlit LCD, and high accuracy.
4. การตั้งค่า
Follow these steps to set up your temperature controller:
- แกะ: Carefully remove the temperature controller and sensor probe from its packaging.
- เชื่อมต่อโพรบ: Ensure the sensor probe is securely connected to the designated port on the controller.
- การจัดวาง: Position the sensor probe in the area where you need to monitor and control the temperature (e.g., inside a terrarium, refrigerator, or greenhouse).
- เปิดเครื่อง: Plug the temperature controller into a standard 120V AC wall outlet. The display will illuminate.
- เชื่อมต่ออุปกรณ์: Plug your heating or cooling device (e.g., heater, fan, refrigerator) into the controlled outlet on the front of the thermostat.
วิดีโอ 1: จบแล้วview of the MakerHawk TC816 Digital Temperature Controller, demonstrating its physical features and basic setup. This video shows the device from various angles, highlighting the display, buttons, and the length of the sensor cable (1.7m).
5. คู่มือการใช้งาน
5.1. การเปลี่ยนหน่วยอุณหภูมิ (เซลเซียส/ฟาเรนไฮต์)
การสลับระหว่างเซลเซียส (°C) และฟาเรนไฮต์ (°F):
- Press and hold the "SET" button for approximately 2 seconds. The display will change the temperature unit.
5.2. โหมดควบคุมอุณหภูมิ
This mode allows you to set a desired temperature range for heating or cooling.
- Press the "SET" button once to enter temperature control mode.
- Use the "UP" and "DOWN" buttons to adjust the "Start Temperature" (ON).
- Press "SET" again to move to the "Stop Temperature" (OFF).
- Use the "UP" and "DOWN" buttons to adjust the "Stop Temperature".
- Press "SET" once more to confirm and exit the setting.
การทำงานของเครื่องทำความร้อน: If "Start Temperature" is น้อยกว่า "Stop Temperature", the device will operate in heating mode. The connected device will turn on when the temperature drops below the Start Temperature and turn off when it reaches the Stop Temperature.
การทำความเย็น: If "Start Temperature" is มากกว่า "Stop Temperature", the device will operate in cooling mode. The connected device will turn on when the temperature rises above the Start Temperature and turn off when it drops to the Stop Temperature.
ช่วงการควบคุมอุณหภูมิ: -40°C ถึง 120°C (-72°F ถึง 176°F)
5.3. Timing Functions (F01, F02, F03, F04)
The controller offers four distinct timing modes. Press the "MODE" button to cycle through these functions (F01, F02, F03, F04).
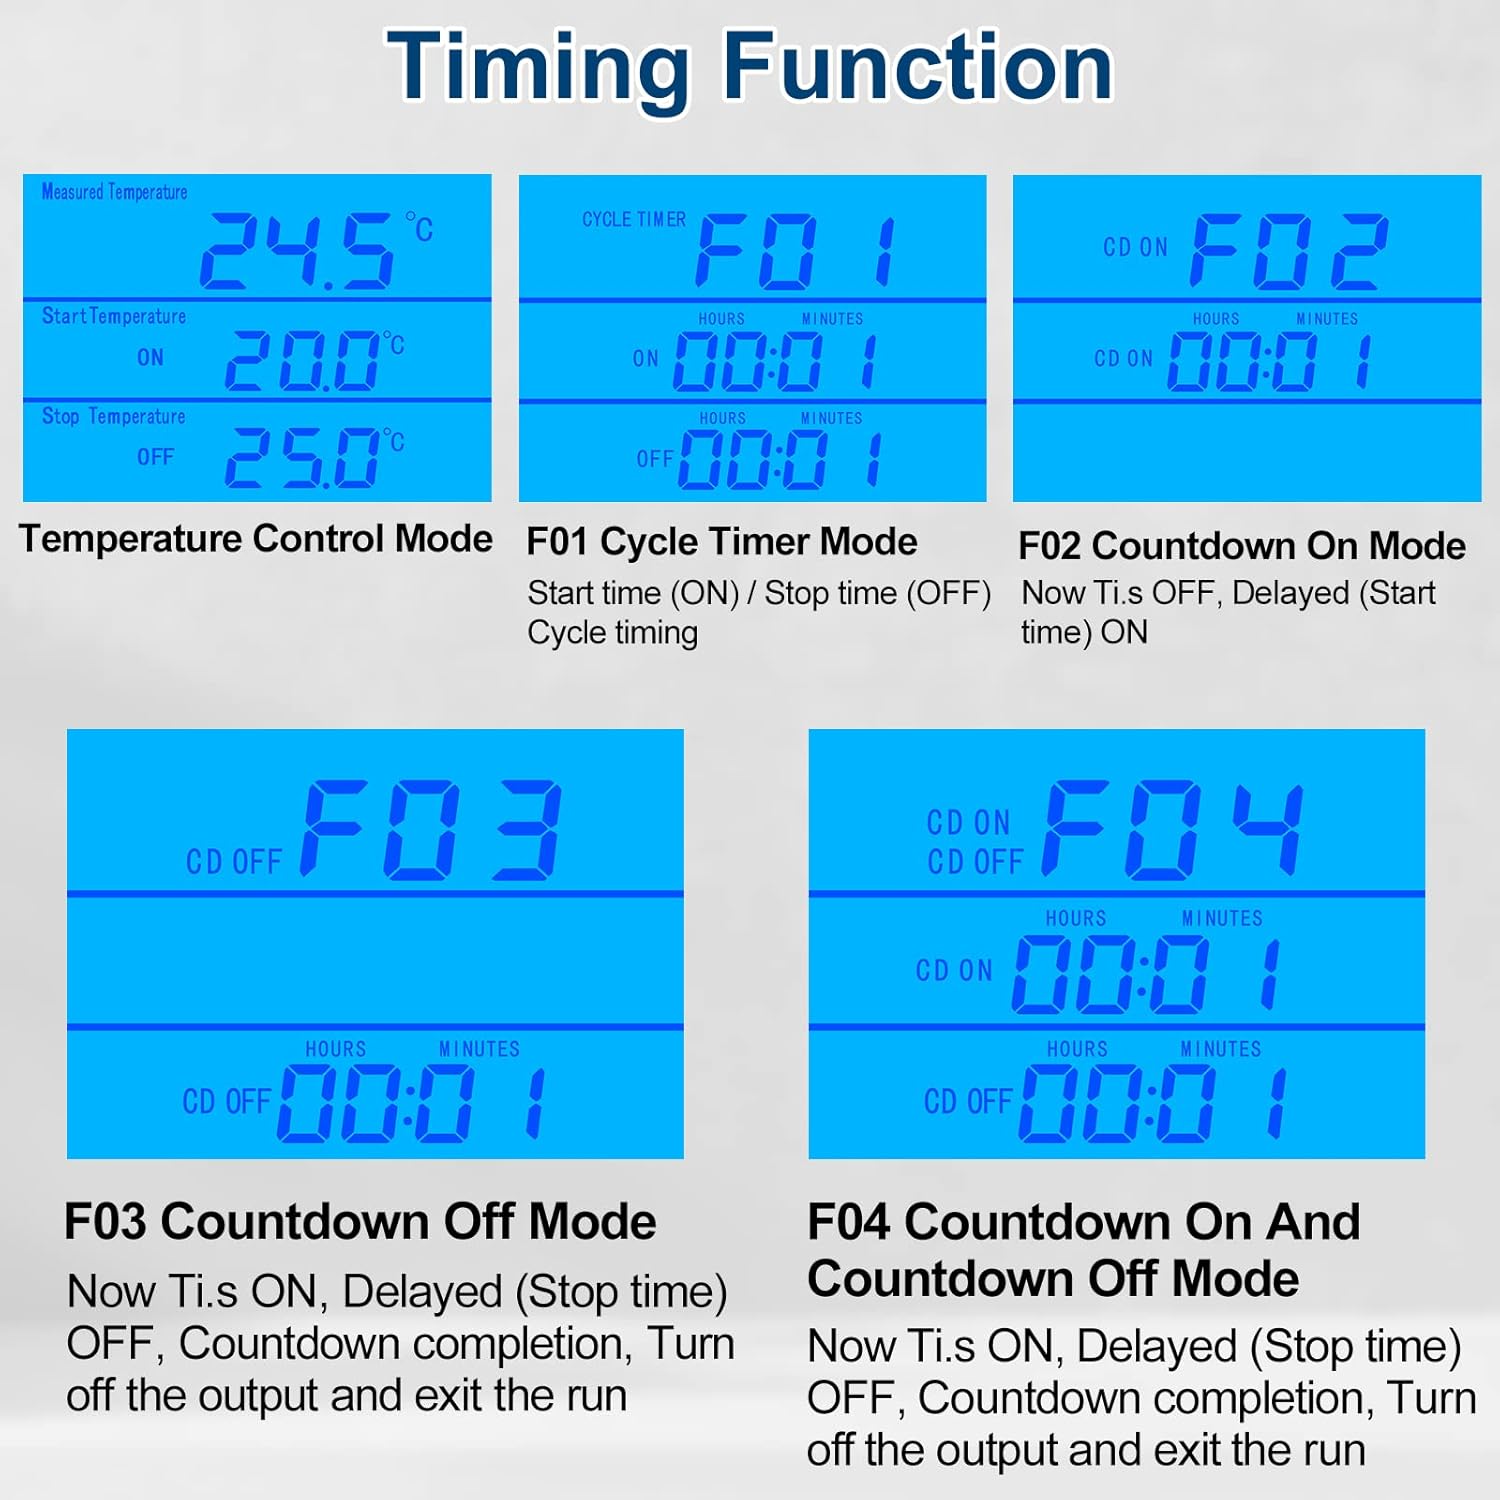
Figure 5: Visual representation of the four timing modes (F01, F02, F03, F04) and temperature control mode.
- F01 Cycle Timer Mode: Sets a repeating ON/OFF cycle.
- Press "MODE" until F01 is displayed.
- Press "SET" to adjust ON time (hours and minutes).
- Press "SET" again to adjust OFF time (hours and minutes).
- Press "SET" to confirm.
- F02 Countdown On Mode: The device remains OFF for a set countdown period, then turns ON.
- Press "MODE" until F02 is displayed.
- Press "SET" to adjust the countdown ON time (hours and minutes).
- Press "SET" to confirm.
- F03 Countdown Off Mode: The device remains ON for a set countdown period, then turns OFF.
- Press "MODE" until F03 is displayed.
- Press "SET" to adjust the countdown OFF time (hours and minutes).
- Press "SET" to confirm.
- F04 Countdown On and Countdown Off Mode: The device turns ON for a set period, then OFF for another set period.
- Press "MODE" until F04 is displayed.
- Press "SET" to adjust the countdown ON time (hours and minutes).
- Press "SET" again to adjust the countdown OFF time (hours and minutes).
- Press "SET" to confirm.
Setting Range for Timing Modes: 0 to 99 hours and 59 minutes.
5.4. การสอบเทียบอุณหภูมิ
If you need to fine-tune the temperature reading for accuracy:
- Plug in the device. Within 2 seconds of powering on, press and hold the "MODE" button for 2 seconds until "CALIBRATE" appears on the screen.
- Use the "UP" and "DOWN" buttons to adjust the temperature offset. The calibration range is -9.9°C to 9.9°C.
- Press and hold the "MODE" button for 2 seconds to save the calibration offset and exit. If you do not save, changes will not be applied.
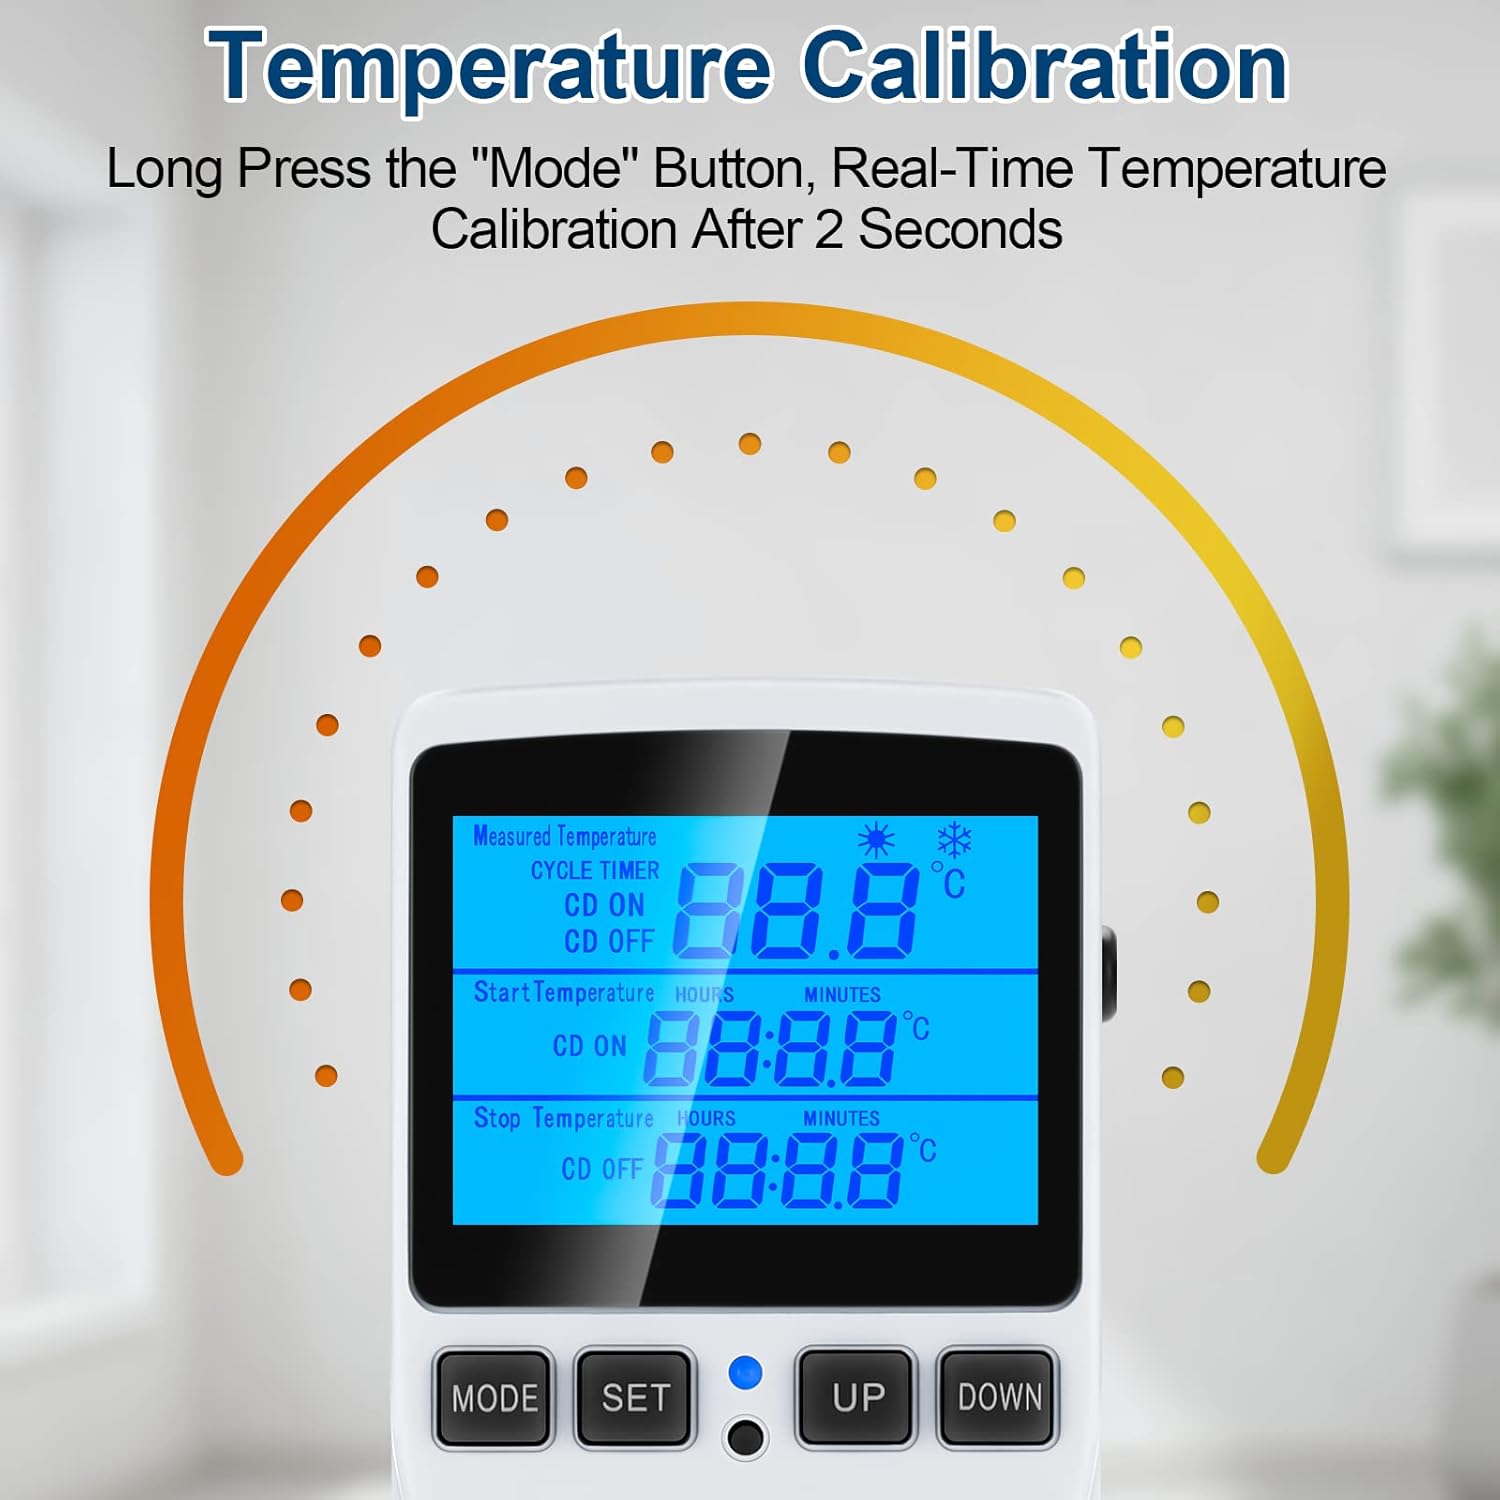
Figure 6: Visual guide for temperature calibration by long-pressing the MODE button.
5.5. Lock Screen Protection
เพื่อป้องกันการเปลี่ยนแปลงการตั้งค่าโดยไม่ตั้งใจ:
- Press and hold the "MODE" and "SET" buttons simultaneously for 5 seconds to lock the thermostat.
- Repeat the process (press and hold "MODE" and "SET" simultaneously for 5 seconds) to unlock the device.
5.6. Backlight Timer Setting
วิธีปรับระยะเวลาแสงพื้นหลัง:
- Press and hold the "UP" and "DOWN" buttons simultaneously for 5 seconds.
- Use "UP" and "DOWN" to select the desired backlight duration:
- bL-0: 10 minutes
- bL-1: 1 Hour
- bL-2: 4 Hours
- bL-3: 8 Hours
- bL-4: Always On
- Press "MODE" to save the setting.
6. การบำรุงรักษา
Regular maintenance ensures the longevity and accuracy of your temperature controller:
- การทำความสะอาด: เช็ดอุปกรณ์ด้วยผ้านุ่มและแห้ง ห้ามใช้น้ำยาทำความสะอาดที่มีฤทธิ์กัดกร่อนหรือจุ่มอุปกรณ์ลงในน้ำ
- การดูแลเซ็นเซอร์: Keep the temperature sensor probe clean and free from debris. Avoid bending or damaging the probe cable.
- พื้นที่จัดเก็บ: เมื่อไม่ใช้งาน ให้เก็บอุปกรณ์ไว้ในที่แห้งและเย็น ห่างจากแสงแดดโดยตรงและอุณหภูมิที่สูงหรือต่ำเกินไป
- การจัดเก็บข้อมูล: The device has a data storage function that saves all set parameters even after power is off.
7 การแก้ไขปัญหา
If you encounter issues with your MakerHawk TC816, refer to the following common problems and solutions:
| ปัญหา | สาเหตุที่เป็นไปได้ | สารละลาย |
|---|---|---|
| หน้าจอว่างเปล่าหรือไม่เปิดใช้งาน | ไม่มีไฟ การเชื่อมต่อหลวม | Ensure the device is securely plugged into a live 120V outlet. Check the outlet with another device. |
| การวัดอุณหภูมิไม่แม่นยำ | Sensor probe dirty or misplaced, calibration needed. | Clean the sensor probe. Ensure the probe is correctly positioned. Perform a temperature calibration (see Section 5.4). |
| Device not switching ON/OFF as expected. | Incorrect temperature settings, timing mode active, locked screen. | Verify your "Start Temperature" and "Stop Temperature" settings. Ensure you are in the correct operating mode (temperature control or timing). Check if the screen is locked (see Section 5.5). |
| ไม่สามารถเปลี่ยนแปลงการตั้งค่าได้ | หน้าจอถูกล็อกอยู่ | Unlock the screen by pressing and holding "MODE" and "SET" simultaneously for 5 seconds. |
| จำเป็นต้องรีเซ็ตเป็นการตั้งค่าจากโรงงาน | ความผิดพลาดของซอฟต์แวร์ การตั้งค่าไม่ถูกต้อง | Use the included reset tool (or a thin pin) to press the reset button located in the small hole on the device. This will restore all parameters to default. |
8. ข้อมูลจำเพาะ
| คุณสมบัติ | รายละเอียด |
|---|---|
| หมายเลขรุ่น | ทีซี816บี |
| ยี่ห้อ | เมคเกอร์ฮอว์ค |
| เล่มที่tage | 110V - 120V AC, 50/60Hz |
| โหลดสูงสุด | 15A/1800W |
| ช่วงการควบคุมอุณหภูมิ | -40°C ถึง 120°C (-72°F ถึง 176°F) |
| ความแม่นยำในการควบคุมอุณหภูมิ | ±1% |
| ความแม่นยำของเวลา | สูงสุด 10 นาที |
| ประเภทเซนเซอร์ | กทช เซ็นเซอร์อุณหภูมิ |
| ความยาวสายเคเบิลเซนเซอร์ | 1.7 เมตร (66.93 นิ้ว) |
| ประเภทจอภาพ | LCD พร้อม Backlight |
| ขนาดสินค้า | 4.72 x 2.95 x 2.36 นิ้ว |
| น้ำหนักสินค้า | 6.7 ออนซ์ |
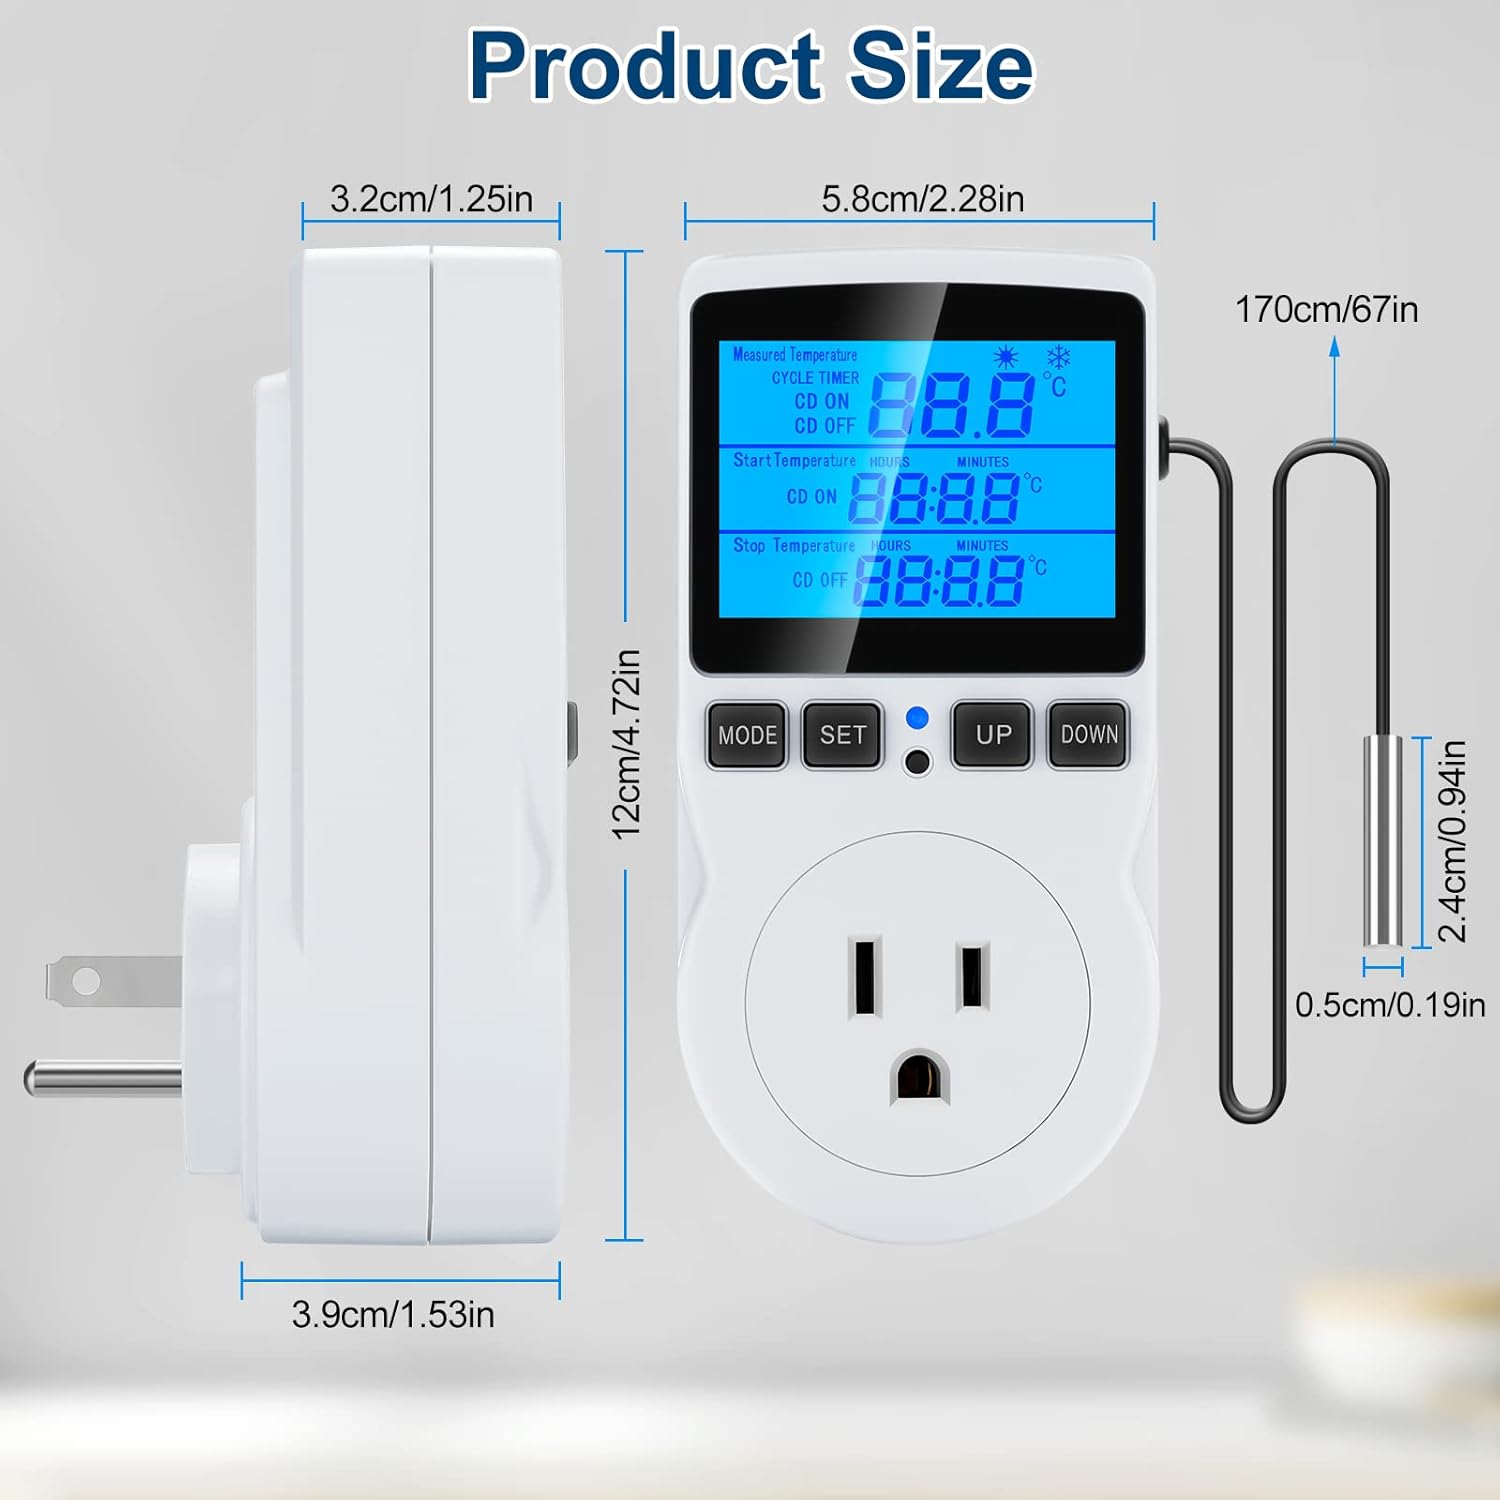
Figure 7: Detailed product dimensions in centimeters and inches.
9. การรับประกันและการสนับสนุน
MakerHawk products are designed for reliability and performance. For warranty information or technical support, please contact MakerHawk customer service through their official website or the platform where you purchased the product. Please have your model number (TC816B) and purchase details ready when contacting support.
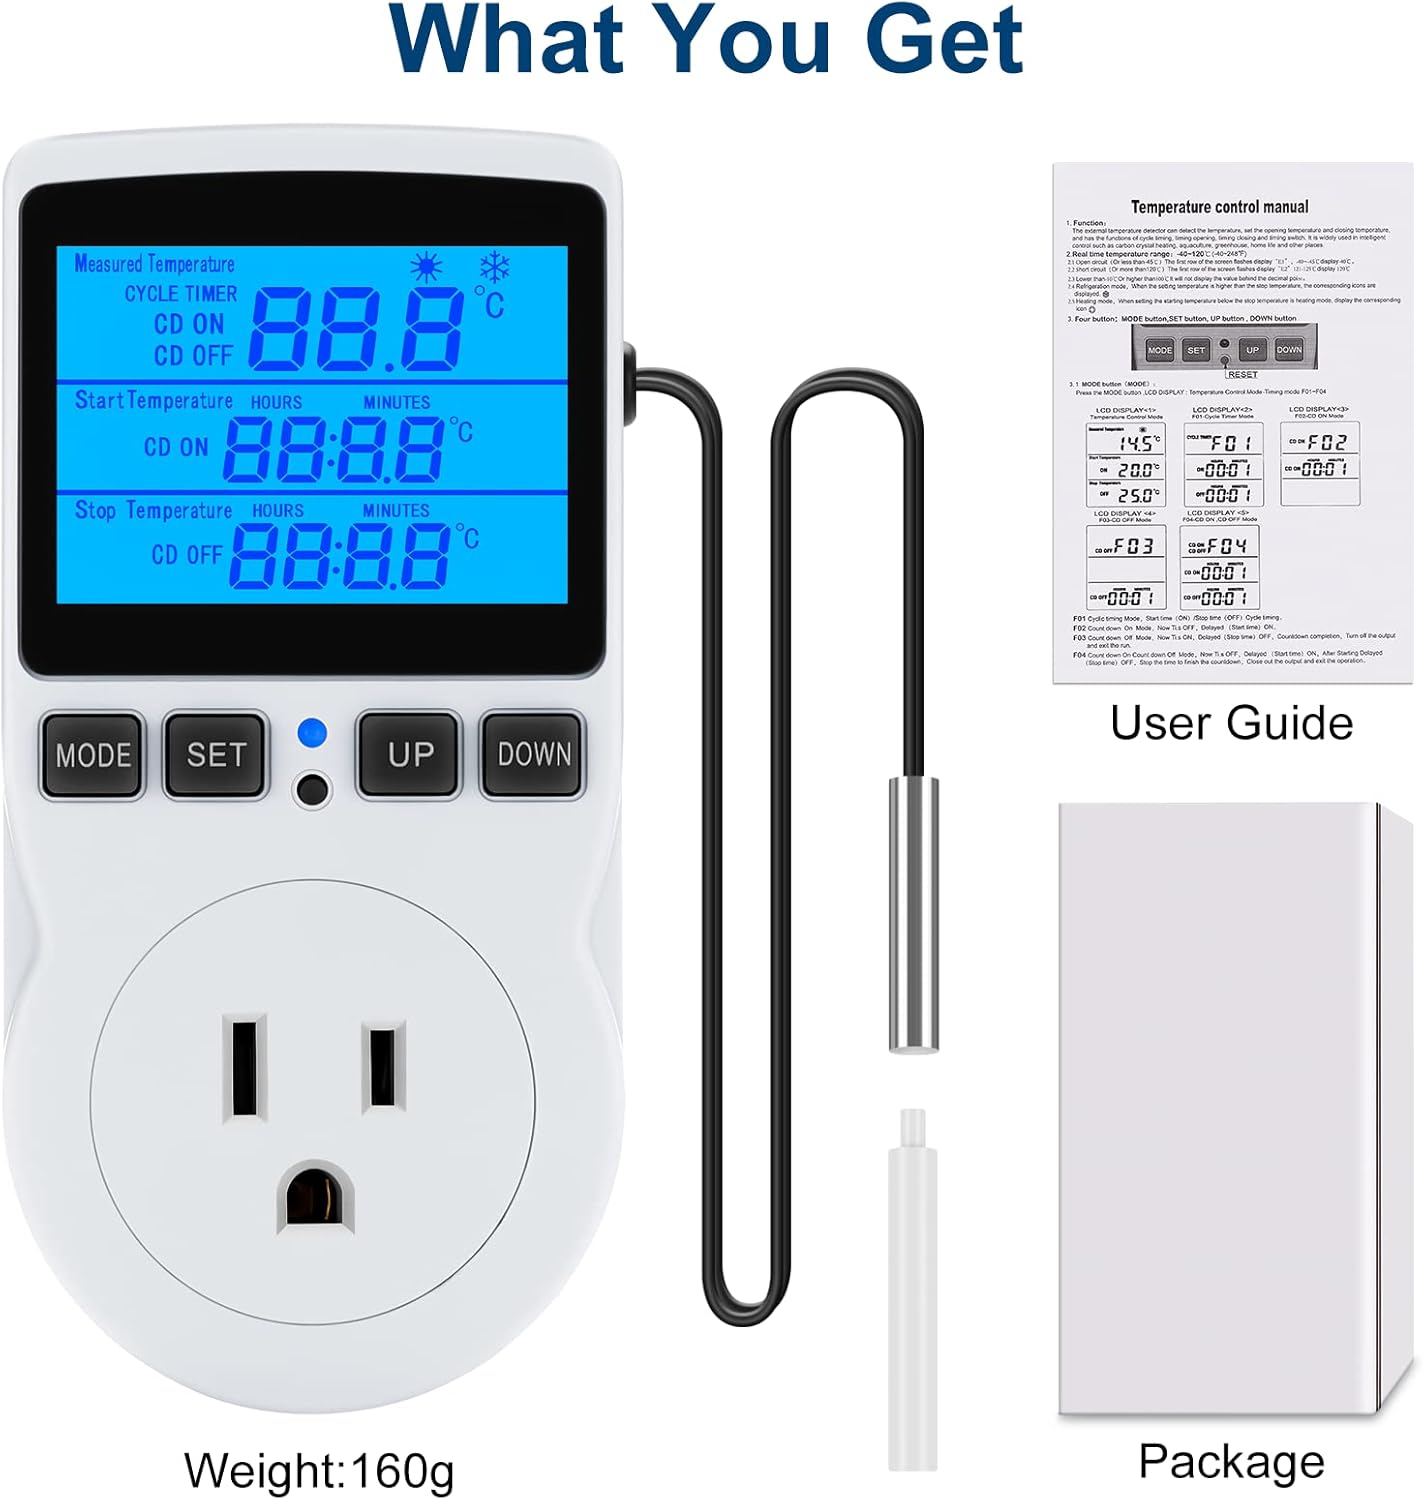
Figure 8: What is included in the package: the temperature controller, sensor probe, user guide, and packaging box.