
MOYSUWE MDM201 Pro
MOYSUWE MDM201 Pro HDMI Digital Microscope User Manual
Model: MDM201 Pro | Brand: MOYSUWE
การแนะนำ
The MOYSUWE MDM201 Pro HDMI Digital Microscope is an advanced inspection tool designed for a wide range of applications, from intricate PCB soldering and watch repair to detailed observation of coins, plants, and insects. Featuring a stunning 7-inch IPS HD screen, a superior 16MP CMOS IMX sensor, and versatile connectivity options, this microscope provides a clear and immersive microscopic experience.
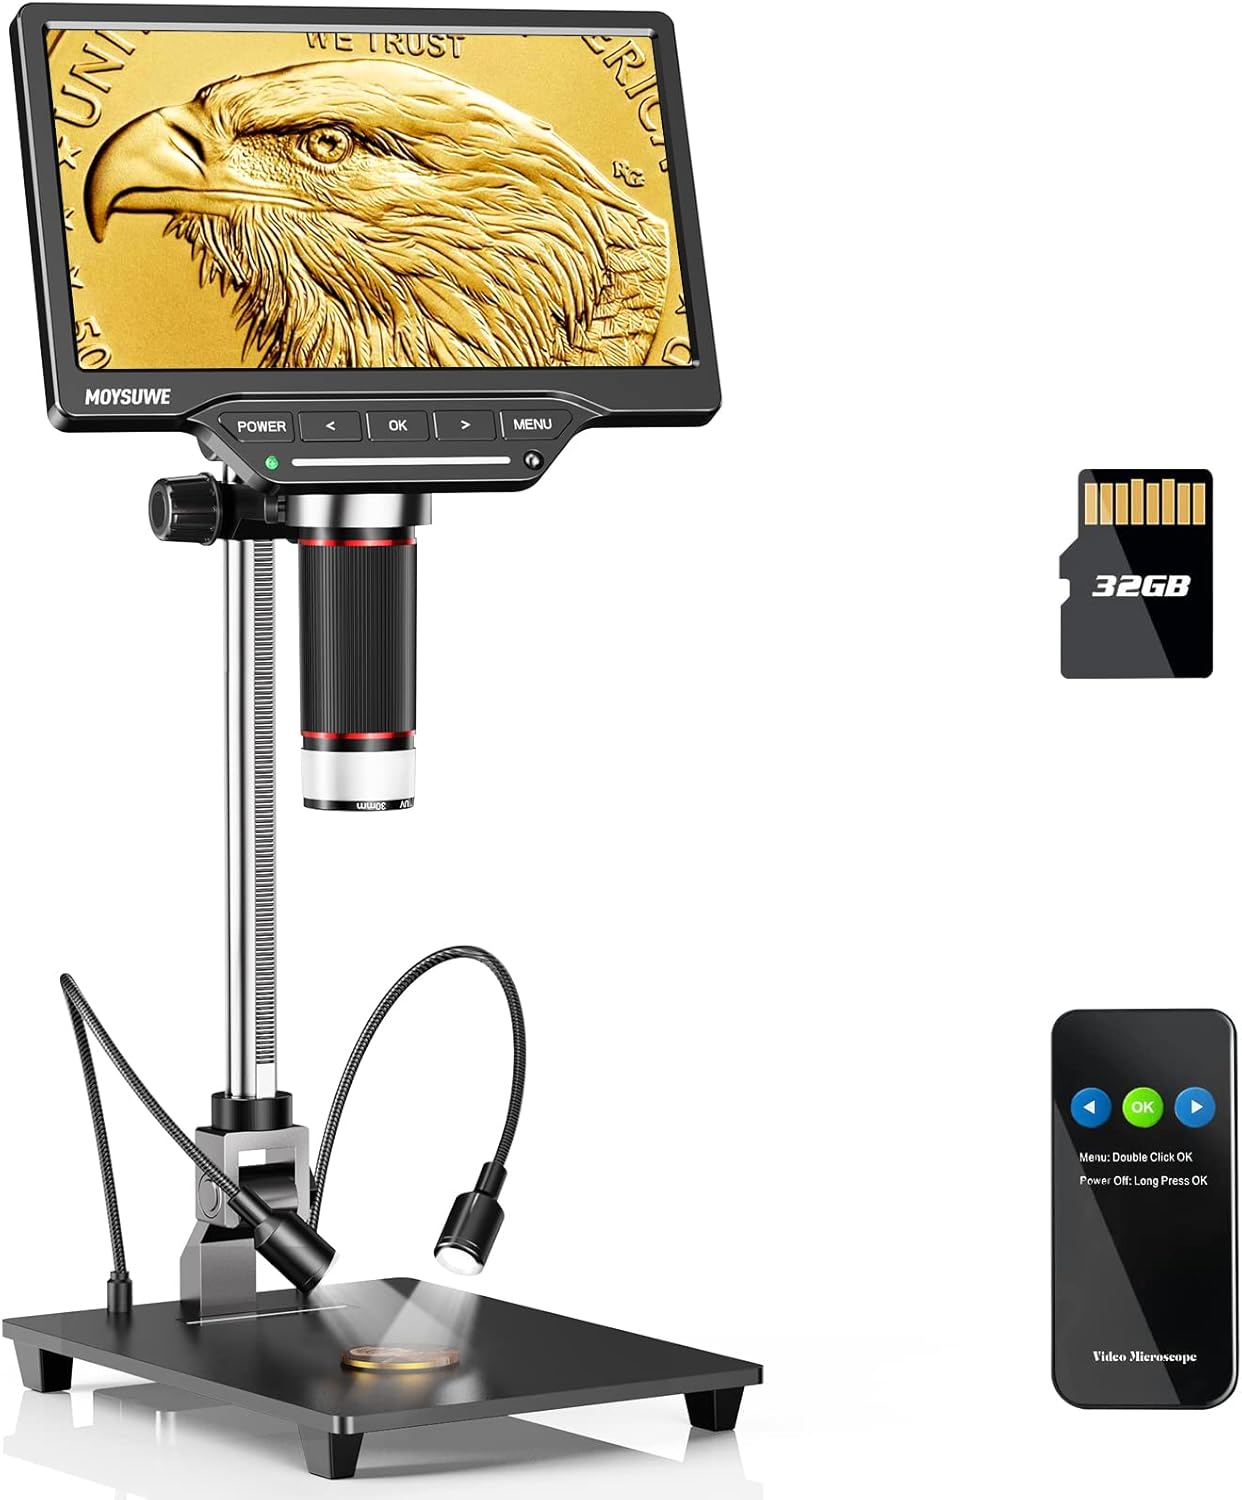
Figure 1: MOYSUWE MDM201 Pro HDMI Digital Microscope with its main components.
คุณสมบัติหลัก:
- Stunning Visual Experience: New upgraded 7-inch IPS HD screen with 1024*600 resolution for crystal clear and vivid pictures with expansive 180° viewมุมการเอียง
- Superior 16MP CMOS IMX Sensor: Ensures true-to-life images with accurate texture and detail reproduction, ideal for various inspection tasks.
- Upgraded 10-inch Bracket: Allows for a wider and higher field of view, easily accommodating entire coins like silver dollars.
- Smart Touch Control Brightness Adjustment: Equipped with 6 LED lights around the lens and 2 adjustable gooseneck lights, with independent touch control for optimal illumination.
- Excellent 3X-1300X Zoom: Provides detailed magnification for soldering, coins, plants, insects, and more.
- HDMI & USB Output: Connects directly to TV or computer screens for larger, clear real-time viewing without extra software.
- Easy to Setup & Use: User-friendly interface and intuitive controls make it accessible for all ages.
- More than a Microscope: Capable of recording 1920*1080 30fps & 1280*720 60fps videos and capturing up to 16MP (5376*3024) photos, saved on the included 32GB SD card.
มีอะไรอยู่ในกล่อง

Figure 2: All components included with your MOYSUWE MDM201 Pro.
- Microscope Monitor (1)
- Aluminum Alloy Bracket (1)
- Aluminum Alloy Base (1)
- รีโมทคอนโทรลไร้สาย (1)
- อะแดปเตอร์ไฟ (1)
- สาย HDMI (1)
- สาย USB (2)
- การ์ด SD 32GB (1)
- Lens Cleaning Cloth (1)
- คู่มือการใช้งาน (1)
การตั้งค่า
1. การประกอบ
- Attach the aluminum alloy bracket to the aluminum alloy base using the provided screws.
- Secure the microscope monitor unit to the top of the bracket. Ensure it is firmly attached.
- Connect the two adjustable gooseneck LED lights to the base.
- Insert the included 32GB SD card into the micro SD card slot on the back of the monitor.
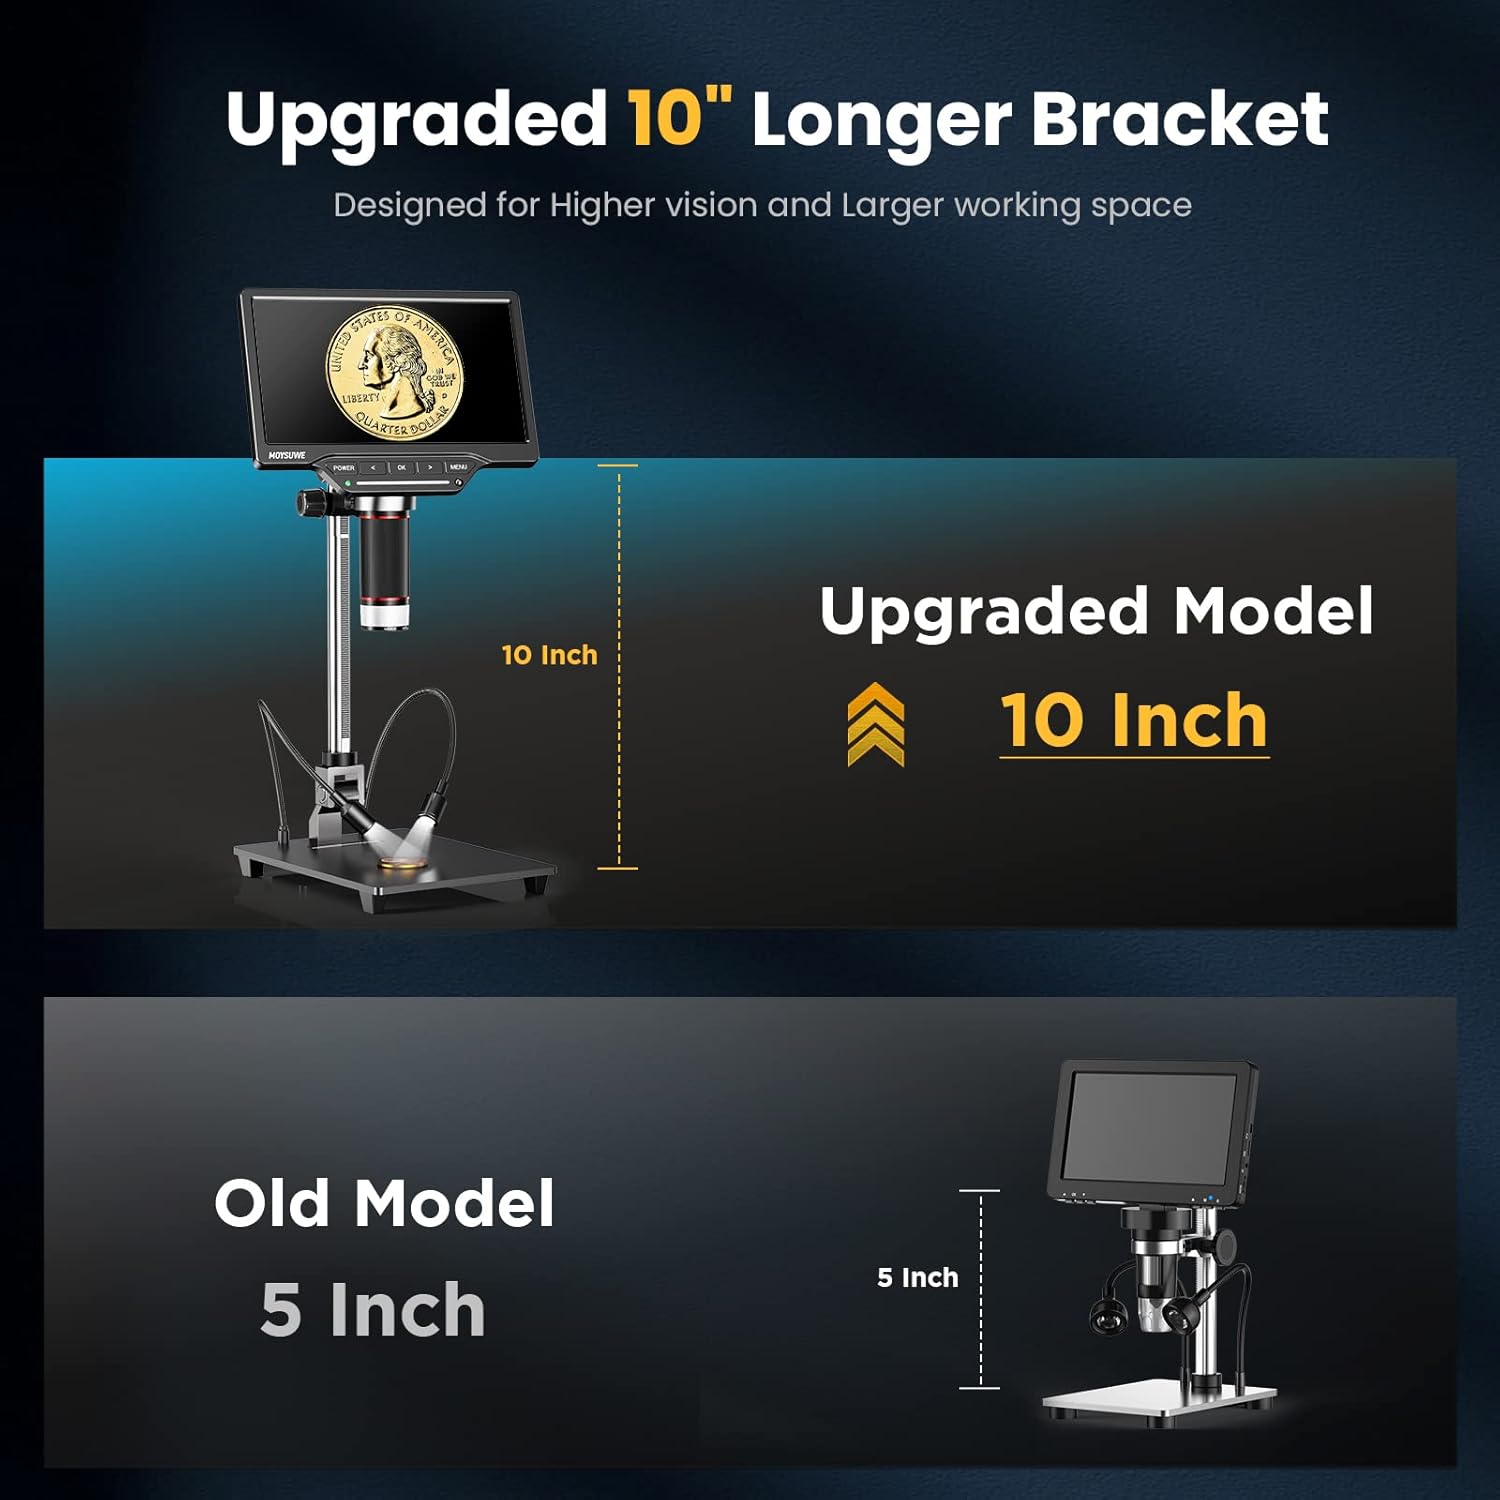
Figure 3: The upgraded 10-inch bracket provides ampพื้นที่ทำงาน
2. การเปิด/ปิดเครื่อง
- To power on, press and hold the 'POWER' button located on the front panel of the monitor until the screen illuminates.
- To power off, press and hold the 'POWER' button again until the screen shuts down.
- The device can operate on its internal rechargeable battery or be powered via the included power adapter.
3. Initial Screen Adjustment
- The 7-inch IPS HD screen can be tilted to various angles (up to 180°) for comfortable viewing. Adjust the screen to your preferred angle.

Figure 4: The 7-inch IPS HD monitor provides a clear view of the microworld.
คำแนะนำการใช้งาน
1. Focusing and Zooming
- Place the object you wish to observe on the base plate directly under the microscope lens.
- Adjust the height of the microscope unit on the stand using the adjustment knob on the side of the bracket to get a rough focus.
- Fine-tune the focus by rotating the focus ring on the microscope lens itself.
- The microscope offers a magnification range from 3X to 1300X. Use the digital zoom function via the remote control or on-screen menu for further magnification.

Figure 5: Observe intricate details with the wide zoom range.
2. Adjusting Lighting
- The microscope features 6 LED lights around the lens and 2 adjustable gooseneck lights on the base.
- Use the touch control bar on the monitor's front panel to turn on/off and adjust the brightness of the main LED lights.
- The gooseneck lights can be independently adjusted for position and brightness to eliminate shadows and provide optimal clarity.

Figure 6: Smart touch control for precise lighting adjustments.
3. การถ่ายภาพและวิดีโอ
- The microscope can capture photos up to 16MP (5376*3024) and record videos in 1920*1080 30fps or 1280*720 60fps.
- Press the 'OK' button on the monitor or the corresponding button on the wireless remote control to capture a photo or start/stop video recording.
- All captured media will be saved to the inserted 32GB SD card.

Figure 7: Easily record videos and capture high-resolution photos.
4. รีโมทคอนโทรลไร้สาย
- The included wireless remote control allows for convenient operation without touching the microscope, minimizing vibrations during capture.
- Functions include digital zoom, image flip, photo/video capture, and screen freeze.

Figure 8: Control your microscope remotely for stable captures.
5. Connecting to External Displays (HDMI & USB)
- เอาท์พุต HDMI: Connect the microscope to a TV or projector using the provided HDMI cable for a larger, real-time HD view.
- เอาท์พุต USB: Connect to a Windows PC or Mac OS computer via USB. No extra software is needed; use default applications like "Windows Camera" (Windows) or "Photo Booth" (Mac OS).
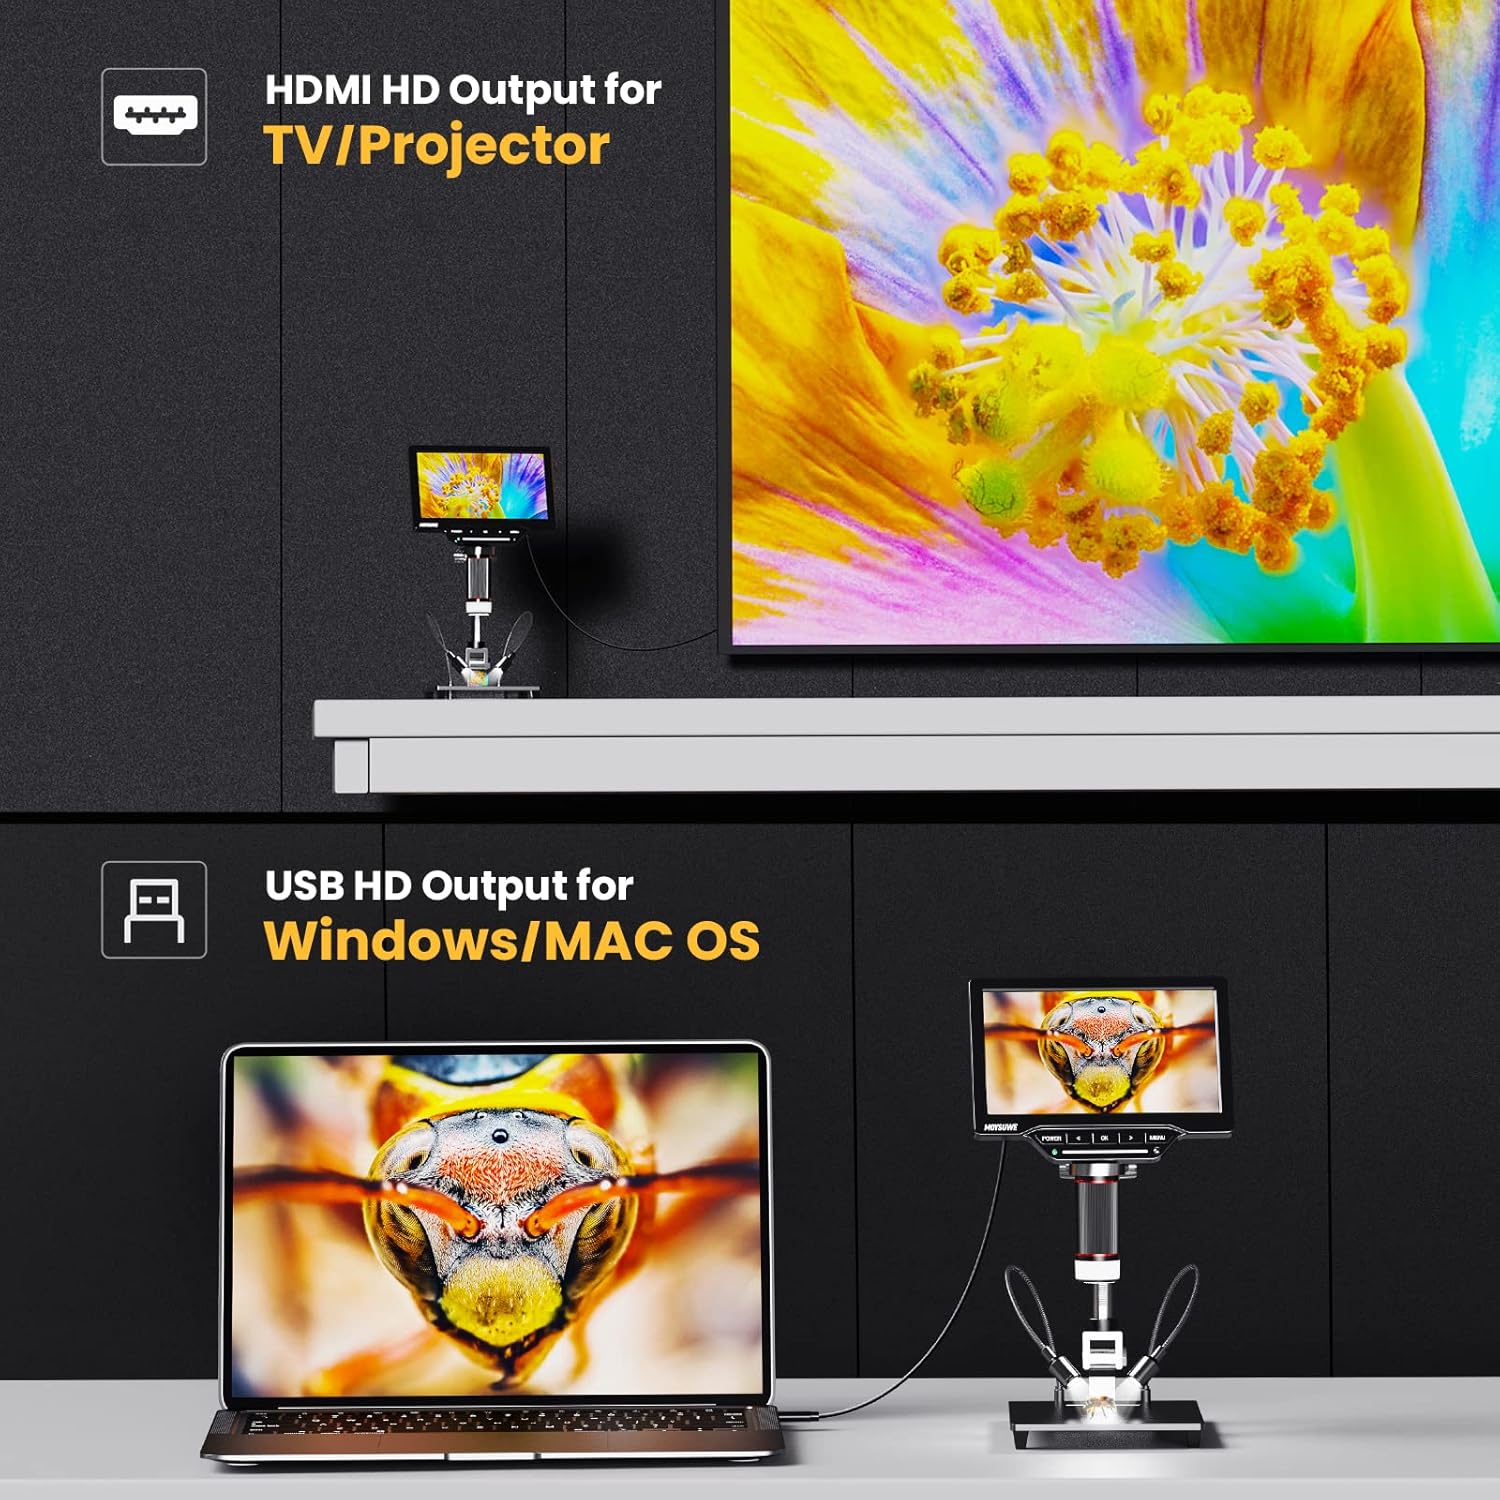
Figure 9: Connect to external displays for enhanced viewการทำงานร่วมกันและการประสานงาน
6. การนำทางเมนูและการตั้งค่า
- Press the 'MENU' button to access various settings, including image effects (color, B/W, negative), multi-direction image flip (horizontal mirror, vertical flip), and screen freeze modes (full screen, left screen, up screen, 1/4 screen).
- Use the arrow buttons to navigate through the menu options and 'OK' to select.

Figure 10: Customize your viewing experience with various image settings.

Figure 11: Utilize screen freeze modes for detailed comparison and analysis.
7. วิดีโอผลิตภัณฑ์อย่างเป็นทางการ
Video 1: MOYSUWE MDM201 Pro 7" IPS HD HDMI Digital Microscope Overview. This video provides a comprehensive look at the microscope's features and functionality.
การซ่อมบำรุง
- การทำความสะอาด: Use the provided lens cleaning cloth to gently wipe the lens and screen. For the body, use a soft, dry cloth. Avoid abrasive cleaners or solvents.
- พื้นที่จัดเก็บ: ควรเก็บกล้องจุลทรรศน์ไว้ในที่แห้งและปราศจากฝุ่นเมื่อไม่ได้ใช้งาน
- การดูแลแบตเตอรี่ เพื่อยืดอายุการใช้งานแบตเตอรี่ ควรหลีกเลี่ยงการปล่อยประจุแบตเตอรี่จนหมดบ่อยๆ ควรชาร์จแบตเตอรี่เป็นประจำ
การแก้ไขปัญหา
- ไม่มีไฟฟ้า: Ensure the power adapter is correctly connected or the internal battery is charged.
- ภาพเบลอ: Adjust the height of the microscope unit and fine-tune the focus ring on the lens. Ensure adequate lighting.
- ไม่มีภาพแสดงบนจอแสดงผลภายนอก: Verify HDMI/USB cable connections. Ensure the correct input source is selected on your TV/monitor. For PC/Mac, confirm the default camera application is running.
- ข้อผิดพลาดของการ์ด SD: Ensure the SD card is inserted correctly. Try reformatting the card (this will erase all data) or use a different compatible SD card.
ข้อมูลจำเพาะ
| คุณสมบัติ | รายละเอียด |
|---|---|
| ขนาดสินค้า | 12.2 x 11.02 x 3.94 นิ้ว |
| น้ำหนักสินค้า | 3.61 ปอนด์ |
| หมายเลขรุ่นสินค้า | MDM201 Pro |
| แบตเตอรี่ | ต้องใช้แบตเตอรี่ลิเธียมไอออน 1 ก้อน (รวมอยู่ด้วย) |
| ประเภทแหล่งกำเนิดแสง | นำ |
| มุมจริงของ View | 180 องศา |
| กำลังขยายสูงสุด | 1300 เท่า |
| เล่มที่tage | 5 โวลต์ |
| อุปกรณ์ที่รองรับ | แล็ปท็อปโทรทัศน์ |
| คำอธิบายเลนส์วัตถุ | ไม่มีสี |
การรับประกันและการสนับสนุน
MOYSUWE is committed to providing high-quality products and excellent after-sales service. For any questions, technical support, or warranty claims, please refer to the contact information provided in your product packaging or visit the official MOYSUWE webเว็บไซต์.
โปรดเก็บหลักฐานการซื้อไว้เพื่อวัตถุประสงค์การรับประกัน
Ask a question about this manual
Ask about setup, troubleshooting, compatibility, parts, safety, or missing instructions. Manuals+ will review the question and use this page’s manual context to help answer it.