
เทคแน็กซ์ TX-190
Technaxx Mini WiFi IP Camera TX-190 User Manual
การแนะนำ
The Technaxx Mini WiFi IP Camera TX-190 is a compact, wireless indoor security camera designed for home surveillance. It features FullHD video resolution, PIR motion detection, night vision, and two-way audio communication. With its integrated rechargeable battery, it offers flexible placement and long operational times. This manual provides essential information for setting up, operating, and maintaining your TX-190 camera.
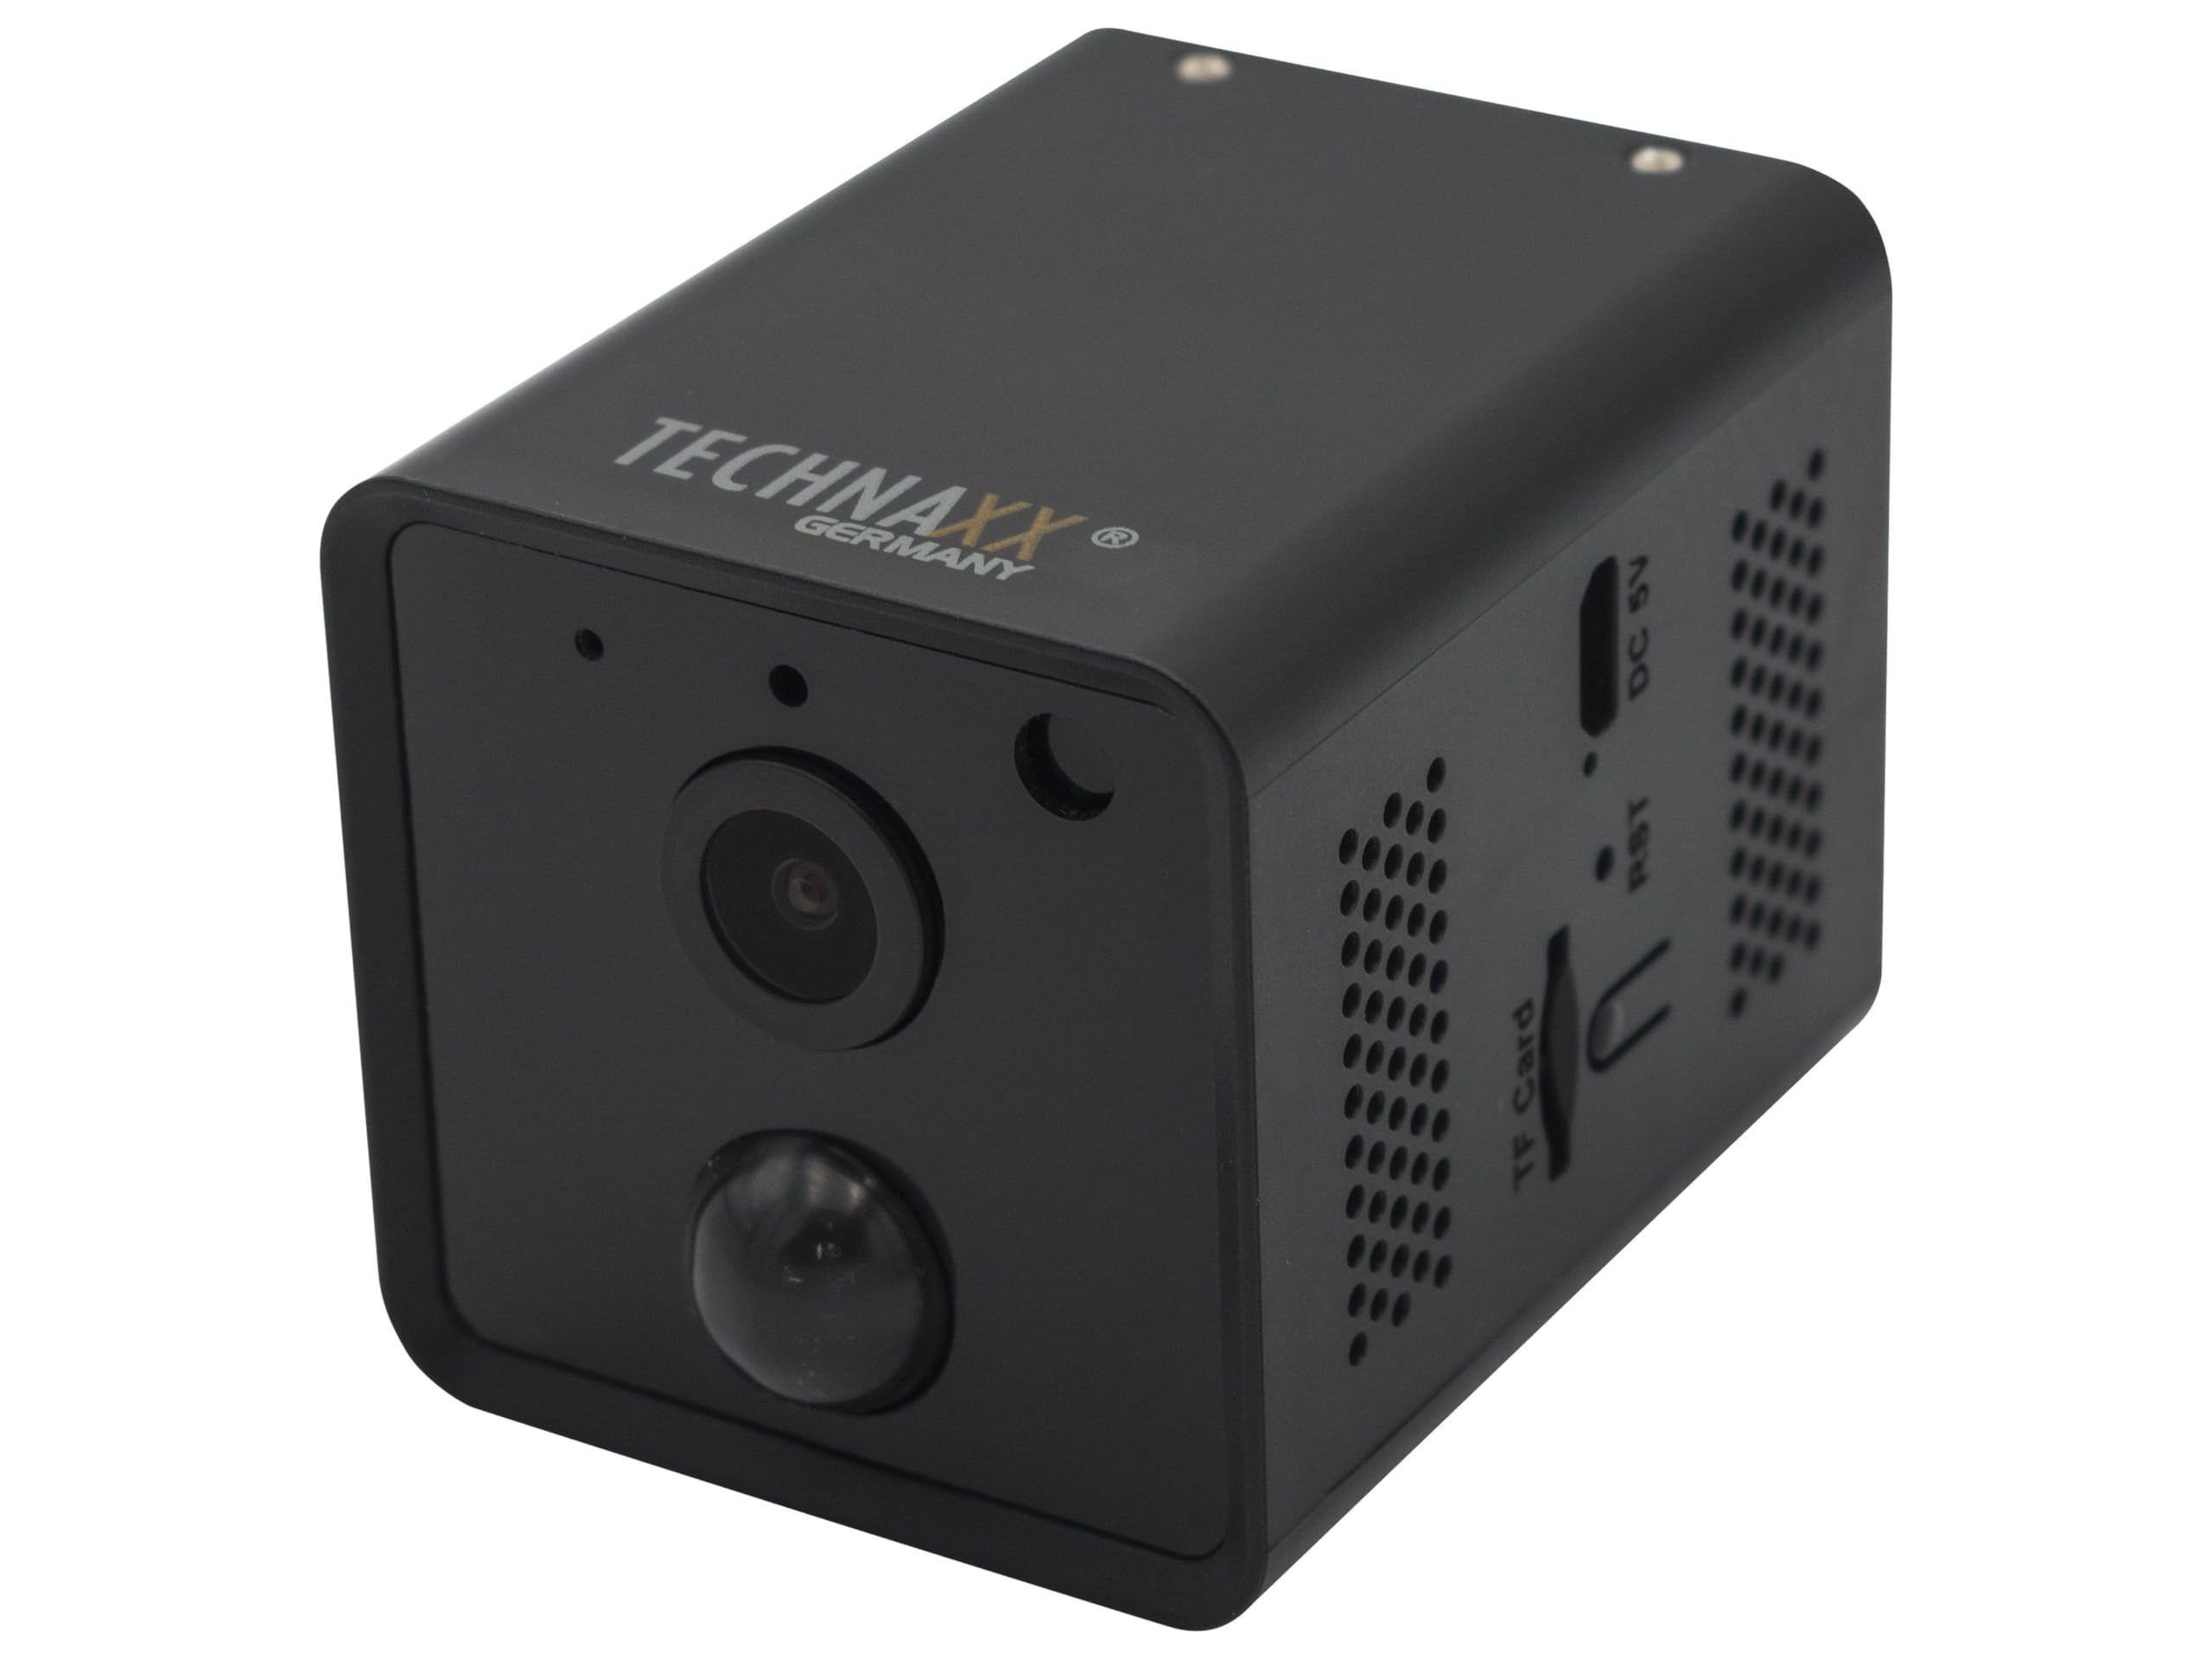
Image: Technaxx Mini WiFi IP Camera TX-190, showcasing การออกแบบที่กะทัดรัด
เนื้อหาแพ็คเกจ
กรุณาตรวจสอบแพ็คเกจสำหรับรายการต่อไปนี้:
- Mini WiFi IP Camera TX-190
- 1x USB Power Cable (1m)
- 3x Screws and Dowels
- ขาตั้งกล้อง
- User Manual (short version)

Image: All items included in the Technaxx TX-190 package.
ข้อมูลจำเพาะ
| คุณสมบัติ | ค่า |
|---|---|
| เซ็นเซอร์รับภาพ | CMOS 3 MP 1/3" |
| เลนส์ | F = 3.6 mm, Fixed Focus |
| แสงสว่างขั้นต่ำ | Color mode: 1 lux; Night mode: 0.01 lux with 2 IR LEDs |
| ความละเอียดวิดีโอ | ความคมชัดสูง (2304 x 1296) |
| อัตราเฟรม | 15 เฟรมต่อวินาที |
| รูปแบบวิดีโอ | .ต.ส. |
| ไวไฟ | 2.4 GHz 802.11b / g / n |
| WiFi Security / Distance | WPA2 / max. 15 m |
| Max Radiated Output Power | 100มิลลิวัตต์ |
| รองรับการ์ด microSD | Up to 128 GB (FAT32/exFAT), Class 10 |
| PIR Motion Detection Distance / Angle | ~8 m (open space) / 120° |
| เวลาการทำงานของเซ็นเซอร์ PIR | 0.2 วินาที |
| Power Consumption (Normal / Standby) | ≤ 2 วัตต์ / ≤ 0.1 วัตต์ |
| ที่ชาร์จภายนอก | DC 5 V/1 A (ไม่รวม) |
| แบตเตอรี่ | Integrated 3.7 V, 3200 mAh Lithium Polymer |
| เวลาดำเนินการ | Up to 15 days (or up to 7 hours continuous recording) |
| เวลาสแตนด์บาย | นานถึง 30 วัน |
| เวลาในการชาร์จ | Up to 5-7 hours (with DC 5 V/1 A adapter) |
| Weight / Dimensions (L x W x H) | 120 ก. / 6.6 x 4.8 x 4.8 ซม |
| ความเข้ากันได้ของแอป | Security Premium App: iOS 13.0+, Android 10.0+ |
| หมายเลขรุ่น | 4989 |
| ASIN | B0BP883GYS |
คู่มือการติดตั้ง
1. การชาร์จกล้อง
Before initial use, fully charge the camera's integrated 3200 mAh battery. Connect the provided USB power cable to the DC 5V port on the camera and to a 5V/1A USB power adapter (not included). The charging process can take up to 5-7 hours.
2. การใส่การ์ด MicroSD
For local video storage, insert a MicroSD (HC/XC) card (up to 128GB, FAT32/exFAT, Class 10) into the TF Card slot. Ensure the camera is powered off before inserting or removing the card.

ภาพ: ด้านบน view of the camera, highlighting the TF Card slot, Reset button, and DC 5V port.
3. การติดตั้งแอปและการสร้างบัญชี
ดาวน์โหลด "Security Premium" app from your smartphone's app store (compatible with iOS 13.0+ and Android 10.0+). Follow the in-app instructions to create an account and register your device.
4. การเชื่อมต่อกับ Wi-Fi
Power on the camera. Open the "Security Premium" app and follow the prompts to add a new device. The app will guide you through connecting the camera to your 2.4 GHz Wi-Fi network. Ensure your camera is within 15 meters of your Wi-Fi router for optimal connection.
5. การติดตั้งกล้อง
The camera can be placed on a flat surface using the included tripod or mounted to a wall using the provided screws and dowels. Choose a location that provides the desired viewing angle (100° horizontal, 62° vertical) and is within range of your Wi-Fi network. The camera is designed for indoor use.

Image: Camera mounted on a wall, demonstrating installation flexibility.

ภาพ: อีกภาพหนึ่ง view of the camera mounted, showing its discreet integration into a room.
คำแนะนำการใช้งาน
สด View
Open the "Security Premium" app and select your TX-190 camera from the device list to access the live video feed. You can monitor your space in real-time.
การบันทึกและการเล่น
The camera automatically records when motion is detected (PIR). Recordings are saved to the inserted MicroSD card. Use the app's playback function to review บันทึกเสียงฟูtage. The video resolution is 2304 x 1296 at 15 fps.
การตรวจจับความเคลื่อนไหว (PIR)
The integrated PIR sensor detects motion up to approximately 8 meters with a 120° angle. When motion is detected, the camera will automatically begin recording and can send notifications to your smartphone via the app. Adjust sensitivity settings within the app if needed.
การมองเห็นตอนกลางคืน
The camera features 2 infrared LEDs for night vision, which activate automatically in low-light conditions. This provides clear visibility up to approximately 5 meters in the dark.
ระบบเสียงสองทาง
Utilize the built-in microphone and speaker for two-way communication through the app. This allows you to listen in on your environment and speak through the camera.
การซ่อมบำรุง
การทำความสะอาด
Wipe the camera's exterior with a soft, dry cloth. Do not use liquid cleaners or aerosols, as they may damage the device. Keep the lens clean for optimal image quality.
การดูแลแบตเตอรี่
To prolong battery life, avoid exposing the camera to extreme temperatures. Recharge the battery when the low battery indicator appears in the app. If storing the camera for an extended period, charge it to about 50% and recharge every few months.
การอัพเดตซอฟต์แวร์
Periodically check the "Security Premium" app for available firmware updates for your camera. Keeping the firmware updated ensures optimal performance and security.
การแก้ไขปัญหา
กล้องไม่เชื่อมต่อกับ Wi-Fi
- โปรดตรวจสอบให้แน่ใจว่าเครือข่าย Wi-Fi ของคุณเป็นความถี่ 2.4 GHz กล้องไม่รองรับ Wi-Fi ความถี่ 5 GHz
- ตรวจสอบว่าได้ป้อนรหัสผ่าน Wi-Fi ในแอปถูกต้องแล้ว
- Place the camera closer to your Wi-Fi router (within 15 meters).
- รีสตาร์ทเราเตอร์และกล้องของคุณ
- If connection issues persist, try resetting the camera using the RST button (requires a pin) and attempt the setup process again.
Password Change Loop During Setup
Some users have reported an issue where the app enters a loop when attempting to change the camera's password during initial setup. If you encounter this, try the following:
- ตรวจสอบให้แน่ใจว่าแอปได้รับการอัปเดตเป็นเวอร์ชั่นล่าสุด
- Try a simpler password initially, then change it after successful setup if possible.
- Perform a factory reset on the camera using the RST button and retry the setup.
- If the issue persists, contact Technaxx customer support for further assistance.
No Recording or Playback Issues
- Check if a MicroSD card is properly inserted and formatted (FAT32/exFAT).
- Ensure the MicroSD card is not full. Back up important footage and format the card if necessary.
- Verify that motion detection recording is enabled in the app settings.
คุณภาพของภาพไม่ดี
- ทำความสะอาดเลนส์กล้องด้วยผ้านุ่ม
- Ensure there is adequate lighting in the environment, especially during the day.
- ตรวจสอบความแรงของสัญญาณ Wi-Fi สัญญาณอ่อนอาจส่งผลต่อคุณภาพการสตรีมได้
การรับประกันและการสนับสนุน
Technaxx products are designed for reliability and performance. This product comes with a standard manufacturer's warranty. Please refer to the warranty card included in your package or visit the official Technaxx webเว็บไซต์สำหรับข้อกำหนดและเงื่อนไขการรับประกันโดยละเอียด
For technical support, troubleshooting assistance, or inquiries regarding your Technaxx Mini WiFi IP Camera TX-190, please contact Technaxx customer service. Contact details can typically be found on the official Technaxx webเว็บไซต์หรือในบรรจุภัณฑ์ของผลิตภัณฑ์
Ask a question about this manual
Ask about setup, troubleshooting, compatibility, parts, safety, or missing instructions. Manuals+ will review the question and use this page’s manual context to help answer it.