
1. บทนำ
This manual provides detailed instructions for the setup, operation, maintenance, and troubleshooting of your ELECROW 10.1 Inch Touchscreen Monitor. Please read this manual thoroughly before using the product to ensure proper functionality and to prevent damage.
The ELECROW 10.1 inch portable monitor features a 1280x800 IPS display, offering clear visuals and wide viewing angles. It supports touch input and is compatible with various devices and operating systems, including Raspberry Pi, Jetson Nano, Banana Pi, PC, and Windows.
2. การตั้งค่า
2.1 เนื้อหาบรรจุภัณฑ์
ตรวจสอบว่ารายการทั้งหมดที่ระบุไว้ด้านล่างนี้รวมอยู่ในแพ็คเกจของคุณ:
- 1x 10.1 inch Touch Display
- 1x HD to HD Cable
- 2x USB cable (USB A to Micro USB)
- 1x HD to Mini HD Adapter
- 1x Screw Pack (4x Small Copper Pillars, 4x M2.5 Screws)
- 2x Bracket (Pro Stand)
- ไขควง 1x
- 1x คู่มือผู้ใช้

Image: All components included in the ELECROW 10.1 Inch Touchscreen Monitor package.

ภาพ: รายละเอียด view of the monitor, cables, stand, and tools.
2.2 ทางกายภาพview และการเชื่อมต่อ
Familiarize yourself with the monitor's ports and dimensions.

Image: Monitor dimensions and port layout.

Image: Close-up of the monitor's rear panel showing port functions and mounting points.
2.3 การเชื่อมต่อจอภาพ
The monitor connects via HDMI for video signal and USB for power and touch functionality. Ensure your device has compatible ports.
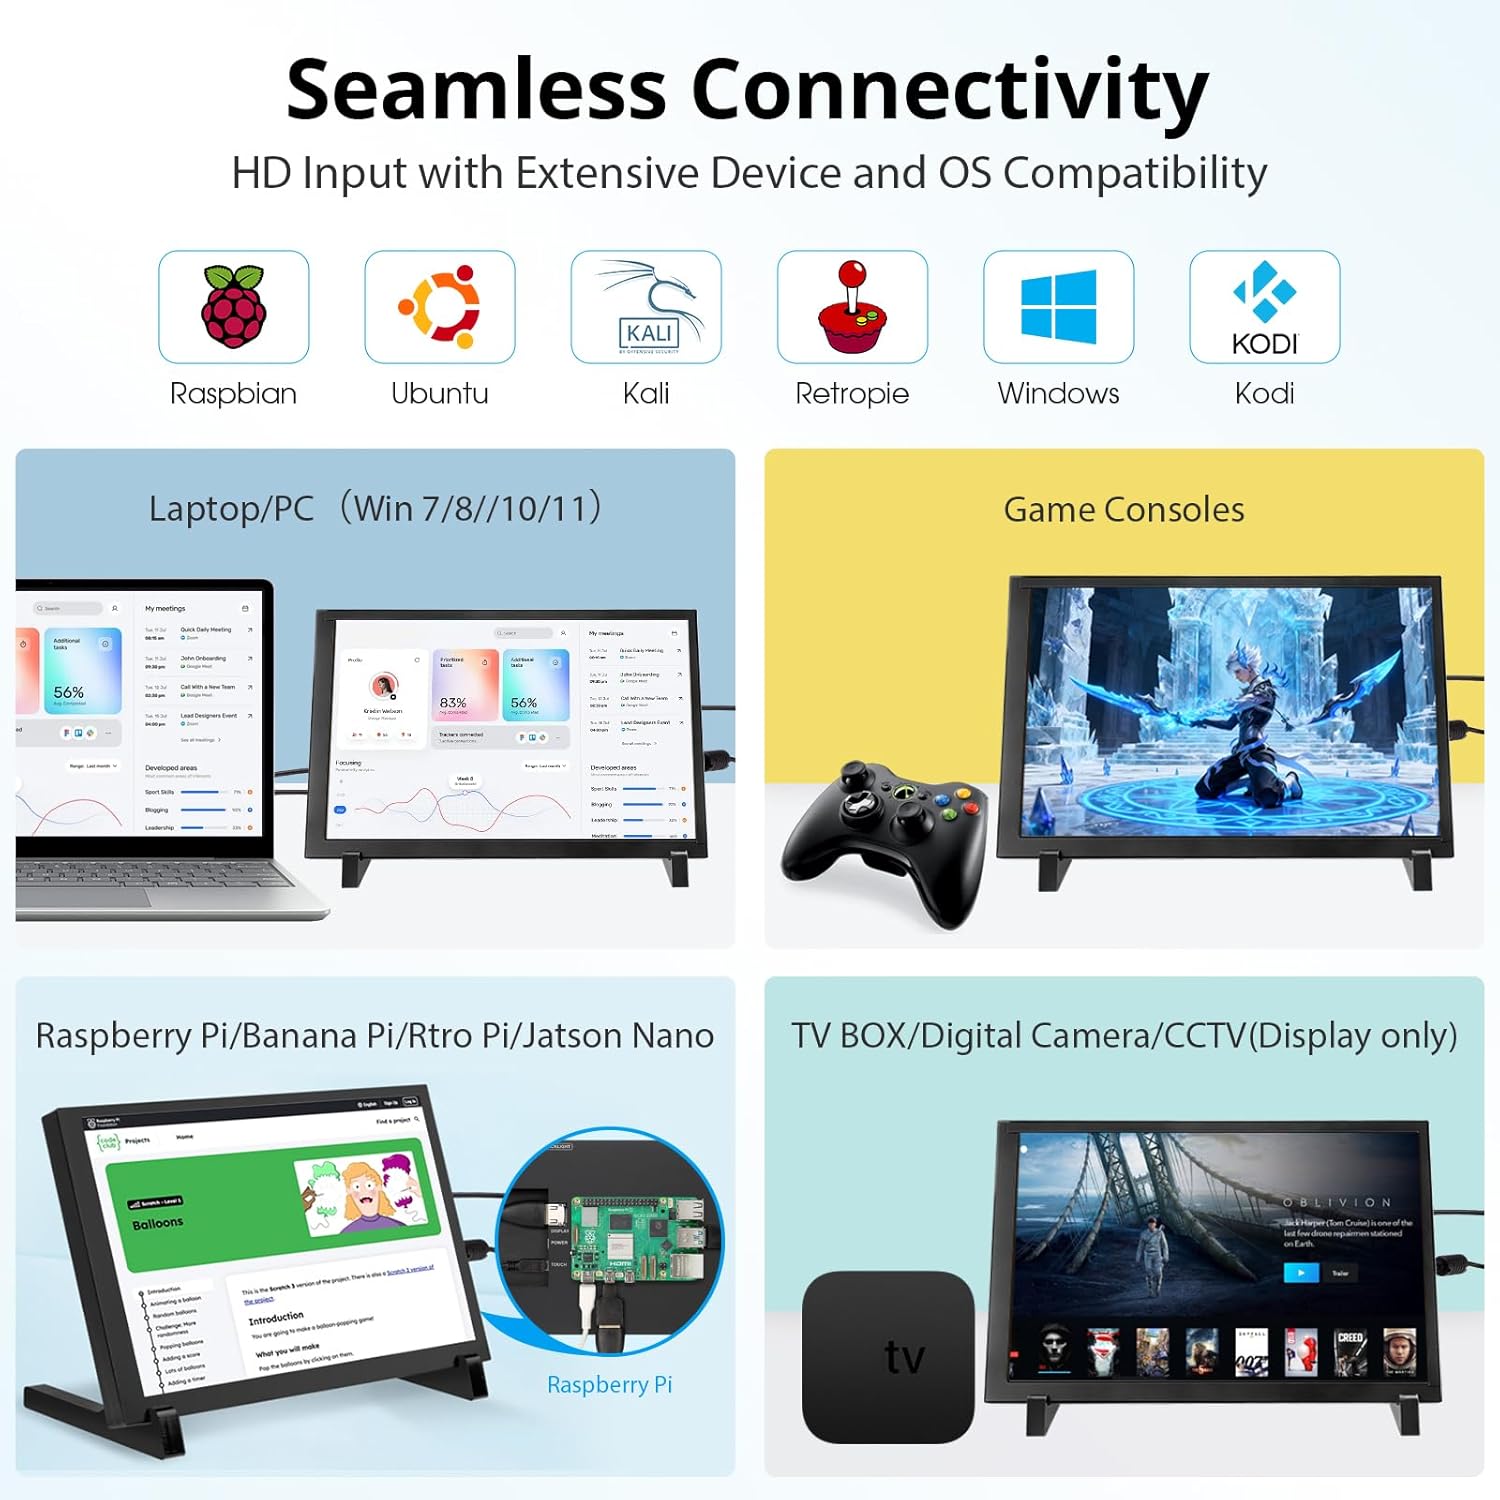
ภาพ: เหนือview ของอุปกรณ์และระบบปฏิบัติการที่เข้ากันได้
2.3.1 การเชื่อมต่อกับ Raspberry Pi
Connect the monitor to your Raspberry Pi using the provided HDMI cable for video and a USB cable for power and touch. For Raspberry Pi 4/5, use the included HD to Mini HD adapter if necessary. The monitor supports single-point touch on Raspberry Pi OS (Raspbian), Ubuntu, and Kali Linux.

Image: Raspberry Pi connection setup.
2.3.2 การเชื่อมต่อกับพีซี/แล็ปท็อป
Connect the monitor to your PC or laptop using an HDMI cable for video and a USB cable for power and touch. The monitor supports 5-point touch on Windows 11/10/8/7 systems.

Image: PC/Laptop connection setup.
2.3.3 การเชื่อมต่อกับอุปกรณ์อื่นๆ
The monitor is compatible with Jetson Nano, Banana Pi, Beaglebone, and game consoles. Use appropriate HDMI and USB connections for these devices.

Image: Jetson Nano connection setup.
2.4 ตัวเลือกการติดตั้ง
The monitor includes a stand for desktop use and features four mounting holes on the back for integration with Raspberry Pi or wall mounting.
2.4.1 Using the Included Stand
Attach the two bracket pieces to the bottom of the monitor to form a stable stand for desktop placement.
2.4.2 Mounting Raspberry Pi Behind the Display
The monitor is designed to allow a Raspberry Pi to be mounted directly behind it, creating a compact setup. Use the provided screws and copper pillars to secure the Raspberry Pi to the designated mounting holes.

Image: Raspberry Pi mounted discreetly behind the display.

Image: Integrated Raspberry Pi and monitor setup.
2.5 ตั้งค่าใหม่view วีดีโอ
Video: An official ELECROW overview and demonstration of the 10.1 Inch 1280x800 IPS LCD Touchscreen Monitor, showcasing คุณสมบัติและวิธีการตั้งค่าพื้นฐาน
3. คู่มือการใช้งาน
3.1 เปิด/ปิดเครื่อง
Once connected to a power source via the USB cable, the monitor will automatically power on. To power off, disconnect the USB power cable. Some operating systems may offer display power management options.
3.2 ฟังก์ชันหน้าจอสัมผัส
The monitor features a capacitive touchscreen. The number of touch points supported depends on the connected operating system:
- Windows (11/10/8/7): Supports 5-point multi-touch.
- Raspberry Pi OS (Raspbian), Ubuntu, Kali Linux, Win10 IoT: Supports single-point touch.

Image: 5-point multi-touch in action.

Image: Multi-touch gestures supported.
3.3 คุณภาพการแสดงผล
The 1280x800 IPS LCD panel provides a wide 178-degree viewing angle and accurate color reproduction.

Image: Display resolution comparison.

Image: Wide viewการสาธิตมุมเอียง
3.4 แอปพลิเคชันอเนกประสงค์
The monitor can be used for various purposes beyond its primary function with development boards, including:
- As a second monitor for PC/Laptops.
- As a digital photo frame.
- For home monitoring displays (CCTV).
- As a display for gaming consoles.

ภาพ: อดีตamples of versatile display applications.

Image: Monitor used for gaming.

Image: Monitor used for home monitoring.
4. การบำรุงรักษา
4.1 การทำความสะอาดหน้าจอ
ในการทำความสะอาดหน้าจอ ให้เช็ดเบาๆ ด้วยผ้าเนื้อนุ่มที่ไม่เป็นขุย สำหรับคราบสกปรกที่ล้างออกยาก ให้ใช้ผ้าชุบน้ำหมาดๆ เช็ดเบาๆampen the cloth with water or a screen-safe cleaning solution. Avoid using harsh chemicals, abrasive materials, or excessive moisture, as these can damage the screen surface.
4.2 การดูแลทั่วไป
- เก็บจอภาพให้ห่างจากแสงแดดโดยตรง แหล่งความร้อน และอุณหภูมิที่สูงหรือต่ำมาก
- ควรหลีกเลี่ยงการทำจอภาพตกหรือกระแทกอย่างแรง
- Do not attempt to disassemble the monitor. Unauthorized disassembly will void the warranty.
- ต้องแน่ใจว่ามีการระบายอากาศที่เหมาะสมเมื่อใช้งาน
5 การแก้ไขปัญหา
5.1 ไม่มีจอแสดงผล / หน้าจอสีดำ
- ตรวจสอบพลังงาน: Ensure the monitor is receiving power via the USB cable and the power source is active.
- ตรวจสอบการเชื่อมต่อ HDMI: Verify that the HDMI cable is securely connected to both the monitor and the source device. Try a different HDMI cable if available.
- เอาท์พุตอุปกรณ์ต้นทาง: Confirm that your source device (e.g., Raspberry Pi, PC) is configured to output video to the connected HDMI port.
- ความเข้ากันได้ของความละเอียด: Ensure the source device's output resolution is compatible with the monitor (1280x800).
5.2 ฟังก์ชันการสัมผัสใช้งานไม่ได้
- Check USB Touch Connection: Ensure the USB cable for touch functionality is securely connected from the monitor's 'TOUCH' port to a USB data port on your source device.
- การติดตั้งไดร์เวอร์: For some operating systems (especially Linux distributions), specific drivers or configuration might be required for touch input. Refer to the documentation for your specific OS and device (e.g., Raspberry Pi documentation for touchscreen setup).
- ความเข้ากันได้ OS: Confirm your operating system supports touch input with this monitor. Windows systems generally offer multi-touch, while Linux-based systems often require specific setup for single-touch.
5.3 ปัญหาคุณภาพของภาพ
- คุณภาพสายเคเบิล: A faulty HDMI cable can cause image distortion or flickering. Try a different cable.
- Source Resolution: Ensure the source device is outputting at the monitor's native resolution (1280x800) for optimal clarity.
6. ข้อมูลจำเพาะ
| คุณสมบัติ | ข้อมูลจำเพาะ |
|---|---|
| ยี่ห้อ | อิเล็คโทรโครว์ |
| ชื่อรุ่น | DIS85101D |
| ขนาดหน้าจอ | 10.1 นิ้ว |
| ปณิธาน | ขนาด 1280x800 |
| ความละเอียดดั้งเดิม | 1280x800 พิกเซล |
| อัตราส่วนภาพ | 16:10 น. |
| ประเภทจอภาพ | จอแอลซีดี |
| เทคโนโลยีการแสดงผล | ไอพีเอส |
| คำอธิบายพื้นผิวหน้าจอ | มันเงา |
| อัตราส่วนคอนทราสต์ | 2000:1 น. |
| อัตราการรีเฟรช | 60 เฮิรตซ์ |
| Viewอิงแองเกิล | 178 องศา |
| ความสว่าง | 250 ซีดี/ตรม. |
| เวลาตอบสนอง | 8 มิลลิวินาที |
| เทคโนโลยีการเชื่อมต่อ | HDMI, ยูเอสบี |
| พอร์ต HDMI ทั้งหมด | 1 |
| พอร์ต USB รวม | 2 (Micro USB for power, Micro USB for touch/power) |
| การใช้พลังงาน | 5.29 วัตต์ |
| เล่มที่tage | 5 โวลต์ |
| น้ำหนักสินค้า | 521 กรัม |
| ขนาดสินค้า (ลึก x กว้าง x สูง) | ลึก 1.6 นิ้ว x กว้าง 6.2 นิ้ว x สูง 9.4 นิ้ว |
| ประเภทการติดตั้ง | Desk Mount, Wall Mount (4 mounting holes) |
| อุปกรณ์ที่รองรับ | Raspberry Pi 3/3B+/4B/5, Jetson Nano, Banana Pi, Beaglebone, PC (Windows, Linux, Ubuntu) |
7. ข้อมูลการรับประกัน
This ELECROW 10.1 Inch Touchscreen Monitor comes with a การรับประกันจากผู้ผลิต 1 ปี. Please retain your proof of purchase for warranty claims. The warranty covers defects in materials and workmanship under normal use. It does not cover damage caused by misuse, accidents, unauthorized modifications, or improper installation.
8. การสนับสนุนลูกค้า
For technical assistance, troubleshooting not covered in this manual, or warranty inquiries, please contact ELECROW customer support through the retailer where you purchased the product or visit the official ELECROW webเว็บไซต์สำหรับข้อมูลการติดต่อ