
1. บทนำ
This manual provides essential information for the safe and efficient operation of your Cuifati 30A MPPT Solar Controller. Please read these instructions carefully before installation and use to ensure optimal performance and longevity of the product.
The Cuifati 30A MPPT Solar Controller is designed to manage the power flow from your solar panels to your battery bank, ensuring efficient charging and protecting your batteries from overcharge and over-discharge. It features an intelligent regulator compatible with 12V, 24V, 36V, and 48V systems, a built-in USB port for device charging, and an LCD digital panel for easy monitoring and parameter configuration.
2. สินค้าหมดview
2.1 คุณสมบัติหลัก
- ความเข้ากันได้กว้าง: Supports 12V, 24V, 36V, and 48V battery systems.
- Integrated USB Output: Two 5V/2A USB ports for charging mobile devices.
- การป้องกันอัจฉริยะ: Features protection against overcurrent, short-circuit, inverse polarity, low voltage และคิดราคาแพงเกินไป
- จอแสดงผล LCD: Provides real-time status and data, allowing for convenient mode switching and parameter configuration.
- Automatic System Management: Manages solar panel and battery operations automatically with a built-in industrial microcontroller.
2.2 ส่วนประกอบ
The solar controller unit includes the main control module with an LCD screen, USB ports, and terminal connections for solar panels, battery, and load. The device is housed in an engineering plastic casing designed for durability.

รูปที่ 1 : ด้านหน้า view of the Cuifati 30A MPPT Solar Controller, showing the LCD display, USB ports, and connection terminals.
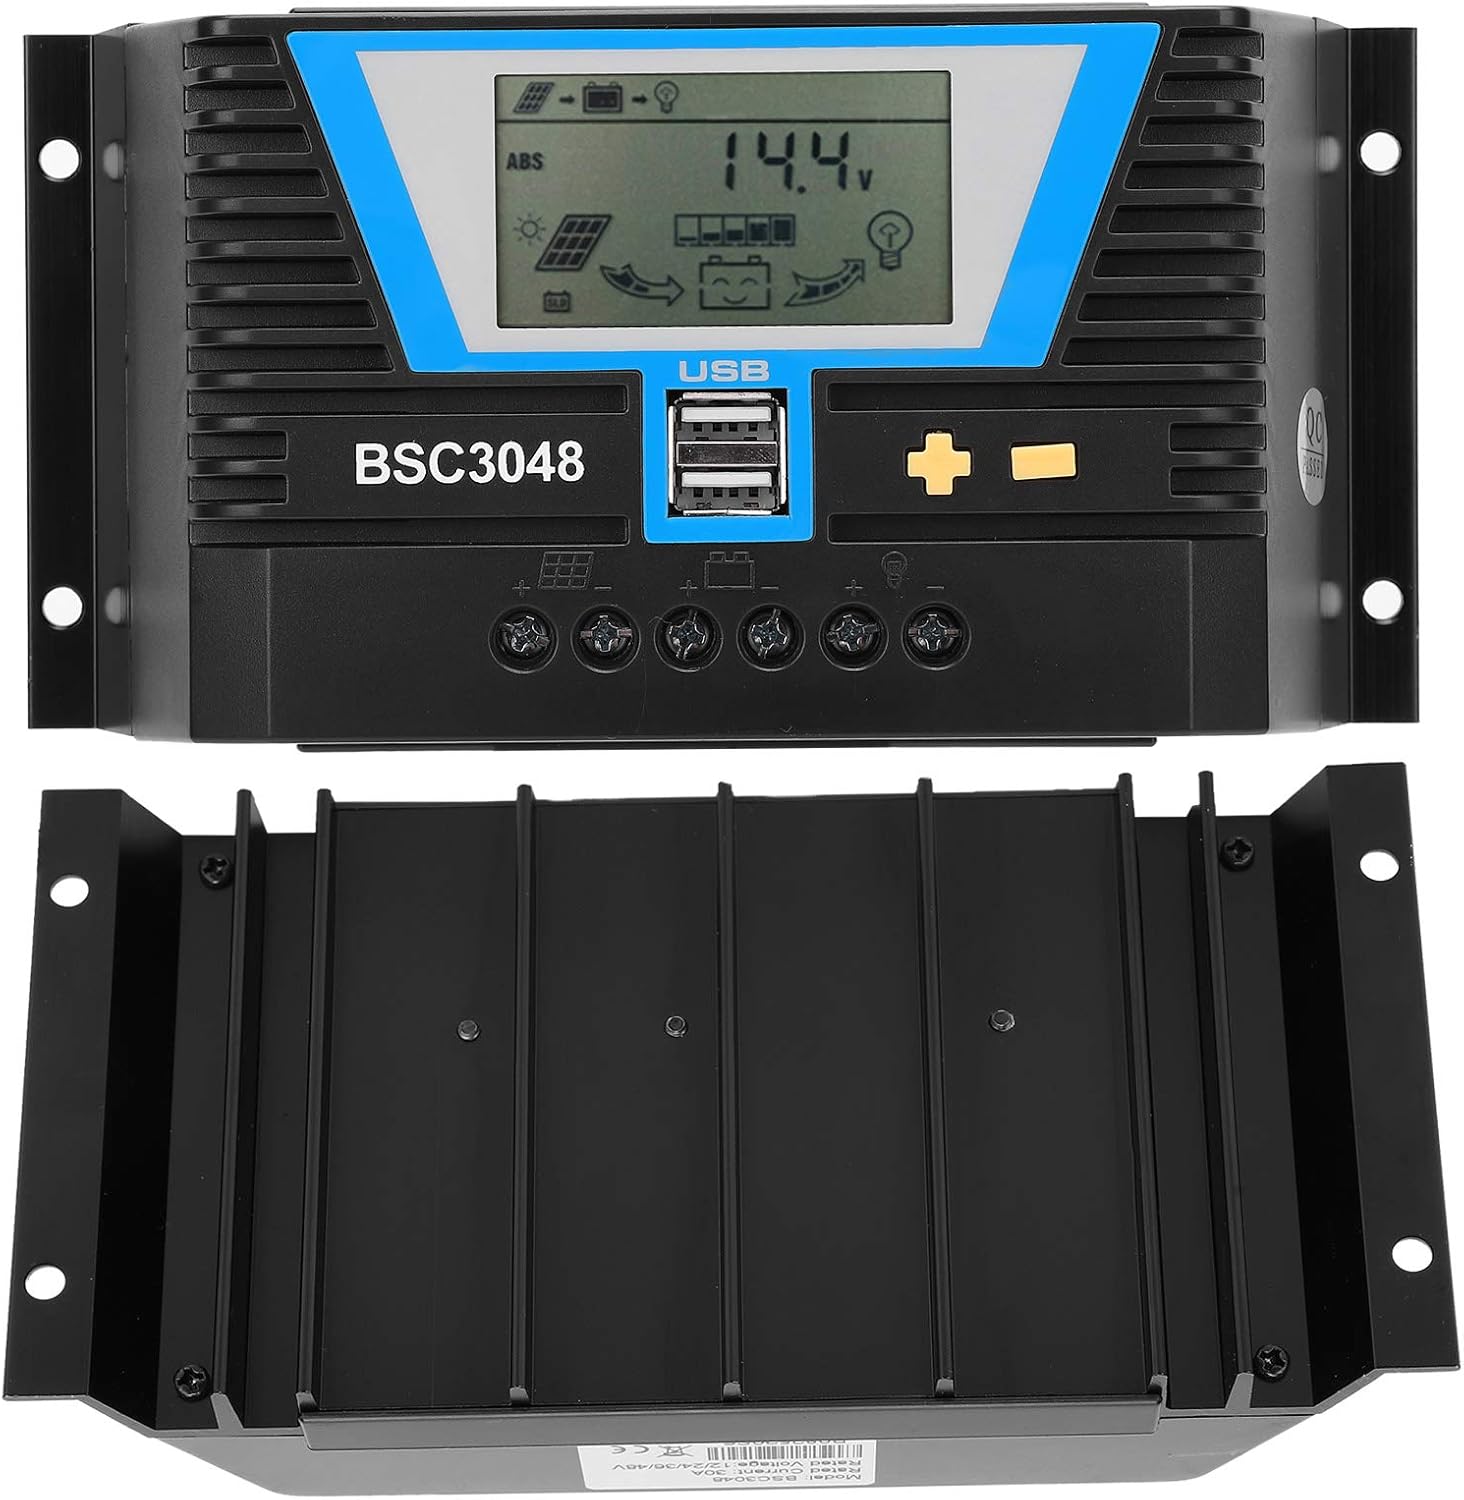
รูปที่ 2: ด้านหน้าและด้านล่าง view of the solar controller, highlighting the heat sink fins for efficient cooling.
3. ข้อมูลจำเพาะ
| พารามิเตอร์ | ค่า |
|---|---|
| ประเภทสินค้า | ตัวควบคุมพลังงานแสงอาทิตย์ |
| วัสดุ | พลาสติกวิศวกรรม |
| กระแสไฟฟ้าที่ได้รับการจัดอันดับ | 30เอ |
| จัดอันดับการทำงานVoltage | 12V/24V/36V/48V (ตรวจจับอัตโนมัติ) |
| ปริมาณอินพุตแผงโซลาร์เซลล์tage | ≤100โวลต์ |
| การสูญเสียไฟฟ้าสถิต | ≤30มิลลิแอมป์ |
| การลดลงของแรงดันในวงจร | ≤0.3โวลต์ |
| เอาท์พุต USB | 5V/2Ax2 ก้อน |
| อุณหภูมิในการทำงาน | -20~ +55 ℃ |
| ระดับการป้องกัน | IP32 |
| ความชื้นสัมพัทธ์ | ≤95% ไม่มีการควบแน่น |
| ขนาดเทอร์มินัล | 6AWG/16มม.² |
| ขนาดแพ็คเกจ | 8.66 x 4.57 x 2.24 นิ้ว |
| น้ำหนักสินค้า | 1.1 ปอนด์ (0.5 กิโลกรัม) |
4. การตั้งค่าและการติดตั้ง
Proper installation is crucial for the safe and efficient operation of your solar charging system. Please follow these steps carefully:
4.1 ข้อควรระวังเพื่อความปลอดภัย
- Ensure all connections are secure and correct to prevent damage to the controller or other components.
- ควรต่อแบตเตอรี่ก่อนเสมอ จากนั้นจึงต่อแผงโซลาร์เซลล์ และสุดท้ายจึงต่ออุปกรณ์ไฟฟ้าที่ต้องการใช้งาน ส่วนการถอดควรทำในลำดับย้อนกลับ
- ติดตั้งตัวควบคุมในบริเวณที่มีอากาศถ่ายเทสะดวก หลีกเลี่ยงแสงแดดโดยตรง อุณหภูมิสูง และความชื้น
- Use appropriate wire gauges for all connections to minimize power loss and prevent overheating.
4.2 ขั้นตอนการเชื่อมต่อ
- เชื่อมต่อแบตเตอรี่: Connect the positive and negative terminals of your battery to the corresponding battery terminals on the solar controller. Ensure correct polarity. The LCD display should light up.
- เชื่อมต่อแผงโซล่าเซลล์: Connect the positive and negative terminals of your solar panel(s) to the corresponding solar panel terminals on the controller. Ensure correct polarity.
- เชื่อมต่อโหลด (ทางเลือก): If you are connecting a DC load directly to the controller, connect its positive and negative terminals to the load terminals on the controller.

รูปที่ 3: ระยะใกล้ view of the controller's connection terminals for solar panels, battery, and load.
5. คู่มือการใช้งาน
The Cuifati solar controller features an intuitive LCD display and control buttons for easy operation and monitoring.
จอแสดงผล LCD 5.1 และปุ่มต่างๆ
The LCD screen displays various system parameters such as battery voltage, charging current, discharge current, and operating modes. The controller typically has three buttons: a 'Mode' button, a '+' button, and a '-' button.

Figure 4: The controller's LCD display and control buttons, along with a guide to basic operations.
5.2 การดำเนินการพื้นฐาน
| โหมด | คำแนะนำการใช้งาน |
|---|---|
| โหมดเรียกดู | Short press the "+" or "-" button to cycle through display parameters. |
| โหลดสวิตช์ | When the load is set to 24-hour mode, short press "+" on the main interface to toggle the load. Do not manually switch the load in other working modes. |
| ตั้งค่าโหมด | In the settable interface, long press "+" to enter parameter setting. Short press "+" or "-" to adjust the parameter. Long press "+" again to confirm and save the parameter setting. (Long pressing "-" will not save parameters and restore to the last setting). |
| รีเซ็ต | Long press "+" in the ambient temperature interface to reset the controller. |
5.3 การชาร์จ USB
The two 5V/2A USB ports can be used to charge compatible electronic devices such as mobile phones, tablets, and PCs. Simply connect your device using a standard USB cable.
6. การบำรุงรักษา
Regular maintenance ensures the longevity and optimal performance of your solar controller.
- ความสะอาด : รักษาตัวควบคุมให้สะอาด ปราศจากฝุ่นและสิ่งสกปรก ใช้ผ้าแห้งเช็ดทำความสะอาดพื้นผิว
- การเชื่อมต่อ: Periodically check all wire connections to ensure they are tight and free from corrosion. Loose connections can lead to power loss or overheating.
- การระบายอากาศ : ตรวจสอบให้แน่ใจว่าบริเวณที่ติดตั้งมีการระบายอากาศที่ดี เพื่อป้องกันไม่ให้ตัวควบคุมร้อนเกินไป
- การตรวจสอบสิ่งแวดล้อม: Verify that the controller is not exposed to excessive moisture, extreme temperatures, or direct sunlight, which can degrade its performance and lifespan.
7 การแก้ไขปัญหา
If you encounter issues with your Cuifati solar controller, refer to the following common problems and solutions:
7.1 No Display on LCD Screen
- ตรวจสอบการเชื่อมต่อแบตเตอรี่: Ensure the battery is correctly connected to the controller with the correct polarity. The controller draws power from the battery to operate its display.
- ปริมาณแบตเตอรี่tage: ตรวจสอบว่าแบตเตอรี่มีปริมาณtage is within the operating range (12V-48V). If the battery is completely discharged, the controller may not power on.
7.2 แบตเตอรี่ไม่ชาร์จ
- การเชื่อมต่อแผงโซลาร์เซลล์: Check if the solar panels are correctly connected to the controller with the correct polarity.
- เอาต์พุตแผงโซลาร์เซลล์: Ensure the solar panels are receiving sufficient sunlight and are producing voltage. Use a multimeter to check the open-circuit voltage ของแผงโซลาร์เซลล์
- การตั้งค่าตัวควบคุม: Verify that the battery type and charging parameters are correctly set in the controller's settings.
7.3 Load Not Working
- โหลดการเชื่อมต่อ: Ensure the load is correctly connected to the controller's load terminals.
- Load Switch Setting: Check the load switch setting on the controller. If it's in a timed mode, ensure the current time is within the active period.
- ปริมาณแบตเตอรี่tage: หากแบตเตอรี่มีประจุtage is too low, the controller may cut off the load to protect the battery.
- ระบบป้องกันการโอเวอร์โหลด: The controller has overload protection. Ensure the load current does not exceed the controller's rated load current.
8. การรับประกันและการสนับสนุน
The Cuifati 30A MPPT Solar Controller comes with a 12-month warranty. For any issues or support inquiries, please contact Cuifati customer service via email. Please have your product model number (CUIFATImipqrgdwyu) and purchase details ready when contacting support.
มีแผนการคุ้มครองเพิ่มเติมให้เลือกสำหรับความคุ้มครองเพิ่มเติม:
- แผนคุ้มครอง 3 ปี
- แผนคุ้มครอง 4 ปี
For details on these plans, please refer to your purchase documentation or contact your retailer.