
1. บทนำ
This manual provides detailed instructions for the installation, operation, and maintenance of your VANTRUE VP01 5-Level Adjustable ACC Hardwire Kit. Please read this manual thoroughly before installation and use to ensure proper functionality and safety. This hardwire kit is designed to provide continuous power to your compatible dash cam for parking mode functionality and includes features to protect your vehicle's battery.
2. สินค้าหมดview
The VANTRUE VP01 Hardwire Kit is an essential accessory for enabling advanced parking surveillance features on your compatible dash cam. It connects directly to your vehicle's fuse box, providing a stable power supply and intelligent battery protection. Key features include:
- ปริมาณต่ำtagการป้องกันอี: Automatically cuts power to the dash cam when the vehicle battery voltage drops below a user-defined threshold, preventing battery drain.
- Custom Timer Setting: Allows continuous recording or power supply for a set duration after the vehicle is parked.
- ACC Linkage Function: Automatically switches the dash cam to parking mode when the ignition is turned off.
- ฉบับกว้างtagความเข้ากันได้: รองรับระบบไฟฟ้าในรถยนต์ 12V-24V
- เอาต์พุต USB Type-C: Compatible with various Type-C dash cams and other devices.
ส่วนประกอบที่รวมอยู่:
- Vantrue Hardwire Kit (VP01)
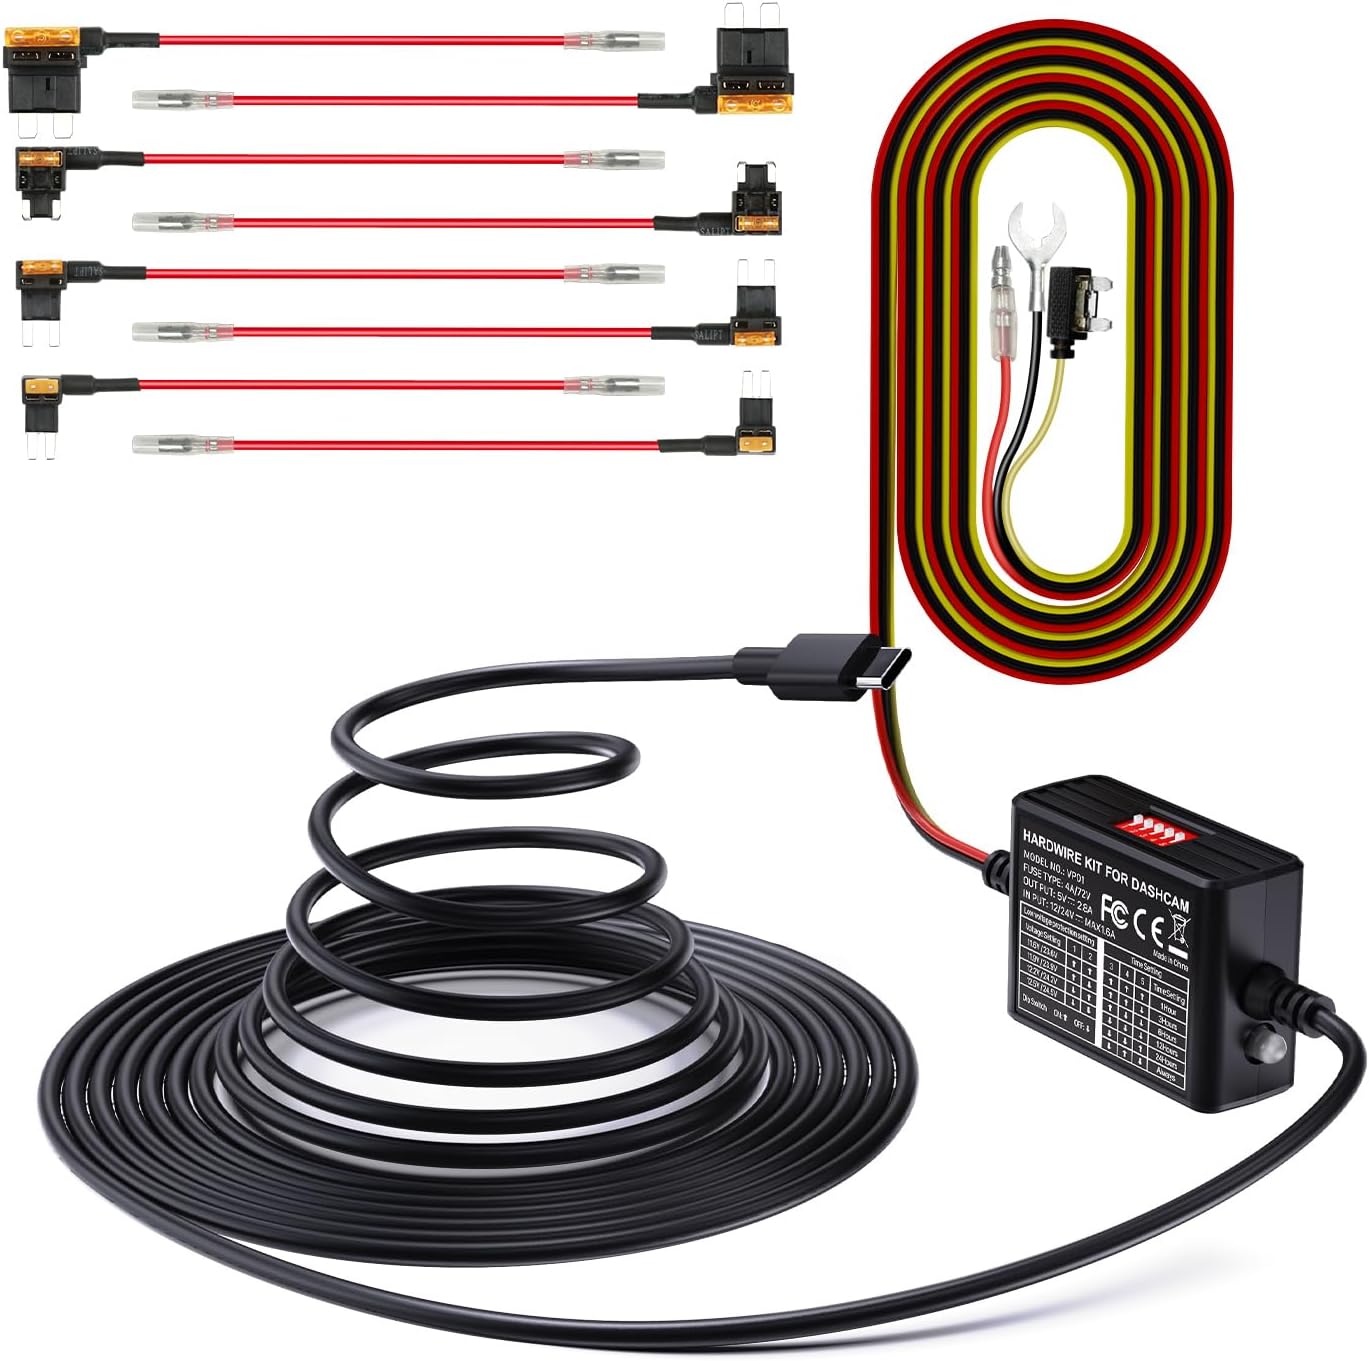
Image 2.1: The VANTRUE VP01 Hardwire Kit, showing its compact design and USB-C connector.
3. ความเข้ากันได้
The VANTRUE VP01 Hardwire Kit is designed for broad compatibility with vehicles operating on 12V to 24V electrical systems. It features a USB Type-C output, making it suitable for a wide range of dash cams and other devices that use a Type-C USB connection.
Compatible VANTRUE Dash Cam Models:
- N4 ProS
- E1 โปร
- N5
- เอ็น5เอส
- N4
- เอ็น4เอส
- E2
- S1 Pro(Max)
- N2X
- E360
Note: This kit is specifically designed for the listed Vantrue dash cam models and may not be compatible with other Vantrue dash cams or third-party devices.

Image 3.1: Visual representation of the hardwire kit's compatibility with several VANTRUE dash cam models.
4. คู่มือการติดตั้ง
Proper installation is crucial for the optimal performance of your hardwire kit. If you are unsure about any steps, it is recommended to seek professional assistance.
4.1 การเชื่อมต่อสายไฟ
The hardwire kit requires connection to three points in your vehicle's fuse box:
- สายสีเหลือง: Connect to a constant power source (B+) that provides power even when the ignition is off. This is typically a fuse that is always live.
- สายสีแดง: Connect to an ACC (Accessory) power source that provides power only when the ignition is on. This allows the dash cam to detect when the vehicle is running or parked.
- สายสีดำ: Connect to any metal part of the vehicle chassis for a ground connection.

Image 4.1: Diagram illustrating the connection points for the yellow (ACC), red (continuous power), and black (ground) wires.
4.2 Fuse Box Connection
Use the included fuse taps to connect the yellow and red wires to appropriate fuses in your vehicle's fuse box. Ensure the fuse tap is inserted in the correct orientation to maintain circuit protection.

Image 4.2: Step-by-step visual guide for connecting the hardwire kit to the vehicle's fuse box, showing continuous power, ACC power, and ground connections.
5. คู่มือการใช้งาน
Once installed, the hardwire kit operates automatically with your dash cam. It manages power delivery based on your vehicle's ignition status and the settings configured on the kit.
5.1 Parking Mode Activation
With the ACC linkage function, your dash cam will automatically transition into parking mode when the vehicle's ignition is turned off. This ensures continuous surveillance even when your car is parked.

Image 5.1: Graphic illustrating the 24-hour parking mode, providing continuous surveillance for your vehicle.
6. การกำหนดค่าการตั้งค่า
The hardwire kit features dip switches for configuring low voltage protection and timer settings. These switches allow you to customize the kit's behavior to suit your needs and vehicle's battery health.

Image 6.1: Close-up of the hardwire kit's dip switches for adjusting low voltage protection and parking mode timer settings.
6.1 ระดับเสียงต่ำtagการตั้งค่าการป้องกัน
This feature prevents your vehicle's battery from draining completely by cutting power to the dash cam when the voltage drops below a selected level. Use the dip switches to set your desired voltagเกณฑ์อี:
| เล่มที่tage การตั้งค่า | สวิตช์จุ่ม 1 | สวิตช์จุ่ม 2 |
|---|---|---|
| 11.6โวลต์/23.6โวลต์ | ON (Up) | ON (Up) |
| 11.9โวลต์/23.9โวลต์ | OFF (Down) | ON (Up) |
| 12.2โวลต์/24.2โวลต์ | ON (Up) | OFF (Down) |
| 12.5โวลต์/24.5โวลต์ | OFF (Down) | OFF (Down) |
Note: The higher voltage values (23.6V, 23.9V, 24.2V, 24.5V) apply to 24V vehicle systems.

Image 6.2: Visual explanation of the low voltage protection system, showing the battery icon and automatic power cut-off.
การตั้งเวลา 6.2 แบบ
Configure how long the dash cam remains powered in parking mode after the ignition is off. Use the dip switches to select your desired duration:
| การตั้งเวลา | สวิตช์จุ่ม 3 | สวิตช์จุ่ม 4 | สวิตช์จุ่ม 5 |
|---|---|---|---|
| 1 ชั่วโมง | ON (Up) | ON (Up) | ON (Up) |
| 3 ชั่วโมง | OFF (Down) | ON (Up) | ON (Up) |
| 6 ชั่วโมง | ON (Up) | OFF (Down) | ON (Up) |
| 12 ชั่วโมง | OFF (Down) | OFF (Down) | ON (Up) |
| 24 ชั่วโมง | ON (Up) | ON (Up) | OFF (Down) |
| เสมอ | OFF (Down) | OFF (Down) | OFF (Down) |
7. การบำรุงรักษา
To ensure the longevity and reliable performance of your hardwire kit and dash cam, consider the following maintenance tips:
- ตรวจสอบการเชื่อมต่อเป็นประจำ: Periodically inspect all wiring connections to ensure they are secure and free from damage.
- การจัดการการ์ด SD: For dash cams, regularly format the SD card to prevent data corruption and ensure continuous recording. Replace the SD card if it shows signs of wear or error.
- ทำความสะอาดอุปกรณ์: Keep the hardwire kit and dash cam free from dust and debris. Use a soft, dry cloth for cleaning.
8 การแก้ไขปัญหา
หากคุณพบปัญหาเกี่ยวกับชุดสายไฟ โปรดดูปัญหาและวิธีแก้ไขที่พบบ่อยต่อไปนี้:
- Dash Cam Not Powering On in Parking Mode:
- Check the yellow wire connection to ensure it is connected to a constant power fuse.
- ตรวจสอบระดับเสียงต่ำtage protection settings. If the vehicle battery voltage is below the set threshold, the kit will cut power.
- Ensure the timer setting is not expired or set to 'Off'.
- Dash Cam Not Switching to Parking Mode:
- Check the red wire connection to ensure it is connected to an ACC power fuse that activates with the ignition.
- Confirm the ACC linkage function is enabled on your dash cam (refer to your dash cam's manual).
- แบตเตอรี่รถยนต์หมดเร็ว:
- ปรับระดับเสียงต่ำลงtage protection setting to a higher voltage (e.g., 12.5V for 12V systems) to cut power sooner.
- Reduce the parking mode timer duration.
- Ensure the fuse adapter is correctly oriented in the fuse box. Incorrect orientation can bypass the protection circuit.
- กล้องติดรถยนต์ไม่มีไฟเลี้ยง:
- Check all three wire connections (yellow, red, black) for secure contact.
- Inspect the fuses in the fuse box that the hardwire kit is connected to. Replace any blown fuses.
- Ensure the USB Type-C connection to the dash cam is firm.
9. ข้อมูลจำเพาะ
| คุณสมบัติ | ข้อมูลจำเพาะ |
|---|---|
| แบบอย่าง | VP01 |
| อินพุต Voltage | 12V - 24V |
| ปริมาณการส่งออกtage | 5V |
| กระแสไฟขาออก | 2A |
| ความยาวสายเคเบิล | 14.8 ฟุต |
| ประเภทขั้วต่อ | ยูเอสบี ไทป์ ซี |
| ปริมาณต่ำtagการป้องกันอี | Adjustable (11.6V/11.9V/12.2V/12.5V for 12V; 23.6V/23.9V/24.2V/24.5V for 24V) |
| การตั้งเวลา | Adjustable (1, 3, 6, 12, 24 hours, or Always) |
| ขนาดรายการ (ยาว x กว้าง x สูง) | 4.33 x 3.03 x 2.4 นิ้ว |
10. การรับประกันและการสนับสนุน
10.1 ข้อมูลการรับประกัน
The VANTRUE VP01 Hardwire Kit comes with a รับประกัน 12 เดือน นับจากวันที่ซื้อ การรับประกันนี้ครอบคลุมถึงข้อบกพร่องจากการผลิตและรับรองว่าผลิตภัณฑ์มีประสิทธิภาพตามที่ระบุไว้ โปรดเก็บหลักฐานการซื้อไว้เพื่อใช้ในการเรียกร้องการรับประกัน
10.2 การสนับสนุนลูกค้า
For any questions, technical assistance, or warranty inquiries, please contact VANTRUE customer support. Refer to the official VANTRUE webไซต์หรือบรรจุภัณฑ์ผลิตภัณฑ์ของคุณเพื่อรับข้อมูลติดต่อล่าสุด