
1. บทนำ
This manual provides essential instructions for the installation, operation, and maintenance of your PowMr MPPT 60A Solar Charge Controller. This controller is designed to efficiently manage power flow from your solar panels to your battery bank, ensuring optimal charging and system protection. Please read this manual thoroughly before installation and use to ensure safe and correct operation.
เนื้อหาแพ็คเกจ:
- 1 x PowMr MPPT 60A Solar Charge Controller
- 1 x คู่มือผู้ใช้ (ภาษาอังกฤษ)
2. คำแนะนำด้านความปลอดภัย
Always observe the following safety precautions to prevent personal injury and damage to the controller or other components:
- ตรวจสอบให้แน่ใจว่าการเชื่อมต่อทั้งหมดถูกต้องและแน่นหนาดีแล้วก่อนที่จะจ่ายไฟ
- The correct connection sequence for the solar controller is to connect the battery first, then the solar panel. Always adhere to this specific order. When disconnecting, follow the reverse order: disconnect solar panel, then battery.
- ห้ามถอดประกอบหรือพยายามซ่อมแซมตัวควบคุมด้วยตนเอง โปรดติดต่อช่างผู้ชำนาญการเพื่อขอรับบริการ
- ติดตั้งตัวควบคุมในบริเวณที่มีอากาศถ่ายเทสะดวก ห่างจากวัสดุไวไฟและแสงแดดโดยตรง
- The solar charge controller is equipped with electronic protections against overcharge, over-discharge, overload, and short circuit. It also features battery temperature compensation, enhancing overall operational safety.
- Use appropriate circuit breakers or fuses for all connections to prevent damage from overcurrent.
3. คุณสมบัติของผลิตภัณฑ์
- เทคโนโลยี MPPT ขั้นสูง: The 60A MPPT solar charge controller features automatic battery voltage detection for 12V, 24V, 36V, and 48V systems. It utilizes advanced Maximum Power Point Tracking (MPPT) technology, ensuring a tracking efficiency of no less than 99.5% and a maximum conversion efficiency of up to 97%.
- ความเข้ากันได้ของแบตเตอรี่สากล: Supports various battery types for charging, including sealed, gel, flooded, LiFePO4, and Li(NiCoMn)O2 cells. User-defined battery parameters are available for custom battery types.
- การคุ้มครองที่ครอบคลุม: Equipped with electronic protections against overcharge, over-discharge, overload, and short circuit. Includes battery temperature compensation for enhanced safety and battery longevity.
- จอแสดงผล LCD มัลติฟังก์ชั่น: Provides real-time system information, including solar panel voltage/power, charging current, battery voltagและสถานะการโหลด
- การระบายความร้อนที่มีประสิทธิภาพ: Features forced air cooling with an aluminum alloy construction for effective heat dissipation, maintaining optimal performance even under high temperatures.
- Dual PV and Battery Connection: Designed for straightforward connection of both photovoltaic arrays and battery banks.
- Multiple Load Working Modes: Offers various load control options, including Load OFF, Load always ON, and Time Control.
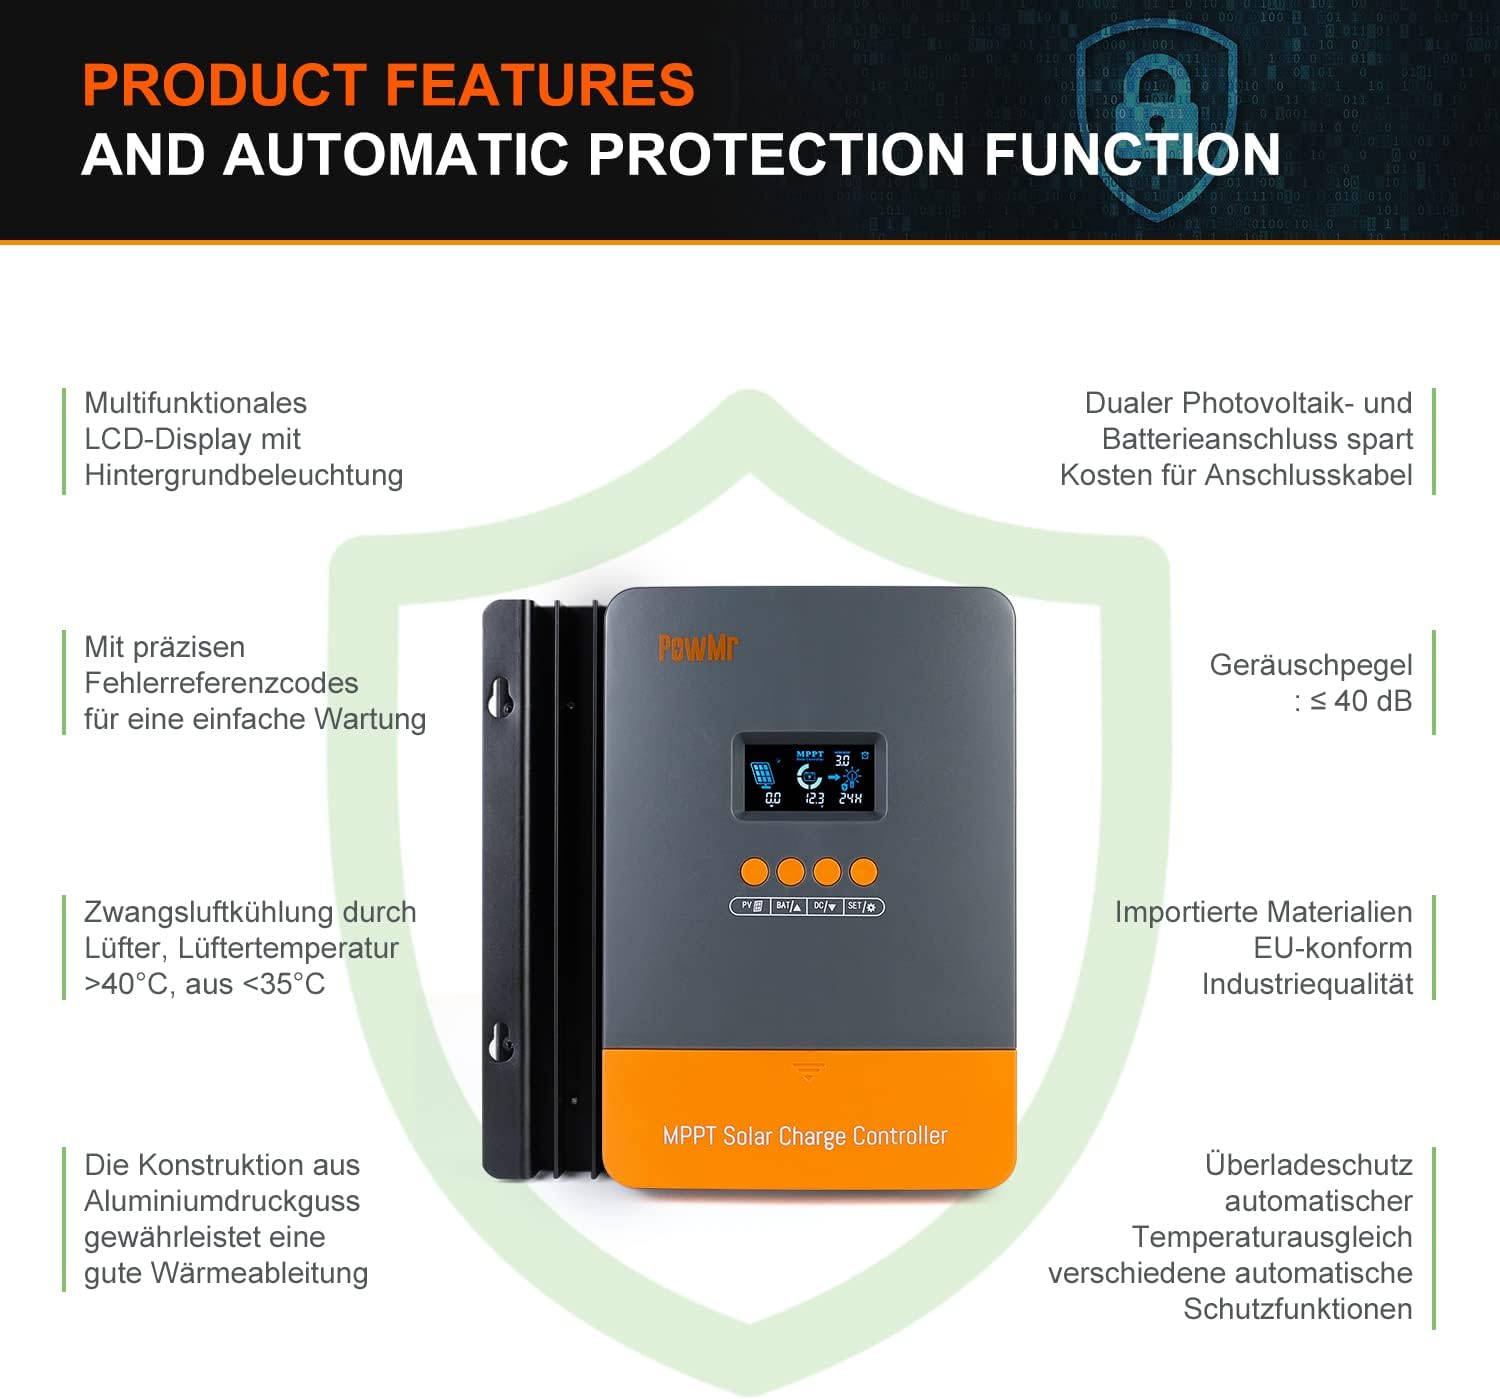
Image: Product features and automatic protection functions. Highlights include a multifunctional LCD display, dual PV and battery connection, precise error codes, forced air cooling, aluminum alloy construction for heat dissipation, and electronic protections.
4. สินค้าหมดview

Image: PowMr MPPT 60A Solar Charge Controller dimensions (165mm x 230mm x 72mm) and its LCD display interface. The display shows solar panel voltage/power, charging current, battery voltage, and load information. Key buttons for PV, Battery, DC Load, and Settings are also visible.
The controller features an intuitive LCD display and control buttons for easy monitoring and configuration. The display provides real-time data on solar input, battery status, and load output.
- ไอคอนแสดงกลางวันหรือกลางคืน
- Battery icon and SOC (State of Charge)
- โหมดการทำงาน
- State and Warning indication
- แผงโซลาร์เซลล์ฉบับtage/power/current
- Charging power/charging current/battery voltage
- Load working Mode / Load power / Load current / Load voltage
5. การติดตั้งและการตั้งค่า
5.1 การติดตั้งคอนโทรลเลอร์
- เลือกสถานที่แห้ง มีอากาศถ่ายเทสะดวก ป้องกันจากแสงแดดโดยตรง อุณหภูมิสูง และน้ำ
- Ensure there is sufficient airflow around the controller for proper cooling.
- Mount the controller vertically on a wall or suitable surface using appropriate fasteners.
5.2 การเชื่อมต่อสายไฟ
สำคัญ: ควรต่อแบตเตอรี่ก่อนเสมอ จากนั้นจึงต่อแผงโซลาร์เซลล์ และสุดท้ายจึงต่ออุปกรณ์ไฟฟ้าที่ต้องการใช้งาน และควรถอดออกในลำดับย้อนกลับ
- เชื่อมต่อแบตเตอรี่: Connect the positive and negative terminals of your battery bank to the corresponding battery terminals on the controller. Ensure correct polarity. The controller will automatically detect the battery voltage (12V/24V/36V/48V)
- เชื่อมต่อแผงโซล่าเซลล์: Connect the positive and negative terminals of your solar panel array to the corresponding PV input terminals on the controller. Ensure correct polarity. The maximum open circuit voltage (Voc) from the PV array should not exceed 160V.
- เชื่อมต่อโหลด DC (ไม่จำเป็น): If using a DC load directly from the controller, connect its positive and negative terminals to the load terminals on the controller.

Image: Diagram illustrating recommended wiring configurations for 12V, 24V, 36V, and 48V battery systems, including corresponding input solar power and voltage ranges. Also shows the three load working modes (Load OFF, Load always ON, Time control).
5.3 การเลือกประเภทแบตเตอรี่
The controller supports various battery types. You can select the appropriate type through the controller's settings menu. For lithium batteries (LiFePO4, Li(NiCoMn)O2), it is essential to set the specific start and end charging voltages according to the battery manufacturer's specifications. Refer to the detailed instructions in the user manual for proper configuration.

Image: Illustration detailing the supported battery types (Sealed, GEL, Flooded, AGM, Lithium, User Custom Battery) and a graph depicting the four-stage battery charging process: Bulk Charge, Constant Charging (Boost/Equalize), and Float Charge.
6. คู่มือการใช้งาน
จอแสดงผล LCD 6.1 และปุ่มต่างๆ
The LCD display provides real-time system status. Use the buttons (PV, BAT, DC, SET) to navigate through menus and adjust parameters. Refer to the detailed manual for specific button functions and menu navigation.
6.2 การชาร์จเอสtages
ตัวควบคุมใช้มัลติสtagอัลกอริทึมการชาร์จเพื่อเพิ่มประสิทธิภาพและอายุการใช้งานของแบตเตอรี่:
- การเรียกเก็บเงินจำนวนมาก: ชาร์จแบตเตอรี่ด้วยกระแสไฟสูงสุดจนกระทั่งถึงระดับ voltage rises to the absorption level.
- Constant Charging (Boost/Equalize): รักษาระดับปริมาตรให้คงที่tage, allowing the current to gradually decrease. Equalization is a controlled overcharge for flooded batteries to balance cell voltagใช่
- ค่าลอย: ลดปริมาตรtage to a lower level once the battery is fully charged, maintaining it at a safe level to prevent self-discharge.
6.3 การโหลดโหมดการทำงาน
The DC load output can be configured with different working modes:
- Load OFF: The load output is always off.
- Load Always ON: The load output is continuously on.
- การควบคุมเวลา: The load output operates for a specified duration after sunset.
7. การบำรุงรักษา
การบำรุงรักษาอย่างสม่ำเสมอจะช่วยให้ตัวควบคุมการชาร์จพลังงานแสงอาทิตย์ของคุณทำงานได้อย่างมีประสิทธิภาพสูงสุดและมีอายุการใช้งานยาวนาน:
- ตรวจสอบการเชื่อมต่อสายไฟทั้งหมดเป็นระยะๆ เพื่อดูความแน่นหนาและการกัดกร่อน
- Clean the controller's exterior with a dry cloth. Do not use liquids or solvents.
- ตรวจสอบให้แน่ใจว่าช่องระบายอากาศปราศจากฝุ่นและเศษสิ่งสกปรก เพื่อให้ความร้อนระบายออกได้อย่างเหมาะสม
- คอยสังเกตหน้าจอ LCD เพื่อดูรหัสข้อผิดพลาดหรือค่าที่ผิดปกติใดๆ
8 การแก้ไขปัญหา
If you encounter issues, refer to the following common problems and solutions. For more complex issues, contact customer support.
| ปัญหา | สาเหตุที่เป็นไปได้ | สารละลาย |
|---|---|---|
| ไม่มีหน้าจอแสดงผล/ไม่มีไฟเลี้ยง | แบตเตอรี่ไม่ได้เชื่อมต่อหรือระดับเสียงต่ำtagเช่น ขั้วกลับด้าน | ตรวจสอบการเชื่อมต่อแบตเตอรี่และปริมาตรtage. ตรวจสอบให้แน่ใจว่าขั้วถูกต้อง |
| แบตเตอรี่ไม่ชาร์จ | Solar panel not connected; low solar input; PV reversed polarity; battery type misconfigured. | Check solar panel connections and polarity. Verify sufficient sunlight. Confirm correct battery type settings. |
| โหลดไม่ทำงาน | Load mode set to OFF; overload; short circuit; low battery voltage. | Check load mode settings. Reduce load. Inspect for short circuits. Charge battery. |
| แสดงรหัสข้อผิดพลาด | ความผิดพลาดของระบบเฉพาะ | โปรดดูคู่มือผู้ใช้ฉบับเต็มสำหรับรายชื่อรหัสข้อผิดพลาดและวิธีแก้ไขที่เกี่ยวข้อง |
9. ข้อมูลจำเพาะ
| พารามิเตอร์ | ค่า |
|---|---|
| หมายเลขรุ่น | โพว์-เอ็ม60-โปร |
| ยี่ห้อ | พาวมิสเตอร์ |
| กระแสไฟชาร์จที่กำหนด | 60เอ |
| เล่มระบบtage | 12V/24V/36V/48V Auto-Identify |
| แม็กซ์ PV อินพุต Voltagอี (Voc) | กระแสตรง 160 โวลต์ |
| Max. Solar Panel Power (for 48V system) | 2880W (12V: 720W, 24V: 1440W, 36V: 2160W) |
| ประสิทธิภาพการติดตาม | ≥99.5% |
| ประสิทธิภาพการแปลง | สูงสุดถึง 97% |
| ประเภทแบตเตอรี่ที่รองรับ | Sealed, Gel, Flooded, LiFePO4, Li(NiCoMn)O2, User-defined |
| ประเภทจอภาพ | จอ LCD พร้อมไฟแบ็คไลท์ |
| ขนาดสินค้า (กว้าง x ยาว x สูง) | 16.5 ซม. x 7.1 ซม. x 23.1 ซม. |
| น้ำหนักผลิตภัณฑ์ | 1.3 กก. |
| อุณหภูมิในการทำงาน | -20°C to +50°C (Max. 60°C ambient) |

Image: Universal compatibility of the PowMr 60A MPPT controller compared to other controllers. It highlights higher maximum input solar power and voltage for 12V, 24V, 36V, and 48V systems, supporting SLA, SLD, GEL, AGM, and LiFePO4 battery types.
10. การรับประกันและการสนับสนุน
For warranty information, technical support, or any questions regarding your PowMr MPPT 60A Solar Charge Controller, please contact PowMr customer service. Refer to the product packaging or the official PowMr webเว็บไซต์สำหรับรายละเอียดการติดต่อ