
Hayve MS3
Hayve MS3 Digital Microscope User Manual
รุ่น : MS3
1. บทนำ
Thank you for choosing the Hayve MS3 Digital Microscope. This advanced instrument is designed for detailed observation and analysis, featuring a 9-inch LCD display, 16MP camera, and up to 1500X magnification. It is ideal for various applications including coin inspection, micro soldering, and general scientific observation. This manual provides comprehensive instructions for setup, operation, maintenance, and troubleshooting to ensure optimal performance and longevity of your device.
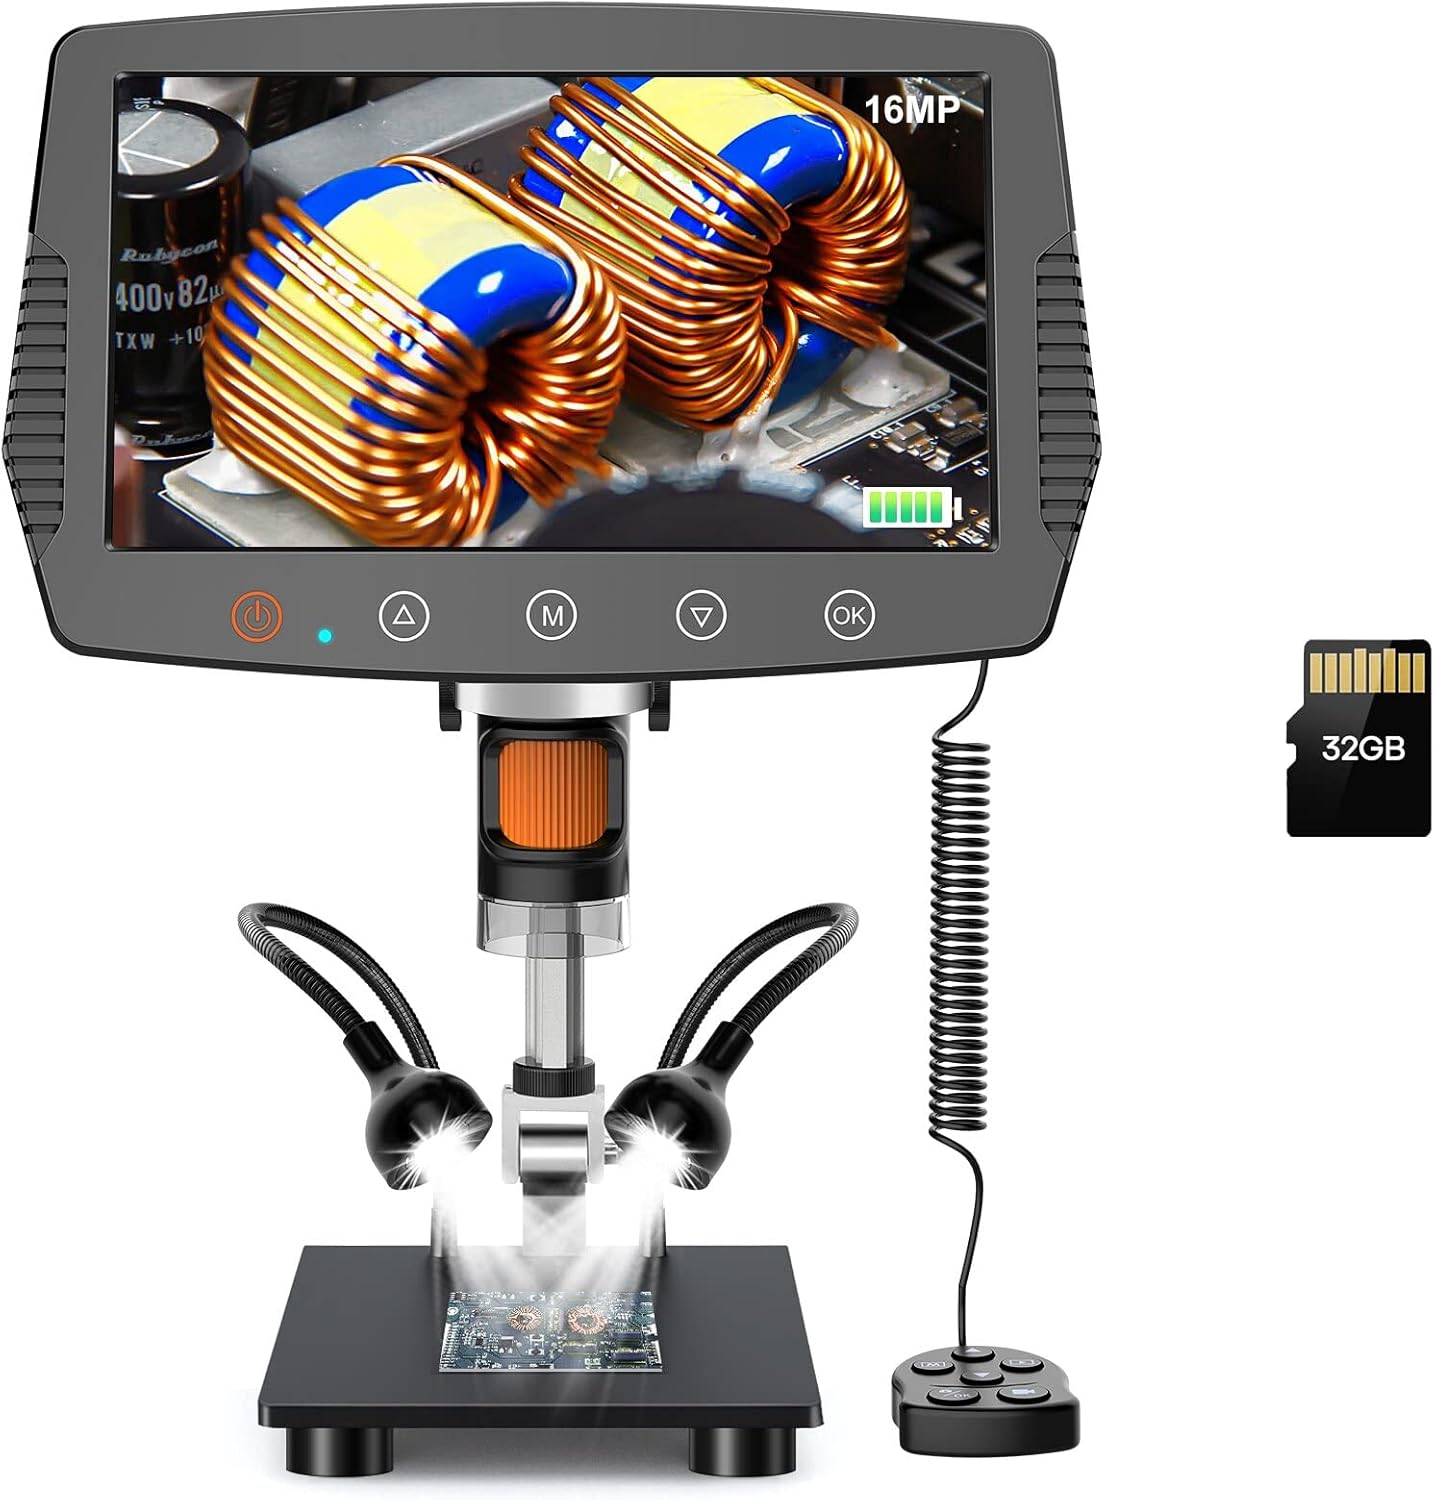
Figure 1: Hayve MS3 Digital Microscope Overview
2. เนื้อหาบรรจุภัณฑ์
โปรดตรวจสอบว่ารายการทั้งหมดที่ระบุไว้ด้านล่างมีอยู่ในแพ็คเกจของคุณหรือไม่:
- Hayve MS3 Digital Microscope Unit (with 9-inch LCD screen)
- Adjustable Stand (8.5-inch length)
- รีโมทคอนโทรลแบบมีสาย
- การ์ด MicroSD ขนาด 32GB (ติดตั้งมาแล้วหรือซื้อแยกต่างหาก)
- USB Cable (for power and data transfer)
- อะแดปเตอร์แปลงไฟ
- คู่มือการใช้งาน (เอกสารนี้)
- Calibration Ruler (if applicable)
3. คุณสมบัติของผลิตภัณฑ์
- 9-inch Large LCD Display: Provides a clear and expansive view, 29% larger than previous models, with 90° rotation capability for comfortable viewการไอเอ็นจี
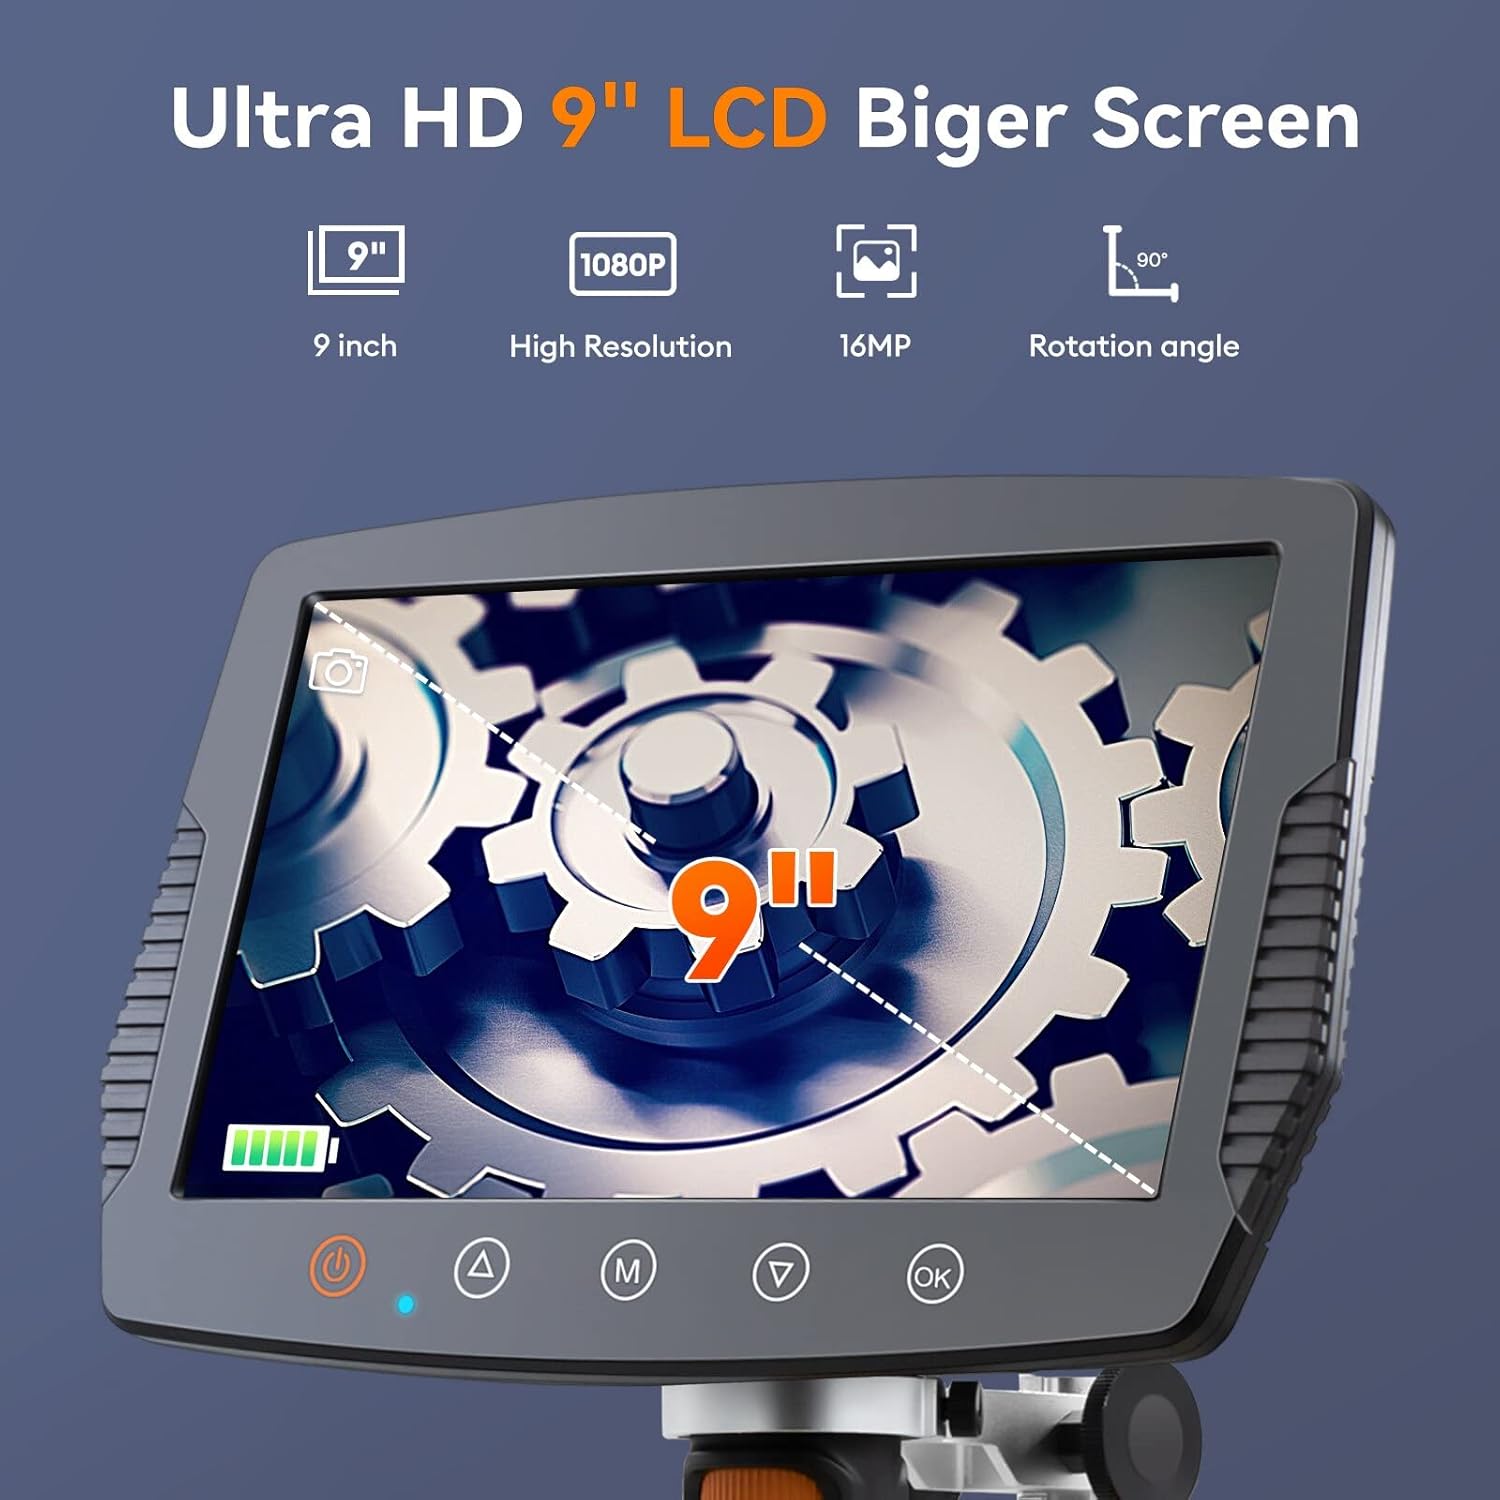
Figure 2: Large LCD Display Features
- Extended Working Distance: The 8.5-inch stand allows for a maximum distance of 6.3 inches between the lens and base, enabling observation of entire coins (up to 30mm diameter field of view).

Figure 3: Extended Stand for Wider View
- การถ่ายภาพความละเอียดสูง: Equipped with a true 16MP HD camera for capturing optimized vivid images and fluent 1080P videos.

Figure 4: 16MP HD Camera System
- ไฟ LED ปรับระดับได้: Features 8 main LEDs and 2 flexible side lights to provide 100% exceptional brightness and eliminate shadows, ensuring clear observation from various angles.

Figure 5: Advanced Lighting System
- ช่วงกำลังขยายกว้าง: Offers 2X to 1500X magnification for versatile observation needs.
- รีโมทคอนโทรลแบบมีสาย: Allows for convenient operation without disturbing the microscope.
- 32GB Storage Card: Included for saving images and videos directly on the device.
- ความเข้ากันได้ของพีซี: Connects to Windows and Mac OS for larger screen viewing and data management.

Figure 6: PC Connectivity and Functions
- Practical Measuring Tools: Software upgrade includes image effects (Flip horz, Flip vert, Gray, Binary, Invert, Emboss) and accurate calibration tools for data acquisition.
4. การติดตั้งและการประกอบ
Follow these steps to assemble your Hayve MS3 Digital Microscope:
- Attach the Bracket to the Base: Rotate the microscope bracket onto the base until securely fastened.
- วางตำแหน่งขาตั้ง: Rotate the stand to be perpendicular to the base and tighten the black button on the bracket to secure its position.
- Mount the Screen Unit: Carefully place the main screen unit onto the top of the stand. Ensure it clicks into place or is securely fastened. Tighten the black button on the screen unit's attachment point to prevent movement.
- เชื่อมต่อรีโมทคอนโทรล: Plug the wired remote control into the designated port on the side of the screen unit.
- เปิดเครื่อง: Connect the power adapter to the microscope and a power outlet. Press the power button to turn on the device.
Video 1: How to Install Hayve MS3 Digital Microscope. This video demonstrates the step-by-step assembly process of the microscope, including attaching the stand, mounting the screen, and connecting the remote control.
5. คู่มือการใช้งาน
5.1 การทำงานพื้นฐาน
- เปิด/ปิดเครื่อง: Press and hold the power button on the screen unit to turn the microscope on or off.
- การปรับกำลังขยาย: Rotate the focus wheel on the microscope lens to adjust the magnification and bring the object into clear focus.
- การปรับแสงสว่าง: Use the brightness adjustment switch or controls on the remote to modify the intensity of the 8 main LEDs and 2 side lights. Position the flexible side lights for optimal illumination.
- การหมุนหน้าจอ: The 9-inch LCD screen can be rotated up to 90° for ergonomic viewมุมการเอียง
5.2 การบันทึกภาพนิ่งและวิดีโอ
- โหมดภาพถ่าย: Press the 'M' button (Mode) to switch to photo mode. Press the 'OK' button or the photo button on the remote to capture an image.
- โหมดวิดีโอ: Press the 'M' button (Mode) again to switch to video recording mode. Press the 'OK' button or the video button on the remote to start/stop recording.
- พื้นที่จัดเก็บ: Images and videos are automatically saved to the inserted 32GB MicroSD card.
5.3 การเชื่อมต่อพีซี
To connect your microscope to a Windows or Mac OS computer:
- ตรวจสอบให้แน่ใจว่ากล้องจุลทรรศน์เปิดใช้งานอยู่
- เชื่อมต่อกล้องจุลทรรศน์กับคอมพิวเตอร์ของคุณโดยใช้สาย USB ที่ให้มา
- ควรพิจารณาว่ากล้องจุลทรรศน์เป็น webcam or mass storage device. You may need to select the appropriate mode on the microscope's screen if prompted.
- Use compatible software on your computer (e.g., default camera application, third-party microscope software) to view the live feed, capture images, or access stored files.
6. การบำรุงรักษา
- การทำความสะอาดเลนส์และหน้าจอ: Use a soft, lint-free cloth specifically designed for optical surfaces to clean the lens and LCD screen. Do not use abrasive cleaners or solvents.
- การทำความสะอาดทั่วไป: Wipe the body of the microscope with a dry or slightly damp soft cloth. Avoid getting moisture into any openings.
- พื้นที่จัดเก็บ: เก็บกล้องจุลทรรศน์ไว้ในที่แห้ง ปราศจากฝุ่น และหลีกเลี่ยงแสงแดดโดยตรงและอุณหภูมิที่สูงหรือต่ำเกินไป
- การดูแลแบตเตอรี่ If the microscope has an internal rechargeable battery, ensure it is charged regularly to maintain battery health, even if not in frequent use.
7 การแก้ไขปัญหา
| ปัญหา | สาเหตุที่เป็นไปได้ | สารละลาย |
|---|---|---|
| กล้องจุลทรรศน์ไม่เปิดใช้งาน | ปัญหาแบตเตอรี่อ่อนหรือการเชื่อมต่อไฟไม่เสถียร | Ensure the power adapter is securely connected and the unit is fully charged. |
| ภาพเบลอหรือไม่โฟกัส | Incorrect focus adjustment or object too far/close. | Rotate the focus wheel to adjust. Ensure the object is within the optimal working distance. |
| หน้าจอมืดเกินไปหรือสว่างเกินไป | Lighting not adjusted correctly. | Adjust the brightness using the controls on the unit or remote. Reposition side lights. |
| ไม่สามารถเชื่อมต่อกับพีซีได้ | การเชื่อมต่อ USB ไม่ถูกต้อง หรือมีปัญหาเกี่ยวกับไดรเวอร์ | Ensure USB cable is properly connected. Try a different USB port. Check if the microscope is in PC mode. Install necessary drivers if prompted by your OS. |
| ไม่สามารถบันทึกภาพ/วิดีโอได้ | MicroSD card full, not inserted, or corrupted. | Check if the 32GB MicroSD card is properly inserted. Delete old files or format the card (backup important data first). Replace the card if corrupted. |
8. ข้อมูลจำเพาะ
| คุณสมบัติ | รายละเอียด |
|---|---|
| หมายเลขรุ่น | MS3 |
| ขนาดจอแสดงผล | จอ LCD ขนาด 9 นิ้ว |
| ความละเอียดของกล้อง | 16 ล้านพิกเซล |
| ความละเอียดวิดีโอ | 1080พ |
| ช่วงการขยาย | 2X ถึง 1500X |
| ความยาวขาตั้ง | 8.5 inches (max working distance 6.3 inches) |
| ทุ่งแห่ง View | เส้นผ่านศูนย์กลางสูงสุด 30 มม. |
| การส่องสว่าง | 8 main LEDs + 2 flexible side lights |
| พื้นที่จัดเก็บ | การ์ด MicroSD ขนาด 32GB (มีให้ในชุด) |
| ความเข้ากันได้ของพีซี | วินโดวส์, แมคโอเอส |
| แหล่งพลังงาน | Corded Electric, Internal Battery (Lithium Polymer) |
| น้ำหนักสินค้า | 0.3 กรัม |
| วัสดุ | แก้วและโลหะ |
9. การรับประกันและการสนับสนุน
Hayve products are manufactured to high-quality standards. For warranty information, technical support, or service inquiries, please refer to the contact details provided with your purchase documentation or visit the official Hayve webไซต์ โปรดเก็บหลักฐานการซื้อไว้เพื่อใช้ในการเรียกร้องการรับประกัน
สำหรับแหล่งข้อมูลเพิ่มเติมและคำถามที่พบบ่อย คุณสามารถเยี่ยมชมได้ที่ Hayve Store on Amazon.
Ask a question about this manual
Ask about setup, troubleshooting, compatibility, parts, safety, or missing instructions. Manuals+ will review the question and use this page’s manual context to help answer it.