1. บทนำ
Welcome to the HyperX Armada 25 Gaming Monitor user manual. This document provides essential information for setting up, operating, maintaining, and troubleshooting your new monitor. The HyperX Armada 25 is designed for competitive gaming, featuring a 24.5-inch Full HD (1920x1080) IPS panel, a 240Hz refresh rate, and a 1ms response time, ensuring smooth and responsive visuals. It also includes NVIDIA G-SYNC compatibility to eliminate screen tearing and minimize input latency. A desk mount is included for convenient setup and to maximize desk space.
คุณสมบัติหลัก:
- แพ็กเกจรวมทุกอย่าง: Includes an ergonomic arm and desk mount for easy setup and space-saving.
- อัตราการรีเฟรชและเวลาตอบสนองสูง: 240Hz refresh rate and 1ms response time for ultra-smooth gaming.
- Vibrant IPS Panel: 24.5-inch Full HD (1920x1080) IPS panel delivers stunning visuals with accurate colors and wide viewมุมการเอียง
- รองรับ NVIDIA G-SYNC: Eliminates screen tearing and reduces stuttering for a fluid gaming experience.

วิดีโอผลิตภัณฑ์อย่างเป็นทางการ:
2. การตั้งค่า
This section guides you through the initial setup of your HyperX Armada 25 Gaming Monitor, including assembly and connection to your computer.
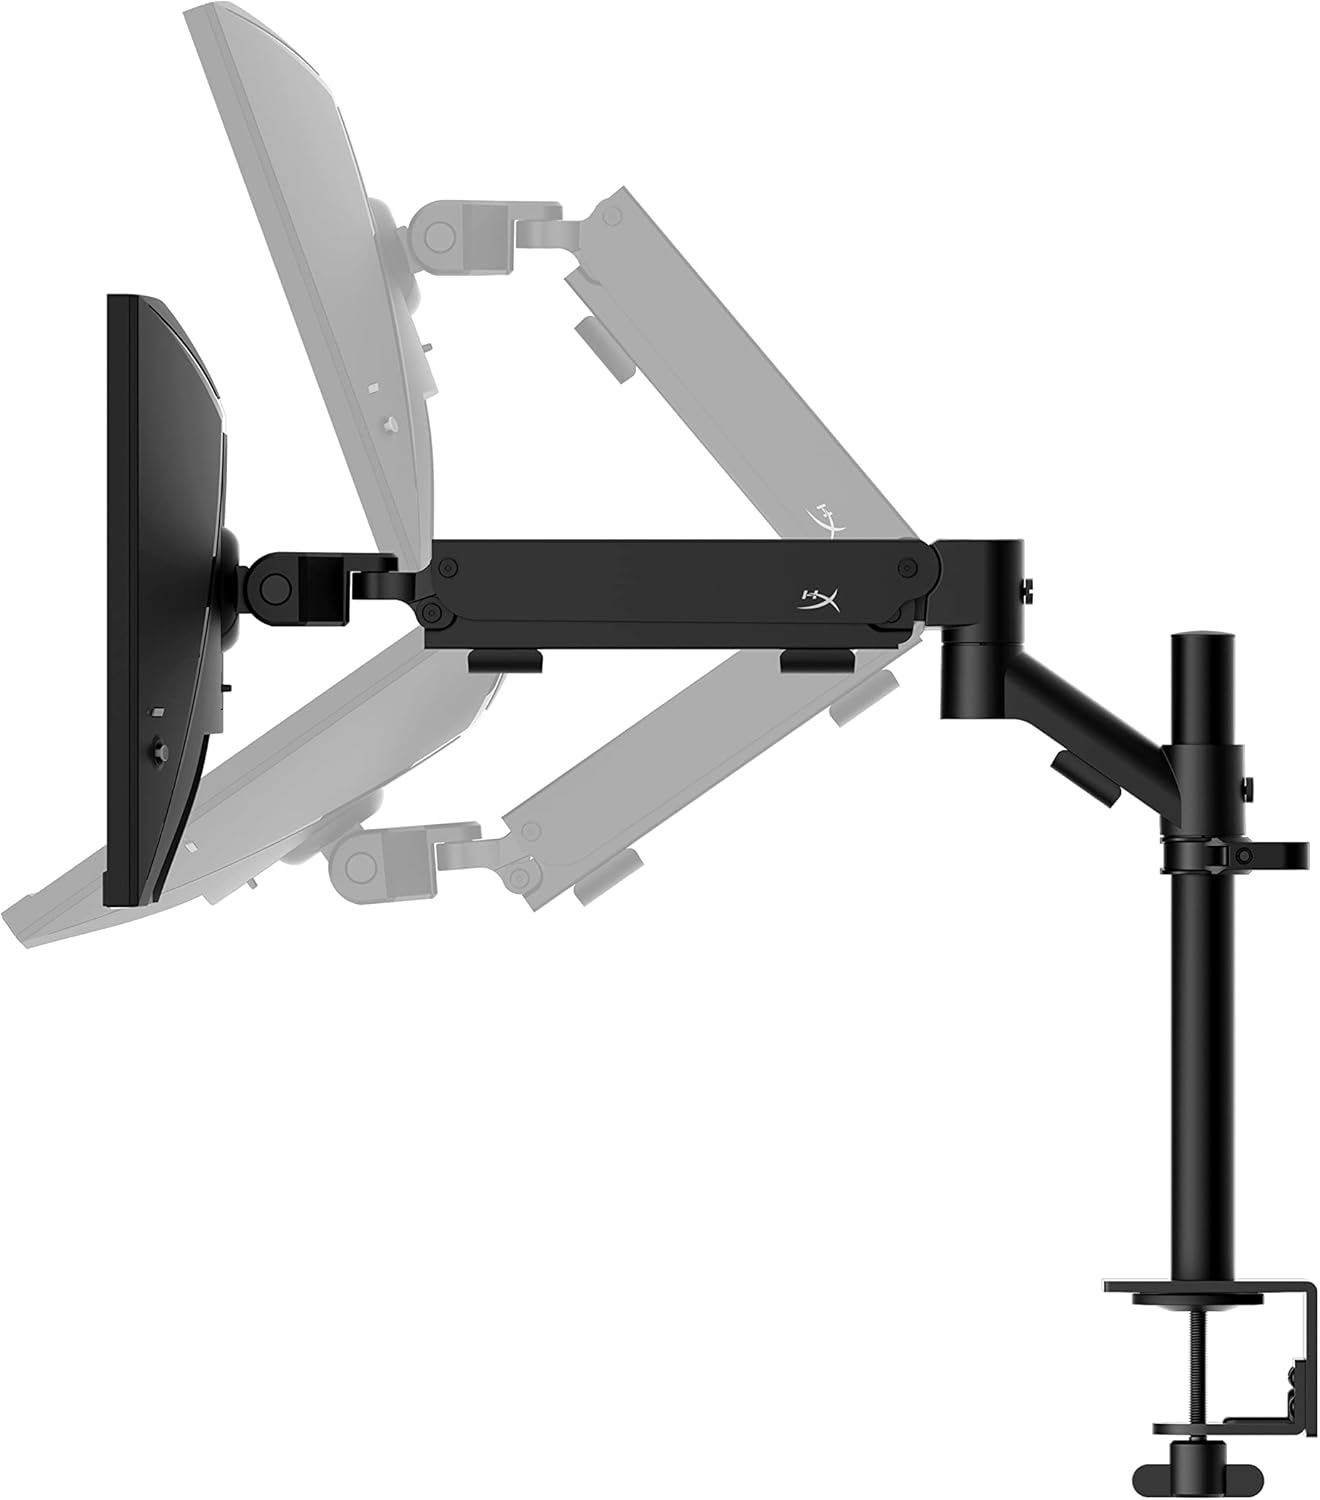
2.1. Assembling the Desk Mount
The HyperX Armada 25 comes with an integrated ergonomic desk mount. Follow the instructions provided in the separate quick start guide for detailed assembly steps. The monitor head easily snaps into the arm, allowing for quick and secure installation.

2.2. การเชื่อมต่อจอภาพ
Connect the monitor to your computer using the appropriate cables. The HyperX Armada 25 supports both HDMI and DisplayPort connections.
- เชื่อมต่อปลายด้านหนึ่งของสาย HDMI หรือ DisplayPort เข้ากับพอร์ตที่ตรงกันบนการ์ดกราฟิกของคอมพิวเตอร์ของคุณ
- Connect the other end of the cable to an available HDMI 2.0 or DisplayPort 1.4 port on the back of your monitor.
- เชื่อมต่อสายไฟเข้ากับจอภาพ แล้วจึงเสียบเข้ากับเต้ารับไฟฟ้า
- กดปุ่มเปิด/ปิดบนจอภาพเพื่อเปิด

3. การใช้งานจอภาพ
This section covers basic operation and navigation of the monitor's On-Screen Display (OSD) menu.
3.1. การนำทางบนหน้าจอ (OSD)
The OSD menu is controlled using a joystick located on the back of the monitor. This joystick allows you to power on/off the monitor and navigate through various settings.
- กดจอยสติ๊ก: เพื่อเปิดเมนู OSD หรือยืนยันการเลือก
- ขยับจอยสติ๊กขึ้น/ลง/ซ้าย/ขวา: To navigate through menu options and adjust settings.
- Hold the joystick: To power off the monitor.

3.2. การปรับตำแหน่งจอภาพ
The ergonomic desk mount allows for flexible positioning of your monitor. You can adjust the height, tilt, swivel, and pivot to find your optimal viewมุมอิง

4. การบำรุงรักษา
Proper maintenance ensures the longevity and optimal performance of your HyperX Armada 25 Gaming Monitor.
- การทำความสะอาดหน้าจอ: ใช้ผ้านุ่มไม่เป็นขุยค่อยๆ งampened with water or a specialized screen cleaner. Avoid using harsh chemicals, abrasive materials, or direct spraying onto the screen.
- การทำความสะอาด Casing: เช็ดจอภาพคasinก. ด้วยผ้าแห้งนุ่มๆ
- การระบายอากาศ : ตรวจสอบให้แน่ใจว่าช่องระบายอากาศของจอภาพไม่ได้ถูกปิดกั้นเพื่อป้องกันความร้อนสูงเกินไป
- ปิดเครื่องเมื่อไม่ใช้งาน: ปิดจอภาพเมื่อไม่ได้ใช้งานเป็นเวลานานเพื่อประหยัดพลังงานและยืดอายุการใช้งาน
5 การแก้ไขปัญหา
หากคุณพบปัญหาเกี่ยวกับจอภาพ โปรดดูขั้นตอนการแก้ไขปัญหาทั่วไปต่อไปนี้
- ไม่มีไฟฟ้า:
- ตรวจสอบว่าสายไฟเชื่อมต่ออย่างแน่นหนากับทั้งจอภาพและเต้ารับไฟฟ้า
- ตรวจสอบให้แน่ใจว่าเต้ารับไฟฟ้าทำงานถูกต้อง
- กดปุ่มเปิด/ปิดบนจอภาพ
- ไม่มีสัญญาณ:
- Verify that the HDMI or DisplayPort cable is securely connected to both the monitor and your computer.
- ตรวจสอบให้แน่ใจว่าคอมพิวเตอร์ของคุณเปิดอยู่และไม่ได้อยู่ในโหมดสลีป
- เลือกแหล่งสัญญาณเข้าที่ถูกต้องโดยใช้เมนู OSD
- Flickering Screen or Image Issues:
- Check the display cable for damage or loose connections.
- ตรวจสอบให้แน่ใจว่าไดรเวอร์การ์ดจอของคุณเป็นเวอร์ชันล่าสุด
- ปรับอัตราการรีเฟรชในการตั้งค่าการแสดงผลของคอมพิวเตอร์ของคุณ
- If G-SYNC is enabled, try disabling it temporarily to see if the issue persists.
- Buttons Not Responding (OSD Joystick):
- ตรวจสอบให้แน่ใจว่าจอภาพเปิดอยู่
- Try restarting the monitor by unplugging and replugging the power cable.
- Clean around the joystick to ensure no debris is obstructing its movement.
6. ข้อมูลจำเพาะ
Detailed technical specifications for the HyperX Armada 25 Gaming Monitor.
| คุณสมบัติ | รายละเอียด |
|---|---|
| ขนาดสินค้า | 21.94 x 25.79 x 31.12 นิ้ว; 16.98 ปอนด์ |
| หมายเลขรุ่นสินค้า | HyperX Armada 25 |
| วันที่พร้อมใช้งานครั้งแรก | วันที่ 24 สิงหาคม 2022 |
| ผู้ผลิต | บริษัท เอชพี อิงค์ |
| ASIN | B0B2C1G356 |
| ขนาดจอแสดงผล | เส้นทแยงมุม 24.5 นิ้ว |
| ปณิธาน | ฟูล HD (1920x1080) |
| อัตราการรีเฟรช | 240เฮิรตซ์ |
| ประเภทแผง | แผง IPS |
| เวลาตอบสนอง | 1มิลลิวินาที |
| ซิงค์เทคโนโลยี | รองรับ NVIDIA® G-SYNC® |
| Included Mount | Desk Mount Included |
| การเชื่อมต่อ | HDMI and Display Port |
7. การรับประกันและการสนับสนุน
For warranty information, technical support, or to access additional resources, please visit the official HyperX webเว็บไซต์หรือติดต่อฝ่ายบริการลูกค้าของพวกเขา
- ไฮเปอร์เอ็กซ์ อย่างเป็นทางการ Webเว็บไซต์: www.hyperx.com
- หน้าการสนับสนุนผลิตภัณฑ์: Refer to the support section on the HyperX webไซต์สำหรับรุ่นเฉพาะของคุณ