1. บทนำ
Thank you for choosing the DIGITEN DTC101 Temperature Controller. This device is designed to precisely regulate and maintain desired temperatures within a range of -40°C to 248°C (-40°F to 480°F). It is suitable for a wide array of applications, including greenhouses, mushroom houses, reptile breeding, animal feeding, aquariums, wine cellars, cigar storage, homebrewing, seed germination, heating mats, and fermentation. This manual provides essential information for safe and effective operation.
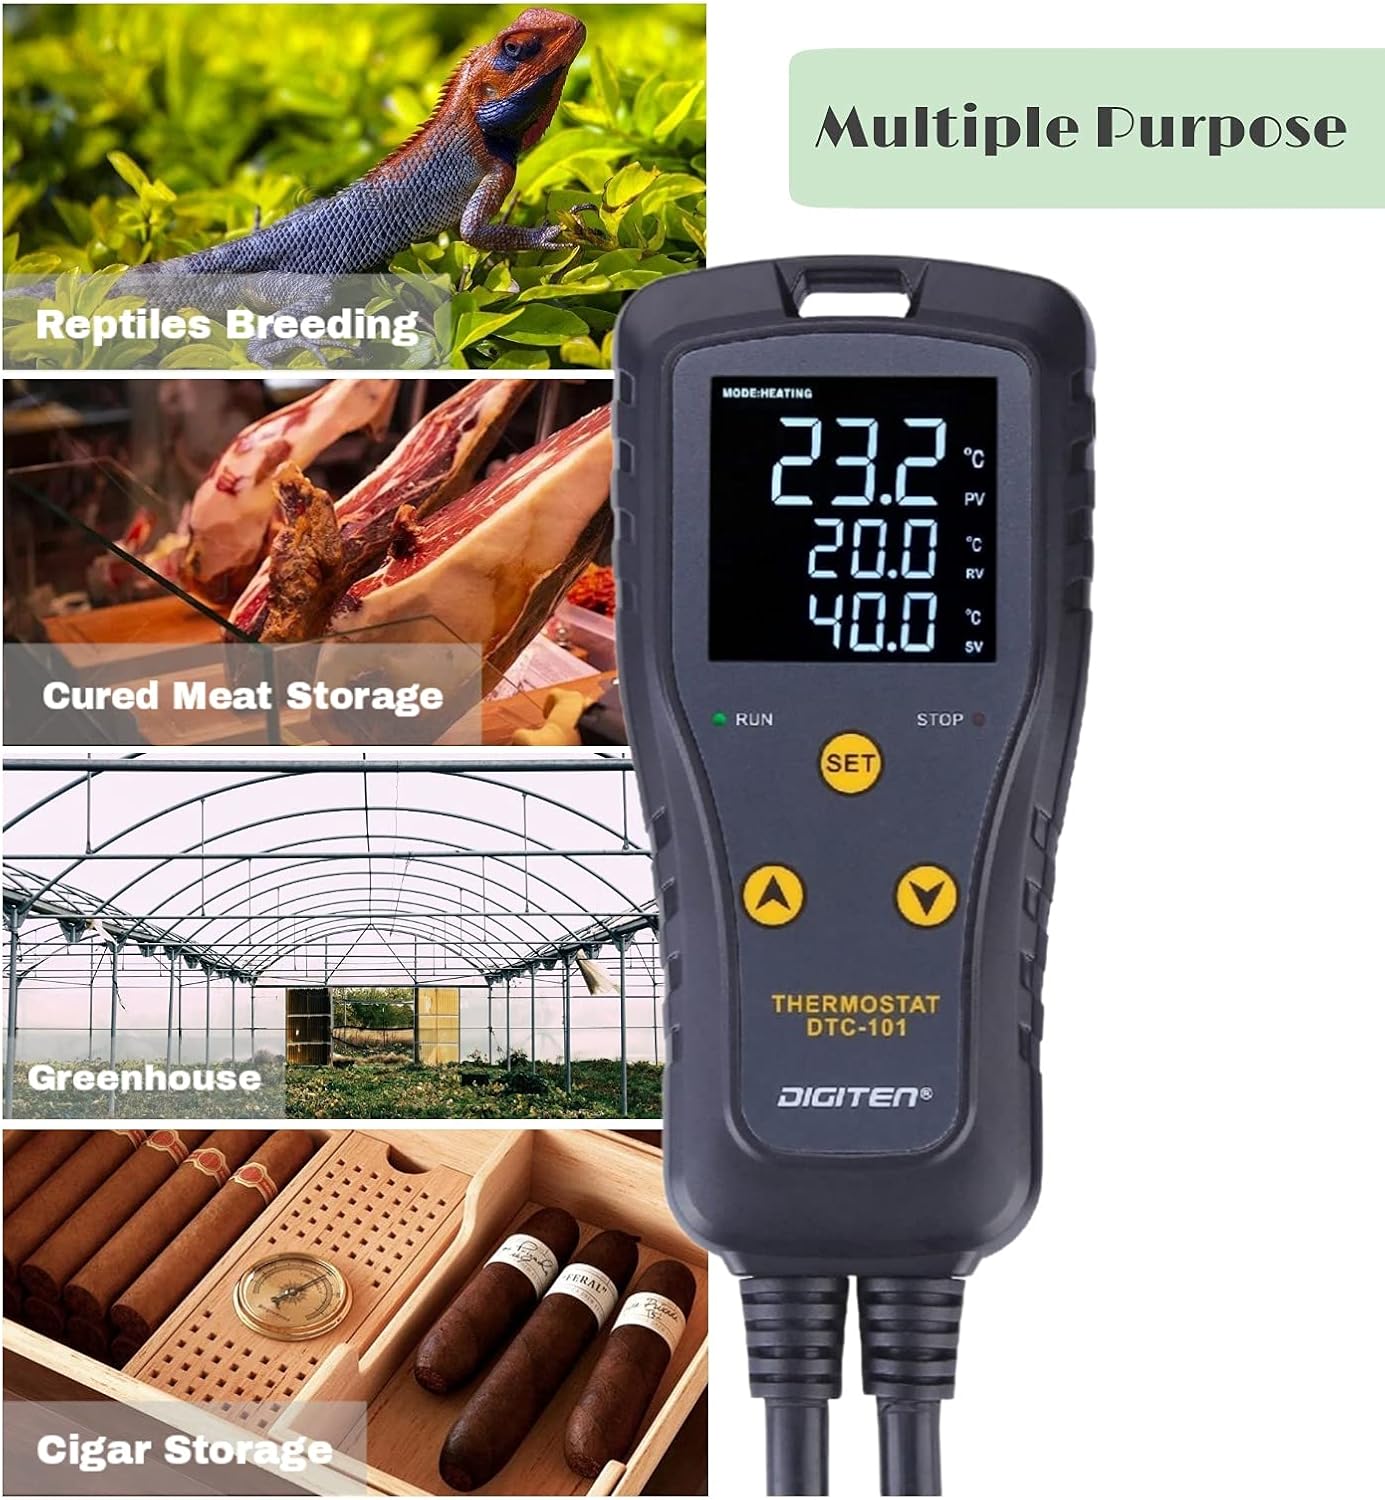
The image highlights the versatile applications of the DTC101 controller, showing its use in diverse environments such as reptile breeding, cured meat storage, greenhouses, and cigar humidors.
2. ข้อมูลด้านความปลอดภัย
- อ่านคำแนะนำทั้งหมดอย่างละเอียดก่อนใช้งาน
- ตรวจสอบให้แน่ใจว่าแหล่งจ่ายไฟตรงกับข้อกำหนดของอุปกรณ์
- Do not immerse the controller unit in water or expose it to excessive moisture. The sensor probe is waterproof, but the main unit is not.
- For long-term stability and safety, it is recommended to restrict the connected load current to 7 amps, even though the device is rated for 10 amps.
- The controller supports high and low-temperature alarms, which are crucial for protecting your equipment and environment from exceeding safe temperature ranges. Configure these alarms according to your specific application needs.
- เก็บให้พ้นจากมือเด็ก
3. สินค้าหมดview
The DIGITEN DTC101 is a plug-and-play temperature controller featuring a clear LED display and intuitive controls. It includes a main control unit and a waterproof temperature sensor probe.
3.1 ส่วนประกอบ
- Main Temperature Controller Unit
- Waterproof Temperature Sensor Probe
3.2. การแสดงผลและการควบคุม
The bright LED display provides real-time temperature readings and settings. The unit features three easy-to-use buttons: SET, UP (▲), and DOWN (▼).

ภาพนี้แสดงรายละเอียด view of the DIGITEN DTC101 display, highlighting the current temperature (PV), run temperature (RV), stop temperature (SV), and the 'RUN' and 'STOP' indicators for heating/cooling modes.
- PV (Current Temp): Displays the actual temperature measured by the sensor.
- RV (Run Temp): The temperature at which the connected device will activate (start heating or cooling).
- SV (Stop Temp): The temperature at which the connected device will deactivate (stop heating or cooling).
- ตัวบ่งชี้การวิ่ง: Illuminates when the connected device is active.
- STOP Indicator: Illuminates when the connected device is inactive.
The controller also features a practical 'Hold Design' with an eyelet tab, allowing it to be conveniently hung on a wall or hook, keeping cords tidy.

The image illustrates the 'Hold Design' of the DTC101 controller, featuring an eyelet tab at the top for convenient hanging and installation.
4. การตั้งค่า
- เชื่อมต่อเซ็นเซอร์: Insert the temperature sensor probe into the designated port on the controller. Ensure it is securely connected.
- ตำแหน่งเซ็นเซอร์: Place the sensor probe in the environment where temperature control is required (e.g., inside an aquarium, greenhouse, or terrarium).
- Plug in Heating/Cooling Device: Connect your heating or cooling equipment (e.g., heating mat, fan, heater) to the output socket of the DTC101 controller.
- เปิดเครื่อง: Plug the DTC101 controller into a standard power outlet. The display will illuminate.
- การติดตั้ง (ทางเลือก): Use the integrated eyelet tab to hang the controller on a wall or hook for optimal placement and cable management.

This image demonstrates a typical setup where the DTC101 temperature controller is connected to a power outlet and a heating/cooling device (represented by a plant growing light) to maintain a desired temperature.

The image shows the DTC101 temperature controller positioned next to an aquarium, illustrating its application in maintaining stable water temperatures for aquatic environments.
5. คู่มือการใช้งาน
The DTC101 is designed for user-friendly operation with its three-button interface.
5.1. Setting Temperature Units (°C/°F)
การสลับระหว่างเซลเซียสและฟาเรนไฮต์:
- กดปุ่ม ขึ้น (▲) และ ลง (▼) buttons simultaneously. The display will toggle between °C and °F.
5.2. Setting Run Temperature (RV) and Stop Temperature (SV)
- กดปุ่ม ชุด button once. The RV (Run Temp) value will flash.
- ใช้ ขึ้น (▲) or ลง (▼) buttons to adjust the desired Run Temperature.
- กดปุ่ม ชุด button again. The SV (Stop Temp) value will flash.
- ใช้ ขึ้น (▲) or ลง (▼) ปุ่มสำหรับปรับอุณหภูมิหยุดที่ต้องการ
- กดปุ่ม ชุด button a third time to confirm and exit the setting mode. The display will return to showing the current temperature.
5.3. Selecting Heating or Cooling Mode
The controller automatically determines the operating mode based on your RV and SV settings:
- โหมดการให้ความร้อน: If RV < SV, the controller will operate in heating mode. The connected device will turn on when the temperature drops to RV and turn off when it reaches SV.
- โหมดทำความเย็น: If RV > SV, the controller will operate in cooling mode. The connected device will turn on when the temperature rises to RV and turn off when it drops to SV.
5.4. Compressor Delay Setting
The compressor delay function protects refrigeration equipment by preventing rapid cycling. This setting is typically adjusted within the advanced menu (refer to specific instructions for accessing advanced settings if needed, as this is not detailed in the basic product information).
5.5. LCD Backlight Control
To turn off the LCD backlight:
- กดปุ่ม ขึ้น (▲) และ ชุด buttons simultaneously for approximately 3 seconds until the light bulb symbol disappears. The LCD backlight will shut off automatically after 30 seconds of inactivity.

This visual guide explains how to convert temperature units (°C/°F), set the heating or cooling mode based on Run Value (RV) and Stop Value (SV), and activate/deactivate the LCD backlight on the DTC101 controller.
6. การบำรุงรักษา
- การทำความสะอาด: เช็ดทำความสะอาดชุดควบคุมด้วยผ้าแห้งนุ่มๆ ห้ามใช้สารทำความสะอาดที่มีฤทธิ์กัดกร่อนหรือตัวทำละลาย
- การดูแลเซ็นเซอร์: Ensure the sensor probe is clean and free from debris that could affect its accuracy. Avoid bending or damaging the sensor cable.
- พื้นที่จัดเก็บ: เมื่อไม่ใช้งาน ควรเก็บตัวควบคุมไว้ในที่แห้งและเย็น หลีกเลี่ยงแสงแดดโดยตรงและอุณหภูมิที่สูงหรือต่ำเกินไป
7 การแก้ไขปัญหา
7.1. Device Not Powering On / No Output
- ตรวจสอบการเชื่อมต่อพลังงาน: ตรวจสอบให้แน่ใจว่าได้เสียบตัวควบคุมเข้ากับเต้ารับไฟฟ้าที่ใช้งานได้แน่นหนาแล้ว
- ตรวจสอบอุปกรณ์ที่เชื่อมต่อ: Verify that the heating/cooling device plugged into the controller's output is functional and properly connected.
- ตรวจสอบการตั้งค่า: Double-check your RV and SV settings. If RV and SV are set to the same value, or if the current temperature is within the set range, the output may not activate.
- รีเซ็ต: Unplug the unit from the power source for a few minutes, then plug it back in.
7.2. การอ่านค่าอุณหภูมิที่ไม่แม่นยำ
- ตำแหน่งเซนเซอร์: Ensure the sensor probe is correctly positioned and not exposed to direct heat sources, drafts, or extreme localized temperatures that do not represent the overall environment.
- ความเสียหายของเซ็นเซอร์: Inspect the sensor cable and probe for any visible damage. A damaged sensor may provide incorrect readings.
7.3. Alarms Triggering Unexpectedly
- Review การตั้งค่านาฬิกาปลุก: Check your high and low-temperature alarm thresholds to ensure they are set appropriately for your application.
- Environmental Fluctuations: Significant and rapid temperature changes in the environment can trigger alarms.
8. ข้อมูลจำเพาะ
| ยี่ห้อ | ดิจิทัล |
| แบบอย่าง | DTC-101UK |
| ประเภทจอภาพ | จอแอลซีดี |
| ช่วงการควบคุมอุณหภูมิ | -40°C ถึง 248°C (-40°F ถึง 480°F) |
| คะแนนปัจจุบัน | 10A (Recommended max 7A for long-term stability) |
| ส่วนประกอบที่รวมอยู่ | Temperature Controller with Sensor |
9. การรับประกันและการสนับสนุน
For warranty information, technical support, or service inquiries, please refer to the documentation included with your purchase or contact DIGITEN customer support directly through their official website or the retailer where the product was purchased. Please have your model number (DTC-101UK) and purchase date available when contacting support.