
1. บทนำ
This manual provides detailed instructions for the safe and efficient operation of your Fitnet AL-300L Aquarium Chiller. This unit is designed to maintain optimal water temperatures for various aquatic environments, including freshwater and saltwater aquariums, as well as hydroponic systems. Please read this manual thoroughly before installation and use to ensure proper function and longevity of the product.

Figure 1: Fitnet AL-300L Aquarium Chiller. This image shows the main chiller unit with its digital display and water inlet/outlet nozzles.
คุณสมบัติผลิตภัณฑ์:
- การระบายความร้อนที่มีประสิทธิภาพ: Features a high-efficiency compressor and R134a refrigerant for stable and precise temperature control.
- ช่วงอุณหภูมิ: Effectively maintains water temperature between 68°F-79°F (20°C-26°C).
- การกระจายความร้อนที่มีประสิทธิภาพ: Equipped with multiple ventilation holes and two built-in cooling fans.
- การทำงานที่มีเสียงรบกวนต่ำ: Designed with silent fans to minimize operational noise.
- การใช้งานที่หลากหลาย: Suitable for freshwater and saltwater fish tanks, and hydroponic systems.
- ชุดอุปกรณ์ครบชุด: Includes water pump, water pipe, and connectors for immediate setup.
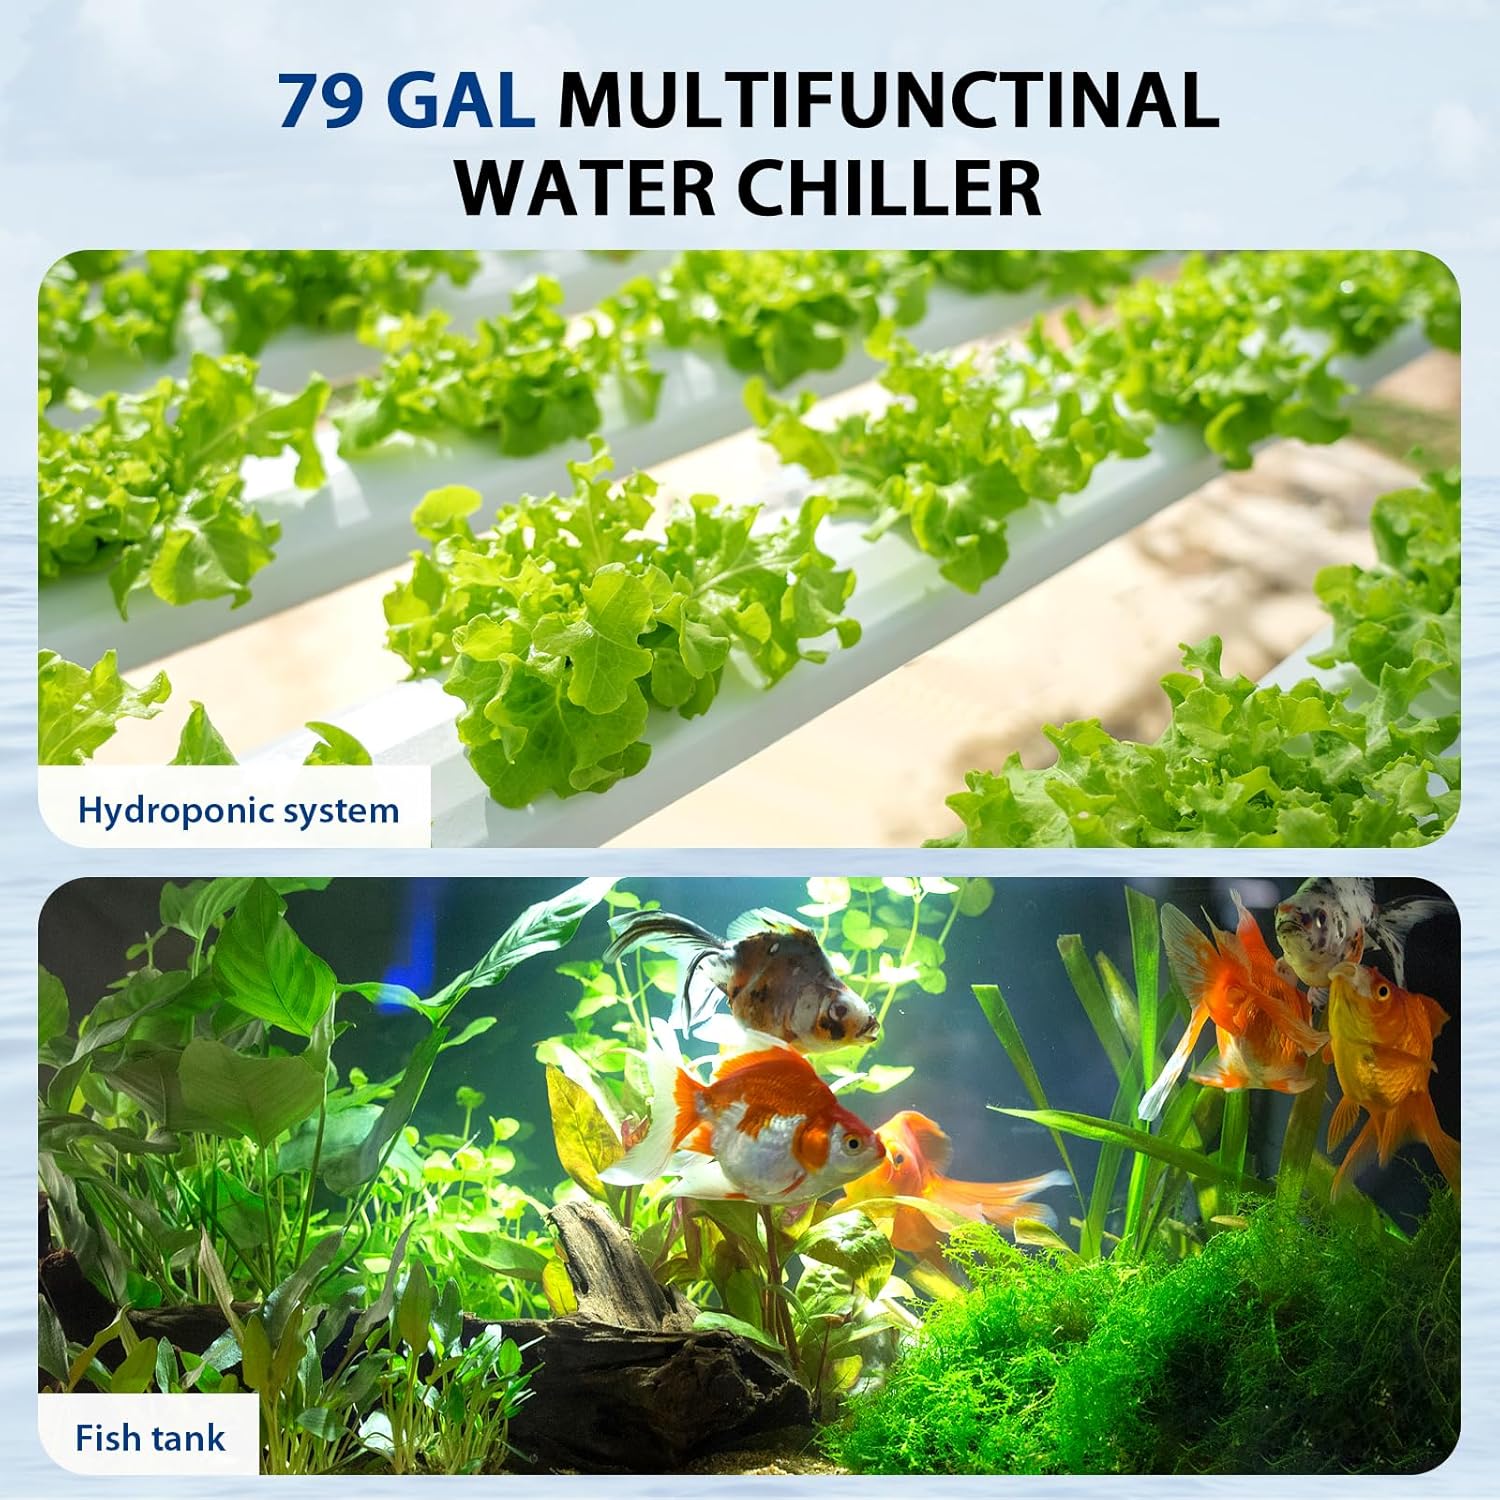
Figure 2: Versatile applications. This image illustrates the chiller's suitability for both hydroponic systems (top) and traditional fish tanks (bottom).
2. ข้อมูลด้านความปลอดภัย
โปรดปฏิบัติตามข้อควรระวังด้านความปลอดภัยต่อไปนี้ เพื่อป้องกันการบาดเจ็บหรือความเสียหายต่อผลิตภัณฑ์
- ควรตัดกระแสไฟก่อนทำการบำรุงรักษา ติดตั้ง หรือทำความสะอาดทุกครั้ง
- ตรวจสอบให้แน่ใจว่าวางเครื่องทำความเย็นไว้บนพื้นผิวที่มั่นคงและเรียบเสมอกัน
- Maintain at least 6 inches (15 cm) of clear space around the chiller for adequate heat dissipation. Blocking vents can lead to overheating and reduced performance.
- ห้ามใช้งานเครื่องทำความเย็นหากสายไฟหรือปลั๊กชำรุด
- Do not immerse the main chiller unit in water. The water pump is submersible, but the chiller unit is not.
- เครื่องใช้ไฟฟ้าตัวนี้มีไว้สำหรับใช้ภายในอาคารเท่านั้น
- เก็บให้พ้นจากมือเด็ก
- Use a Ground Fault Circuit Interrupter (GFCI) for all electrical connections to prevent electrical shock.

Figure 3: Recommended clearance for heat dissipation. This diagram illustrates the importance of maintaining at least 6 inches (15 cm) of space between the chiller and any walls or obstructions to ensure proper airflow and cooling efficiency.
3. เนื้อหาบรรจุภัณฑ์
ตรวจสอบว่ามีรายการทั้งหมดอยู่ในบรรจุภัณฑ์ก่อนดำเนินการติดตั้ง
- Fitnet AL-300L Aquarium Chiller Unit
- ปั๊มน้ำใต้น้ำ
- Water Pipe (Hose)
- Connectors and Clamps
- สายไฟ
- คู่มือการใช้งาน (เอกสารนี้)

Figure 4: Included components. This image displays the main chiller unit alongside the water pump, hoses, connectors, and clamps that come with the product.

Figure 5: Submersible water pump. This image shows the water pump, designed for submersion in fresh or saltwater, which circulates water through the chiller.
4. คำแนะนำในการตั้งค่า
Follow these steps for proper installation of your aquarium chiller.
- Positioning the Chiller: Place the chiller on a flat, stable surface near your aquarium or hydroponic system. Ensure there is at least 6 inches (15 cm) of clear space around all sides for optimal airflow and heat dissipation.
- เตรียมตัวเชื่อมต่อ: Gather the provided connectors, including the white sealing washers.
- Install Inlet/Outlet Nozzles:
- Insert a white sealing washer onto each inlet/outlet nozzle.
- Place the pipe joint into the black nut cap.
- Tighten the black nuts onto the chiller's inlet and outlet ports.
- Connect Water Pump: Attach one end of the water pipe to the outlet of the submersible water pump. Secure it with a clamp หากจำเป็น.
- Connect Chiller to System:
- Connect the other end of the water pipe from the pump to the chiller's inlet port.
- Connect a second water pipe from the chiller's outlet port back to your aquarium or hydroponic system.
- ตรวจสอบให้แน่ใจว่าการเชื่อมต่อทั้งหมดแน่นหนาและกันน้ำได้เพื่อป้องกันการรั่วไหล
- ปั๊มจุ่ม: Place the submersible water pump into your aquarium or hydroponic reservoir. Ensure it is fully submerged and positioned to draw water effectively.
- การเชื่อมต่อไฟฟ้า: Plug the chiller's power cord into a GFCI-protected electrical outlet. Plug in the water pump's power cord.
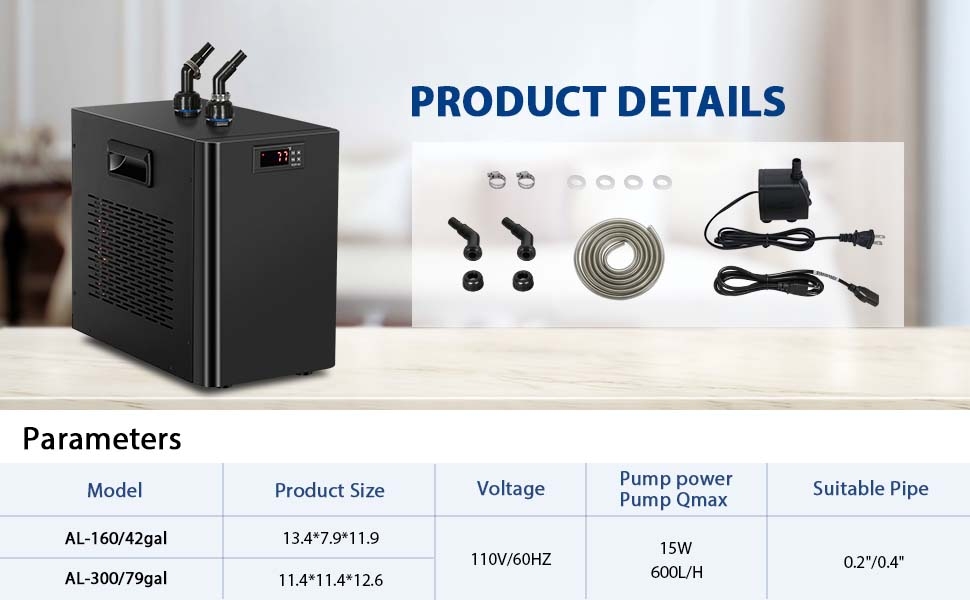
Figure 6: Chiller installation steps. This diagram illustrates the process of preparing accessories, installing sealing washers, attaching pipe joints, and tightening the black nuts for secure hose connections.

Figure 7: Chiller setup with an aquarium. This image shows the chiller unit connected to a small fish tank, illustrating the hose routing and the overall footprint of the chiller (dimensions: 12.6" H x 11.4" W x 11.4" D).
5. คู่มือการใช้งาน
The chiller features a digital control panel for temperature setting and calibration.
5.1. เปิด/ปิดเครื่อง
Locate the power switch on the back of the unit. Flip the switch to the 'ON' position to power on the chiller. The digital display will illuminate.

Figure 8: Power switch. This image shows the main power switch located on the rear panel of the chiller unit.
5.2. Temperature Setting (Assumed Target Temperature Range: 75-79°F)
The chiller will begin cooling after a 2-3 minute power-on delay. To adjust the target temperature:
- Set Shutdown Temperature: กดปุ่ม ชุด กุญแจ. ใช้ ▲ (ขึ้น) หรือ ▼ (down) arrow keys to adjust the desired shutdown temperature (e.g., 77°F). Press the ฿ กุญแจสำคัญในการบันทึก
- Set Starting Temperature (F1 Code): กดค้างไว้ ชุด กุญแจจนกระทั่ง F1 code appears. Then, press the ชุด key again. Use the ▲ or ▼ arrow keys to adjust the temperature difference (e.g., to 4°F for a working range of 4°F).

Figure 9: Temperature setting and F2 calibration. This image provides a visual guide to setting the shutdown temperature and adjusting the F1 code for the working temperature range, as well as the F2 calibration process.
5.3. F2 Calibration Setting
If the chiller's displayed temperature does not match an external thermometer, you can calibrate it:
- กดค้างไว้ ชุด กุญแจสำคัญในการแสดง F1. กดปุ่ม ▲ กุญแจสำคัญในการแสดง F2. กด ชุด อีกครั้ง.
- ใช้ ▲ or ▼ arrow keys to adjust the offset value (e.g., to 5 if the chiller reads 77°F and the actual temperature is 72°F, meaning a -5 adjustment is needed). Press ฿ เพื่อกลับไปยังการแสดงอุณหภูมิปัจจุบัน
6. การบำรุงรักษา
การบำรุงรักษาอย่างสม่ำเสมอจะช่วยให้เครื่องทำความเย็นทำงานได้อย่างมีประสิทธิภาพสูงสุดและยืดอายุการใช้งาน
- ช่องระบายอากาศสะอาด: Periodically check and clean the air intake and exhaust vents to prevent dust and debris buildup, which can impede heat dissipation. Use a soft brush or vacuum cleaner.
- ตรวจสอบท่อและการเชื่อมต่อ: Regularly check hoses and connections for any signs of leaks, kinks, or damage. Replace damaged components immediately.
- Clean Water Pump: Disconnect power to the pump and remove it from the water. Disassemble and clean the impeller and pump housing to remove any algae or debris that may affect water flow.
- คุณภาพน้ำ: Maintain good water quality in your aquarium or hydroponic system to reduce the buildup of contaminants in the chiller's internal components.
7 การแก้ไขปัญหา
If you encounter issues with your chiller, refer to the following common problems and solutions.
| ปัญหา | สาเหตุที่เป็นไปได้ | สารละลาย |
|---|---|---|
| Chiller not cooling or insufficient cooling. |
|
|
| น้ำรั่วจากจุดต่อสาย |
|
|
| Chiller making unusual noise. |
|
|
| Digital display shows incorrect temperature. |
|
|
8. ข้อมูลจำเพาะ
| คุณสมบัติ | รายละเอียด |
|---|---|
| ชื่อรุ่น | AL-300L |
| ความจุ | 79 แกลลอน / 300 ลิตร |
| ขนาด (กว้าง x ยาว x สูง) | 12.6 x 11.4 x 11.39 นิ้ว |
| สารทำความเย็น | R134a |
| ช่วงอุณหภูมิที่แนะนำ | 68°F - 79°F (20°C - 26°C) |
| วัสดุ | อลูมิเนียม |
| สี | สีดำ |
| ผู้ผลิต | ฟิตเนสเน็ต |
| Pump Power (Qmax) | 15W, 600L/H |
| เล่มที่tage | 110V/60HZ |
9. การรับประกันและการสนับสนุน
Fitnet offers a รับประกันจากผู้ผลิต 1 ปี for this 79-gallon water chiller. This warranty covers defects in materials and workmanship under normal use.
For warranty claims, technical support, or any questions regarding your Fitnet Aquarium Chiller, please contact Fitnet customer service through your original purchase platform or the official Fitnet webเว็บไซต์.
โปรดเก็บหลักฐานการซื้อไว้เพื่อใช้ยืนยันการรับประกัน