
การแนะนำ
Thank you for choosing the VETEK AF6 4K Video Camera Camcorder. This manual provides comprehensive instructions for the proper setup, operation, and maintenance of your device. Please read this manual thoroughly before using the camcorder to ensure optimal performance and longevity.
เนื้อหาแพ็คเกจ
ตรวจสอบว่ารายการทั้งหมดที่ระบุไว้ด้านล่างนี้รวมอยู่ในแพ็คเกจของคุณ:
- 1x VETEK AF6 4K Camcorder
- สาย USB 1x
- สาย HDMI 1x
- 1x Lens Hood
- 1x Fill Light (External LED Light)
- เครื่องชาร์จ USB 1x
- 1x รีโมทคอนโทรล
- 1x 32GB SD Card
- 1x Microphone Cable
- ไมโครโฟนภายนอก 1 ตัว
- 1x Reusable Camera Bag
- 2x Rechargeable Lithium Batteries
- 1x Dual External Battery Charger
- 1x Camera Instruction Manual
- 1x Microphone Instruction Manual
- 1x Handheld Stabilizer

สินค้าเกินview
Familiarize yourself with the main components of your VETEK AF6 camcorder.

คุณสมบัติหลัก:
- ความละเอียดวิดีโอ 4K: Records videos at 3840*2160.
- 48.0 MP Image Resolution: Captures still images at 7920*5940.
- 3.0-inch 270° Rotatable Touch Screen: ให้ความยืดหยุ่น viewing angles and intuitive control.
- ซูมดิจิตอล 18 เท่า: Allows for closer shots of distant subjects.
- การเชื่อมต่อ Wi-Fi: Enables remote control and file transfer via a smartphone app.
- ฟังก์ชั่นกล้อง PC: สามารถใช้เป็น webกล้องสำหรับไลฟ์สตรีมมิ่งและวิดีโอคอล
- การรองรับไมโครโฟนภายนอก: ช่วยเพิ่มคุณภาพเสียง
- External Fill Light Support: Improves illumination in low-light conditions.
- Handheld Stabilizer Compatibility: ช่วยลดการสั่นของกล้องเพื่อให้ภาพดูราบรื่นยิ่งขึ้นtage.
- Special Shooting Modes: Includes Slow Motion and Time-Lapse.
การตั้งค่า
1. การติดตั้งและการชาร์จแบตเตอรี่
- Open the battery compartment cover on the camcorder.
- Insert a rechargeable lithium battery, ensuring correct polarity.
- ปิดฝาช่องใส่แบตเตอรี่
- To charge, insert the batteries into the dual external battery charger. Connect the charger to a power source using the provided USB cable and charger. The indicator lights will show charging status.
บันทึก: Ensure batteries are fully charged before first use for optimal performance. If indicator lights flicker or do not show a stable charging status, ensure the batteries are correctly seated in the charger and the power connection is stable.
2. การติดตั้งการ์ด SD
- Locate the SD card slot on the camcorder.
- Insert the 32GB SD card (included) into the slot with the metal contacts facing the correct direction, until it clicks into place.
- To remove, gently press the SD card until it pops out.
สำคัญ: Format the SD card in the camcorder's menu before initial use to ensure compatibility and prevent data corruption.
3. การติดตั้งอุปกรณ์เสริม
- ไมโครโฟนภายนอก: Slide the external microphone onto the hot shoe mount on top of the camcorder. Connect the microphone cable to the MIC input port.
- เลนส์ฮูด: Attach the lens hood to the front of the camcorder lens by twisting it clockwise until secure. The lens hood helps reduce glare and protects the lens.
- External LED Light: Slide the external fill light onto the hot shoe mount. Ensure it is securely fastened. This light provides additional illumination.
- อุปกรณ์กันสั่นแบบถือด้วยมือ: Attach the camcorder to the handheld stabilizer using the screw mount at the bottom of the camcorder. The stabilizer helps maintain steady footage.




คำแนะนำการใช้งาน
1. เปิด/ปิดเครื่อง
Open the LCD screen to power on the camcorder. Close the LCD screen to power off. Alternatively, use the power button located on the device.
2. Basic Recording (Video/Photo)
- สลับโหมด: Use the Mode button to switch between video recording mode and photo capture mode.
- เริ่ม/หยุดการบันทึก: In video mode, press the Record button to start recording. Press it again to stop.
- ถ่ายภาพ: In photo mode, press the Photo button to capture a still image.

3. ฟังก์ชั่นซูม
Use the T (Telephoto) and W (Wide) buttons on the camcorder or the zoom controls on the remote control to adjust the 18X digital zoom.
4. การใช้งานหน้าจอสัมผัส
The 3.0-inch LCD screen is rotatable up to 270 degrees and supports touch input. Navigate menus, adjust settings, and review ฟูtage by tapping or swiping on the screen.
5. Wi-Fi Connection & App
Download the specified app (refer to the camera's manual for the app name) on your smartphone or tablet. Enable Wi-Fi on the camcorder and connect your mobile device to the camcorder's Wi-Fi network (SSID: 4K_WIFI1079, Password: 12345678). This allows for remote viewing, image capture, video shooting, and sharing to social media.

6. PC Camera Mode (Webฟังก์ชันกล้อง)
Connect the camcorder to your PC using the USB cable. Select "PC CAM" mode on the camcorder. Your computer will recognize the camcorder as a webcam, enabling its use for video chatting and live streaming on platforms like YouTube or Facebook.

7.คุณสมบัติพิเศษ
- สโลว์โมชั่น: Access this mode through the camcorder's menu to record videos at a higher frame rate, allowing for slow-motion playback.
- การถ่ายภาพแบบไทม์แลปส์: Select this option in the menu to capture a series of still images at set intervals, which can then be compiled into a time-lapse video.
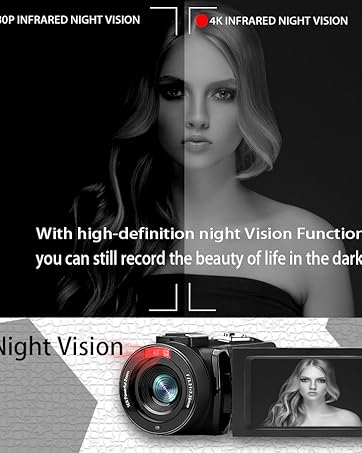
- การมองเห็นตอนกลางคืน: The camcorder features an infrared night vision function, enabling recording in low-light or dark environments. Activate this feature via the menu.


8. รีโมทคอนโทรล
The included remote control allows you to operate the camcorder from a distance, controlling functions such as recording, photo capture, and zoom without touching the device.

การซ่อมบำรุง
- การทำความสะอาด: ใช้ผ้าแห้งนุ่มๆ เช็ดทำความสะอาดตัวกล้องวิดีโอ สำหรับเลนส์ ให้ใช้ผ้าและน้ำยาทำความสะอาดเลนส์โดยเฉพาะ หลีกเลี่ยงวัสดุที่มีฤทธิ์กัดกร่อนหรือสารเคมีรุนแรง
- พื้นที่จัดเก็บ: เก็บกล้องวิดีโอไว้ในที่แห้งและเย็น หลีกเลี่ยงแสงแดดโดยตรงและอุณหภูมิที่สูงหรือต่ำเกินไป ถอดแบตเตอรี่ออกหากเก็บไว้นาน
- ความต้านทานน้ำ: This camcorder is ไม่กันน้ำ. หลีกเลี่ยงการโดนน้ำหรือความชื้นสูง
การแก้ไขปัญหา
| ปัญหา | สาเหตุที่เป็นไปได้ | สารละลาย |
|---|---|---|
| กล้องวิดีโอไม่สามารถเปิดได้ | แบตเตอรี่หมดหรือติดตั้งไม่ถูกต้อง | ตรวจสอบให้แน่ใจว่าแบตเตอรี่ชาร์จเต็มแล้วและใส่ถูกต้องแล้ว |
| Battery charger indicator lights flicker. | Poor contact between battery and charger, or unstable power supply. | Re-seat batteries firmly in the charger. Check USB cable and power adapter connection. Try a different USB port or power source. |
| ไม่สามารถบันทึกวิดีโอหรือถ่ายภาพได้ | SD card is full, not inserted, or corrupted. Incorrect mode selected. | Check SD card status, ensure it's inserted and has free space. Format the SD card if necessary (this will erase all data). Verify camcorder is in the correct mode. |
| คุณภาพวิดีโอ/ภาพถ่ายต่ำ | Lens is dirty. Insufficient lighting. Incorrect settings. | Clean the lens. Use the external fill light or shoot in better-lit conditions. Adjust resolution and other settings in the menu. |
| ปัญหาการเชื่อมต่อ Wi-Fi | Incorrect Wi-Fi password or app not installed. | Ensure correct SSID (4K_WIFI1079) and password (12345678). Download and install the correct app. |
ข้อมูลจำเพาะ
- ยี่ห้อ: เวเทค
- หมายเลขรุ่น: เอเอฟ6
- ความละเอียดการจับภาพวิดีโอ: 4K (3840*2160)
- ความละเอียดของภาพนิ่งที่มีประสิทธิภาพ: 48.0 ล้านพิกเซล (7920*5940)
- ซูมดิจิตอล: 18X
- ขนาดหน้าจอ: 3.0 นิ้ว
- ประเภทจอภาพ: 270° Rotatable Touch Screen
- ประเภทหน่วยความจำแฟลช: SD (supports up to 128GB, 32GB included)
- รูปแบบการจับภาพวิดีโอ: เอ็มพี 4
- รูปแบบเสียงที่รองรับ: เอ็มพี 4
- เทคโนโลยีการเชื่อมต่อ: พอร์ต USB, พอร์ต HDMI, Wi-Fi
- ความเข้ากันได้ของระบบปฏิบัติการ: Windows XP/7/8/10, MAC
- ระบบป้องกันภาพสั่นไหว: ดิจิตอล
- ระดับการต้านทานน้ำ: ไม่ทนน้ำ
- จำนวนแบตเตอรี่: แบตเตอรี่ลิเธียมโพลิเมอร์ 2 ก้อน (รวมอยู่ด้วย)
- ขนาดสินค้า (ลึก x กว้าง x สูง) : ลึก 3.9 นิ้ว x กว้าง 6.2 นิ้ว x สูง 7.8 นิ้ว
การรับประกันและการสนับสนุน
For warranty information and technical support, please refer to the contact details provided in the separate warranty card or visit the official VETEK webหากคุณพบปัญหาใดๆ ที่ไม่ได้กล่าวถึงในคู่มือนี้ โปรดติดต่อฝ่ายบริการลูกค้าเพื่อขอความช่วยเหลือ