
1. บทนำ
This manual provides detailed instructions for the installation, operation, and maintenance of the VIVOTEK ND9323P H.265 8-Channel Embedded PoE Network Video Recorder (NVR). Please read this manual thoroughly before using the product to ensure proper and safe operation. Keep this manual for future reference.
2. ข้อมูลด้านความปลอดภัย
Observe the following safety precautions to prevent damage to the NVR and to ensure user safety:
- แหล่งจ่ายไฟ: Use only the power adapter supplied with the NVR. Ensure the power source matches the NVR's voltagข้อกำหนดอี
- การระบายอากาศ : อย่าปิดกั้นช่องระบายอากาศใดๆ ติดตั้ง NVR ในบริเวณที่มีการระบายอากาศดีเพื่อป้องกันความร้อนสูงเกินไป
- สิ่งแวดล้อม: Avoid exposing the NVR to water, moisture, extreme temperatures, or direct sunlight. Do not place heavy objects on the NVR.
- การบริการ: อย่าพยายามให้บริการผลิตภัณฑ์นี้ด้วยตนเอง ส่งต่อการบริการทั้งหมดไปยังช่างบริการที่ผ่านการรับรอง
- การจัดการ: Handle the NVR with care. Avoid dropping or subjecting it to strong impacts.
3. เนื้อหาบรรจุภัณฑ์
Carefully unpack the box and ensure all items are present and in good condition. If any items are missing or damaged, contact your vendor immediately.
- เครื่องบันทึกวิดีโอเครือข่าย VIVOTEK ND9323P
- อะแดปเตอร์แปลงไฟ
- USB Mouse
- คู่มือการติดตั้งแบบด่วน
- Accessory Pack (Screws for HDD installation, Ethernet cable)
- Case (referring to the NVR enclosure itself)
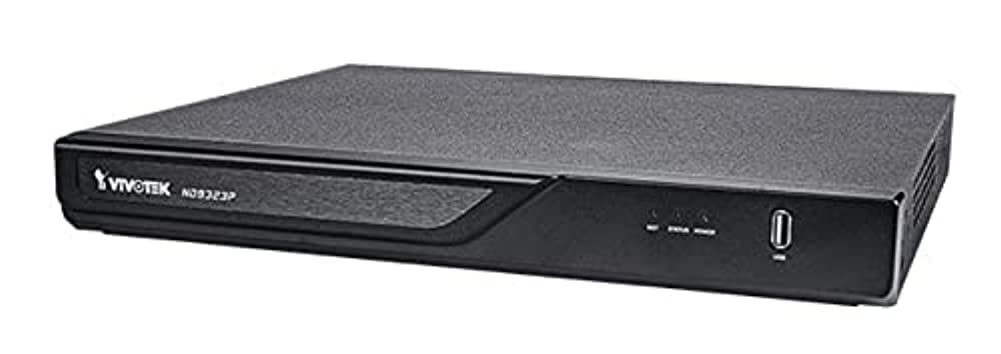
Figure 3.1: VIVOTEK ND9323P NVR unit. This image shows the front panel of the NVR, typically featuring status indicators and USB ports.
4. สินค้าหมดview
The VIVOTEK ND9323P is an 8-channel embedded Network Video Recorder designed for IP surveillance systems. It supports H.265 video compression for efficient storage and bandwidth usage. With its integrated Power over Ethernet (PoE) ports, it simplifies camera installation by providing both power and data connectivity through a single Ethernet cable.
4.1 คุณสมบัติหลัก
- 8-Channel Video Input
- H.265/H.264 Video Compression
- 8 x 802.3at/af PoE Ports
- Local Display Output (HDMI/VGA)
- Remote Access via VIVOTEK VIVOCloud App or VMS
- Supports up to 16TB HDD storage (HDD not included)
4.2 แผงด้านหน้าและด้านหลัง
Refer to the Quick Installation Guide for detailed diagrams of the front and rear panels, indicating ports and indicators.
- แผงด้านหน้า: Power LED, HDD LED, Network LED, USB ports.
- แผงด้านหลัง: Power input, LAN port, PoE ports (1-8), HDMI output, VGA output, Audio I/O, USB ports.
5. การตั้งค่า
5.1 การติดตั้งฮาร์ดไดรฟ์ (ไม่บังคับ)
The NVR does not typically include a pre-installed hard drive. Follow these steps to install a 3.5-inch SATA hard drive:
- คลายสกรูและถอดฝาครอบด้านบนของ NVR ออก
- เชื่อมต่อสายเคเบิลข้อมูล SATA และสายไฟจาก NVR เข้ากับฮาร์ดไดรฟ์
- ยึดฮาร์ดไดรฟ์เข้ากับตัวเครื่อง NVR โดยใช้สกรูที่ให้มา
- ปิดฝาด้านบนกลับเข้าที่และยึดด้วยสกรู
บันทึก: Ensure the NVR is powered off and unplugged before installing or removing a hard drive.
5.2 การเชื่อมต่อทางกายภาพ
- เชื่อมต่อกล้อง: Connect your IP cameras to the NVR's PoE ports (1-8) using Ethernet cables. The NVR will provide power and network connectivity to the cameras.
- เชื่อมต่อกับเครือข่าย: Connect the NVR's LAN port to your local network router or switch using an Ethernet cable.
- เชื่อมต่อจอแสดงผล: เชื่อมต่อจอภาพเข้ากับพอร์ต HDMI หรือ VGA ของเครื่องบันทึกวิดีโอเครือข่าย (NVR)
- เชื่อมต่อเมาส์: เสียบเมาส์ USB เข้ากับพอร์ต USB ของ NVR พอร์ตใดพอร์ตหนึ่ง
- เปิดเครื่อง: เสียบอะแดปเตอร์เข้ากับแหล่งจ่ายไฟของ NVR แล้วเสียบเข้ากับเต้ารับไฟฟ้า NVR จะเปิดเครื่องโดยอัตโนมัติ
5.3 การกำหนดค่าเริ่มต้น
Upon first boot, the NVR will guide you through a setup wizard on the connected monitor:
- เลือกภาษา: เลือกภาษาที่คุณต้องการ
- การตั้งค่ารหัสผ่าน: Create a strong password for the administrator account. This is crucial for security.
- การตั้งค่าเครือข่าย: Configure network settings (DHCP or Static IP). DHCP is recommended for most home users.
- เวลาและวันที่: ตั้งค่าเขตเวลา วันที่ และเวลาให้ถูกต้อง
- การเริ่มต้นฮาร์ดไดรฟ์: If you installed a new hard drive, the NVR will prompt you to format it. Confirm to proceed. คำเตือน: Formatting will erase all data on the drive.
- ค้นหาและเพิ่มกล้อง: The NVR will automatically search for connected VIVOTEK cameras. Select and add them to the NVR.
- เสร็จ: Complete the wizard to access the NVR's live view.
6. การใช้งาน NVR
6.1 การเข้าถึง NVR
You can access and manage the NVR through various methods:
- การแสดงท้องถิ่น: Directly via the connected monitor and USB mouse.
- Web เบราว์เซอร์: ป้อนที่อยู่ IP ของ NVR ลงใน web เบราว์เซอร์บนคอมพิวเตอร์ที่เชื่อมต่อกับเครือข่ายเดียวกัน
- VIVOTEK VIVOCloud App: Download the mobile app for remote viewไอเอ็นจีและการจัดการ
- VIVOTEK VAST 2 VMS: For advanced management and multi-NVR systems.
6.2 สด View
การแสดงสด view displays real-time video feeds from all connected cameras. You can switch between single-camera viewกริดกล้องหลายตัว viewและปรับแต่งรูปแบบการแสดงผลได้ตามต้องการ
6.3 การตั้งค่าการบันทึก
ตั้งค่าตารางการบันทึกและโหมดการบันทึกสำหรับกล้องแต่ละตัว:
- การบันทึกต่อเนื่อง: บันทึกตลอด 24 ชม.
- การบันทึกการตรวจจับความเคลื่อนไหว: บันทึกเฉพาะเมื่อตรวจพบการเคลื่อนไหวเท่านั้น
- การบันทึกตามกำหนดเวลา: บันทึกข้อมูลในช่วงเวลาที่กำหนด
- การบันทึกเหตุการณ์: Records based on external triggers or alarms.
Access these settings through the NVR's main menu: Configuration > Recording > Schedule.
6.4 การเล่นซ้ำ
เพื่อview บันทึกเสียงฟูtage:
- จากเมนูหลัก เลือก การเล่นซ้ำ.
- เลือกกล้องและช่วงวันที่/เวลาที่คุณต้องการบันทึกใหม่view.
- Use the timeline and playback controls (play, pause, fast forward, rewind) to navigate through the footage.
6.5 Event Management and Notifications
Configure the NVR to respond to events such as motion detection, camera tampering, or network disconnection. The NVR can send email notifications, trigger alarms, or start recording.
Access these settings via: การกำหนดค่า > เหตุการณ์.
7. การบำรุงรักษา
การอัปเดตเฟิร์มแวร์ 7.1 รายการ
Regularly check for and install firmware updates to ensure optimal performance, security, and access to new features. Firmware can be updated via the NVR's web interface or local display menu: Configuration > System > Firmware Upgrade.
คำเตือน: Do not power off the NVR during a firmware upgrade. This can cause permanent damage.
7.2 การจัดการฮาร์ดไดรฟ์
Monitor the health of your hard drive(s) and ensure sufficient storage space. The NVR will automatically overwrite the oldest recordings when the disk is full, based on your settings.
Access HDD status and settings via: การตั้งค่า > พื้นที่จัดเก็บ > การจัดการฮาร์ดดิสก์.
7.3 การทำความสะอาด
Keep the NVR unit clean and free from dust. Use a soft, dry cloth for cleaning. Do not use liquid cleaners or aerosols.
8 การแก้ไขปัญหา
This section addresses common issues you might encounter with your VIVOTEK ND9323P NVR.
8.1 ไม่มีการแสดงวิดีโอบนจอภาพ
- ตรวจสอบสายเคเบิล: ตรวจสอบให้แน่ใจว่าสาย HDMI/VGA เชื่อมต่อกับ NVR และจอภาพอย่างแน่นหนา
- อินพุตมอนิเตอร์: Verify the monitor is set to the correct input source (HDMI/VGA).
- กำลังไฟ NVR: Confirm the NVR is powered on and its power LED is illuminated.
8.2 Cameras Not Showing Up / No Image
- การเชื่อมต่อ PoE: Ensure cameras are properly connected to the NVR's PoE ports. Check if the PoE port LEDs on the NVR are active.
- พลังของกล้อง: If not using PoE, ensure cameras are receiving power from their own power adapters.
- การเชื่อมต่อเครือข่าย: Verify the NVR and cameras are on the same network segment if not directly connected via PoE.
- สถานะกล้อง: Check the camera's own status indicators.
- NVR Camera Management: ไปที่ Configuration > Camera > Camera Management to ensure cameras are added and enabled. Try rescanning for cameras.
8.3 Cannot Access NVR via Web เบราว์เซอร์
- ที่อยู่ IP: Confirm the NVR's IP address is correct and that your computer is on the same network.
- สายเคเบิลเครือข่าย: Ensure the NVR's LAN port is connected to your network.
- ไฟร์วอลล์: Temporarily disable your computer's firewall to check if it's blocking access.
- ความเข้ากันได้ของเบราว์เซอร์: Use a recommended web เบราว์เซอร์ (เช่น Chrome, Firefox)
8.4 ลืมรหัสผ่าน
If you forget the administrator password, you may need to perform a factory reset. Refer to the VIVOTEK support website or contact technical support for the specific procedure for your model, as this often involves a physical reset button or a specific utility.
9. ข้อมูลจำเพาะ
The following table lists the key specifications for the VIVOTEK ND9323P NVR:
| คุณสมบัติ | ข้อมูลจำเพาะ |
|---|---|
| หมายเลขรุ่น | เอ็นดี9323พี |
| ยี่ห้อ | วิโวเทค |
| จำนวนช่องสัญญาณ | 8 |
| เทคโนโลยีการเชื่อมต่อ | อีเธอร์เน็ต |
| อุปกรณ์ที่รองรับ | Camera, Mobile Device |
| การบีบอัดวิดีโอ | เอช.265, เอช.264 |
| พอร์ต PoE | 8 x 802.3at/af |
| ขนาดสินค้า | 19.69 x 19.69 x 11.02 นิ้ว |
| น้ำหนักสินค้า | 0.01 ออนซ์ |
| ผู้ผลิต | วีโวเทค |
10. การรับประกันและการสนับสนุน
VIVOTEK products are covered by a limited warranty. For detailed warranty terms and conditions, please refer to the warranty card included with your product or visit the official VIVOTEK webเว็บไซต์.
For technical support, product registration, or to download the latest firmware and software, please visit the VIVOTEK support portal:
VIVOTEK Official Support Webเว็บไซต์
When contacting support, please have your NVR's model number (ND9323P) and serial number ready.