
1. สินค้าหมดview
The PowMr Growatt SPF 5000ES is a 5000W 48V solar inverter with an integrated MPPT charge controller. This versatile unit is designed to work with or without a 48V battery system, offering flexible power solutions for various applications. It features a maximum PV input voltage of 450VDC and provides a 220VAC output.
คุณสมบัติที่สำคัญ ได้แก่:
- Integrated MPPT charge controller with 100A maximum charge current.
- Supports 48V battery systems (Li-Ion & Lead Acid: AGM, Flooded, User-defined, Lithium).
- Capable of operating without a 48V battery.
- 220VAC pure sine wave output.
- อินพุต PV สูงสุด voltagสูงถึง 450VDC
- กำหนดค่าความสำคัญของอินพุตของกริดหรือพลังงานแสงอาทิตย์ได้
- Bypass mode support.
- Parallel operation for capacity expansion up to 30kW (max 6 units).
- Detailed LCD display for monitoring and settings.
- WIFI/GPRS remote monitoring (optional).
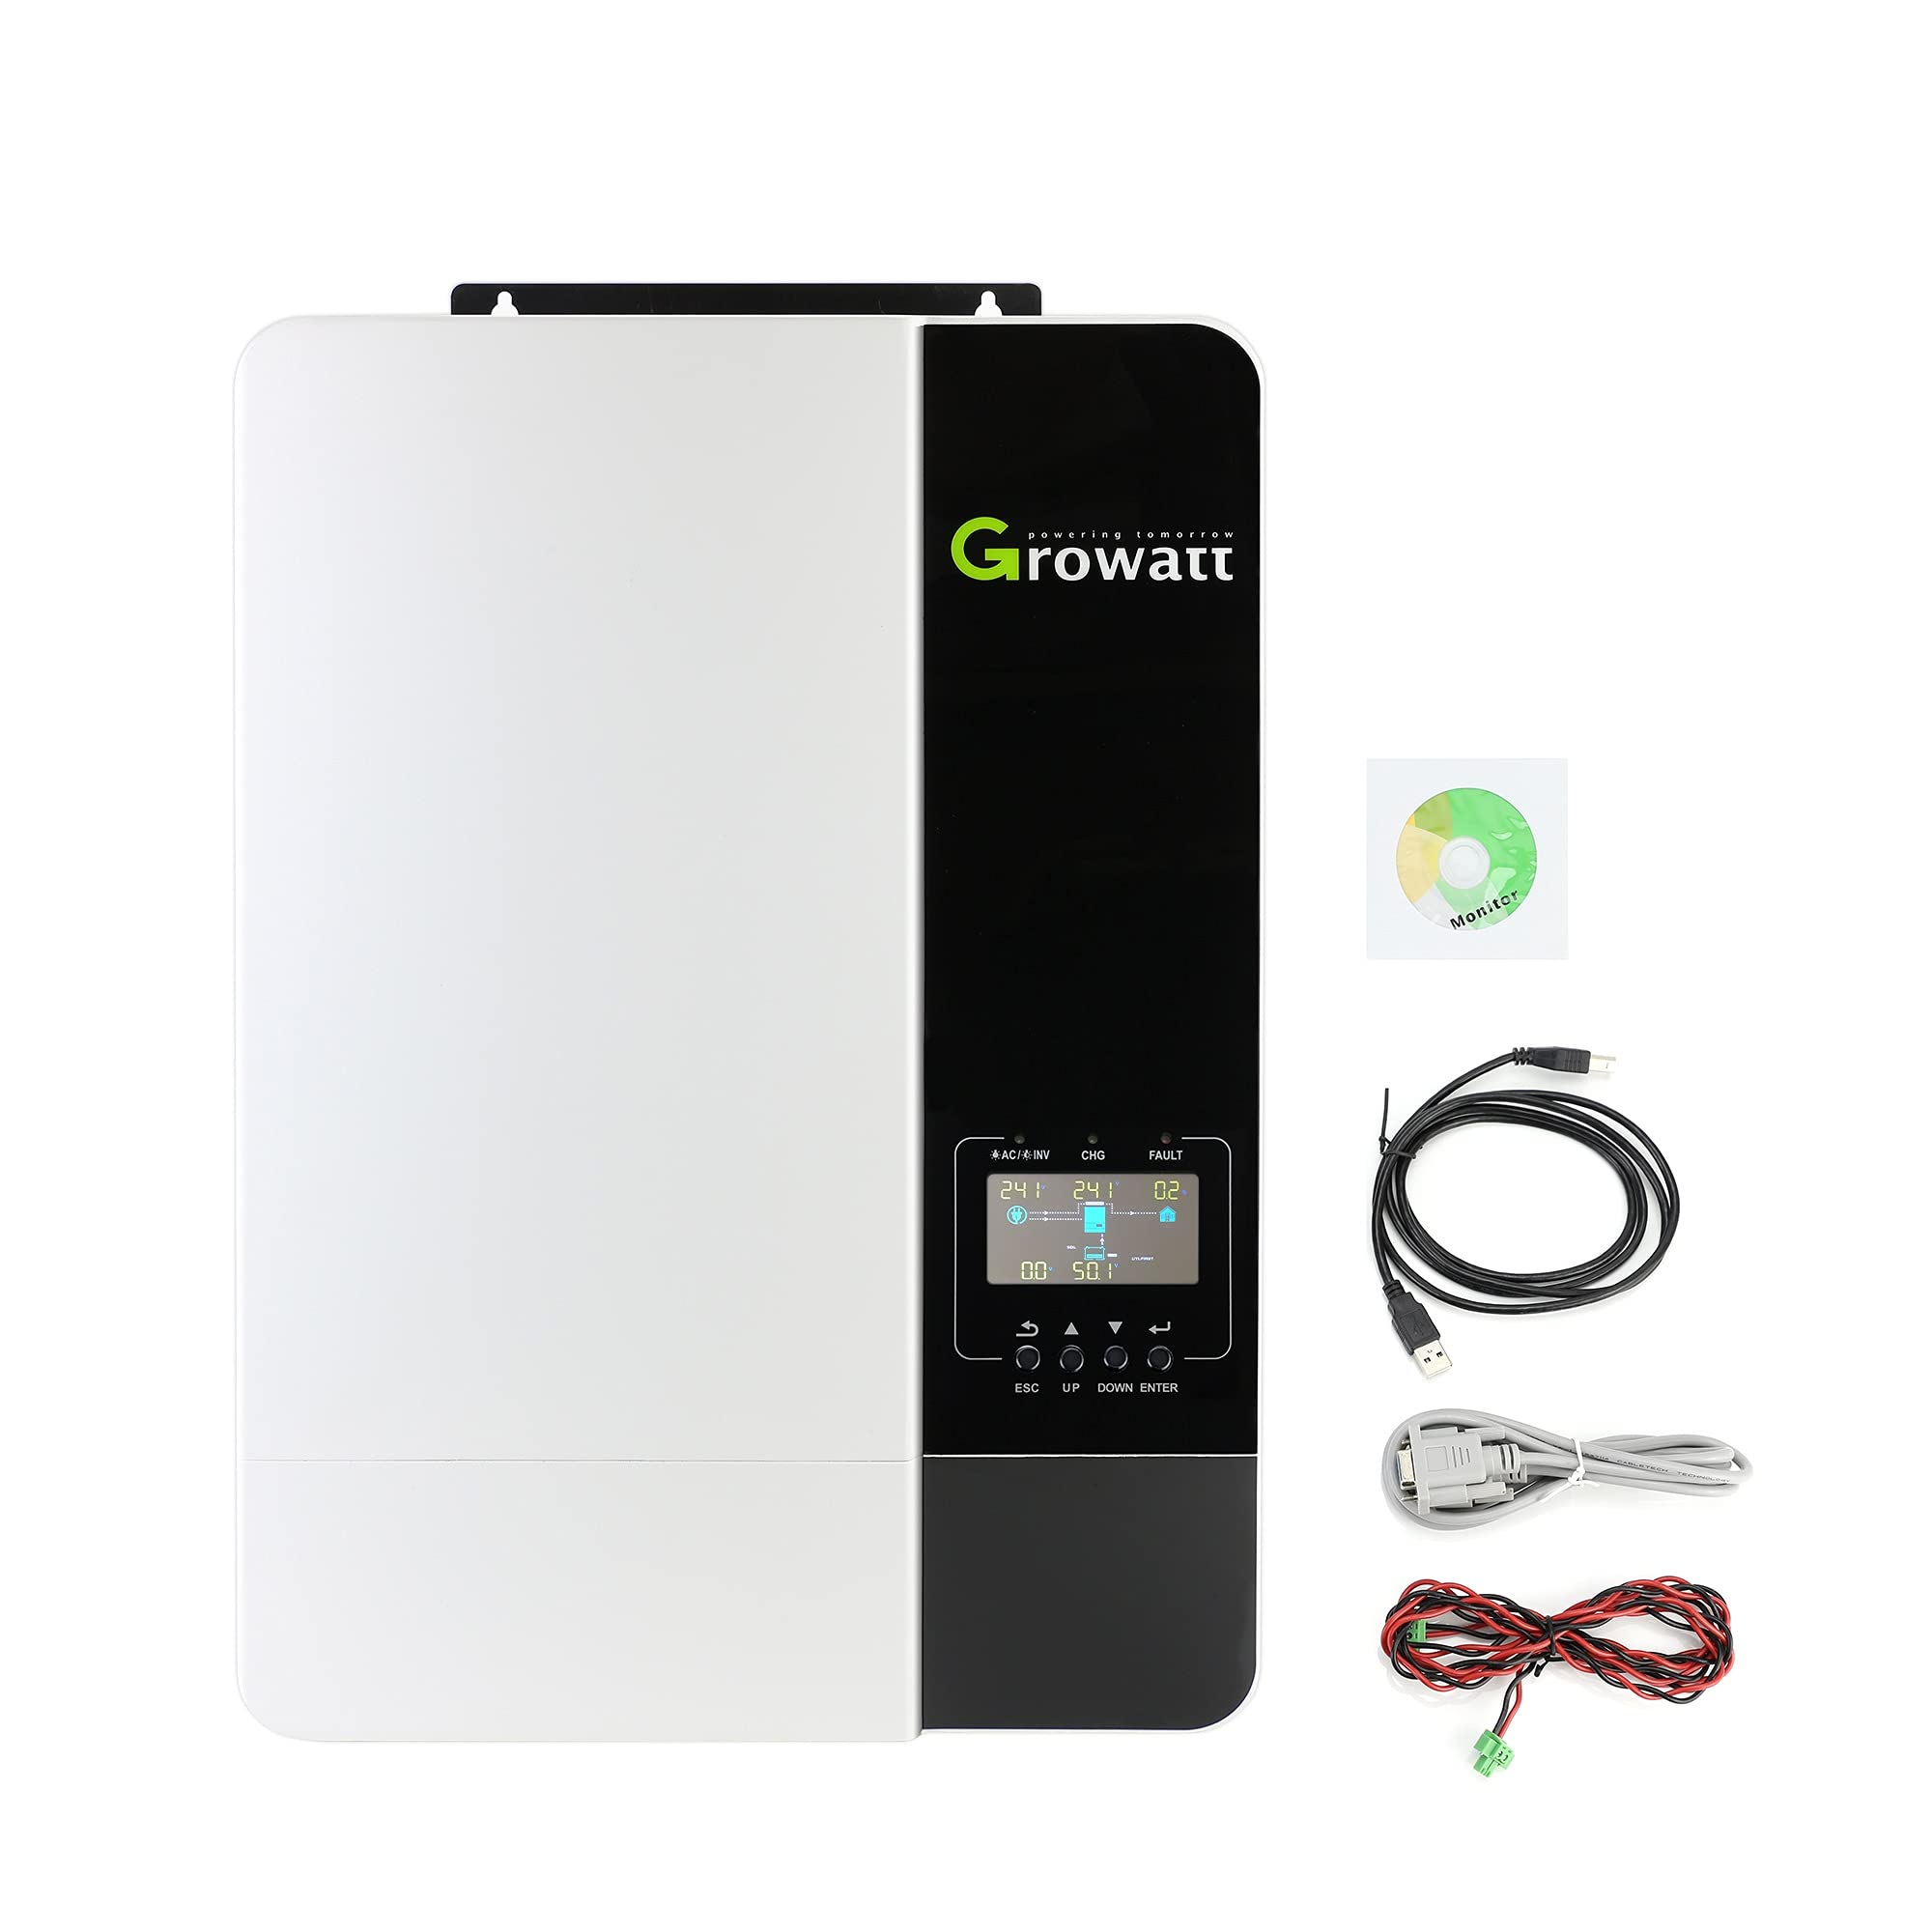
รูปที่ 1 : ด้านหน้า view of the Growatt SPF 5000ES Solar Inverter.
2. เนื้อหาบรรจุภัณฑ์
Upon unpacking, verify that all items listed below are included and undamaged. If any items are missing or damaged, please contact your dealer.
แพ็คเกจมาตรฐานโดยทั่วไปประกอบด้วย:
- Growatt SPF 5000ES Inverter Unit
- คู่มือการใช้งาน
- ซีดีซอฟแวร์
- สายเคเบิลสื่อสารแบบขนาน
- สายเคเบิลแบ่งปันกระแสไฟฟ้า
- สายสื่อสาร USB
For a visual guide on unpacking and identifying components, refer to the 'Packing And Unpack Inspect' section of Video 1 in the Operation section.
3. การติดตั้ง
3.1 ข้อควรระวังเพื่อความปลอดภัย
- ห้ามติดตั้งอินเวอร์เตอร์บนวัสดุก่อสร้างที่ติดไฟได้
- Mount the inverter on a solid surface capable of supporting its weight.
- ติดตั้งอินเวอร์เตอร์ในระดับสายตาเพื่อให้สามารถอ่านหน้าจอ LCD ได้อย่างชัดเจน
- Ensure the ambient temperature is between 0°C and 55°C for optimal operation.
- Maintain sufficient clearance (at least 20 cm on sides, 50 cm top/bottom) around the inverter for heat dissipation and wire access.

Figure 2: Recommended installation position and clearances for the inverter to ensure proper ventilation and access.
3.2 การเชื่อมต่อสายไฟ
All wiring should be performed by a qualified electrician. Ensure all power sources are disconnected before making any connections.
การเชื่อมต่อแบตเตอรี่:
- Connect the 48V battery bank to the Battery Input Port.
- Use 2AWG size cables for battery connections.
- ตรวจสอบให้แน่ใจว่าขั้วถูกต้อง (+ ต่อกับ + และ - ต่อกับ -)
การเชื่อมต่ออินพุต AC:
- Connect the utility grid or generator AC input to the AC Input Port.
- Use 8AWG size cables for AC input connections.
- Connect Ground wire to Ground terminal, Hot Line 1 to L terminal, and Hot Line 2 to N terminal.
การเชื่อมต่อเอาต์พุต AC:
- Connect your loads to the AC Output Port.
- Use 8AWG size cables for AC output connections.
การเชื่อมต่ออินพุต PV:
- Connect the solar panel array to the PV Input Port.
- Use 8AWG size cables for PV input connections.
- Ensure PV panel voltage is at least 150V and stable, and current does not exceed 18A.

รูปที่ 3: รายละเอียด view of the inverter's connection ports and recommended cable sizes.
พอร์ตสื่อสาร:
The inverter includes ports for WIFI/GPRS, USB, CAN, and RS485 communication for monitoring and parallel operation. An optional WIFI/GPRS module can be connected for remote monitoring.

Figure 4: Front panel with LCD display and indicators, and rear panel showing AC input/output, PV input, battery input, and various communication ports.
4. การดำเนินการ
4.1 การเปิด/ปิดเครื่อง
- ตรวจสอบให้แน่ใจว่าการเชื่อมต่อสายไฟทั้งหมดมีความปลอดภัยและถูกต้อง
- Switch the DC input breaker to the ON position.
- Switch the AC output breaker to the ON position.
- Press the Power On/Off switch on the inverter to turn it on.
4.2 จอแสดงผล LCD และปุ่มฟังก์ชัน
The inverter features an LCD display and function buttons for monitoring system status and configuring settings.
4.3 การตั้งค่าระบบ
To access and modify settings, press and hold the ENTER button for 3 seconds. Use the UP and DOWN buttons to navigate through programs and values, and ENTER to confirm selections.
Program 01: Output Source Priority
This setting determines the priority of power sources for your loads.
- SOL (Solar First): Solar energy powers loads as first priority. If solar is insufficient, battery energy supplies power. Grid energy is used only if solar is unavailable or battery voltage drops below a warning level.
- UTI (Utility First): Utility grid is the primary power source.
- SBU (พลังงานแสงอาทิตย์-แบตเตอรี่-ยูทิลิตี้): Solar power first, then battery, then utility.
- SUB (แบตเตอรี่พลังงานแสงอาทิตย์): Solar power first, then utility, then battery.
Program 05: Battery Type
Select the type of battery connected to the inverter. Options include AGM, Flooded, User-defined, and Lithium. For Lithium batteries, consult the lithium battery compatibility list and set the relevant communication protocol.
Program 14: Charger Source Priority
This setting determines the priority of charging sources for your battery.
- CSO (โซลาร์เฟิร์ส): Solar energy charges the battery as first priority. Utility charges only when solar energy is not available.
- CUE (Grid First): Grid energy charges the battery as first priority.
- SNU (Solar and Grid): Both solar and utility energy charge the battery.
- OSO (เฉพาะพลังงานแสงอาทิตย์): Only solar energy will be the charger source, regardless of utility power availability.
Program 19: Bulk Charging Voltage (CV voltage)
Set the bulk charging voltage from 48V to 58.4V. This setting is active when Program 05 is set to 'User-defined'.
Program 20: Floating Charging Voltage
Set the floating charging voltage from 48V to 58.4V. This setting is active when Program 05 is set to 'User-defined'.
Program 21: Low DC Cut-off Voltage
Set the low DC cut-off voltage from 40V to 48V. This setting is active when Program 05 is set to 'User-defined'.
Program 23: AC Output Mode (Parallel Operation)
When units are used in parallel for a single-phase system, select "PAL". For parallel operation in a three-phase system, select "3P1" for L1 phase, "3P2" for L2 phase, and "3P3" for L3 phase.
Video 1: Growatt SPF 5000ES Inverter Installation and Operation Guide. This video demonstrates system introduction, unpacking, product overview, installation steps, and basic operation settings for the inverter, including troubleshooting.
5. ข้อมูลจำเพาะ
| คุณสมบัติ | ข้อมูลจำเพาะ |
|---|---|
| ยี่ห้อ | พาวมิสเตอร์ |
| แบบอย่าง | SPF 5000ES |
| แหล่งพลังงาน | ใช้พลังงานจากแบตเตอรี่ |
| วัดtage | 5000 วัตต์ |
| อินพุต Voltage | 48 โวลต์ |
| กำลังขับ | 5000 วัตต์ |
| ปริมาณการส่งออกtage | 120 โวลต์, 220 โวลต์ |
| ความถี่ | 50 เฮิรตซ์ |
| อินพุต PV สูงสุด Voltage | 450VDC |
| กระแสไฟชาร์จสูงสุด | 100เอ |
| น้ำหนักสินค้า | 31.9 ปอนด์ |
6 การแก้ไขปัญหา
Refer to the table below for common issues and their solutions. For more detailed troubleshooting, please consult the full user manual.
| ปัญหา / รหัสข้อผิดพลาด | คำอธิบาย | จะต้องทำอย่างไร |
|---|---|---|
| หน่วยปิดโดยอัตโนมัติในระหว่างกระบวนการเริ่มต้น | แบตเตอรี่ความจุtagค่า e ต่ำเกินไป (<1.91V/เซลล์) | 1. ชาร์จแบตเตอรี่ใหม่ 2. เปลี่ยนแบตเตอรี่ |
| ไม่มีการตอบสนองหลังจากเปิดเครื่อง | 1. ปริมาตรของแบตเตอรี่tagค่า e ต่ำเกินไป (<1.4V/เซลล์) 2. Battery polarity is reversed. | 1. ตรวจสอบว่าแบตเตอรี่และสายไฟเชื่อมต่อกันดีหรือไม่ 2. ชาร์จแบตเตอรี่ใหม่ 3. เปลี่ยนแบตเตอรี่ |
| Mains exist but unit works in battery mode. (Green LED is flashing) | ปริมาณอินพุตtage is 0 on the LCD and green LED is flashing. | ตรวจสอบว่าเบรกเกอร์ไฟฟ้ากระแสสลับสะดุดหรือไม่ และต่อสายไฟ AC ดีหรือไม่ |
| Mains exist but unit works in battery mode. (Green LED is flashing) | คุณภาพของไฟ AC ไม่เพียงพอ (ฝั่งหรือเครื่องกำเนิดไฟฟ้า) | 1. ตรวจสอบว่าสายไฟ AC บางและ/หรือยาวเกินไปหรือไม่ 2. ตรวจสอบว่าเครื่องกำเนิดไฟฟ้า (ถ้าใช้) ทำงานได้ดีหรือว่าอินพุต voltage range setting is correct. (UPS - Appliance) |
| Mains exist but unit works in battery mode. (Green LED is flashing) | Set "Battery First" or "Solar First" as the priority of output source. | Change output source priority to Utility First. |
| When it's turned on, internal relay is switching on and off repeatedly. | จอแสดงผล LCD และไฟ LED กะพริบ | Battery is disconnected. Check if battery wires are connected well. |
| รหัสความผิดปกติ 01 | พัดลมเสีย | เปลี่ยนพัดลม |
| รหัสความผิดปกติ 02 | Internal temperature of component is over 100°C. | ตรวจสอบว่าการไหลของอากาศของเครื่องถูกปิดกั้นหรือว่าอุณหภูมิแวดล้อมสูงเกินไปหรือไม่ |
| รหัสความผิดปกติ 03 | แบตเตอรี่มีประจุมากเกินไป | กลับไปที่ศูนย์ซ่อม |
| รหัสความผิดปกติ 03 | แบตเตอรี่ความจุtagอีสูงเกินไป | ตรวจสอบว่าข้อมูลจำเพาะและปริมาณของแบตเตอรี่ตรงตามข้อกำหนดหรือไม่ |
| รหัสความผิดปกติ 05 | เอาต์พุตลัดวงจร | ตรวจสอบว่าสายไฟเชื่อมต่อดีหรือไม่ และนำโหลดที่ผิดปกติออก |
| รหัสความผิดปกติ 06/08 | เอาต์พุตผิดปกติ (Inverter voltag(e ต่ำกว่า 190Vac หรือสูงกว่า 260Vac) | 1. ลดภาระที่เชื่อมต่อ 2. Return to repair center. |
| รหัสความผิดปกติ 07 | อินเวอร์เตอร์ทำงานเกินกำลัง 110% และหมดเวลาแล้ว | ลดภาระที่เชื่อมต่อด้วยการปิดอุปกรณ์บางอย่าง |
| รหัสความผิดปกติ 08/09/53/57 | ส่วนประกอบภายในล้มเหลว | กลับไปที่ศูนย์ซ่อม |
| รหัสความผิดปกติ 51 | กระแสเกินหรือไฟกระชาก | รีสตาร์ทเครื่อง หากเกิดข้อผิดพลาดขึ้นอีก โปรดกลับไปที่ศูนย์ซ่อม |
| รหัสความผิดปกติ 52 | รถโดยสารประจำทางtagอีต่ำเกินไป | รีสตาร์ทเครื่อง หากเกิดข้อผิดพลาดขึ้นอีก โปรดกลับไปที่ศูนย์ซ่อม |
| รหัสความผิดปกติ 55 | ปริมาณการส่งออกtage ไม่สมดุล | หากเชื่อมต่อแบตเตอรี่ได้ดี โปรดกลับไปที่ศูนย์ซ่อม |
| รหัสความผิดปกติ 56 | เสียบแบตเตอรี่ไม่ดีหรือฟิวส์ขาด | หากเชื่อมต่อแบตเตอรี่ได้ดี โปรดกลับไปที่ศูนย์ซ่อม |
| รหัสความผิดปกติ 60 | Negative power fault. | 1. Check whether the AC output connected to the grid input. 2. Check whether Program 8 settings are the same for all parallel inverters. 3. Check whether the current sharing cables are connected well in the same parallel phases. 4. Check whether all neutral wires of all parallel units are connected together. 5. If problem still exists, contact repair center. |
| รหัสความผิดปกติ 80 | CAN fault. | 1. Check whether the parallel communication cables are connected well. 2. Check whether Program 23 settings are right for the parallel system. |
| รหัสความผิดปกติ 81 | Host loss. | If problem still exists, contact repair center. |
7. การรับประกันและการสนับสนุน
The product comes with a manufacturer's warranty. For specific warranty terms and conditions, please refer to the warranty card included in your package or contact PowMr customer support. For technical assistance or service, please reach out to your authorized dealer or the manufacturer directly.
Warranty Description: 1 (as per product specifications, further details should be sought from the manufacturer).