
1. บทนำ
This instruction manual provides comprehensive guidance for the installation, operation, and maintenance of your AKAMATE Dual Din Car Stereo. Please read this manual thoroughly before using the product to ensure proper function and safety. Keep this manual for future reference.
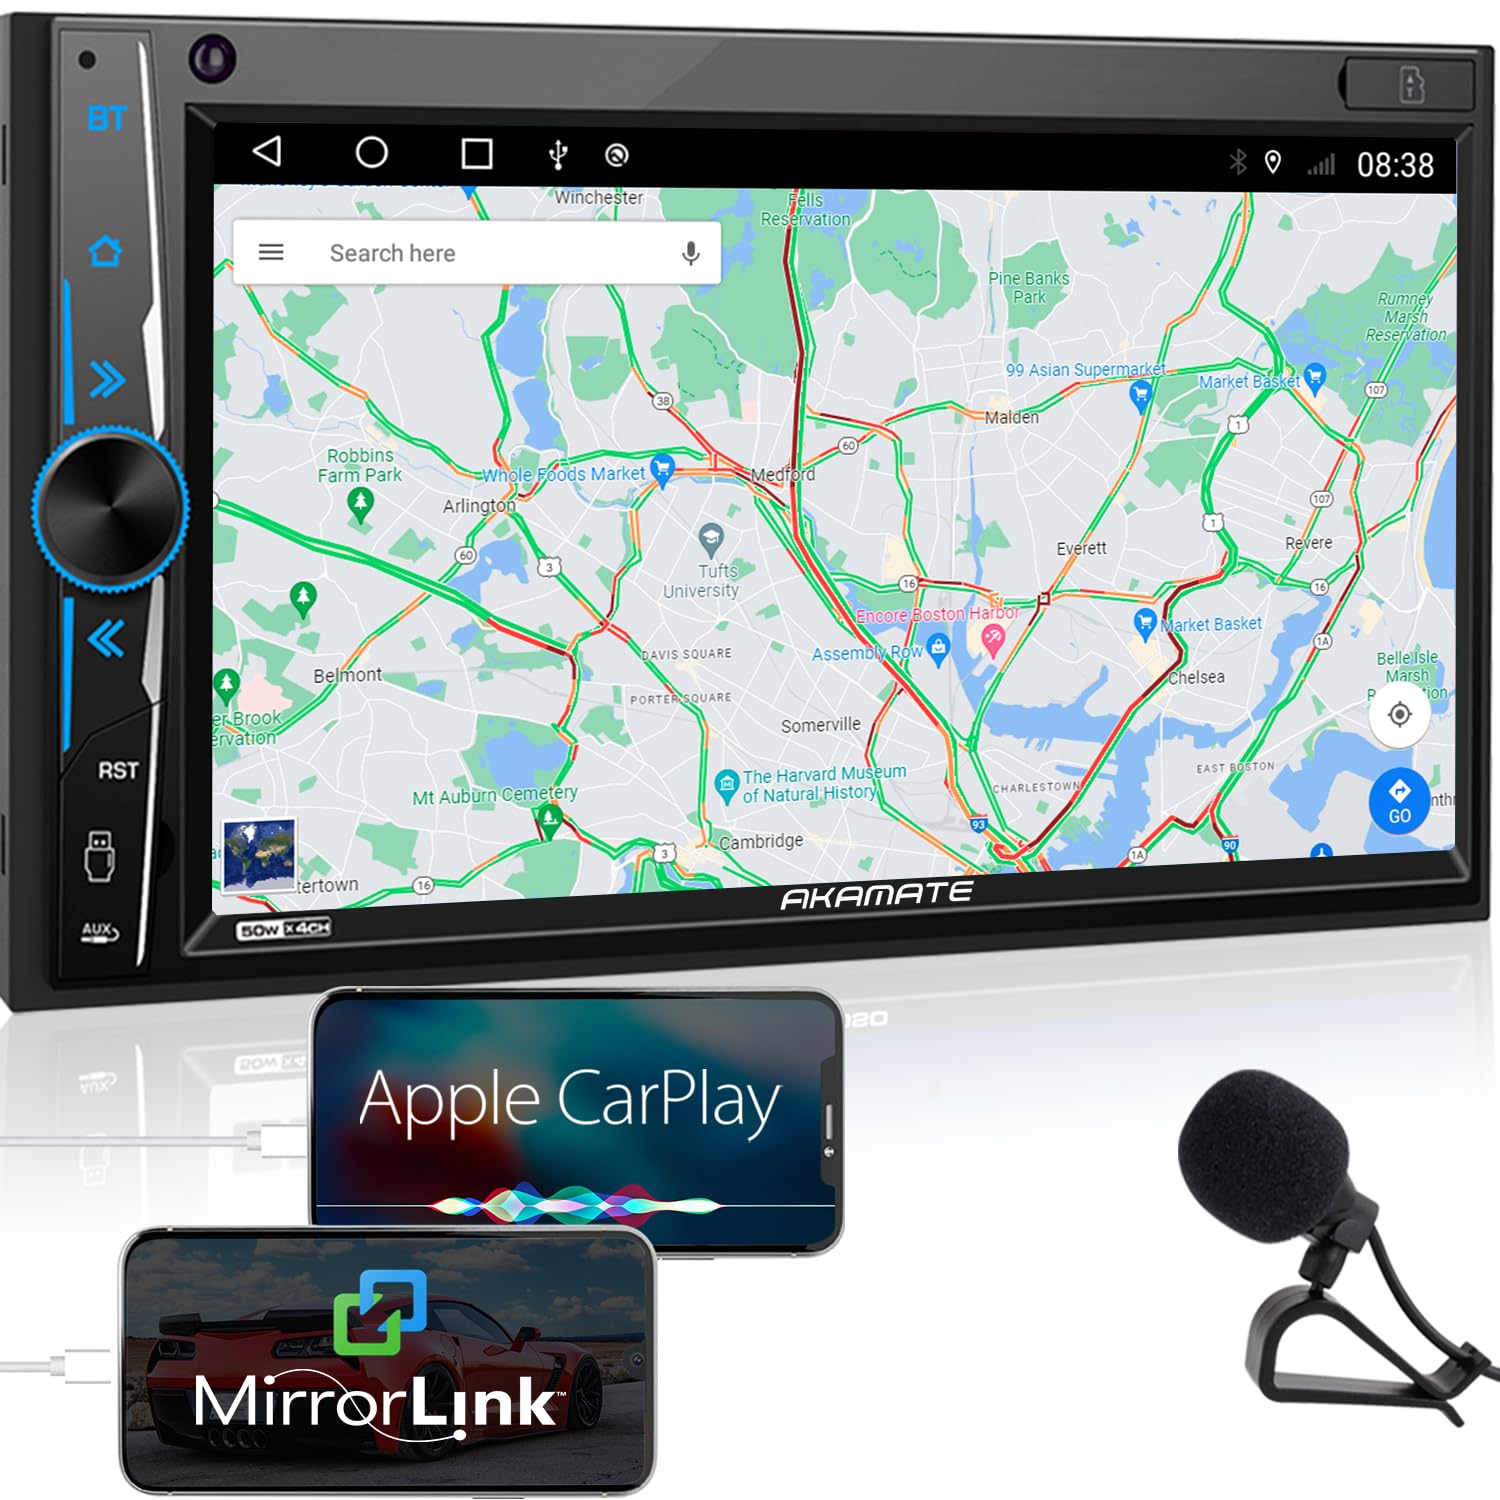
Image 1.1: AKAMATE Dual Din Car Stereo main unit. This image shows the front view of the car stereo with its 7-inch touchscreen and physical buttons on the left side.
2. ข้อมูลด้านความปลอดภัย
WARNING: Improper installation or operation can lead to serious injury or damage. Always consult a qualified professional for installation if you are unsure.
- อย่าใช้งานอุปกรณ์ในลักษณะที่รบกวนสมาธิในการขับขี่ ให้ความสำคัญกับความปลอดภัยบนท้องถนนเสมอ
- ตรวจสอบให้แน่ใจว่าสายไฟทั้งหมดเชื่อมต่ออย่างถูกต้องเพื่อป้องกันไฟฟ้าลัดวงจรหรืออันตรายจากไฟฟ้า
- Do not disassemble or modify the unit. This may cause damage, electric shock, or fire.
- รักษาระดับเสียงให้อยู่ในระดับที่คุณสามารถได้ยินเสียงการจราจรจากภายนอกได้
- หลีกเลี่ยงการให้เครื่องสัมผัสกับอุณหภูมิที่สูงหรือต่ำเกินไป แสงแดดโดยตรงเป็นเวลานาน หรือความชื้นที่มากเกินไป
3. เนื้อหาบรรจุภัณฑ์
ตรวจสอบว่ามีรายการทั้งหมดอยู่ในแพ็คเกจ:
- 1 × Dual Din Car Stereo with Frame
- 1 × Power and Audio Cable
- รีโมทคอนโทรล IR 1 ×
- 1 × External Microphone
- 1 × Steering Wheel Control (SWC) Interface
- 1 × Backup Camera and Camera Cable
- 2 × Installation Brackets and Screws
- 2 × User Manuals (This document is one of them)
4. การตั้งค่า
4.1. การติดตั้ง
Before beginning installation, ensure the vehicle's battery is disconnected to prevent electrical damage. This unit is designed for a standard Dual Din opening. Please measure your dash opening before installation.

Image 4.1: Wiring diagram and dimensions for the AKAMATE car stereo. This image illustrates the physical dimensions of the head unit and provides a detailed wiring diagram for power, speakers, external microphone, steering wheel control, and camera inputs.
- เตรียมแดชบอร์ด: Remove the existing car stereo and any necessary trim panels to access the wiring harness and mounting area.
- การเชื่อมต่อสายไฟ: Refer to the provided wiring diagram (Image 4.1). Connect the power, ground, accessory, speaker, and other necessary wires from your vehicle's harness to the stereo's harness. Ensure secure connections.
- ไมโครโฟนภายนอก: Connect the external microphone to the designated input on the stereo. Position the microphone in a suitable location for clear voice pickup, such as near the sun visor.
- กล้องมองหลัง (อุปกรณ์เสริม): If installing the backup camera, connect its video cable to the "Rear Camera Input" on the stereo and its power cable to the vehicle's reverse light circuit.
- ระบบควบคุมพวงมาลัย (SWC): Connect the SWC wires according to your vehicle's specifications. Configuration may be required in the stereo's settings menu.
- ติดตั้งหน่วย: Secure the stereo into the dashboard opening using the provided brackets and screws. Reinstall any removed trim panels.
- เชื่อมต่อแบตเตอรี่อีกครั้ง: เชื่อมต่อแบตเตอรี่รถยนต์อีกครั้ง
4.2. การเปิดเครื่องครั้งแรกและการตั้งค่าพื้นฐาน
After installation, turn on your vehicle's ignition. The stereo should power on. Follow any on-screen prompts for initial setup, such as language selection and time/date settings.
5. คู่มือการใช้งาน
5.1. Touchscreen and General Controls
The unit features a 7-inch 1024x600 HD capacitive touchscreen for intuitive control. Use gestures like tapping, swiping, and pinching (where applicable) to navigate menus and control functions.
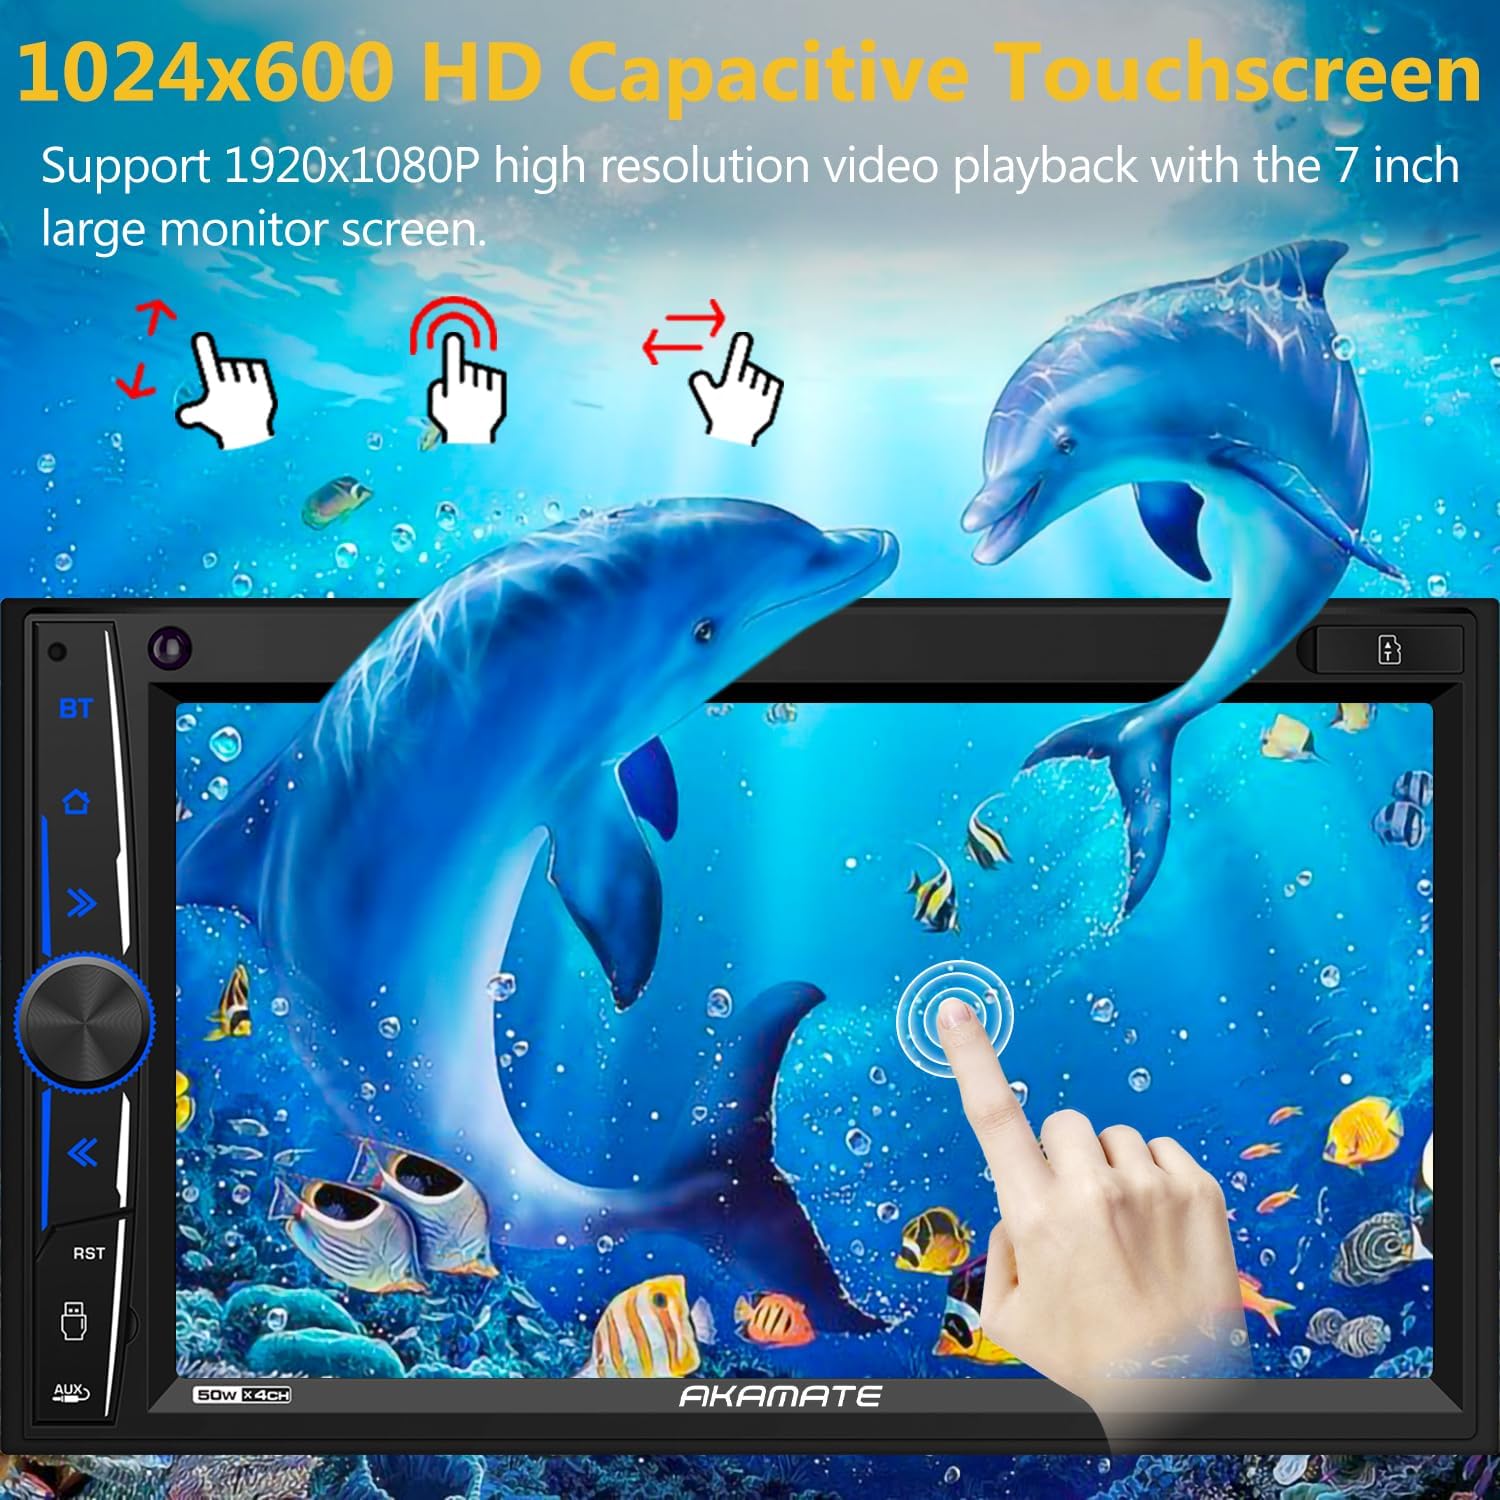
Image 5.1: Demonstration of the 7-inch HD Capacitive Touchscreen. This image shows the stereo displaying a high-resolution image of dolphins, with finger gestures indicating touch and swipe functionality.
The physical knob on the left typically controls volume and can be pressed for mute or power functions. Other physical buttons provide quick access to common features like Bluetooth, Home, or Reset.
5.2. Apple CarPlay
Connect your iPhone to the stereo using an original USB cable. The unit will automatically detect your phone and launch Apple CarPlay. You can then access familiar iPhone features directly on the stereo's screen, including:
- การโทรศัพท์
- Navigation (Maps)
- การเล่นเพลง
- ข้อความ
- ผู้ช่วยเสียง (Siri)

Image 5.2: Apple CarPlay interface showing navigation and call functions. This image displays the car stereo screen with a navigation map and a phone call interface, demonstrating Apple CarPlay functionality.
5.3. Mirror Link (for Android & iOS)
The Mirror Link function allows you to display your smartphone's screen content directly on the stereo. This feature is compatible with iPhone 12 Pro/12 and earlier models, and most Android 11 phones.
- เชื่อมต่อสมาร์ทโฟนของคุณกับสเตอริโอผ่านสาย USB
- Select the "Mirror Link" or "Phone Link" option on the stereo's interface.
- ทำตามคำแนะนำบนหน้าจอทั้งบนโทรศัพท์และเครื่องเสียงเพื่อทำการเชื่อมต่อ
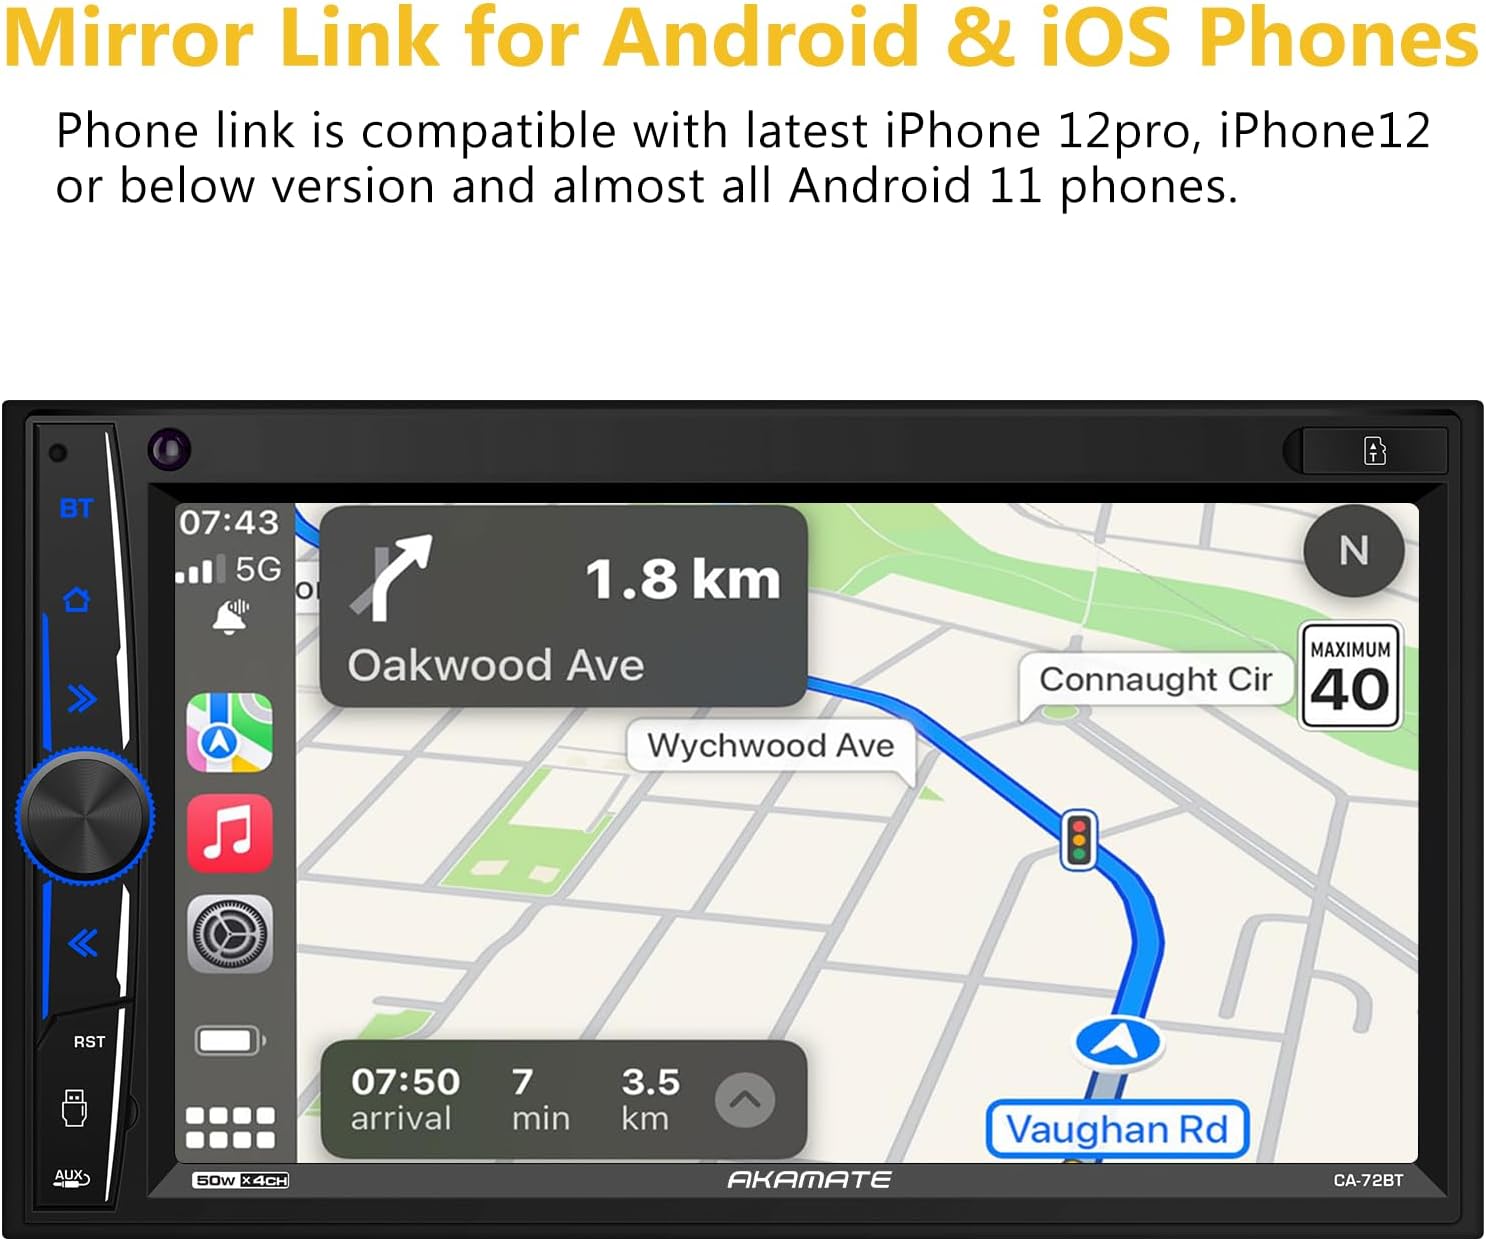
Image 5.3: Mirror Link feature displaying a phone's navigation screen on the car stereo. This image shows the stereo screen mirroring a navigation application from a connected smartphone.
5.4. การเชื่อมต่อบลูทูธ 5.0
The unit supports Bluetooth 5.0 for stable wireless connections, enabling hands-free calling and audio streaming.
- การจับคู่: On the stereo, navigate to the Bluetooth menu. On your smartphone, search for available Bluetooth devices and select "AKAMATE" (or similar device name). Enter the PIN (usually "0000") if prompted.
- การโทรแบบแฮนด์ฟรี: Once paired, you can make and receive calls directly through the stereo. The dual microphone design ensures clear audio for conversations.
- การสตรีมเสียง: Stream music from your phone or apps like Spotify and Pandora to the car stereo. Use the stereo's controls to manage playback (play/pause, skip tracks, adjust volume).

Image 5.4: Bluetooth 5.0 interface showing a phone dialer and indicating dual microphone functionality. This image displays the stereo screen with a phone keypad for dialing and highlights the Bluetooth connection and dual microphone feature.
5.5. Radio (FM/AM)
Access the Radio function from the main menu. Use the touchscreen to scan for stations, save presets, and switch between FM and AM bands.
5.6. การเล่น USB/SD
เสียบไดรฟ์ USB หรือการ์ด SD ที่มีสื่อบันทึกข้อมูล files into the designated ports. The stereo will automatically detect the media and allow you to browse and play audio or video files.
5.7. การตั้งค่าเสียง (อีควอไลเซอร์ 16 แบนด์)
Navigate to the Audio or EQ settings menu. The 16-band customizable equalizer allows for precise adjustment of audio frequencies to suit your preferences. Preset EQ modes (Rock, Pop, Jazz, etc.) are also available.
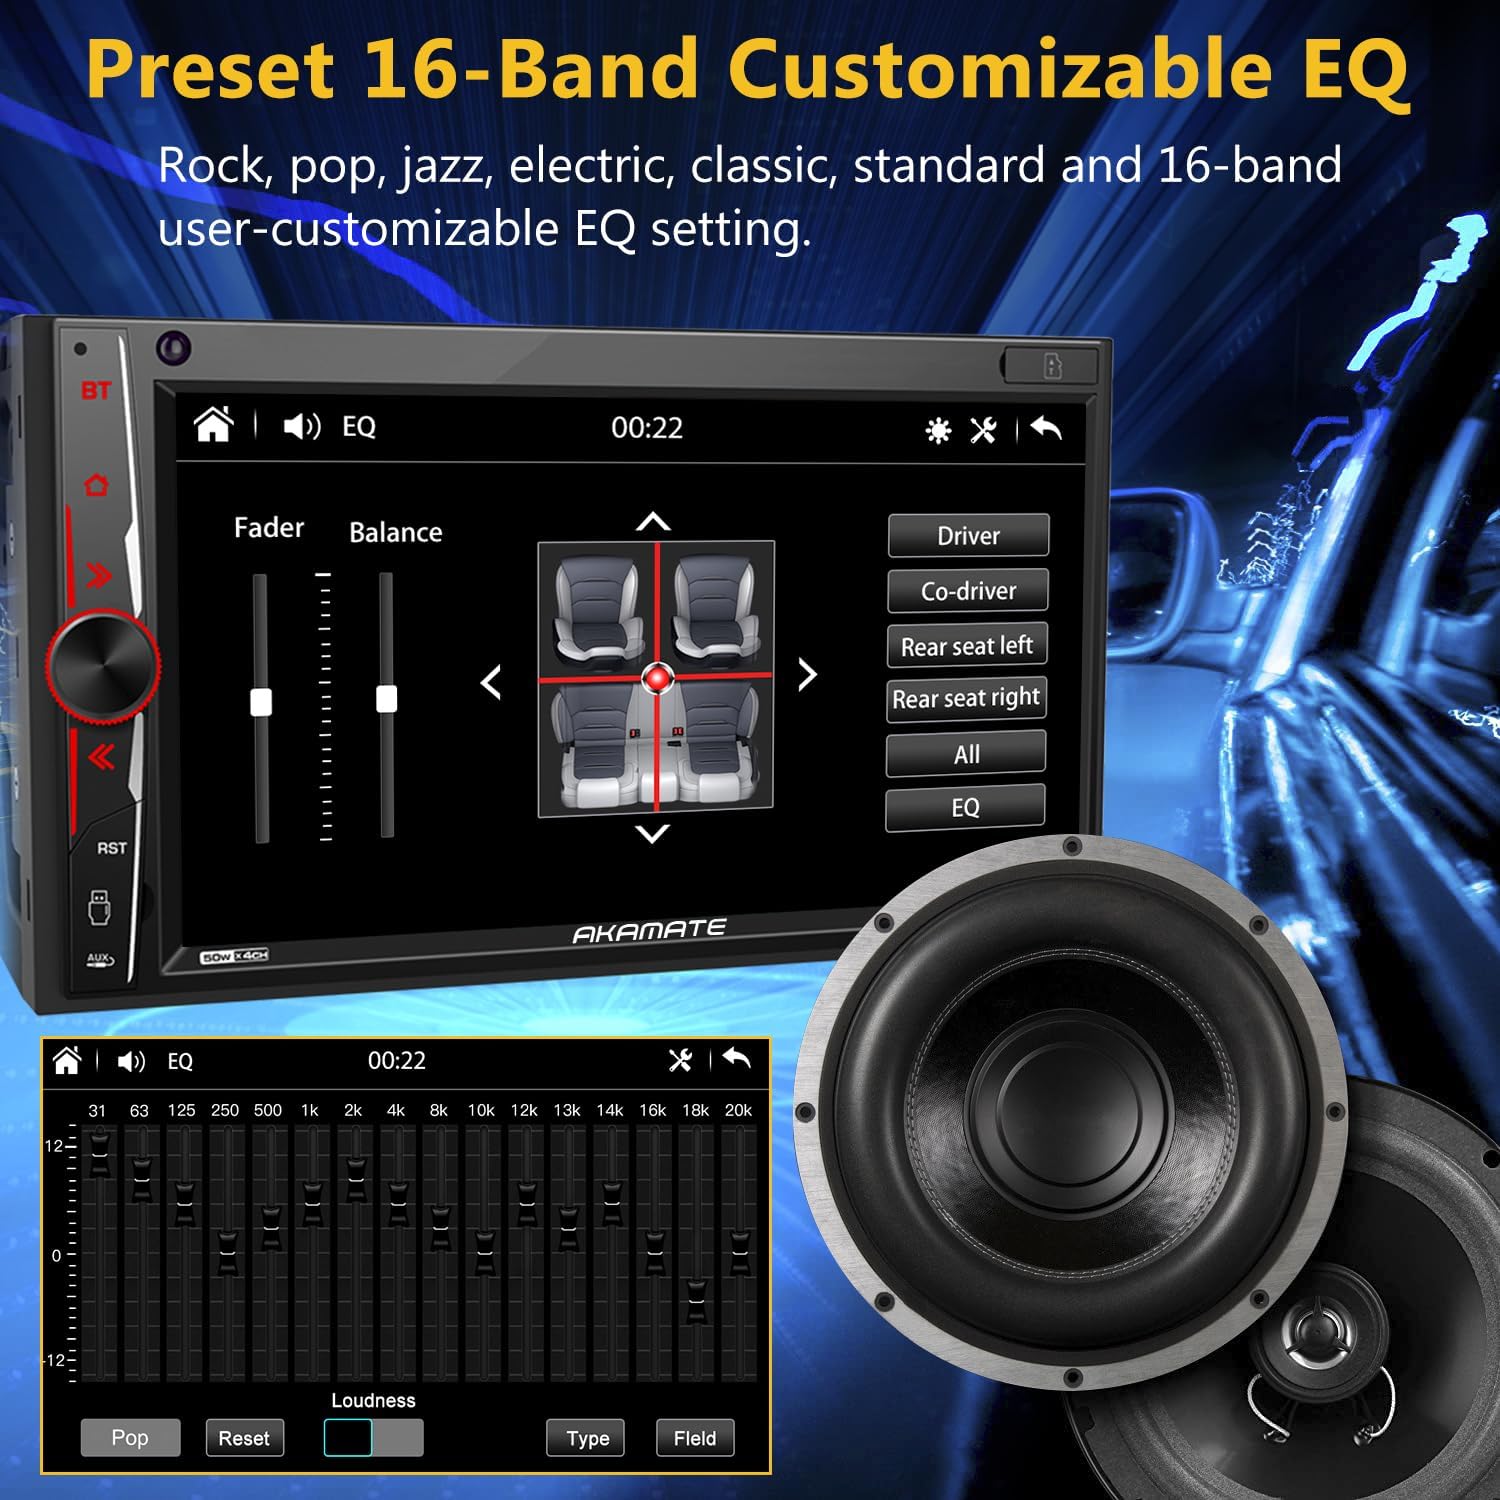
Image 5.5: 16-Band Customizable EQ settings interface. This image shows the stereo screen displaying the equalizer settings, allowing users to adjust audio frequencies and select preset sound modes.
5.8. ด้านหลังview อินพุตกล้อง
When the vehicle is shifted into reverse, the stereo automatically displays the video feed from the connected rearview camera. The included camera provides 720P HD night vision for improved visibility.

ภาพที่ 5.6: ด้านหลังview camera display showing 720P quality. This image compares the clarity of a 720P rearview camera feed with a lower resolution one, highlighting the enhanced detail provided by the included camera.
5.9. ระบบควบคุมพวงมาลัย (SWC)
If your vehicle supports steering wheel controls, you can configure them through the stereo's settings menu. This allows you to control functions like volume, track changes, and mode selection directly from your steering wheel.
6. การบำรุงรักษา
- การทำความสะอาดหน้าจอ: ใช้ผ้านุ่มไม่เป็นขุยเช็ดหน้าจอสัมผัสเบาๆ สำหรับรอยเปื้อนฝังแน่น ให้เช็ดเบาๆampชุบผ้าด้วยน้ำหรือน้ำยาทำความสะอาดที่ปลอดภัยต่อหน้าจอ หลีกเลี่ยงสารเคมีรุนแรงหรือวัสดุที่มีฤทธิ์กัดกร่อน
- การทำความสะอาดทั่วไป: รักษาตัวเครื่องให้สะอาดปราศจากฝุ่นและเศษผง ใช้แปรงขนนุ่มหรือลมอัดทำความสะอาดบริเวณปุ่มและพอร์ตต่างๆ
- อุณหภูมิ: ควรหลีกเลี่ยงการวางเครื่องไว้กลางแดดจัดหรือในอุณหภูมิที่สูงหรือต่ำเกินไปเป็นเวลานาน เนื่องจากอาจส่งผลต่อประสิทธิภาพและอายุการใช้งาน
7 การแก้ไขปัญหา
| ปัญหา | สาเหตุที่เป็นไปได้ | สารละลาย |
|---|---|---|
| ไม่มีไฟเข้า / เครื่องไม่เปิดใช้งาน | Incorrect wiring (power/ground), blown fuse, vehicle battery issue. | Check all power connections (yellow, red, black wires). Verify vehicle fuses. Ensure battery is charged. |
| ไม่มีเสียง. | ระดับเสียงต่ำเกินไป, เปิดใช้งานโหมดปิดเสียง, ต่อสายลำโพงไม่ถูกต้อง ampปัญหาตัวขยายเสียง | เพิ่มระดับเสียง ตรวจสอบว่าเปิดใช้งานโหมดปิดเสียงอยู่หรือไม่ ตรวจสอบการเชื่อมต่อลำโพง ตรวจสอบให้แน่ใจว่าอุปกรณ์ภายนอกเชื่อมต่ออยู่ ampเครื่องขยายเสียง (ถ้าใช้) จะได้รับพลังงาน |
| ปัญหาการเชื่อมต่อบลูทูธ | Device not in pairing mode, incorrect PIN, interference, device already connected. | Ensure both devices are in pairing mode. Re-enter PIN. Move closer to the unit. Disconnect other Bluetooth devices. |
| Apple CarPlay / Mirror Link not working. | Non-original USB cable, phone not compatible, software glitch. | Use an original USB cable. Check phone compatibility. Restart both phone and stereo. |
| หลังview กล้องไม่แสดงผล | Incorrect camera wiring, camera power issue, reverse trigger wire not connected. | Verify camera video and power connections. Ensure the reverse trigger wire (usually pink/brown) is correctly connected to the vehicle's reverse light. |
| หน้าจอสัมผัสไม่ตอบสนองหรือช้า | ปัญหาซอฟต์แวร์ชั่วคราว จำเป็นต้องปรับเทียบหน้าจอ | Perform a system reset (locate the RST button, often a small pinhole). Check for firmware updates if available. |
8. ข้อมูลจำเพาะ
- ยี่ห้อ: อะกามาเต
- แบบอย่าง: B093B9ZPS5
- ASIN: B093B9ZPS5
- GTIN/UPC: 759337201146
- แสดง: 7-inch HD Capacitive Touchscreen (1024x600 resolution, 178° viewมุมเอียง)
- การเชื่อมต่อ: Bluetooth 5.0, USB, SD Card, A/V Input
- คุณสมบัติ: Apple CarPlay, Mirror Link (Android/iOS), FM/AM Radio Tuner, RDS, 16-Band EQ, Rearview Camera Input (720P HD), Steering Wheel Control (SWC) support, Dual Microphone (built-in & external)
- เอาต์พุตเสียง: Stereo, 4 Channels
- กำลังขับ: 200 วัตต์
- บริการอินเทอร์เน็ตที่รองรับ: Pandora, Spotify (via connected smartphone)
- วิธีการควบคุม: Touchscreen, Mechanical Knob, Voice (via CarPlay/Mirror Link), IR Remote Control
- รูปแบบที่รองรับ: Audio and Video Interleave (AVI), WMA, WAV (and others for video playback up to 1920x1080P)
- การชาร์จ USB: 1.5A for phone charging
- ปุ่มส่องสว่าง: 7 different LED colors
9. การรับประกันและการสนับสนุน
AKAMATE products are designed for reliability and performance. For specific warranty details, please refer to the warranty card included with your purchase or contact AKAMATE customer support.
If you encounter any issues during installation or operation that are not covered in this manual, please contact AKAMATE customer service for assistance. Our support team is available to help and will respond within 24 hours.
ข้อมูลติดต่อ: Refer to your product packaging or the official AKAMATE webเว็บไซต์สำหรับรายละเอียดการติดต่อล่าสุด