Unbranded DP-KK99
คู่มือผู้ใช้กล้องวงจรปิดแบบพาโนรามา WiFi รุ่น DP-KK99 (ไม่มีตราสินค้า)
Model: DP-KK99
1. บทนำ
This manual provides detailed instructions for the installation, operation, and maintenance of your Unbranded DP-KK99 WiFi Panoramic Security Camera. Please read this manual thoroughly before using the product to ensure proper functionality and safety. This camera offers 360-degree panoramic surveillance, motion detection, night vision, and two-way audio communication for comprehensive home monitoring.
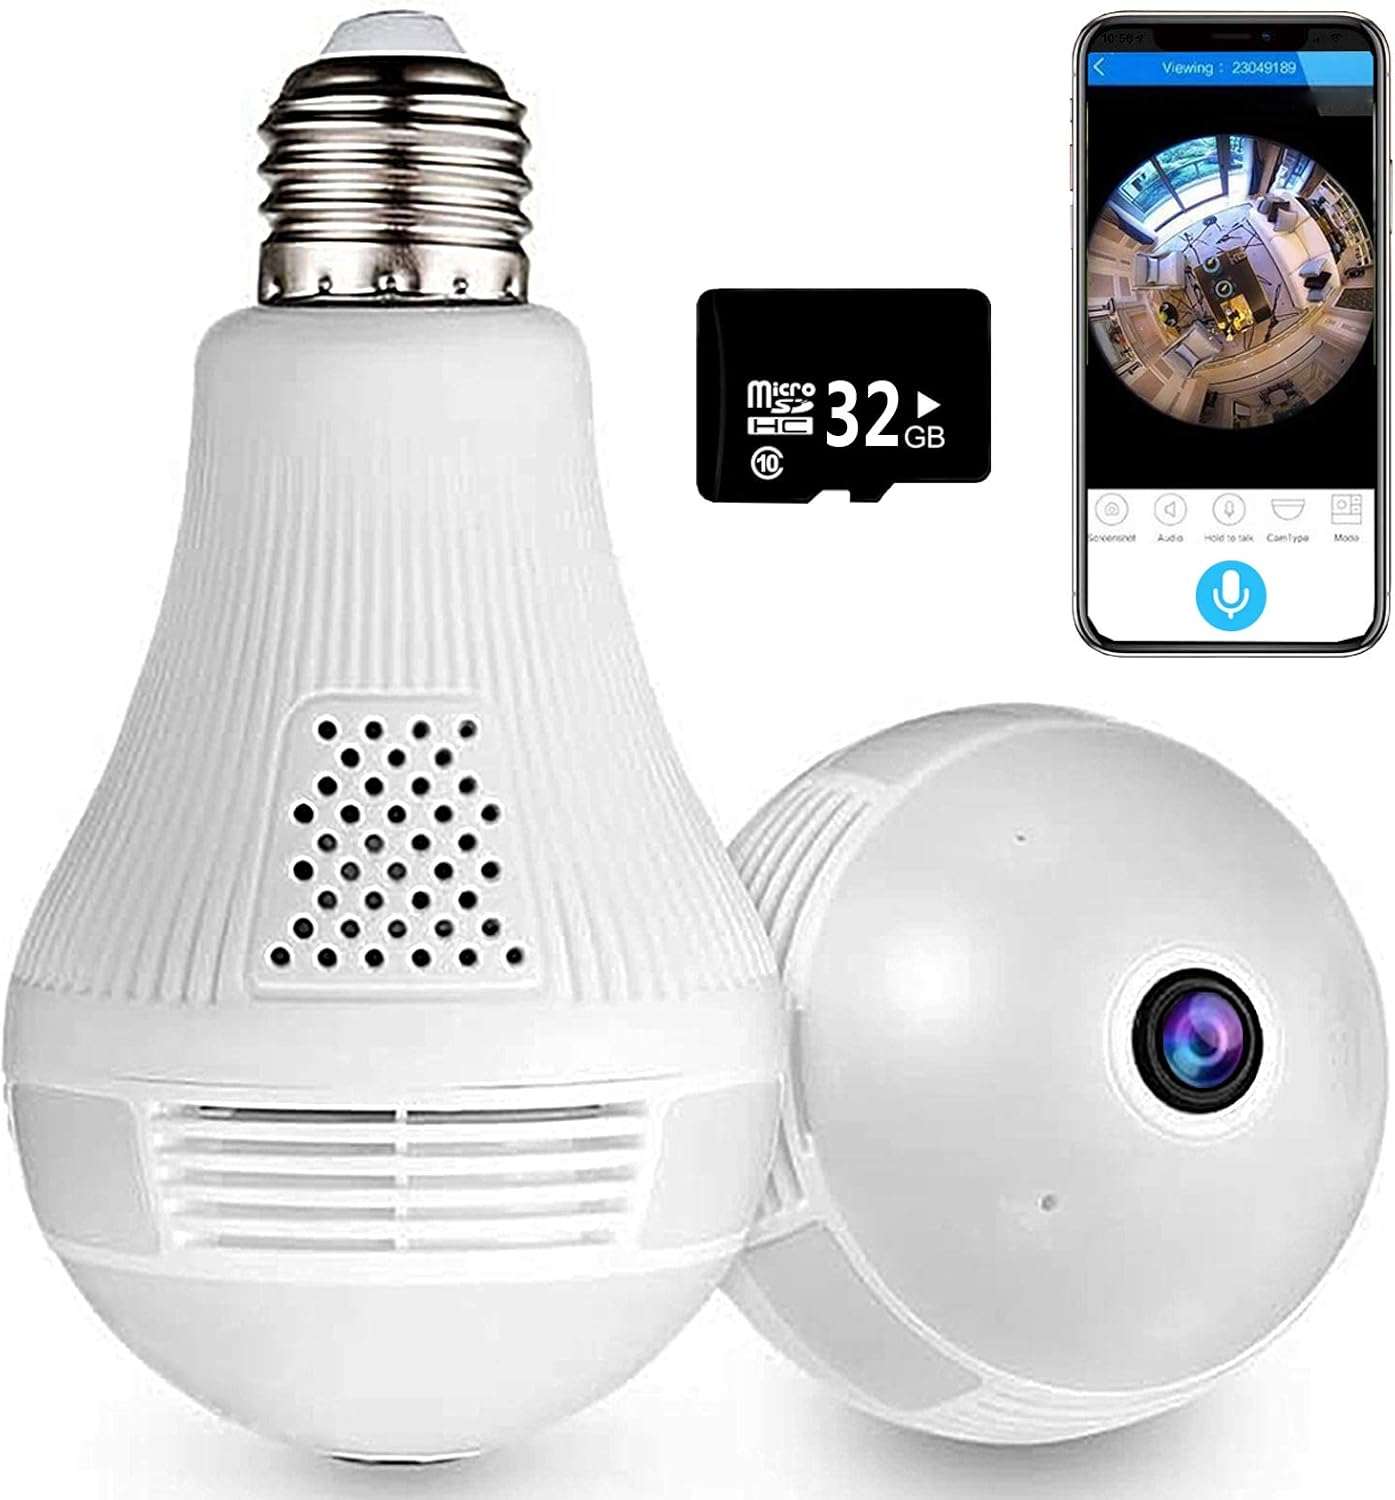
Image 1.1: The Unbranded DP-KK99 WiFi Panoramic Security Camera, showing its bulb-like design, a 32GB Micro SD card, and a smartphone displaying the camera's panoramic view.
2. เนื้อหาบรรจุภัณฑ์
โปรดตรวจสอบสิ่งของในกล่องเมื่อได้รับสินค้า หากมีสิ่งใดขาดหายหรือเสียหาย โปรดติดต่อผู้ค้าปลีก
- Unbranded DP-KK99 WiFi Panoramic Security Camera
- การ์ด Micro SD ขนาด 32GB (ติดตั้งมาแล้วหรือซื้อแยกต่างหาก)
- ตัวยึด
- คู่มือการใช้งาน (เอกสารนี้)
3. คู่มือการติดตั้ง
3.1 การติดตั้ง
The camera is designed for easy installation into a standard E27 lamp ฐาน.
- Ensure the power to the E27 lamp base is turned off before installation.
- Screw the camera firmly into the E27 lamp ฐาน.
- เปิดไฟให้กับ lamp base. The camera will power on and begin its startup sequence.

Image 3.1: Visual guide for screwing the camera into a standard E27 lamp ฐานสำหรับการติดตั้ง
3.2 การดาวน์โหลดแอปและการเชื่อมต่อ
The camera operates via the 'iCsee' mobile application.
- ดาวน์โหลดแอป: Scan the QR code provided on the product packaging or search for "iCsee" in your smartphone's app store (iOS/Android).
- ลงทะเบียนบัญชี: Open the iCsee application and register a new account using your email address. Phone numbers are not required for registration.
- เพิ่มกล้อง: Tap the '+' icon within the app to add a new device. Follow the on-screen prompts to select "Add Camera."
- เชื่อมต่อกับ Wi-Fi: Enter your 2.4GHz Wi-Fi network password. The camera only supports 2.4GHz Wi-Fi. Ensure the Wi-Fi name and password are spelled correctly.
- Initial Connection Tips: For the first connection, place the camera within 2 meters of your Wi-Fi router.
- Set New Password: Once successfully connected, set a new password for your camera for security.
3.3 Important Connection Notes
- Only 2.4GHz Wi-Fi networks are supported. 5GHz networks are not compatible.
- Ensure your Wi-Fi name and password are entered accurately.
- For initial setup, keep the camera close to your Wi-Fi router (within 2 meters).
4. คู่มือการใช้งาน
4.1 รีโมท Viewไอเอ็นจีและการควบคุม
เมื่อเชื่อมต่อแล้ว คุณสามารถ view อยู่ footage and control camera functions remotely through the iCsee app.
- สด View: Access the camera feed to see a clear, all-round view of your monitored area. The 360-degree fisheye lens provides comprehensive coverage without blind spots.
- การจับกุม: Use the app to capture pictures and record videos directly from the live feed.

Image 4.1: The camera's 360-degree panoramic view eliminates blind spots, providing coverage equivalent to multiple standard cameras.
4.2 การสื่อสารด้วยเสียงสองทาง
The camera features a built-in microphone and speaker, enabling two-way audio communication.
- From the iCsee app, you can initiate audio calls and conversations with individuals near the camera.
- The clear microphone ensures effective vocal transmission.

Image 4.2: The camera supports two-way intercom/audio, allowing remote communication with family members.
4.3 การตรวจจับการเคลื่อนไหวและการแจ้งเตือน
The camera is equipped with a motion detection function to enhance security.
- When abnormal motion is detected, the camera will send an alert message directly to your mobile phone via the iCsee app.
- This feature helps keep your home or office secure by notifying you of unusual activity.

Image 4.3: The camera supports motion detection, sending alarm notifications to your smartphone upon detecting activity.
4.4 การมองเห็นตอนกลางคืน
The camera provides excellent night vision capabilities for monitoring in low-light or dark conditions.
- It features built-in infrared night vision and white light full-color night vision dual mode.
- This dual mode ensures clear visibility and security around the clock.
4.5 ฟังก์ชั่นไฟ
The integrated light can be controlled via the app.
- You can set the light to turn on automatically in the dark, manually control it, or schedule it to turn on at specific times.
4.6 ตัวเลือกการจัดเก็บข้อมูล
กล้องรองรับการจัดเก็บข้อมูลทั้งแบบโลคอลและบนคลาวด์สำหรับอาหารที่บันทึกไว้tage.
- การ์ด Micro SD: สด viewing and recording are supported directly to the included 32GB Micro SD card.
- การเก็บข้อมูลบนคลาวด์: Cloud storage options may be available through the iCsee app for additional backup and accessibility.

Image 4.4: The camera supports both Micro SD card and cloud storage for recording and viewการไอเอ็นจี
5. ข้อมูลจำเพาะ
| คุณสมบัติ | รายละเอียด |
|---|---|
| หมายเลขรุ่น | DP-KK99 |
| เทคโนโลยีการเชื่อมต่อ | ไร้สาย (Wi-Fi) |
| โปรโตคอลการเชื่อมต่อ | Wi-Fi (2.4GHz เท่านั้น) |
| อุปกรณ์ที่รองรับ | สมาร์ทโฟน (iOS/Android) |
| แหล่งพลังงาน | AC/DC (E27 Lamp ฐาน) |
| ประเภทการติดตั้ง | การติดตั้งบนเพดาน |
| ฟอร์มแฟกเตอร์ | โดม |
| สี | สีขาว |
| ขนาดรายการ (ยาว x กว้าง x สูง) | 6.5 x 3.94 x 3.54 นิ้ว |
| น้ำหนักสินค้า | 7.8 ออนซ์ |
| คุณสมบัติพิเศษ | Motion Sensor, Night Vision (Infrared & Full-Color), Two-Way Audio |
| การใช้งานภายใน/ภายนอกอาคาร | ในร่ม |
| รูปแบบการจับภาพวิดีโอ | MPEG-4 |
| การให้คะแนนการคุ้มครองระหว่างประเทศ | IP67 |
6 การแก้ไขปัญหา
หากคุณพบปัญหาเกี่ยวกับกล้อง โปรดดูวิธีแก้ไขปัญหาทั่วไปต่อไปนี้:
- การเชื่อมต่อล้มเหลว:
- ตรวจสอบให้แน่ใจว่าเครือข่าย Wi-Fi ของคุณเป็น 2.4GHz กล้องไม่รองรับ Wi-Fi 5GHz
- Verify that the Wi-Fi name (SSID) and password are entered correctly in the iCsee app.
- During initial setup, ensure the camera is within 2 meters of your Wi-Fi router.
- การรีเซ็ตกล้อง: If connection fails, insert a thimble or small pin into the reset hole on the camera. Press and hold for 10 seconds until you hear a prompt or see an indicator light change. Wait 2 minutes for the camera to restart, then attempt to reconnect.
- Hotspot Mode Activation: If you need to activate hotspot mode, insert a thimble into the reset hole and click 3 times. Then, search for a Wi-Fi network starting with "camera" on your phone. The default password for this hotspot is 1234567890.
- No Picture/Offline: Check the power supply to the E27 lamp base. Ensure the camera is securely screwed in and receiving power. Verify your Wi-Fi connection is stable.
- คุณภาพของภาพต่ำ: Ensure the camera lens is clean and free from dust or obstructions. Check your internet connection speed.
- การ์ด SD ไม่บันทึก: Ensure the 32GB Micro SD card is properly inserted. Format the SD card through the app if necessary.
7. การบำรุงรักษา
- การทำความสะอาด: เช็ดเลนส์และตัวกล้องเบาๆ ด้วยผ้าแห้งเนื้อนุ่ม ห้ามใช้สารเคมีรุนแรงหรือน้ำยาทำความสะอาดที่มีฤทธิ์กัดกร่อน
- การจัดวาง: Ensure the camera is installed in a dry, indoor environment. Avoid direct exposure to water or extreme temperatures.
- อัพเดตเฟิร์มแวร์: Periodically check the iCsee app for available firmware updates to ensure optimal performance and security.
8. การรับประกันและการสนับสนุน
Specific warranty details for this Unbranded product are not provided in this manual. For warranty information, technical support, or service inquiries, please contact your original retailer or the seller directly. Keep your purchase receipt as proof of purchase.
Ask a question about this manual
Ask about setup, troubleshooting, compatibility, parts, safety, or missing instructions. Manuals+ will review the question and use this page’s manual context to help answer it.