
1. บทนำ
Thank you for choosing the RICOO S7411 Monitor Wall Mount. This manual provides essential information for the safe and correct installation, operation, and maintenance of your new wall mount. Please read these instructions thoroughly before beginning installation and retain them for future reference. This mount is designed to securely hold monitors and TVs ranging from 13 to 27 inches (33-69 cm) with VESA 75x75 or 100x100 mounting patterns and a maximum weight of 20 kg.
2. ข้อมูลด้านความปลอดภัย
- ความจุน้ำหนัก: Do not exceed the maximum load capacity of 20 kg (44 lbs). Overloading can result in serious injury or damage to equipment.
- ขนาดหน้าจอ: Ensure your screen's diagonal measurement is within the recommended range of 13-27 inches (33-69 cm).
- ความเข้ากันได้ของ VESA: Verify that your monitor or TV has VESA mounting patterns of 75x75 mm or 100x100 mm.
- ประเภทผนัง: The included wall plugs are suitable for concrete walls only. For other wall types (e.g., wood studs, drywall), consult a professional or use appropriate mounting hardware (not included).
- การติดตั้ง: Improper installation may cause property damage or personal injury. If you are unsure about the installation process, seek professional assistance.
- ชิ้นส่วนที่เคลื่อนไหว: Be cautious when adjusting the mount to avoid pinching fingers or other body parts.
- เด็ก: Keep small parts and packaging materials away from children, as they may pose a choking hazard.
3. เนื้อหาบรรจุภัณฑ์
Before installation, please check that all components are present and undamaged. If any parts are missing or defective, contact RICOO customer support.
- Pre-assembled Monitor Bracket
- Wall Plugs (for concrete walls only)
- Screen Mounting Screws
- สกรูยึดผนัง
- Additional Accessories (e.g., washers, spacers)

Figure 3.1: Technical diagram showing the components and dimensions of the S7411 mount.
4. ข้อมูลจำเพาะ
| แบบอย่าง | S7411 |
| ยี่ห้อ | ริคู |
| ขนาดหน้าจอที่เข้ากันได้ | 13 - 27 นิ้ว (33 - 69 เซนติเมตร) |
| ความเข้ากันได้ของ VESA | 75x75 มม., 100x100 มม. |
| ความจุในการรับน้ำหนักสูงสุด | 20 กก. (44 ปอนด์) |
| ช่วงหมุน | +/- 90 องศา |
| ช่วงความเอียง | -3 ถึง -10 องศา |
| การปรับระยะห่างจากผนัง | 44 - 192 มม. |
| Front Panel Rotation | +/- 3 องศา |
| วัสดุ | เหล็กอัลลอยด์ |
| ประเภทการติดตั้ง | ติดผนัง |
| ขนาดสินค้า | 19 x 12 x 14 ซม. |
| น้ำหนักผลิตภัณฑ์ | 650 กรัม |

Figure 4.1: VESA compatibility and screen size range.
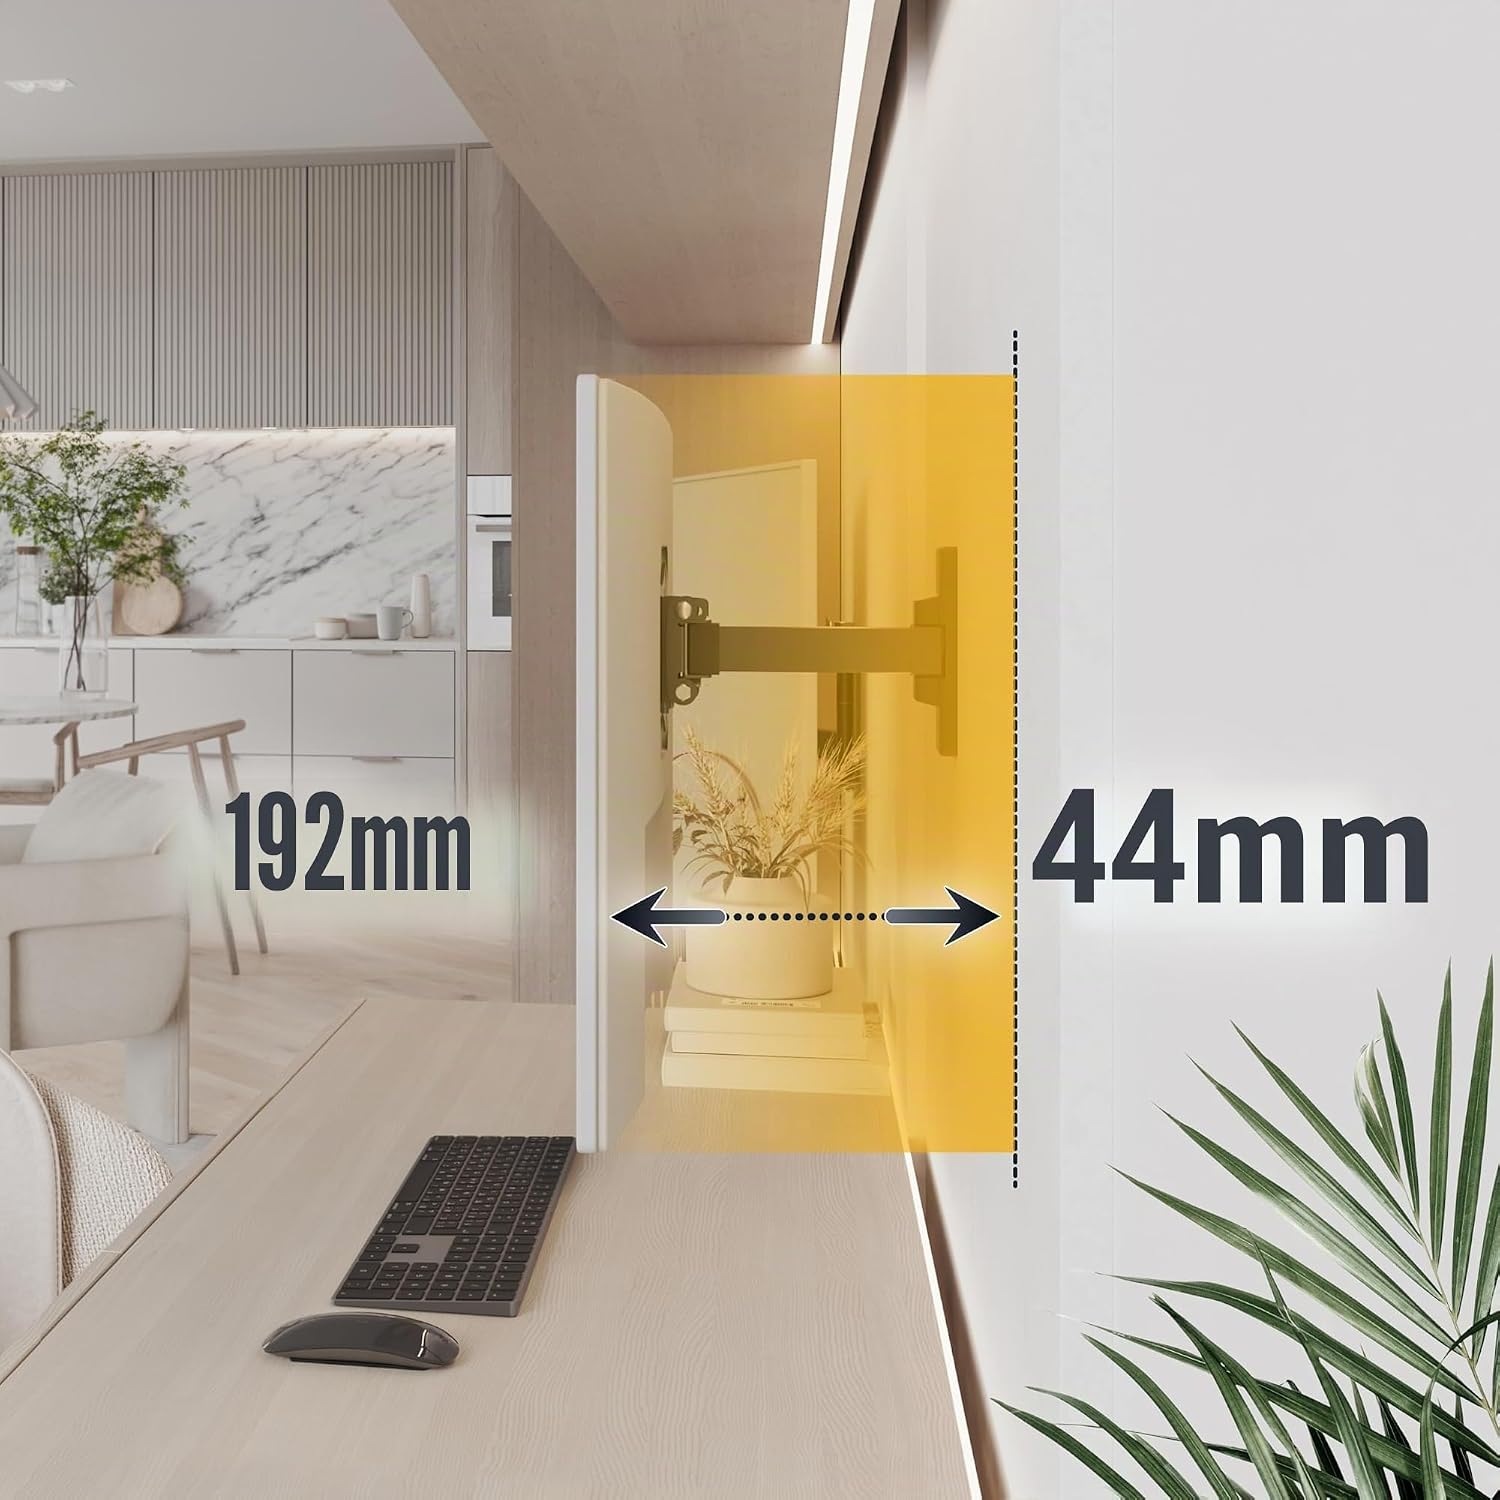
Figure 4.2: The mount supports a maximum weight of 20 kg.
5. การตั้งค่า (การติดตั้ง)
Follow these steps carefully to install your RICOO S7411 Monitor Wall Mount.
- การตรวจสอบก่อนการติดตั้ง:
- Ensure your wall can support the combined weight of the mount and your monitor (up to 20 kg).
- Confirm your monitor's VESA pattern is 75x75 mm or 100x100 mm.
- Gather necessary tools: drill, level, screwdriver, pencil.
- การติดตั้งแผ่นยึดผนัง:
- Choose a suitable location on your wall. Use a level to mark the drilling points for the wall plate.
- Drill pilot holes at the marked locations. For concrete walls, insert the provided wall plugs. For other wall types, use appropriate anchors (not included).
- Secure the wall plate to the wall using the wall screws. Ensure it is firmly attached and level.

Figure 5.1: Securing the wall plate.
- Attaching the VESA Plate to the Monitor:
- วางจอภาพคว่ำหน้าลงบนพื้นผิวที่นุ่มและสะอาดอย่างระมัดระวัง
- Align the VESA plate of the mount with the mounting holes on the back of your monitor.
- Use the appropriate screen mounting screws and washers/spacers (if needed) to secure the VESA plate to the monitor. Do not overtighten.

Figure 5.2: Attaching the VESA plate to the monitor.
- Mounting the Monitor to the Wall Arm:
- ขอความช่วยเหลือจากผู้อื่น ยกจอภาพพร้อมแผ่น VESA ที่ติดมาด้วยอย่างระมัดระวัง
- Hook the VESA plate onto the arm of the wall mount.
- Secure the monitor to the arm using the provided locking mechanism or screws, as indicated in the detailed diagram. Ensure it is securely fastened.

Figure 5.3: Final assembly of monitor to wall arm.
6. การใช้งาน (การปรับแต่ง)
The RICOO S7411 mount offers flexible adjustments for optimal viewความสะดวกสบาย
- การปรับหมุน: The monitor can be swiveled up to +/- 90 degrees horizontally. Gently push or pull the monitor to the desired angle.
- การปรับเอียง: The screen can be tilted from -3 to -10 degrees vertically. Loosen the tilt adjustment screws slightly, adjust the screen to your preferred tilt, and then retighten the screws to secure the position.
- Wall Distance Adjustment: The mount allows you to adjust the distance of your monitor from the wall between 44 mm and 192 mm. Extend or retract the arm to achieve the desired distance.
- Front Panel Rotation: The front panel can be rotated +/- 3 degrees to ensure your screen is perfectly level after installation. Loosen the rotation screw, adjust, and retighten.

Figure 6.1: Horizontal swivel adjustment.

Figure 6.2: Vertical tilt adjustment.

Figure 6.3: Adjustable wall distance.
7. การบำรุงรักษา
การบำรุงรักษาตามปกติจะช่วยให้ตัวยึดติดผนังของคุณมีอายุการใช้งานยาวนานและปลอดภัย
- การทำความสะอาด: เช็ดฐานยึดด้วยผ้าแห้งเนื้อนุ่ม หลีกเลี่ยงการใช้สารทำความสะอาดที่มีฤทธิ์กัดกร่อนหรือตัวทำละลาย เพราะอาจทำให้พื้นผิวเสียหายได้
- การตรวจสอบเป็นระยะ: Periodically check all screws and connections to ensure they are tight and secure. Over time, vibrations or adjustments may cause screws to loosen.
- การหล่อลื่น: No lubrication is typically required for the moving parts. If movement becomes stiff, ensure no debris is obstructing the joints.
8 การแก้ไขปัญหา
If you encounter any issues with your RICOO S7411 Monitor Wall Mount, refer to the following common problems and solutions:
| ปัญหา | สาเหตุที่เป็นไปได้ | สารละลาย |
|---|---|---|
| Monitor is not level | Wall plate or VESA plate not perfectly level; front panel rotation needs adjustment. | Adjust the front panel rotation (+/- 3 degrees) as described in Section 6. If the issue persists, re-check the wall plate installation with a level. |
| Difficulty adjusting swivel/tilt | Screws too tight; debris in joints. | Ensure adjustment screws are not overtightened. Loosen slightly if necessary. Check for any obstructions in the moving parts. |
| ภูเขารู้สึกไม่มั่นคง | Loose screws; incorrect wall anchors; overloaded mount. | Check all mounting screws (wall and monitor) and tighten them securely. Verify that the wall anchors are appropriate for your wall type. Ensure the monitor weight does not exceed 20 kg. |
| Monitor does not fit | Incorrect VESA pattern or screen size. | Confirm your monitor's VESA pattern is 75x75 mm or 100x100 mm and its size is between 13-27 inches. |
9. การรับประกันและการสนับสนุน
The RICOO S7411 Monitor Wall Mount comes with a 24-month legal warranty for new products, covering manufacturing defects and material faults.
For any questions regarding our products, installation, or warranty claims, please do not hesitate to contact our customer support team. We are happy to assist you.
อีเมล: support@ricoo.de


