
1. บทนำ
This manual provides detailed instructions for the safe and efficient operation of the Komshine GX39 Fiber Fusion Splicer. The GX39 is designed for precise fiber optic splicing with features such as fast splicing and heating times, low splice loss, and a versatile 3-in-1 fiber holder. Please read this manual thoroughly before using the device.

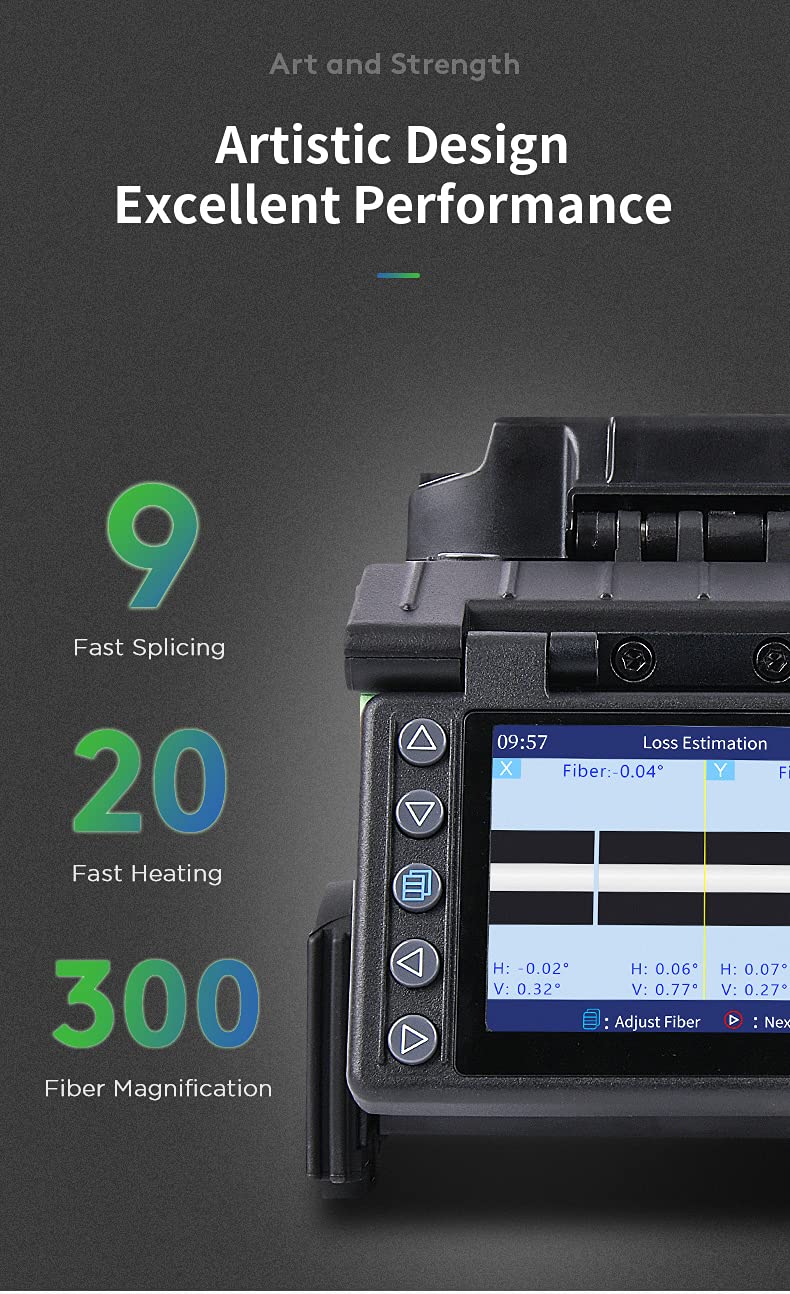
เกินview of the Komshine GX39 Fiber Fusion Splicer highlighting its core features.
2. ข้อมูลด้านความปลอดภัย
ปฏิบัติตามข้อควรระวังด้านความปลอดภัยต่อไปนี้เสมอเพื่อป้องกันการบาดเจ็บและความเสียหายต่ออุปกรณ์:
- Do not look directly into the fiber end when the splicer is operating, as invisible laser light may be present.
- ตรวจสอบให้แน่ใจว่าพื้นที่ทำงานสะอาดและมีแสงสว่างเพียงพอ
- Handle optical fibers with care; they are fragile and can cause splinters.
- เก็บอุปกรณ์ให้ห่างจากน้ำและความชื้นที่มากเกินไป
- ใช้เฉพาะอะแดปเตอร์แปลงไฟและแบตเตอรี่ที่ให้มาเท่านั้น
- อย่าพยายามถอดประกอบหรือซ่อมแซมอุปกรณ์ด้วยตนเอง โปรดติดต่อช่างผู้ชำนาญการ
3. เนื้อหาบรรจุภัณฑ์
Verify that all items are present in your Komshine GX39 package:
- Komshine GX39 Fiber Fusion Splicer
- เครื่องลอกใยแก้ว
- มีดไฟเบอร์ออปติก
- อะแดปเตอร์ AC
- แบตเตอรี่ลิเธียม (5200mAh)
- อิเล็กโทรดสำรอง
- เครื่องชาร์จ
- ถาดระบายความร้อน
- Operation Manual CD
- กระเป๋าใส่อุปกรณ์
- ผ้าเช็ดทำความสะอาด

Complete Komshine GX39 Fiber Fusion Splicer kit.
4. การตั้งค่าและการใช้งาน
Follow these steps for proper setup and operation of the GX39 Fusion Splicer.
4.1. การชาร์จแบตเตอรี่
The GX39 is equipped with a 5200mAh lithium battery. Connect the AC adapter to the splicer and a power outlet to charge the battery. A full charge allows for approximately 320 splicing and heating cycles.
4.2. การเตรียมใยอาหาร
การเตรียมเส้นใยอย่างเหมาะสมเป็นสิ่งสำคัญอย่างยิ่งต่อความสำเร็จในการต่อเส้นใย
- ลอกเส้นใยออก: Use the fiber stripper to remove the outer coating of the optical fiber to the required length.
- ทำความสะอาดเส้นใย: After stripping, use cleaning wipes moistened with alcohol to thoroughly clean the bare fiber. This removes any residue that could affect splice quality.
- แยกเส้นใย: Place the cleaned fiber into the optical fiber cleaver. Ensure the fiber is positioned correctly for a precise, perpendicular cut. The cleaver features a tungsten steel blade for a smooth cut surface and has a blade life of up to 48,000 times with a cleaving angle of less than 0.5 degrees.

Optical fiber cleaver with tungsten steel blade for precise cuts.
4.3. Fiber Placement and Splicing
The GX39 features a 3-in-1 fiber holder compatible with various fiber types.
- Place the Fiber: Open the splicer's cover and carefully place the prepared fibers into the 3-in-1 fiber holders on both sides. Ensure the fiber ends are aligned in the V-grooves. The holder supports 3.0mm jumper, 0.9mm pigtail, FTTH fiber, and bare fiber.
- Initiate Splicing: Close the cover. The splicer will automatically detect the fibers and begin the alignment process. The 3.5-inch 800*480 HD LCD screen will display the fiber alignment.
- Splicing Cycle: The GX39 performs fast splicing in approximately 9 seconds. The screen will show the estimated splice loss, typically around 0.01dB for SM fiber.

The 3-in-1 fiber holder accommodates various fiber types.
Splicer display showing fiber alignment and estimated loss.
4.4. Heat Shrinking
After successful splicing, the splice point needs protection.
- Position Heat Shrink Tube: Move the heat shrink tube over the welded fiber joint.
- วางไว้ในเครื่องทำความร้อน: Carefully place the fiber with the heat shrink tube into the heating oven.
- วงจรความร้อน: Close the heater cover. The GX39 performs fast heating in approximately 20 seconds.
- การระบายความร้อน: Once heating is complete, remove the fiber and place it in the integrated cooling tray to cool down before handling.

Heat shrinking process for protecting the fiber splice.
4.5. คู่มือวิดีโอการใช้งาน
This video demonstrates the complete fiber optic fusion splicing process using the Komshine GX39, including fiber preparation, splicing, and heat shrinking.
5. การบำรุงรักษา
Regular maintenance ensures the longevity and performance of your GX39 Fusion Splicer.
5.1. การเปลี่ยนอิเล็กโทรด
The electrodes have a life of approximately 4000 splices. When the splicer indicates electrode wear or splice quality degrades, replace them. The GX39 features an innovative tool-free electrode replacement design.

Tool-free electrode replacement for convenience.
5.2. การทำความสะอาด
Regularly clean the V-grooves, objective lenses, and other optical components with a soft, lint-free cloth and appropriate cleaning solution. Keep the entire device free from dust and debris.
5.3. Durability and Storage
The GX39 is designed with enhanced toughness and features a silicone protective case, making it water-resistant, dust-resistant, and shock-resistant. Store the splicer in its carrying case in a dry, cool environment when not in use to protect it from environmental factors and physical damage.

Silicone protective case for enhanced durability.
6 การแก้ไขปัญหา
If you encounter issues with your Komshine GX39, refer to the following common troubleshooting tips:
- Poor Splice Quality: Check fiber cleave quality, clean V-grooves and electrodes, and ensure electrodes are not worn out.
- แบตเตอรี่ไม่ชาร์จ: Verify the AC adapter connection and ensure the power outlet is functional.
- ปัญหาการแสดงผล: Restart the device. If the problem persists, contact support.
- Fiber Not Detected: Ensure fibers are correctly placed in the V-grooves and the fiber holders are properly closed.
For more complex issues, consult the detailed troubleshooting section on the provided Operation Manual CD or contact Komshine customer support.
7. ข้อมูลจำเพาะ
| คุณสมบัติ | ข้อมูลจำเพาะ |
|---|---|
| เวลาการต่อสาย | 9 seconds (fast splicing) |
| เวลาในการให้ความร้อน | 20 seconds (fast heating) |
| อายุการใช้งานของอิเล็กโทรด | 4000 ครั้ง |
| การสูญเสียการเชื่อมต่อโดยเฉลี่ย | SM: 0.02dB; MM: 0.01dB; DS: 0.04dB; NZDS: 0.04dB |
| ความจุของแบตเตอรี่ | 5200mAh (approx. 320 circular welds) |
| แสดง | 3.5 inch 800*480 HD LCD Screen |
| การขยายภาพด้วยเส้นใย | 300X (X-axis or Y-axis); 150X (X-axis or Y-axis) |
| ที่วางไฟเบอร์ | 3-in-1 (SM, MM, bare fiber, pigtail, rubber-insulated, multi fiber cable) |
| การจัดเก็บข้อมูล | 10000 groups splicing results; 100 sets of images |
| การเชื่อมต่อ | USB interface for data download and software updates |
| ขนาด | 122มม. (กว้าง) × 148มม. (สูง) × 130มม. (ลึก) |
| น้ำหนัก | Min. 1.44kg (without battery) |
| ความต้านทานต่อสิ่งแวดล้อม | Water-resistant, dust-resistant, shock-resistant, high-temp-resistant |

Key specifications and features of the Komshine GX39.
8. การรับประกันและการสนับสนุน
The Komshine GX39 Fiber Fusion Splicer comes with a manufacturer's warranty. For detailed warranty terms and conditions, please refer to the documentation included with your product or visit the official Komshine website. For technical support, service, or spare parts, please contact Komshine customer service through their official channels.