
1. บทนำ
This manual provides comprehensive instructions for the installation, setup, and operation of the Cuifati Mini Relay Switch Remote Control system. This system is designed for various applications requiring remote control of electrical circuits, such as computer mainframes, automatic doors, and other low-voltage devices. Please read this manual carefully before use to ensure proper functionality and safety.
2. ข้อมูลด้านความปลอดภัย
- โปรดตรวจสอบให้แน่ใจว่าได้ตัดการเชื่อมต่อแหล่งจ่ายไฟแล้วก่อนทำการเดินสายไฟหรือติดตั้งใดๆ
- ตรวจสอบว่าปริมาณการใช้งานtage of your application matches the specifications of this relay switch.
- Do not exceed the maximum load current specified for the relay.
- Keep the device away from moisture, extreme temperatures, and corrosive environments.
- หากคุณไม่แน่ใจเกี่ยวกับการเดินสายไฟ ควรให้ผู้ที่มีคุณสมบัติเหมาะสมเป็นผู้ดำเนินการติดตั้ง
3. เนื้อหาบรรจุภัณฑ์
แพ็คเกจประกอบด้วยรายการต่อไปนี้:
- 1 x Relay Remote Control Switch (Receiver)
- 1 x ตัวส่งสัญญาณ (รีโมทคอนโทรล)
Note: Other items shown in product images are not included.
4. สินค้าหมดview
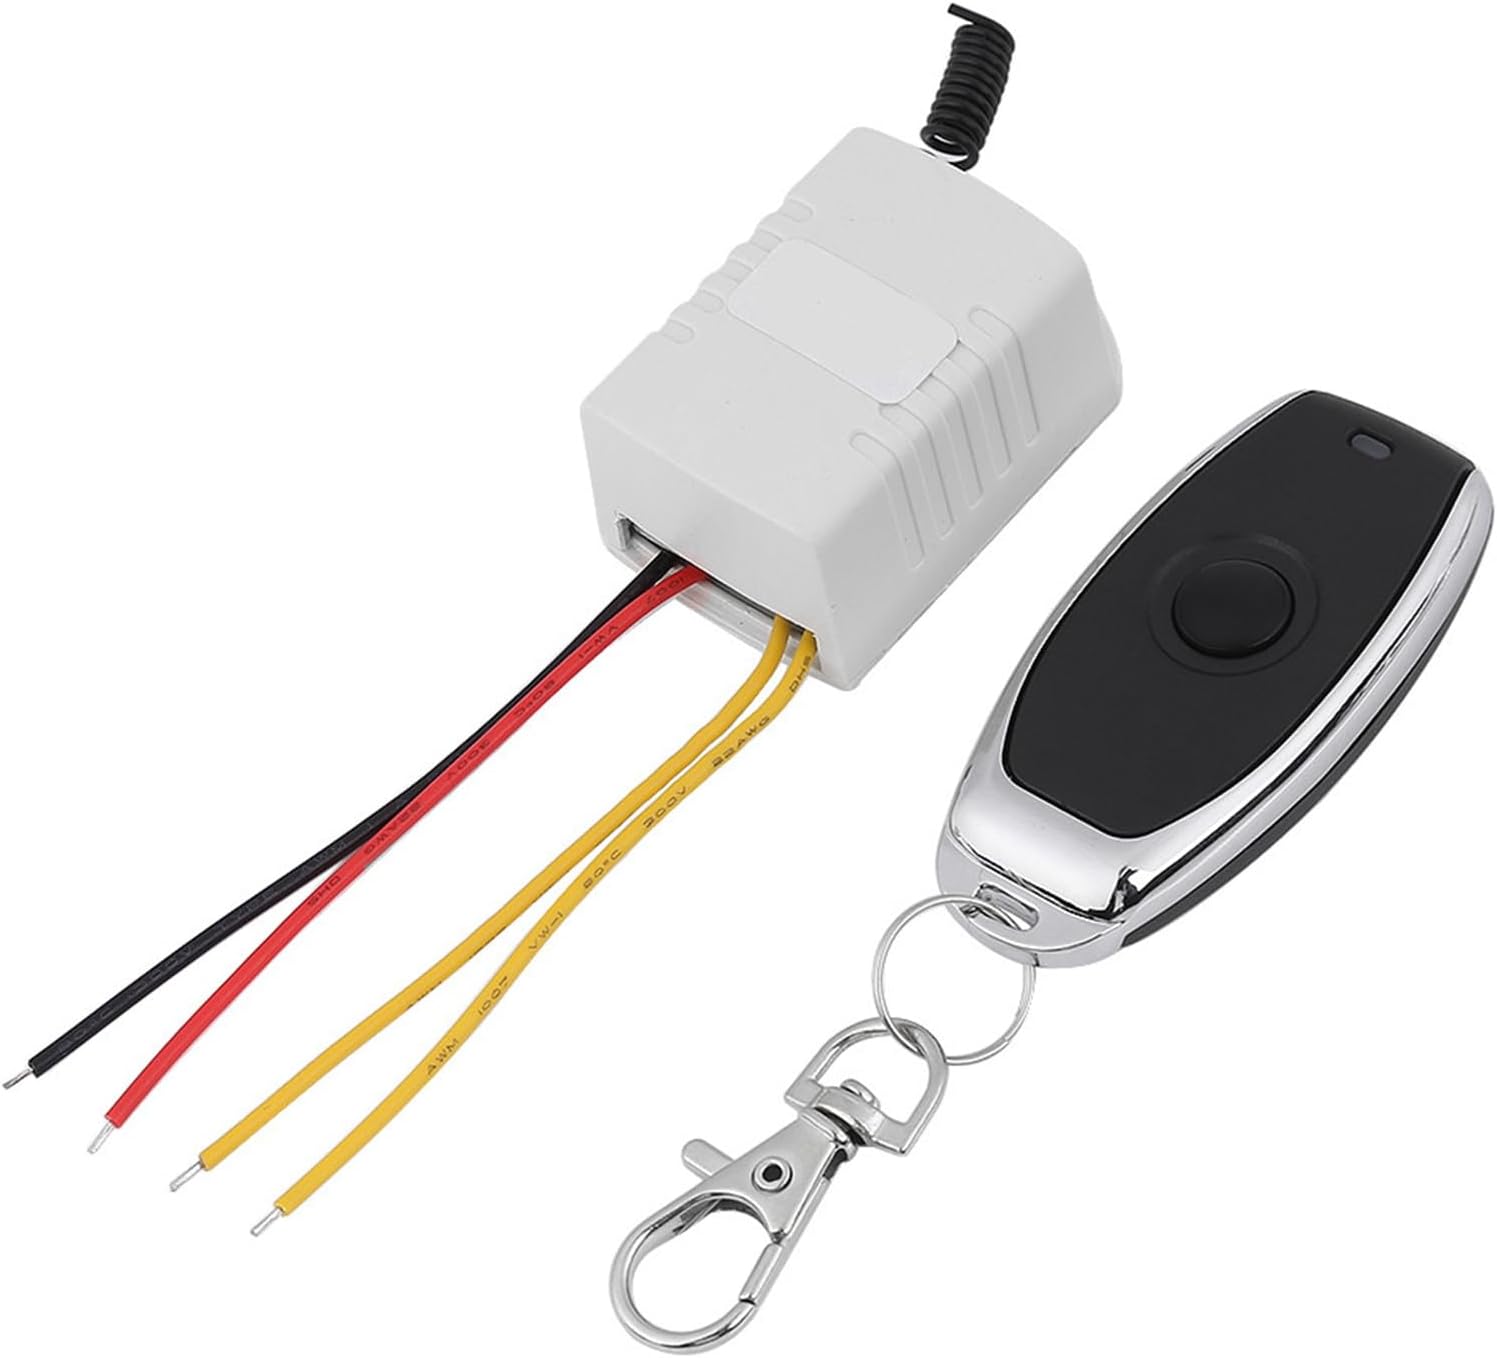
The Cuifati Mini Relay Switch system consists of a compact receiver unit and a handheld remote control transmitter. The receiver unit houses the relay and learning button, while the transmitter sends wireless signals to control the relay's state.
5. ข้อมูลจำเพาะ
| พารามิเตอร์ | ค่า |
|---|---|
| ฉบับทำงานtage | DC 4V - 12V (DC4V 4.5V 5V 6V 7.4V 9V 12V) |
| กระแสไฟสแตนด์บาย | 7-9มิลลิแอมป์ |
| กระแสไฟฟ้าทำงาน | 70-130มิลลิแอมป์ |
| Relay Standard | 20A (14VDC 12A / 120VAC 7A) |
| โหลดที่แนะนำ | น้อยกว่า 7A |
| รหัสการเรียนรู้ | Learning Button to add Transmitter |
| โหมดการทำงาน | Momentary / Toggle (adjusted by Jumper) |
| ขนาดตัวรับ | Approx. 43 x 30 x 22mm (1.69 x 1.18 x 0.87inch) |
| ขนาดรีโมท | Approx. 60 x 30 x 12mm (2.36 x 1.18 x 0.47inch) |
| น้ำหนักสินค้า | 1.76 ออนซ์ |
| ประเภทขั้วต่อ | ขั้วต่อสกรู |
| ประเภทการติดตั้ง | การติดตั้งบนพื้นผิว |
6. การตั้งค่า
6.1 แผนผังสายไฟและการเชื่อมต่อ
The receiver unit features screw terminals for power input and relay output. Refer to the diagram below for proper connections.

- จีเอ็นดี: Input Ground (Negative power supply).
- วีซีซี: อินพุต Voltage (Positive power supply, DC 4V-12V).
- เอ็นซี: Normally Close (Relay contact is closed when inactive, opens when activated).
- คอม: Common (Common terminal for the relay contact).
- เลขที่: Normally Open (Relay contact is open when inactive, closes when activated).
6.2 โหมดการทำงาน
The relay switch supports two operating modes: Momentary and Toggle. These modes are typically adjusted by a jumper on the receiver board (refer to the product's physical jumper settings if available, as specific jumper details are not provided in the data).
- โหมดชั่วขณะ: Press and hold the remote button to turn the relay ON. Release the button to turn the relay OFF.
- โหมดสลับ: Press the remote button once to turn the relay ON. Press it again to turn the relay OFF.
6.3 Clearing Stored Codes
To clear all previously learned remote control codes from the receiver:
- Locate the learning button on the receiver board.
- Press and hold the learning button for approximately 5 seconds.
- The receiver's LED indicator will turn ON and then OFF, signifying that all codes have been successfully cleared.

6.4 Learning New Codes (Pairing Transmitter)
To pair a new remote control transmitter with the receiver:
- Press the learning button on the receiver. The receiver's LED indicator will flash slowly, indicating it is in learning mode.
- Press the desired button on the transmitter (remote control).
- The receiver's LED indicator will flash quickly twice, then flash slowly again. This confirms successful learning.
- Press the learning button on the receiver again to exit learning mode and turn off the LED indicator.
7. การใช้งานอุปกรณ์
Once the transmitter is paired and the receiver is wired correctly, you can operate your connected device wirelessly.
- If configured for โหมดชั่วขณะ, press and hold the remote button to activate the relay. Release the button to deactivate.
- If configured for สลับโหมด, press the remote button once to activate the relay. Press it again to deactivate.

8. การบำรุงรักษา
The Cuifati Mini Relay Switch is designed for low maintenance. To ensure optimal performance and longevity:
- Keep the receiver and transmitter clean and free from dust. Use a soft, dry cloth for cleaning.
- Avoid exposing the devices to water or high humidity.
- Replace the battery in the remote control when its range decreases or it stops responding. (Battery type not specified, typically small coin cell or A27/A23 type for similar remotes).
9 การแก้ไขปัญหา
- อุปกรณ์ไม่ตอบสนองต่อรีโมท:
- Check if the receiver is powered correctly (VCC and GND connections).
- Ensure the remote control's battery is not depleted.
- Verify that the remote is properly paired with the receiver (refer to Section 6.4).
- Check for any obstructions or excessive distance between the remote and receiver.
- รีเลย์ไม่ทำงาน:
- Confirm that the load connected to the relay does not exceed the specified maximum current (7A recommended).
- Inspect the wiring to the COM, NO, and NC terminals for secure connections.
- ระยะสั้น:
- ตรวจสอบให้แน่ใจว่าเสาอากาศของเครื่องรับสัญญาณไม่มีสิ่งกีดขวางหรือชำรุดเสียหาย
- เปลี่ยนแบตเตอรี่รีโมทคอนโทรล
- ลดการรบกวนจากอุปกรณ์ไร้สายอื่น ๆ
10. การรับประกันและการสนับสนุน
Specific warranty information for the Cuifati Mini Relay Switch is not provided in this manual. Please refer to the product packaging, your point of purchase, or the manufacturer's official webเข้าชมเว็บไซต์เพื่อดูรายละเอียดเกี่ยวกับการรับประกันและการบริการลูกค้า
For technical assistance or further inquiries, please contact Cuifati customer service through the channels provided with your purchase.