
1. บทนำ
This manual provides detailed instructions for the safe and efficient operation, setup, and maintenance of your Jack Direct Drive Sewing Machine A5. This machine is designed for versatile use, capable of handling both light and heavy fabrics, including yarn and jeans, due to its enlarged sewing range. Please read this manual thoroughly before using the machine to ensure optimal performance and longevity.
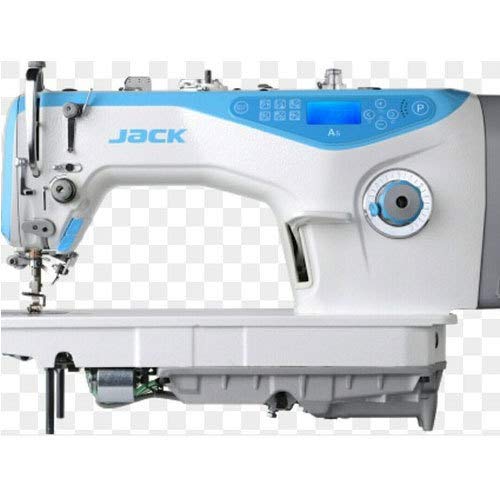
รูปที่ 1.1 : ด้านหน้า view of the Jack Direct Drive Sewing Machine A5. This image displays the main body of the sewing machine, highlighting its direct drive motor integration and the user interface panel.
2. คำแนะนำด้านความปลอดภัยที่สำคัญ
ปฏิบัติตามข้อควรระวังด้านความปลอดภัยขั้นพื้นฐานเสมอเมื่อใช้เครื่องใช้ไฟฟ้า เพื่อลดความเสี่ยงต่อการเกิดไฟไหม้ ไฟฟ้าช็อต หรือการบาดเจ็บต่อบุคคล
- อ่านคำแนะนำทั้งหมดก่อนใช้เครื่อง
- Keep hands away from all moving parts. Never touch the needle, presser foot, or handwheel while the machine is operating.
- ถอดปลั๊กเครื่องออกจากเต้ารับไฟฟ้าทุกครั้งเมื่อถอดฝาครอบ หล่อลื่น หรือเมื่อทำการปรับแต่งการบริการผู้ใช้อื่นๆ ตามที่ระบุในคู่มือการใช้งาน
- ห้ามใช้งานเครื่องหากสายไฟหรือปลั๊กชำรุด หรือหากเครื่องทำงานผิดปกติ
- Use only attachments recommended by the manufacturer as contained in this instruction manual.
- ห้ามทำตกหรือเสียบวัตถุใดๆ ลงในช่องเปิดใดๆ
- ห้ามใช้กลางแจ้ง
- ห้ามดำเนินการในบริเวณที่มีการใช้ผลิตภัณฑ์สเปรย์ หรือในบริเวณที่มีการส่งออกซิเจน
- หากต้องการตัดการเชื่อมต่อ ให้หมุนปุ่มควบคุมทั้งหมดไปที่ตำแหน่งปิด จากนั้นถอดปลั๊กออกจากเต้าเสียบ
3. การติดตั้งและการประกอบ
The Jack Direct Drive Sewing Machine A5 typically comes with the main unit pre-assembled. However, some components, such as the thread stand and table, may require assembly. Refer to the included components list for verification.
3.1 การแกะกล่อง
- ถอดวัสดุบรรจุภัณฑ์ออกทั้งหมดอย่างระมัดระวัง
- Verify all components listed in the 'Included Components' section are present. The product includes "One pices pack".
- วางเครื่องบนพื้นผิวที่มั่นคงและระดับ

Figure 3.1: The Jack Direct Drive Sewing Machine A5 mounted on its dedicated table and stand, illustrating a complete setup. This view shows the thread stand, foot pedal, and the overall ergonomic design for industrial use.
3.2 การเชื่อมต่อสายไฟ
- ตรวจสอบให้แน่ใจว่าสวิตช์เปิดปิดของเครื่องอยู่ในตำแหน่ง 'ปิด'
- Connect the power cord securely to the machine and then to a suitable electrical outlet. The machine is electric.
3.3 การร้อยด้ายเครื่องจักร
Proper threading is crucial for consistent stitch quality. Follow the numbered guides on the machine for correct thread pathing from the spool to the needle.

รูปที่ 3.2: ด้านข้าง view of the Jack A5 sewing machine, detailing the control panel and the threading path. This image helps in identifying key operational components and guides for proper thread installation.
4. คู่มือการใช้งาน
The Jack Direct Drive Sewing Machine A5 is designed for ease of use with advanced features for precise sewing.
4.1 การเย็บปักถักร้อยขั้นพื้นฐาน
- Turn on the power switch. The display panel will illuminate.
- วางผ้าไว้ใต้ตีนผี
- Lower the presser foot using the lever.
- Gently press the foot pedal to start sewing. The direct drive motor provides immediate and precise control.
- ค่อยๆ ดึงผ้าผ่านเครื่องจักรอย่างราบรื่น
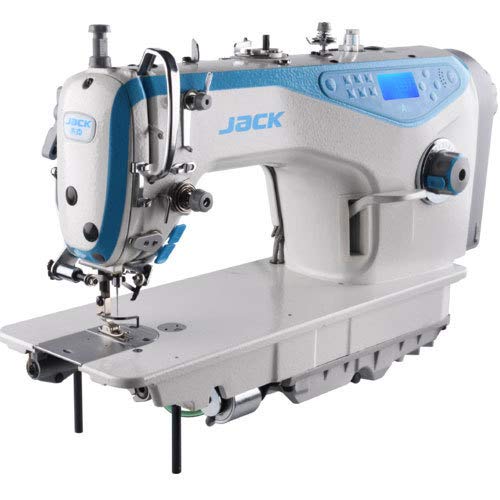
รูปที่ 4.1: มุม view of the Jack Direct Drive Sewing Machine A5, showcasing its robust construction and the clear display panel. This perspective highlights the working area and the overall design.
4.2 การปรับการตั้งค่าตะเข็บ
The A5 model features an intuitive control panel for adjusting stitch length, speed, and other parameters. Refer to the display for current settings.
- ความยาวตะเข็บ: Use the designated buttons on the control panel to increase or decrease stitch length.
- ความเร็วในการเย็บ: Adjust the maximum sewing speed via the control panel to match your comfort and fabric type.
- ตำแหน่งเข็ม: Some models allow for needle up/down positioning at stop.
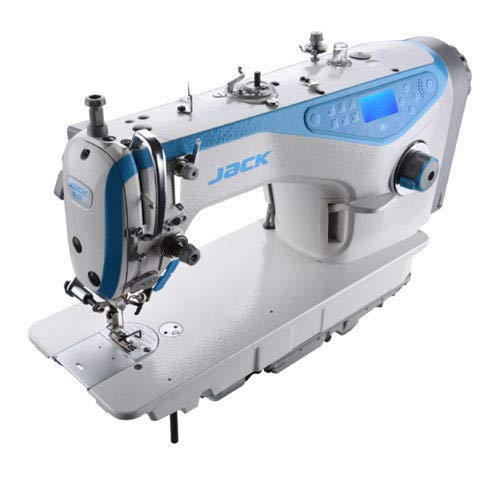
รูปที่ 4.2: ระยะใกล้ view of the Jack Direct Drive Sewing Machine A5's control panel and needle area. This image provides a detailed look at the buttons and display for adjusting sewing parameters.
5. การบำรุงรักษา
การบำรุงรักษาอย่างสม่ำเสมอจะช่วยให้จักรเย็บผ้าของคุณมีอายุการใช้งานยาวนานและทำงานได้อย่างมีประสิทธิภาพสูงสุด
5.1 การทำความสะอาด
- รายวัน: Remove lint and dust from the bobbin case area and feed dogs using a small brush.
- รายสัปดาห์: Clean the tension discs and needle bar area.
- ถอดปลั๊กเครื่องก่อนทำความสะอาดทุกครั้ง
5.2 Lubrication (Oiling)
The Jack A5, being a direct drive machine, may have specific oiling points. Refer to the machine's internal diagrams or consult a qualified technician for precise lubrication instructions. Use only high-quality sewing machine oil.
5.3 การเปลี่ยนเข็ม
- ปิดและถอดปลั๊กเครื่อง
- คลายเข็ม clamp สกรู
- ถอดเข็มเก่าออก
- Insert a new needle with the flat side facing the back, pushing it up as far as it will go.
- ขันเข็มให้แน่นamp ขันสกรูให้แน่น
6. การแก้ไขปัญหาทั่วไป
ส่วนนี้จะนำเสนอวิธีแก้ปัญหาทั่วไปที่คุณอาจพบเจอ
| ปัญหา | สาเหตุที่เป็นไปได้ | สารละลาย |
|---|---|---|
| ข้ามตะเข็บ | เข็มไม่ถูกต้อง เข็มงอ การร้อยด้ายไม่ถูกวิธี | เปลี่ยนเข็มและร้อยด้ายเข้าเครื่องให้ถูกต้อง |
| ด้ายแตก | Incorrect tension, poor quality thread, burrs on needle plate. | ปรับความตึงของด้าย ใช้ด้ายคุณภาพดี ตรวจสอบดูว่ามีเสี้ยนหรือไม่ |
| เครื่องไม่สตาร์ท | Power not connected, safety switch engaged. | Check power cord, ensure safety features are disengaged. |
| เย็บไม่เท่ากัน | ความตึงไม่ถูกต้อง เข็มสึกหรอ การป้อนผ้าไม่สม่ำเสมอ | Adjust tension, replace needle, ensure smooth fabric guidance. |
If problems persist after attempting these solutions, please contact customer support or a qualified service technician.
7. ข้อมูลจำเพาะผลิตภัณฑ์
| คุณสมบัติ | รายละเอียด |
|---|---|
| แบบอย่าง | A5 |
| ASIN | B081YRMYG6 |
| ยี่ห้อ | Generic (Jack) |
| ส่วนประกอบที่รวมอยู่ | One piece pack |
| สี | สีขาว |
| แหล่งพลังงาน | ไฟฟ้า |
| ความเข้ากันได้ของเนื้อผ้า | Light and heavy fabrics (yarn, jeans, etc.) |
8. การรับประกันและการสนับสนุน
For information regarding warranty coverage, please refer to the warranty card included with your purchase or contact the retailer. For technical support or service inquiries, please reach out to the manufacturer's authorized service centers.
เก็บใบเสร็จรับเงินของคุณไว้เป็นหลักฐานการซื้อสำหรับการเรียกร้องการรับประกันใดๆ