
1. สินค้าหมดview
This manual provides detailed instructions for the installation, operation, and maintenance of your AmeriLite LED Bar Projector Black Headlight Assembly. This product is designed as a direct OEM replacement for specific GMC Sierra models, enhancing visibility and vehicle aesthetics.
1.1 ความเข้ากันได้
- พอดี: 2014-2015 GMC Sierra 1500, 2015-2019 GMC Sierra 2500 HD, 2015-2019 GMC Sierra 3500 HD
- ไม่พอดี: Vehicles equipped from the factory with LED Bar or Stock HID Headlight Models.

Image 1.1: Compatibility check for GMC Sierra models. Ensure your vehicle has stock halogen headlights.
1.2 คุณสมบัติหลัก
- DOT & SAE Compliant: Meets or exceeds all U.S. and Canadian safety standards.
- เปลี่ยนแทนชิ้นส่วนเดิมจากโรงงานโดยตรง: Designed for easy installation without modification.
- High Intensity LED Running Light: Integrated C-shape LED bar for enhanced daytime visibility.
- Projector Beam: Provides focused and clear light output.
- โครงสร้างทนทาน: Made with premium materials and features a polycarbonate lens for longevity.
- ทนต่อสภาพอากาศ: ได้รับการออกแบบให้ทนทานต่อสภาวะแวดล้อมต่างๆ
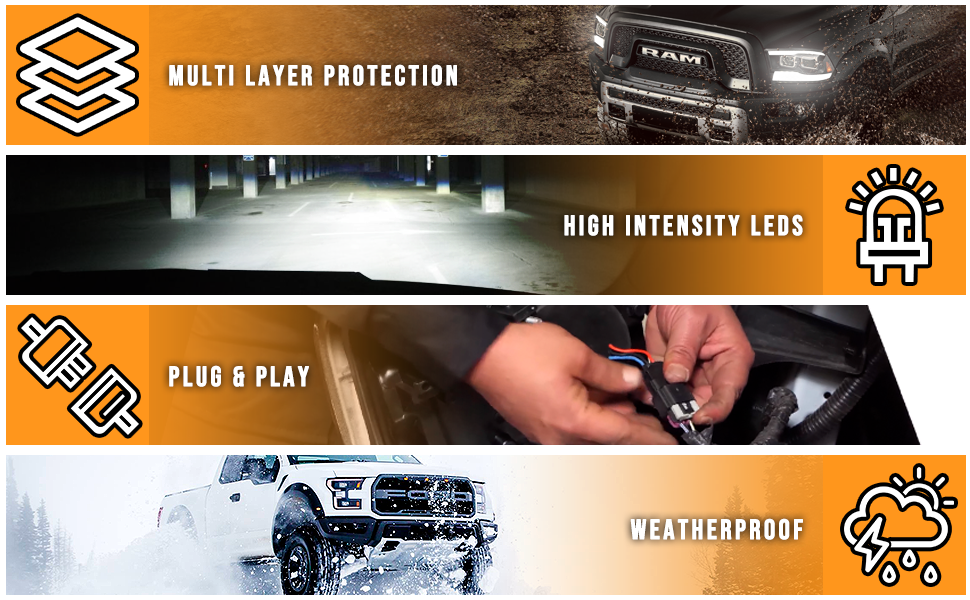
ภาพที่ 1.2: จบแล้วview of product features including multi-layer protection and high-intensity LEDs.
2. ข้อมูลด้านความปลอดภัย
Please read all safety warnings and instructions before beginning installation. Failure to follow these instructions may result in property damage, personal injury, or improper product function.
- ควรตัดการเชื่อมต่อแบตเตอรี่รถยนต์ทุกครั้งก่อนทำการซ่อมแซมหรือดัดแปลงระบบไฟฟ้า
- สวมอุปกรณ์ป้องกันส่วนบุคคลที่เหมาะสม รวมถึงแว่นตานิรภัยและถุงมือ
- ตรวจสอบให้แน่ใจว่ารถจอดอยู่บนพื้นราบและดึงเบรกมือไว้
- หากคุณไม่แน่ใจเกี่ยวกับขั้นตอนใด ๆ โปรดปรึกษาช่างเทคนิคยานยนต์ที่มีคุณสมบัติเหมาะสม
- กำจัดชิ้นส่วนเก่าอย่างถูกวิธีตามระเบียบข้อบังคับท้องถิ่น
3. เนื้อหาบรรจุภัณฑ์
ตรวจสอบว่าส่วนประกอบทั้งหมดอยู่ครบและไม่ได้รับความเสียหายก่อนดำเนินการติดตั้ง
- 1x Driver Side Headlight Assembly
- 1x Passenger Side Headlight Assembly
- 2x High/Low Beam H7 Halogen Bulbs (Pre-installed or included)
- 2x Turn Signal 7443 Amber Bulbs (Pre-installed or included)

Image 3.1: Included bulbs for high/low beam and turn signal functions.
4. การตั้งค่าและการติดตั้ง
This section outlines the steps for installing your new AmeriLite Headlight Assemblies. Professional installation is recommended if you are not familiar with automotive electrical systems or bodywork.
4.1 เครื่องมือที่จำเป็น (ไม่รวม)
- ชุดประแจซ็อกเก็ต
- ชุดไขควง (หัวแฉกและหัวแบน)
- Trim Removal Tool (Optional, but recommended)
- ผ้าสะอาด
4.2 ขั้นตอนก่อนการติดตั้ง
- จอดรถบนพื้นราบที่มั่นคงและดึงเบรกมือ
- ดับเครื่องยนต์และถอดกุญแจออกจากสวิตช์กุญแจ
- ถอดขั้วลบของแบตเตอรี่รถยนต์ออกเพื่อป้องกันไฟฟ้าลัดวงจร
- Open the hood and locate the existing headlight assemblies.
4.3 Removal of Existing Headlights
- Identify and remove any retaining clips, bolts, or screws securing the grille and bumper cover. Carefully detach the grille and partially pull back the bumper cover to access the headlight mounting points.
- Locate and remove the mounting bolts/screws that hold the headlight assembly in place. There are typically 2-3 bolts accessible from the top and side.
- Gently pull the old headlight assembly forward to disengage it from its mounting tabs.
- Carefully disconnect all electrical connectors from the back of the headlight assembly. Twist and remove any bulbs that are not integrated into the new assembly, if applicable.
- ถอดชุดไฟหน้าเก่าออกจากรถ
4.4 Installation of New Headlights
- Ensure the new AmeriLite headlight assembly has all necessary bulbs installed. If not, install the provided H7 and 7443 bulbs into their respective sockets.
- Connect all electrical connectors from the vehicle's wiring harness to the corresponding ports on the back of the new headlight assembly. Ensure connections are secure.
- Carefully slide the new headlight assembly into its mounting position, ensuring all tabs and alignment pins engage correctly.
- Secure the headlight assembly using the original mounting bolts/screws. Do not overtighten.
- ทำซ้ำขั้นตอนสำหรับอีกด้านหนึ่ง
- Reinstall the bumper cover and grille, securing all clips, bolts, and screws.

ภาพที่ 4.1: ด้านหลัง view of the headlight assembly highlighting electrical connections and adjustment points.

ภาพที่ 4.2: อดีตample of connecting the socket wire harness during installation.
4.5 การตรวจสอบหลังการติดตั้ง
- เชื่อมต่อขั้วลบของแบตเตอรี่รถยนต์อีกครั้ง
- Turn on the vehicle's headlights, high beams, turn signals, and parking lights to ensure all functions are operating correctly.
- Verify that the LED running lights illuminate.
- Check for any loose connections or abnormal flickering.
- Adjust the headlight beam aim as necessary (refer to Section 5.2).
5. คู่มือการใช้งาน
Your new AmeriLite Headlight Assemblies operate in conjunction with your vehicle's existing lighting controls.
5.1 Headlight Functions
- ไฟต่ำ: Provides standard illumination for general driving conditions.
- ไฟสูง: Provides maximum illumination for improved visibility on dark roads. Activate using your vehicle's high beam switch.
- LED Running Light (DRL): The integrated C-shape LED bar functions as a Daytime Running Light, enhancing vehicle visibility during daylight hours. This typically activates automatically with the ignition.
- สัญญาณไฟเลี้ยว: The amber bulb provides directional indication.

Image 5.1: High intensity LED running light in operation.

Image 5.2: The C-shape LED light bar serving as a Daytime Running Light.
5.2 Beam Adjustment
Proper headlight aim is crucial for safe driving and to avoid blinding oncoming traffic. After installation, it is recommended to check and adjust the beam aim.
- Park your vehicle on a level surface approximately 25 feet (7.6 meters) from a wall.
- Measure the height from the ground to the center of your headlight lens. Mark this height on the wall.
- Locate the beam adjuster screw on the back of the headlight assembly (refer to Image 4.1).
- Using a Phillips screwdriver or appropriate tool, turn the adjuster screw to raise or lower the beam until the top edge of the low beam cut-off is slightly below the marked line on the wall.
- Repeat for both headlights. Fine-tune as needed for optimal visibility without causing glare to other drivers.
6. การบำรุงรักษา
Regular maintenance will help ensure the longevity and optimal performance of your headlight assemblies.
- การทำความสะอาด: Clean the headlight lenses regularly with a soft cloth and mild automotive soap or glass cleaner. Avoid abrasive cleaners or harsh chemicals that can damage the polycarbonate lens.
- การตรวจสอบ: Periodically inspect the headlight assemblies for any signs of damage, cracks, or moisture intrusion. Check electrical connections for corrosion or looseness.
- การเปลี่ยนหลอดไฟ: If a halogen bulb burns out, replace it with an H7 (for high/low beam) or 7443 (for turn signal) bulb of the correct wattage. Refer to your vehicle's owner's manual for specific bulb replacement procedures, as access may vary.
7 การแก้ไขปัญหา
This section addresses common issues you might encounter with your headlight assemblies.
| ปัญหา | สาเหตุที่เป็นไปได้ | สารละลาย |
|---|---|---|
| ไฟหน้าไม่เปิด | Blown fuse, loose electrical connection, faulty bulb, wiring issue. | Check vehicle fuses. Verify all electrical connectors are securely plugged in. Replace faulty bulbs. Inspect wiring for damage. |
| One headlight not working | Faulty bulb, loose connection to that specific headlight. | Replace the bulb. Check the electrical connector for that headlight. |
| LED running light not illuminating | Loose connection, wiring issue, LED module failure. | Check connections. If issue persists, contact support. |
| ความชื้นภายในเลนส์ | Condensation (normal in some conditions), seal failure. | Small amounts of condensation usually dissipate. If excessive or persistent, check for proper sealing and contact support if necessary. |
| Headlight beam is too high/low | Improper beam adjustment. | Adjust the headlight beam aim using the adjuster screw (refer to Section 5.2). |
8. ข้อมูลจำเพาะ
| ข้อมูลจำเพาะ | รายละเอียด |
|---|---|
| ยี่ห้อ | อเมริไลท์ |
| หมายเลขรุ่น | 02-AZ-GS14-PBC-P-A |
| ประเภทบริการยานพาหนะ | Truck (GMC Sierra 1500/2500HD/3500HD) |
| ประเภทแหล่งกำเนิดแสง | Halogen (for main beam), LED (for DRL) |
| วัสดุเลนส์ | โพลีคาร์บอเนต |
| สี | Black Housing, Clear Lens |
| เล่มที่tage | 12 โวลต์ (กระแสตรง) |
| คุณสมบัติพิเศษ | กันน้ำ |
| OEM Equivalent Part Numbers | 84144049, 84144050, 23130718, 23130717 |
9. การรับประกันและการสนับสนุน
9.1 ข้อมูลการรับประกัน
AmeriLite provides a รับประกันคืนเงินภายใน 30 วัน และก การรับประกันแบบจำกัด 90 วัน on this product. This warranty covers manufacturing defects and ensures the product is free from defects in material and workmanship under normal use.
การรับประกันไม่ครอบคลุมความเสียหายที่เกิดจากการติดตั้งที่ไม่ถูกต้อง อุบัติเหตุ การใช้งานผิดวิธี การใช้งานผิดประเภท การละเลย การดัดแปลงที่ไม่ได้รับอนุญาต หรือการสึกหรอตามปกติ
9.2 การสนับสนุนลูกค้า
For technical assistance, warranty claims, or any questions regarding your AmeriLite Headlight Assembly, please contact AmeriLite customer support through the retailer where the product was purchased or visit the official AmeriLite webเว็บไซต์สำหรับข้อมูลการติดต่อ
When contacting support, please have your product model number (02-AZ-GS14-PBC-P-A) and proof of purchase readily available.