
1. บทนำ
The MakeSkyBlue 60A MPPT Solar Charge Controller V119 is an advanced device designed to efficiently manage power flow from solar panels to batteries in various solar power systems. It utilizes Maximum Power Point Tracking (MPPT) technology to maximize energy harvest from your solar array and ensure optimal battery charging. This controller is compatible with 12V, 24V, and 48V battery systems.

Image 1.1: MakeSkyBlue 60A MPPT Solar Charge Controller V119 with its packaging and included accessories.
2. คุณสมบัติหลัก
- Intelligent Maximum Power Point Tracking (MPPT) Technology: Optimizes solar panel output for maximum efficiency.
- Built-in DSP Controller: Ensures high performance and reliable operation.
- สาม-Stagอี การชาร์จ: ช่วยเพิ่มประสิทธิภาพแบตเตอรี่และยืดอายุการใช้งานแบตเตอรี่
- จอแสดงผล LCD มัลติฟังก์ชั่น: Provides real-time system information and status.
- ความเข้ากันได้ของแบตเตอรี่ที่กว้าง: Suitable for various battery types (default for lead-acid, adjustable for others).
- การเชื่อมต่อ WiFi: Allows monitoring and configuration via an Android phone application (local connection only, not internet/cloud).
- การป้องกันที่ครอบคลุม: Includes limited current protection, over-temperature protection, and overcharging protection.

Image 2.1: Front panel of the MakeSkyBlue 60A MPPT Solar Charge Controller V119, showing the LCD display and control interface.
3. การตั้งค่าและการติดตั้ง
Proper installation is crucial for the safe and efficient operation of your MPPT charge controller. Always ensure all connections are secure and correctly polarized. It is recommended to install appropriate circuit breakers between the solar panels and the controller, and between the controller and the battery bank.
3.1 แผนผังการเดินสายไฟ
Follow the diagram below for correct wiring. Connect the battery first, then the solar panels, and finally the DC load (if applicable).

Image 3.1: Detailed connection diagram illustrating the wiring of solar panels, circuit breakers, battery, and DC load to the MakeSkyBlue MPPT Solar Charge Controller.
3.2 ขั้นตอนการเชื่อมต่อ
- เชื่อมต่อแบตเตอรี่: Connect the positive and negative terminals of your battery bank to the BT+ and BT- terminals on the controller. Ensure correct polarity.
- เชื่อมต่อแผงโซลาร์เซลล์: Connect the positive and negative terminals of your solar panel array to the PV+ and PV- terminals on the controller. Verify correct polarity and ensure the PV array open circuit voltage is within the specified range for your battery system voltage.
- เชื่อมต่อโหลด DC (ไม่จำเป็น): If using a DC load directly from the controller, connect its positive and negative terminals to the OU+ and OU- terminals. Ensure the load current does not exceed 5A.
Important: Always connect the battery first and disconnect it last to prevent damage to the controller.
4. คู่มือการใช้งาน
Once installed, the controller will automatically begin operating. The multi-function LCD display provides real-time information about the system status.
4.1 จอแสดงผล LCD เกินview
The LCD display shows various parameters such as PV voltage, ปริมาณแบตเตอรี่tage, charging current, and system status. Use the control buttons (PRG/ESC, Up, Down, ENTER) to navigate through the display menus and adjust settings.
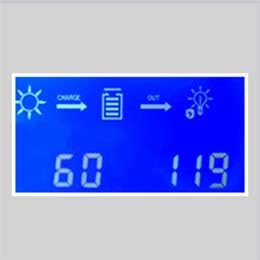
ภาพที่ 4.1: อดีตample of the LCD display showing solar input, battery charge, and output status with numerical readings.
4.2 Battery Type and Charging Settings
The default charging mode is set for lead-acid batteries. For other battery types, or to fine-tune charging parameters, you can adjust the voltage settings through the controller's menu. Refer to your battery manufacturer's specifications for recommended charging voltagใช่
- For 12V Battery Systems: Set voltagอีจาก 12V-17V.
- For 24V Battery Systems: Set voltagอีจาก 24V-34V.
- For 48V Battery Systems: Set voltagอีจาก 48V-68V.
4.3 WiFi Monitoring (Android App)
The V119 model includes WiFi functionality for monitoring and configuration via a dedicated Android application. This connection is local between the controller and your Android phone and does not require an internet connection. Consult the app's instructions for pairing and usage.
5. การบำรุงรักษา
การบำรุงรักษาอย่างสม่ำเสมอจะช่วยให้ตัวควบคุมการชาร์จของคุณมีอายุการใช้งานยาวนานและทำงานได้อย่างมีประสิทธิภาพสูงสุด
- ความสะอาด : Keep the controller clean and free from dust and debris. Ensure ventilation openings are not obstructed.
- การตรวจสอบการเชื่อมต่อ: Periodically inspect all wiring connections for tightness and corrosion. Loose connections can lead to power loss or overheating.
- สภาพแวดล้อม : Ensure the controller is installed in a dry, well-ventilated area, away from direct sunlight and extreme temperatures.
- การตรวจติดตามอุณหภูมิ: The internal fan activates when the temperature exceeds 45℃ and turns off below 40℃. Ensure proper airflow to assist cooling.
6 การแก้ไขปัญหา
This section addresses common issues you might encounter with your charge controller.
| ปัญหา | สาเหตุที่เป็นไปได้ | สารละลาย |
|---|---|---|
| ไม่มีจอแสดงผลหรือพลังงาน | แบตเตอรี่ไม่ได้เชื่อมต่อหรือระดับเสียงต่ำtage; loose battery connections. | Ensure battery is connected first with correct polarity. Check battery voltage และการเชื่อมต่อ |
| ไม่สามารถชาร์จไฟจากแผงโซลาร์เซลล์ได้ | Solar panels not connected; PV voltage too low; incorrect PV polarity; insufficient sunlight. | Check PV connections and polarity. Ensure PV open circuit voltage is within the specified range for your system. Verify adequate sunlight. |
| Overcharging protection activated | ปริมาณแบตเตอรี่tage reached overcharging protection limit. | This is a normal protection function. The controller will stop charging once the battery is full. Ensure battery type settings are correct. |
| เตือนอุณหภูมิเกิน | Controller internal temperature exceeds 75℃. | Ensure adequate ventilation around the controller. Reduce ambient temperature if possible. Check for obstructed fan. |
| Limited current protection activated | Charging current exceeds 61A. | This is a normal protection function to prevent damage. The controller will limit the current. Ensure your solar array power does not significantly exceed the controller's maximum input capacity for your system voltage. |
7. ข้อมูลจำเพาะ
| พารามิเตอร์ | ค่า |
|---|---|
| แบบอย่าง | 60A-V119 |
| จัดอันดับการชาร์จปัจจุบัน | 60เอ |
| เล่มระบบtage | 12V / 24V / 48V Auto Recognition |
| Max PV Array Power (12V System) | ≤ 720 วัตต์ |
| Max PV Array Power (24V System) | ≤ 1440 วัตต์ |
| Max PV Array Power (36V System) | ≤ 2100 วัตต์ |
| Max PV Array Power (48V System) | ≤ 2800 วัตต์ |
| แรงดันไฟฟ้าวงจรเปิดของแผงโซลาร์เซลล์tagอี (ระบบ 12V) | 20V-80V |
| แรงดันไฟฟ้าวงจรเปิดของแผงโซลาร์เซลล์tagอี (ระบบ 24V) | 37V-105V |
| แรงดันไฟฟ้าวงจรเปิดของแผงโซลาร์เซลล์tagอี (ระบบ 36V) | 50V-160V |
| แรงดันไฟฟ้าวงจรเปิดของแผงโซลาร์เซลล์tagอี (ระบบ 48V) | 72V-160V |
| การป้องกันกระแสไฟฟ้าจำกัด | 61เอ |
| การป้องกันอุณหภูมิเกิน | >75℃ |
| อุณหภูมิเมื่อเปิดพัดลม | >45℃ |
| อุณหภูมิปิดพัดลม | <40℃ |
| การป้องกันการชาร์จเกินฉบับที่tagอี (12V) | 15โวลต์ |
| การป้องกันการชาร์จเกินฉบับที่tagอี (24V) | 30โวลต์ |
| การป้องกันการชาร์จเกินฉบับที่tagอี (36V) | 45โวลต์ |
| การป้องกันการชาร์จเกินฉบับที่tagอี (48V) | 60โวลต์ |
| ขนาดสินค้า | 8.46 x 1.97 x 4.53 นิ้ว |
| น้ำหนักสินค้า | 2.97 ปอนด์ |
| ประเภทจอภาพ | จอแอลซีดี |

Image 7.1: Comparison table highlighting features across different MakeSkyBlue MPPT Solar Charge Controller models, including V119.
8. การรับประกันและการสนับสนุน
For warranty information and technical support, please refer to the documentation provided with your purchase or contact MakeSkyBlue customer service directly. Keep your purchase receipt as proof of purchase.
Manufacturer: MakeSkyBlue