
1. บทนำ
This manual provides detailed instructions for the installation, operation, and maintenance of your EPEVER MPPT 20A Solar Charge Controller, model Tracer2210AN-G3. This controller is designed for 12V/24V battery systems, featuring Maximum Power Point Tracking (MPPT) technology for efficient solar energy conversion.
คุณสมบัติหลัก:
- 20A charge/discharge current, 12V/24V DC battery system auto-identification.
- Max. PV input power: 260W for 12V battery, 520W for 24V battery. Max PV voltage ของ 100V
- Common Negative ground design.
- Compatible with Lead-acid batteries (GEL/AGM, Sealed, Flooded) and Lithium batteries.
- Four load control modes: manual, light ON/OFF, light On+Timer, and test mode.
- Advanced MPPT technology with >99.5% tracking efficiency and 98% peak conversion efficiency.
- Backlight LCD display for monitoring.
- RS485 Communication port for optional modules (MT52, RTS, PC Cable, Bluetooth, Wifi).
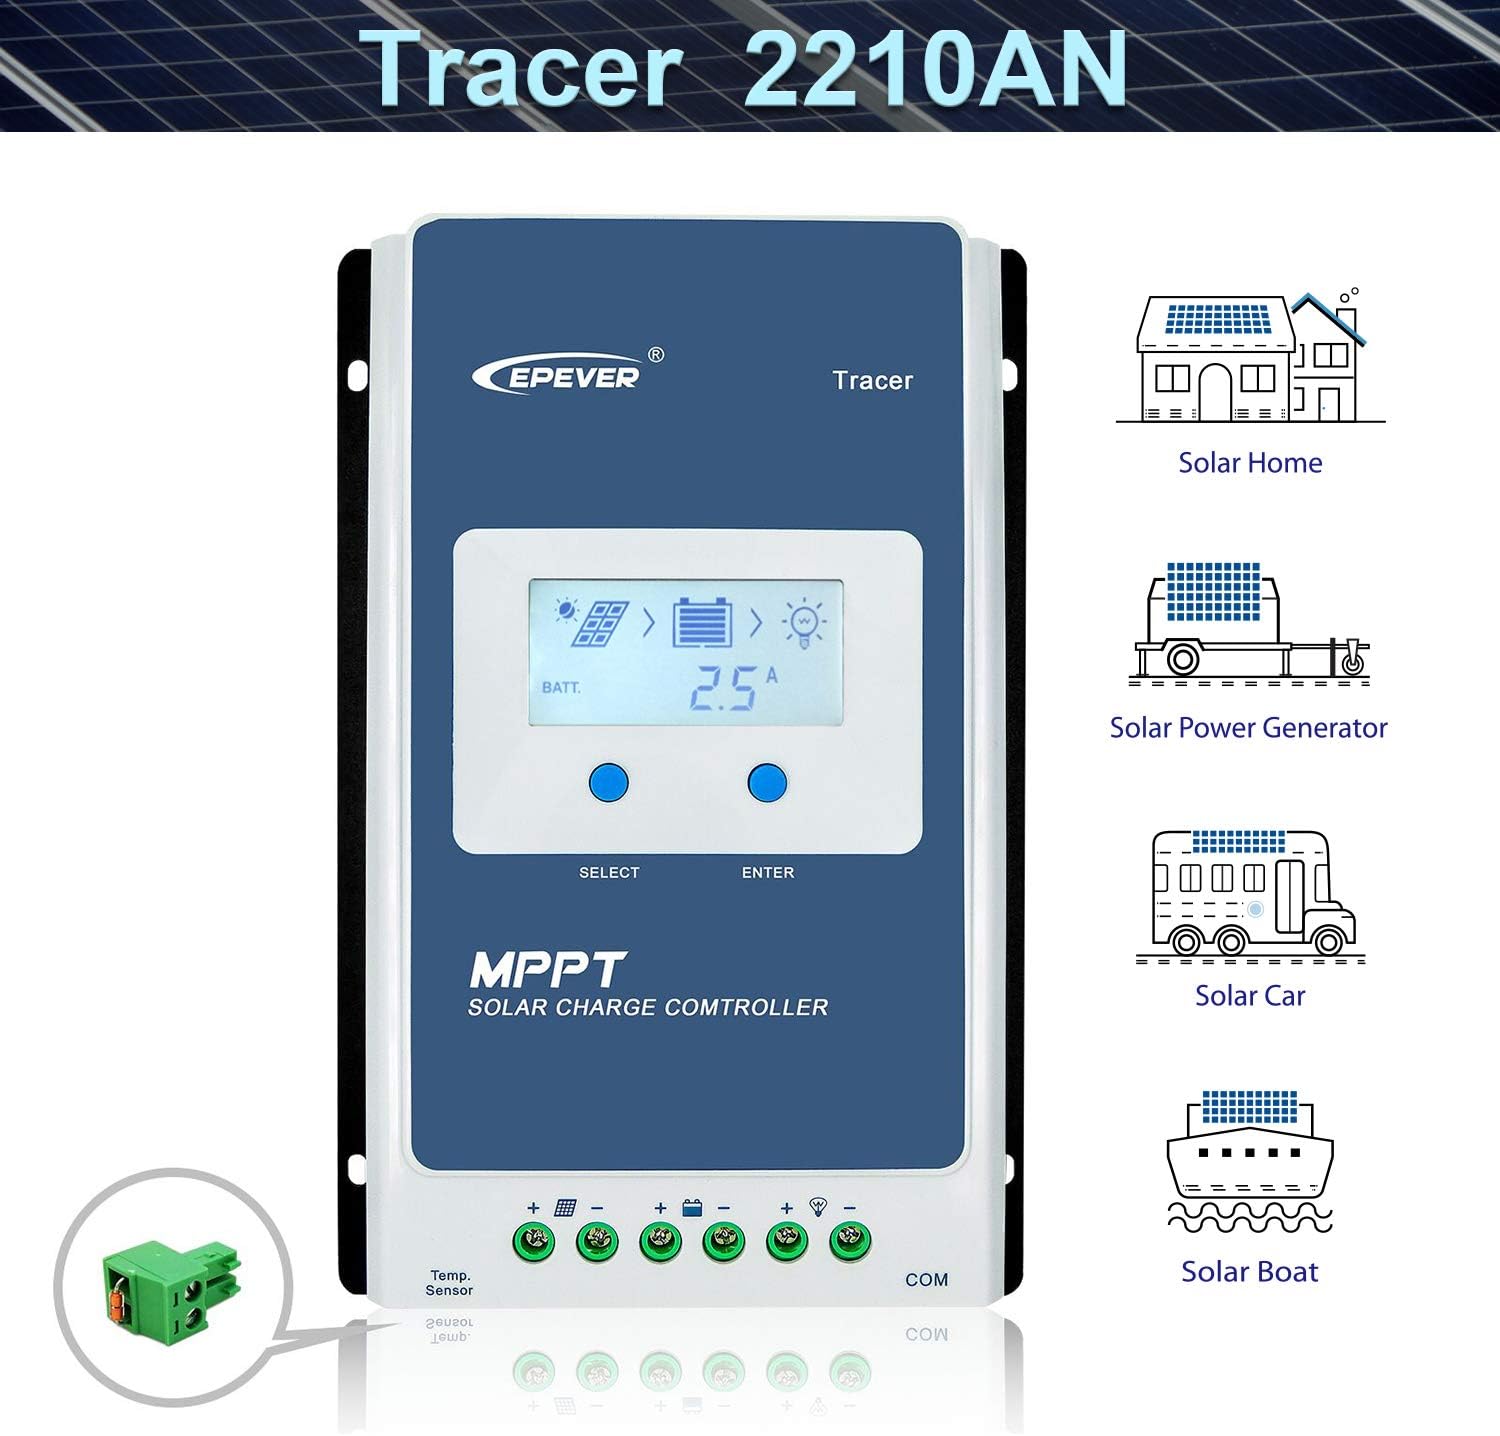
Figure 1: EPEVER MPPT 20A Solar Charge Controller Tracer2210AN-G3. This image shows the front view of the solar charge controller with its LCD display and control buttons, along with icons illustrating its use in solar homes, power generators, cars, and boats.
2. คำแนะนำด้านความปลอดภัย
Please read all instructions and warnings in this manual before installation and operation. Keep this manual for future reference.
- ตรวจสอบให้แน่ใจว่าสายไฟทั้งหมดมีขนาดถูกต้องและหุ้มฉนวนอย่างเหมาะสม
- ควรต่อแบตเตอรี่ก่อนเสมอ จากนั้นจึงต่อแผงโซลาร์เซลล์ และสุดท้ายจึงต่ออุปกรณ์ไฟฟ้าที่ต้องการใช้งาน และควรถอดออกในลำดับย้อนกลับ
- Do not use an electric screwdriver for terminal connections to avoid damage.
- ตรวจสอบให้แน่ใจว่ามีการระบายอากาศที่เหมาะสมรอบๆ ตัวควบคุมเพื่อป้องกันความร้อนสูงเกินไป
- The controller is designed for indoor use; avoid exposure to direct sunlight, high temperatures, and moisture.
- บุคลากรที่มีคุณสมบัติเหมาะสมเท่านั้นที่ควรทำการติดตั้งและบำรุงรักษา
3. สินค้าหมดview
ส่วนประกอบ:
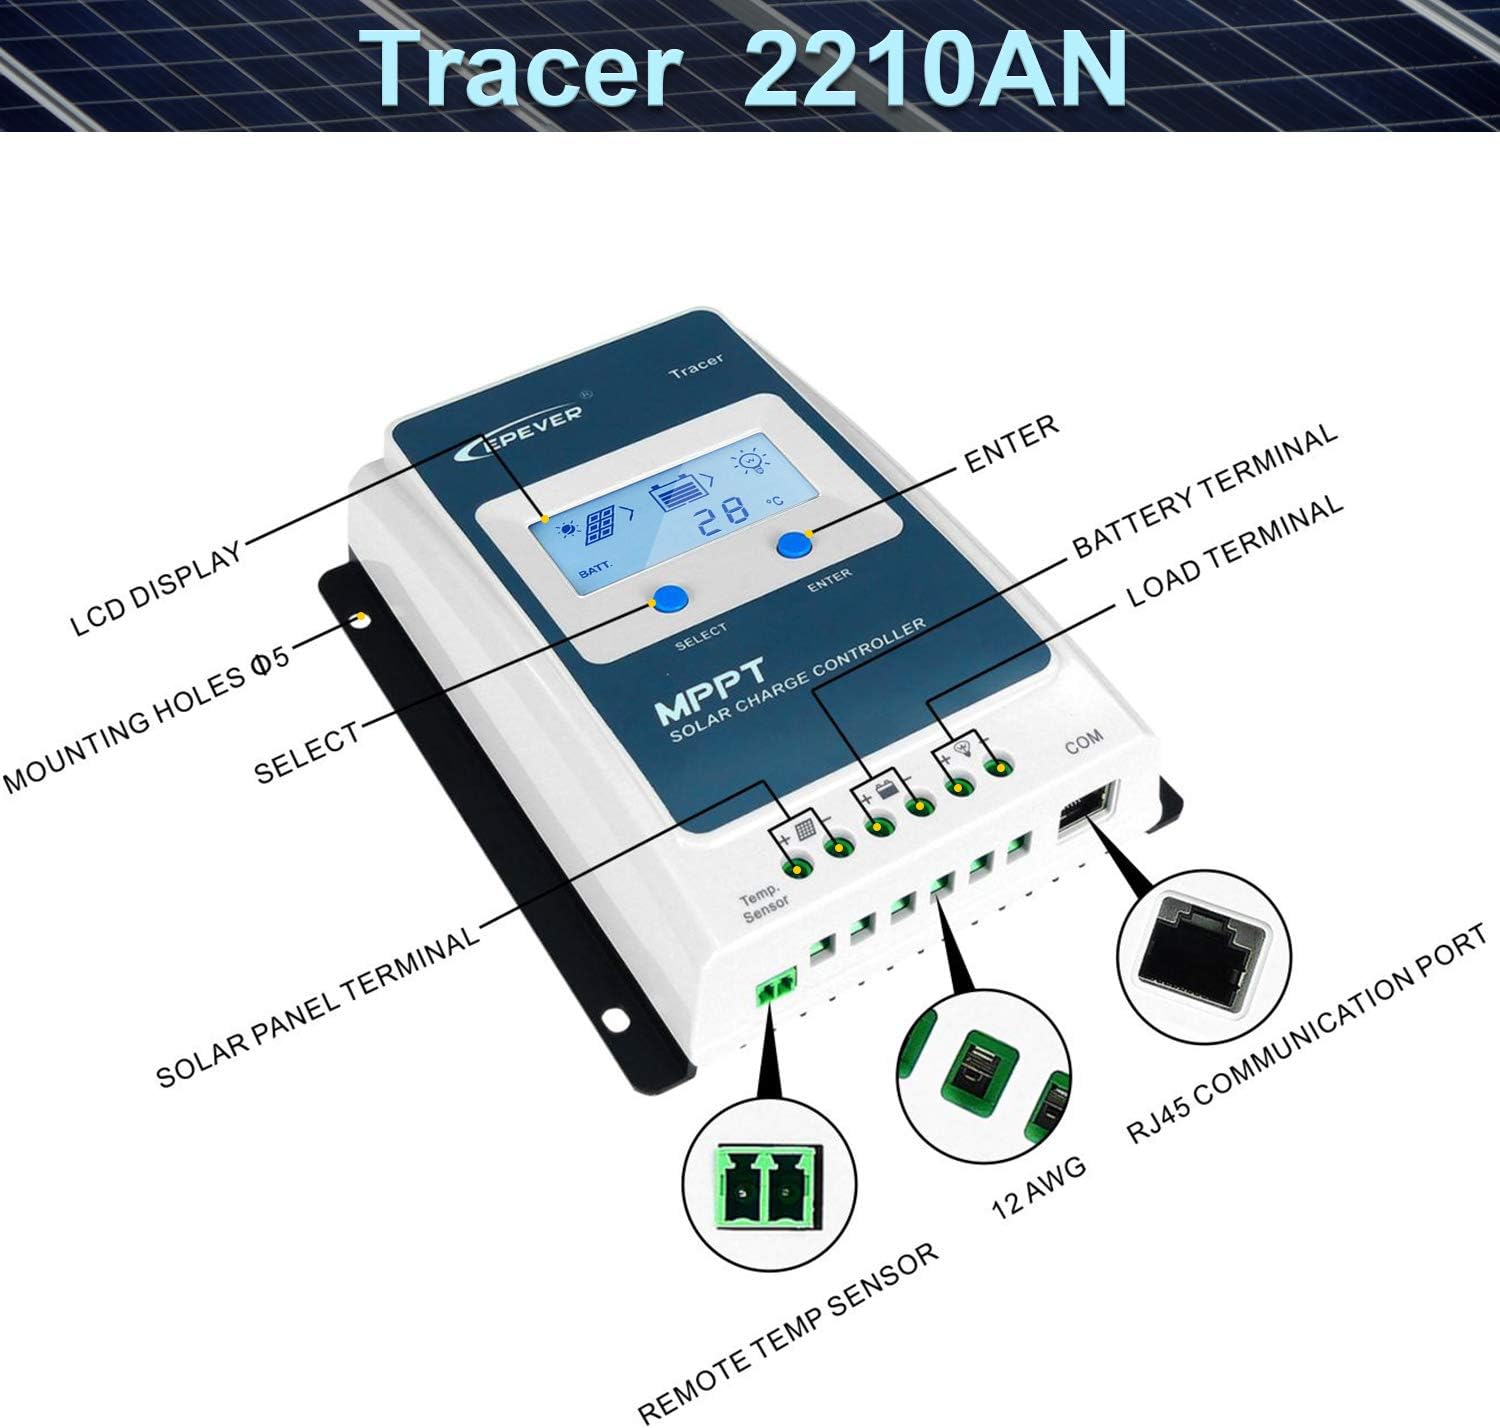
Figure 2: Labeled components of the Tracer2210AN-G3 controller. This image highlights the LCD display, mounting holes, Solar Panel Terminal, Remote Temp Sensor port, Battery Terminal, Load Terminal, and RJ45 Communication (COM) port.
จอแสดงผล LCD:
The LCD display provides real-time monitoring of system parameters. Use the SELECT and ENTER buttons to navigate and adjust settings.

รูปที่ 3: รายละเอียด view of the LCD display showing various parameters such as PV Input voltage/current, Charging current, Power generation, Load work mode, Battery voltage/current, Discharge capacity/current, and Temperature.
4. การติดตั้งและเดินสายไฟ
Always Connect the Battery First!
Please read the complete installation instructions to familiarize yourself with the installation steps before proceeding.
ขั้นตอนการเชื่อมต่อ:
- การเชื่อมต่อแบตเตอรี่: Connect the battery to the controller. Ensure correct polarity (+ to + and - to -).
- Solar Panel (PV array) Connection: Connect the solar panel to the controller. Ensure correct polarity.
- โหลดการเชื่อมต่อ: Connect the DC load to the controller. Ensure correct polarity.
Disconnection Steps (Reverse Order):
- ถอดปลั๊กอุปกรณ์ไฟฟ้าออก
- Disconnect the Solar Panel (PV array).
- ถอดแบตเตอรี่ออก

Figure 4: Connection Diagram. This diagram illustrates the proper wiring sequence for the solar panel, battery, DC load, and optional AC load via an inverter, all connected to the solar charge controller.
วิดีโอการติดตั้ง:
Video 1: MPPT Unboxing and Setting. This video demonstrates the unboxing process, connection of battery, solar panel, and load, and basic parameter settings for the EPEVER MPPT solar charge controller.
5. การดำเนินการ
การตั้งค่าประเภทแบตเตอรี่:
ตัวควบคุมรองรับแบตเตอรี่หลายประเภท วิธีการตั้งค่าประเภทแบตเตอรี่:
- กดปุ่ม เข้า button and hold for 5 seconds under the battery voltagอีอินเทอร์เฟซ
- กดปุ่ม เลือก button when the battery type interface is flashing to choose your battery type (e.g., GEL, Sealed, Flooded, User, LiFePO4, Li(NiCoMn)O2).
- กดปุ่ม เข้า ปุ่มเพื่อยืนยันประเภทแบตเตอรี่
คำเตือน: For 'User' battery type, refer to Chapter 3 of the full user manual for battery control voltage settings. Lithium battery parameters may require setting via a phone APP if the controller has a built-in Bluetooth module.

Figure 5: Compatible Battery Types. This image lists various lead-acid and lithium battery types supported by the controller, including Sealed, Gel, Flooded, LiFePO4, and Li(NiCoMn)O2.
Setting Load Working Mode:
To set the load working mode:
- กดปุ่ม เข้า button and hold for 5 seconds under the load mode interface.
- กดปุ่ม เลือก button when the load mode interface is flashing to choose the desired mode (e.g., Light ON/OFF, Test mode, Manual mode).
- กดปุ่ม เข้า button to confirm the load mode.
คำเตือน: Light ON/OFF, Test mode, and Manual mode are set via Timer1. Timer2 will be disabled and display "2n".
6. ข้อมูลจำเพาะ
ข้อมูลจำเพาะทั่วไป:
- ยี่ห้อ: อีเอฟเวอร์
- แบบอย่าง: เทรเซอร์2210AN-G3
- เล่มที่tage: 12 Volts / 24 Volts Auto Work
- วัสดุ: อลูมิเนียม
- ประเภทจอภาพ: จอแอลซีดี
- ยูพีซี: 791262788231
Model Comparison (Tracer-AN Series):
| แบบอย่าง | Tracer1210AN | Tracer2210AN | Tracer3210AN | Tracer4210AN |
|---|---|---|---|---|
| Rate Charge Current | 10เอ | 20เอ | 30เอ | 40เอ |
| Rate Discharge Current | 10เอ | 20เอ | 30เอ | 40เอ |
| ปริมาณแบตเตอรี่tagอี เรนจ์ | 8 ~ 32 โวลต์ | |||
| สูงสุด พีวีฉบับtage | 100โวลต์ | |||
| กำลังไฟฟ้าเข้า PV สูงสุด | 130 วัตต์/12 โวลต์, 260 วัตต์/24 โวลต์ | 260 วัตต์/12 โวลต์, 520 วัตต์/24 โวลต์ | 390 วัตต์/12 โวลต์, 780 วัตต์/24 โวลต์ | 520 วัตต์/12 โวลต์, 1040 วัตต์/24 โวลต์ |
| เทอร์มินัลคอนโทรลเลอร์ | 12AWG (4 มม.²) | 6AWG (16 มม.²) | 6AWG (16 มม.²) | 6AWG (16 มม.²) |
| สายเคเบิลที่แนะนำ | 12AWG (4 มม.²) | 10AWG (6 มม.²) | 8AWG (10 มม.²) | 8AWG (10 มม.²) |
Table 1: Comparison of Tracer-AN series models based on charging current and maximum PV input power.
พารามิเตอร์ประเภทแบตเตอรี่:

Figure 6: Suitable Battery Types: Lead-Acid or Lithium. This table provides detailed voltage settings for various battery types including Sealed, Gel, Flooded, User-defined, LiFePO4 (LFP4S, LFP8S), and Li(NiCoMn)O2 (LCNM3S, LCNM6S, LCNM7S) for parameters like Over Voltage Disconnect, Charging Limit, Equalize Charging, Float Charging, and more.
7. อุปกรณ์เสริม
Enhance the functionality of your EPEVER MPPT Solar Charge Controller with these optional accessories:

Figure 7: Optional Accessories. This image displays various optional accessories such as Remote Temperature Sensor (RTS), USB to RS485 cable, Remote Meter (MT50), WiFi Serial Adapter (eBox-WIFI-01), RS485 to Bluetooth Adapter (eBox-BLE-01), Logger (eLOG01), and PT Adapter (PT-ADP), along with their descriptions and uses.
- เซ็นเซอร์วัดอุณหภูมิระยะไกล (RTS300R47K3.81A): For accurate battery temperature compensation.
- สายเคเบิล USB to RS485 (CC-USB-RS485-150U): Connects controller to PC for monitoring via Solar Station PC software.
- มิเตอร์ระยะไกล (MT50): External display for monitoring operating data and fault information.
- อะแดปเตอร์อนุกรม WiFi (eBox-WIFI-01): Enables monitoring via mobile APP over WiFi.
- อะแดปเตอร์แปลง RS485 เป็น Bluetooth (eBox-BLE-01): Enables monitoring via mobile APP over Bluetooth.
- โปรแกรมบันทึกข้อมูล (eLOG01): Records operating data for analysis via PC software.
- อะแดปเตอร์ PT (PT-ADP): Manages communication with multiple controllers.
8. การบำรุงรักษา
การบำรุงรักษาอย่างสม่ำเสมอจะช่วยให้ตัวควบคุมการชาร์จพลังงานแสงอาทิตย์ของคุณทำงานได้อย่างมีประสิทธิภาพสูงสุดและมีอายุการใช้งานยาวนาน:
- ตรวจสอบการเชื่อมต่อ: ตรวจสอบการเชื่อมต่อสายไฟทั้งหมดเป็นระยะๆ เพื่อดูความแน่นหนาและการกัดกร่อน
- ตัวควบคุมที่สะอาด: Keep the controller clean and free from dust. Use a dry cloth for cleaning.
- ตรวจสอบความเสียหาย: ตรวจสอบความเสียหายทางกายภาพที่เกิดขึ้นกับ casinเช่น สายเคเบิล หรือขั้วต่อ
- ประสิทธิภาพการทำงานของจอภาพ: Regularly check the LCD display for normal operation and parameter readings.
9 การแก้ไขปัญหา
หากคุณพบปัญหาเกี่ยวกับคอนโทรลเลอร์ โปรดดูปัญหาและวิธีแก้ไขที่พบบ่อยต่อไปนี้:
- ไม่มีจอแสดงผล: ตรวจสอบการเชื่อมต่อแบตเตอรี่และตรวจสอบปริมาณแบตเตอรี่tage อยู่ในช่วงการทำงาน
- ไม่มีการชาร์จ: Verify solar panel connections and ensure sufficient sunlight. Check PV voltage บนจอแสดงผล
- โหลดไม่ทำงาน: ตรวจสอบการเชื่อมต่อโหลดและตรวจสอบให้แน่ใจว่าโหมดควบคุมโหลดได้รับการตั้งค่าอย่างถูกต้อง ตรวจสอบระดับแบตเตอรี่tage อยู่เหนือระดับต่ำtage disconnect setting.
- ความร้อนสูงเกินไป: Ensure adequate ventilation around the controller. Reduce load if necessary.
- ปริมาณแบตเตอรี่ไม่ถูกต้องtagอี การอ่าน: Check battery connections and ensure the remote temperature sensor (if used) is properly connected.
For more complex issues, consult the detailed troubleshooting section in the complete user manual or contact EPEVER customer support.
10. การรับประกันและการสนับสนุน
EPEVER products come with a standard warranty. Please refer to the warranty card included with your product for specific terms and conditions. For technical support, product inquiries, or warranty claims, please contact EPEVER customer service through their official webไซต์หรือร้านค้าปลีกที่คุณซื้อผลิตภัณฑ์