
1. บทนำ
This manual provides detailed instructions for the installation, operation, and maintenance of your UHPPOTE 2-Channel Color Quad System Video Splitter. This device is designed to process and display video feeds from up to two analog security cameras, offering various display modes and image adjustments. Please read this manual thoroughly before using the product to ensure proper functionality and safety.
บันทึก: This device is only compatible with AHD/TVI analog cameras.
2. ข้อมูลด้านความปลอดภัย
- ตรวจสอบแหล่งจ่ายไฟ voltage matches the device's requirements (DC 12V).
- อย่าให้อุปกรณ์สัมผัสกับความชื้นหรืออุณหภูมิที่สูงเกินไป
- หลีกเลี่ยงการวางอุปกรณ์ในที่ที่โดนแสงแดดโดยตรงหรือใกล้แหล่งความร้อน
- อย่าพยายามเปิดหรือซ่อมแซมอุปกรณ์ด้วยตนเอง แนะนำให้ส่งช่างผู้ชำนาญเข้ารับบริการทั้งหมด
- เก็บอุปกรณ์ให้ห่างจากสนามแม่เหล็กแรงสูง
3. เนื้อหาบรรจุภัณฑ์
ตรวจสอบว่ารายการทั้งหมดที่ระบุไว้ด้านล่างนี้รวมอยู่ในแพ็คเกจของคุณ:
- 1 x UHPPOTE 2-Channel Video Splitter/Processor
- 1 x รีโมทคอนโทรล
- 1 x คู่มือผู้ใช้ภาษาอังกฤษ
- อะแดปเตอร์ไฟฟ้า 1 ตัว
- 3 x BNC Adapters
4. สินค้าหมดview
แผงด้านหน้า
The front panel features control buttons and indicators for managing video inputs and display modes.

รูปที่ 4.1: ด้านหน้า view of the video splitter. It displays buttons for MENU, ENTER, A/B, PB, directional arrows, ZOOM, FREEZE, MODE, AUTO, and a POWER switch.
แผงด้านหลัง
The rear panel provides all necessary connection ports for video input, video output, and power.

รูปที่ 4.2: หลัง view of the video splitter. It shows two BNC video input ports labeled VIDEO1 and VIDEO2, one BNC monitor output port, and a DC 12V power input jack.
ด้านล่าง View
The bottom of the device features rubber feet for stability and ventilation holes.
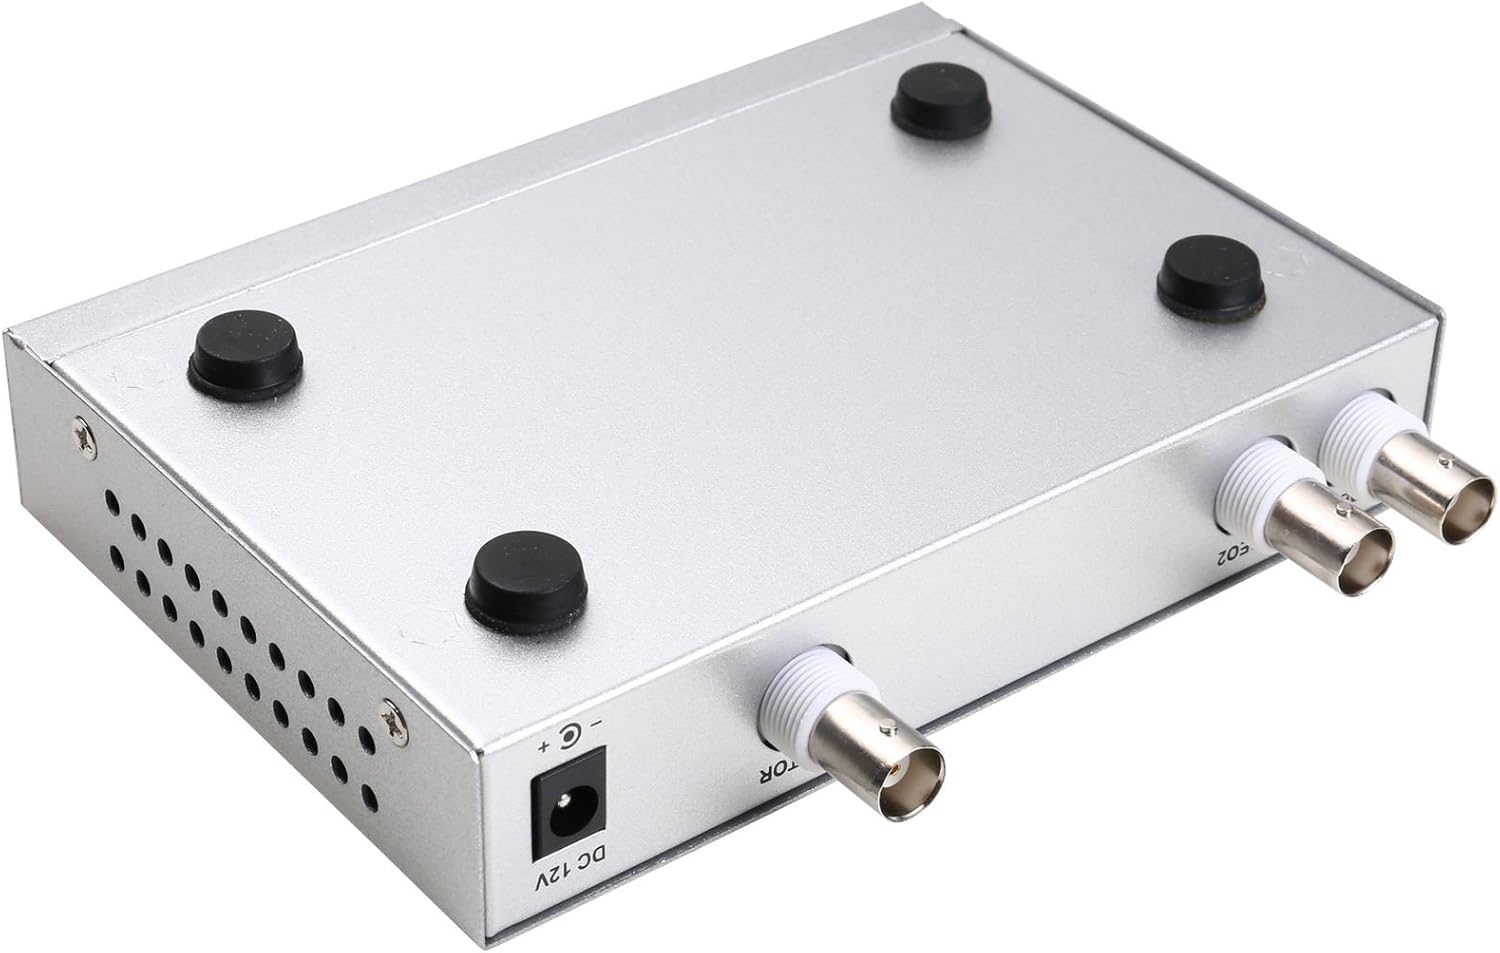
รูปที่ 4.3: ด้านล่าง view of the video splitter, highlighting the four rubber feet for stable placement.
อะแดปเตอร์แปลงไฟ
The included power adapter supplies the necessary DC 12V power to the unit.

รูปที่ 4.4: The power adapter provided with the unit, rated for DC 12V output.
5. การตั้งค่า
Follow these steps to connect your video splitter:
- เชื่อมต่อกล้อง: Connect your AHD/TVI analog cameras to the VIDEO1 and VIDEO2 BNC input ports on the rear panel of the splitter. Use the provided BNC adapters if necessary.
- เชื่อมต่อจอภาพ: Connect your display monitor to the MONITOR OUT BNC port on the rear panel.
- เชื่อมต่อพลังงาน: Plug the DC 12V power adapter into the DC 12V input jack on the rear panel, then plug the adapter into a power outlet.
- เปิดเครื่อง: Flip the POWER switch on the front panel to the 'ON' position.

รูปที่ 5.1: Connection schematic. (1) Video input from cameras (CAM1, CAM2) to VIDEO1, VIDEO2. (2) Video output from MONITOR OUT to a display monitor. (3) Power input to DC 12V.
6. คู่มือการใช้งาน
The video splitter offers various display modes and image adjustment features. Use the front panel buttons or the remote control to operate the device.
6.1. โหมดการแสดงผล
กดปุ่ม โหมด button to cycle through different display layouts:
- Single Channel Display: View one camera feed in full screen (Full 1, Full 2).
- Dual Panoramic Display: View two camera feeds side-by-side (left/right split) or top/bottom split.
- การแสดงภาพซ้อนภาพ (PIP): View one main camera feed with a smaller inset window of the second camera. PIP positions are switchable (top-left, top-right, bottom-left, bottom-right).
6.2. Image Adjustments
You can adjust image parameters for each camera channel:
- กดปุ่ม เมนู button to access the on-screen display (OSD) menu.
- Use the directional arrow buttons (▲ / ▼ / ◀ / ▶) to navigate through menu options.
- กด เข้า เพื่อเลือกตัวเลือกหรือยืนยันการตั้งค่า
- ปรับพารามิเตอร์ต่างๆ เช่น Brightness, Contrast, Saturation, Hue, และ ความคมชัด for each camera channel individually.
- กด เมนู อีกครั้งเพื่อออกจากเมนู OSD
6.3. ฟังก์ชั่นพิเศษ
- หยุดนิ่ง: กดปุ่ม แช่แข็ง button to pause the current video frame. Press again to resume live video.
- ซูม: กดปุ่ม ซูม button to activate electronic zoom. Use the directional arrows to select the enlarged area. Press ซูม อีกครั้งเพื่อออก
- อัตโนมัติ: กดปุ่ม ออโต้ button to enable auto-cruise mode, which cycles through different camera views or display modes automatically. Each channel can be set for auto-cruise.
- ก/ข: Switch between camera inputs.
- พีบี: Playback function (if supported by connected DVR/NVR, otherwise may not be active).
7. การบำรุงรักษา
- การทำความสะอาด: ใช้ผ้านุ่มและแห้งเช็ดทำความสะอาดภายนอกอุปกรณ์ ห้ามใช้น้ำยาทำความสะอาดหรือสเปรย์
- การระบายอากาศ : ตรวจสอบให้แน่ใจว่าช่องระบายอากาศไม่ถูกปิดกั้นเพื่อป้องกันความร้อนสูงเกินไป
- พื้นที่จัดเก็บ: When not in use for extended periods, store the device in a cool, dry place, away from direct sunlight and dust.
8 การแก้ไขปัญหา
If you encounter issues with your video splitter, refer to the following common problems and solutions:
- ไม่มีไฟฟ้า:
- ตรวจสอบว่าอะแดปเตอร์ไฟฟ้าเชื่อมต่อกับอุปกรณ์และเต้ารับไฟฟ้าอย่างแน่นหนาหรือไม่
- Ensure the power switch on the front panel is in the 'ON' position.
- ตรวจสอบว่าเต้ารับไฟฟ้าใช้งานได้
- ไม่มีเอาต์พุตวิดีโอ:
- Confirm that cameras are properly connected to the VIDEO IN ports.
- Ensure the monitor is correctly connected to the MONITOR OUT port and is powered on.
- Check the video cables for damage or loose connections.
- Verify that the cameras are AHD/TVI analog cameras, as other types are not supported.
- Try cycling through display modes using the MODE button.
- คุณภาพของภาพต่ำ:
- Adjust Brightness, Contrast, Saturation, Hue, and Sharpness settings via the OSD menu.
- Ensure video cables are of good quality and not excessively long.
- Check the camera's own settings and lens focus.
- รีโมทคอนโทรลไม่ทำงาน:
- ตรวจสอบและเปลี่ยนแบตเตอรี่รีโมทคอนโทรล
- Ensure there are no obstructions between the remote control and the device's IR receiver.
9. ข้อมูลจำเพาะ
| คุณสมบัติ | ข้อมูลจำเพาะ |
|---|---|
| ยี่ห้อ | อุ๊พพต |
| หมายเลขรุ่น | 402 |
| วัสดุ | โลหะเชลล์ |
| สี | เงิน |
| อินพุตวิดีโอ | 2-way (BNC) |
| เอาท์พุตวิดีโอ | 1-way (BNC) |
| ความละเอียด PAL | 720 x 576 @ 50 Hz |
| ความละเอียด NTSC | 720 x 480 @ 60 Hz |
| น้ำหนักสินค้า | 0.88 ปอนด์ |
| ความเข้ากันได้ | AHD/TVI Analog Cameras Only |
10. การรับประกันและการสนับสนุน
For warranty information or technical support, please refer to the contact details provided with your purchase or visit the official UHPPOTE webไซต์ โปรดเก็บใบเสร็จรับเงินของคุณไว้เป็นหลักฐานการซื้อสำหรับการเรียกร้องการรับประกันใดๆ