
1. ข้อมูลด้านความปลอดภัย
โปรดอ่านคำแนะนำทั้งหมดอย่างละเอียดก่อนการติดตั้งและการใช้งาน เก็บคู่มือนี้ไว้เพื่อใช้อ้างอิงในอนาคต
- คำเตือน: เสี่ยงต่อการถูกไฟฟ้าช็อต โปรดตัดกระแสไฟที่ฟิวส์หรือเบรกเกอร์ก่อนทำการติดตั้งหรือซ่อมบำรุง
- ควรให้ช่างไฟฟ้าที่มีคุณสมบัติเหมาะสมหรือผู้ที่มีความรู้ด้านไฟฟ้าเป็นผู้ทำการติดตั้ง
- ตรวจสอบปริมาณอุปทานtage is compatible with the light fixture (240 Volts as per specifications).
- ห้ามดัดแปลงอุปกรณ์ติดตั้งในลักษณะใดๆ ทั้งสิ้น
- This product is not dimmable. Do not connect to a dimmer switch.
- Keep away from babies and children to avoid danger of suffocation from packaging materials.
2. สินค้าหมดview
The Lepro 8.7-inch 15W LED Flush Mount Ceiling Light is designed for various indoor applications, including bathrooms, kitchens, bedrooms, hallways, and laundry rooms. Its slim, waterproof, and dustproof design ensures durability and seamless integration into any interior style.
คุณสมบัติหลัก:
- IP54 Water Resistant and Dustproof: Sealed design protects against splashing water and dust, making it suitable for damp สภาพแวดล้อมเช่นห้องน้ำ
- ดีไซน์บางเฉียบ: Blends seamlessly with any interior, ideal for low or sloped ceilings.
- อายุการใช้งานยาวนาน: Integrated LED lights are rated for over 20,000 hours of operation.
- แสงสีขาวอุ่น: Provides 3000 Kelvin soft warm white illumination.
- ความสว่างสูงและประหยัดพลังงาน: 15 watts, 1500 lumens, equivalent to a 100-watt incandescent bulb, offering up to 88% energy savings.
- ดัชนีการแสดงสีสูง (CRI > 80): Ensures colors appear natural and vibrant.
- Wide Illumination Range: Effectively illuminates an area of 9 to 12 square meters (95-130 sq. ft).
- ไม่สามารถหรี่แสงได้: This light fixture is not compatible with dimmer switches.
ข้อมูลจำเพาะ:
| ยี่ห้อ | โรคเรื้อน |
| หมายเลขรุ่น | PR1500024-WW |
| สี | สีขาวอุ่น |
| วัสดุ | พลาสติก |
| ขนาดสินค้า | ยาว 8.7 นิ้ว x กว้าง 8.7 นิ้ว x สูง 1.97 นิ้ว (220 มม. x 220 มม. x 50 มม.) |
| น้ำหนักสินค้า | 1.21 ปอนด์ (0.55 กิโลกรัม) |
| แหล่งพลังงาน | AC |
| เล่มที่tage | 240 โวลต์ |
| วัดtage | 15 วัตต์ |
| ความสว่าง | 1500 ลูเมน |
| อุณหภูมิสี | 3000 เคลวิน |
| ดัชนีความถูกต้องของสี (CRI) | >80 (typically 85) |
| ชีวิตเฉลี่ย | 20,000 ชั่วโมง |
| ระดับความต้านทานต่อน้ำ | IP54 (กันน้ำ) |
| ประเภทการติดตั้ง | Flush Mount |
| คุณสมบัติพิเศษ | ไม่หรี่แสงได้ |
3. เนื้อหาบรรจุภัณฑ์
ตรวจสอบว่าส่วนประกอบทั้งหมดอยู่ครบและไม่ได้รับความเสียหายก่อนเริ่มการติดตั้ง
- โคมระย้า LED ฝังฝ้า
- ตัวยึด
- ฮาร์ดแวร์สำหรับติดตั้ง (สกรู, พุกยึดผนัง)
- Anti-scratch pads (3 pieces)
- คู่มือการใช้งาน

Image: Contents of the product package, showing the light fixture and mounting hardware.
4. คำแนะนำในการติดตั้ง
Follow these steps carefully to install your Lepro LED Flush Mount Ceiling Light. Ensure power is OFF before starting.
คู่มือวีดีโอ:
Video: Official installation guide for Lepro ceiling lights, demonstrating the step-by-step process.
- ขั้นตอนที่ 1: ตัดการเชื่อมต่อไฟฟ้า
Before starting any electrical work, turn off the power at the circuit breaker or fuse box to prevent electric shock.
Image: A hand switching off a wall light switch, emphasizing the importance of cutting power before installation.
- Step 2: Remove the Mounting Bracket from the Fixture
Locate the bracket lock on the back of the light fixture. Press the bracket lock to detach the mounting bracket from the lamp ร่างกาย.
Image: Diagram illustrating the removal of the mounting bracket from the light fixture by pressing a lock mechanism.
- ขั้นตอนที่ 3: ติดตั้งขายึด
Measure the hole spacing on the mounting bracket. Depending on your ceiling type (wooden, cement, or junction box), use the appropriate screws and wall anchors to securely fix the mounting bracket to the ceiling. Ensure the bracket is flush against the ceiling.
Image: Diagram showing the mounting bracket installation process for various ceiling types, including drilling holes for cement ceilings and attaching to a junction box.
- Step 4: Apply Anti-scratch Pads
Paste the three provided anti-scratch pads to the back of the lamp body. These pads help protect the ceiling surface and ensure a snug fit.
Image: Diagram illustrating where to attach the anti-scratch pads on the rear of the light fixture.
- ขั้นตอนที่ 5: เชื่อมต่อสายไฟ
Open the waterproof wires compartment on the light fixture. Insert the live (L) and neutral (N) wires from your ceiling into the corresponding polarities on the wire connector. Ensure a secure connection. Close the compartment.
Image: Diagram showing the electrical wiring connection process, highlighting the live (L) and neutral (N) terminals.
- ขั้นตอนที่ 6: ติดตั้งโคมไฟ
Align the light fixture with the installed mounting bracket. Push the lamp body firmly against the ceiling and twist it clockwise until it locks securely into place. Ensure the light is flush with the ceiling.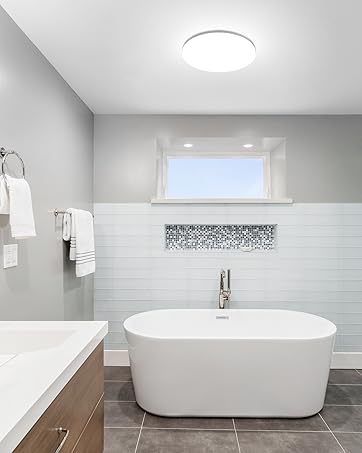
Image: Diagram showing the light fixture being attached to the mounting bracket on the ceiling.
- ขั้นตอนที่ 7: คืนพลังงาน
Once the light fixture is securely installed, restore power at the circuit breaker or fuse box. Test the light to ensure it functions correctly.
5. การดำเนินการ
This Lepro LED Flush Mount Ceiling Light is designed for simple operation. Once installed and powered, it functions as a standard on/off light fixture.
- การเปิด/ปิด: ใช้สวิตช์ติดผนังมาตรฐานของคุณเพื่อเปิดหรือปิดโคมไฟ
- ไม่สามารถหรี่แสงได้: This fixture provides a fixed brightness and cannot be dimmed. Do not use with dimmer switches.
6. การบำรุงรักษา
To ensure the longevity and optimal performance of your light fixture, follow these maintenance guidelines:
- การทำความสะอาด: Disconnect power before cleaning. Wipe the fixture with a soft, dry or slightly damp ผ้า. อย่าใช้สารเคมีที่รุนแรงหรือน้ำยาทำความสะอาดที่มีฤทธิ์กัดกร่อน
- ไม่ต้องเปลี่ยนหลอดไฟ: This fixture uses integrated LED lights that are designed to last for 20,000 hours. There are no user-replaceable bulbs.
- การตรวจสอบ: ตรวจสอบอุปกรณ์เป็นระยะๆ เพื่อหาร่องรอยความเสียหายหรือการเชื่อมต่อที่หลวม หากพบปัญหาใดๆ ให้ตัดการเชื่อมต่อไฟฟ้าและปรึกษาช่างไฟฟ้าผู้เชี่ยวชาญ
7 การแก้ไขปัญหา
If you encounter any issues with your light fixture, refer to the following troubleshooting steps:
| ปัญหา | สาเหตุที่เป็นไปได้ | สารละลาย |
|---|---|---|
| ไฟไม่เปิด | ไม่มีแหล่งจ่ายไฟ การเชื่อมต่อสายไฟหลวม สวิตซ์ไฟติดผนังชำรุด | ตรวจสอบเบรกเกอร์/ฟิวส์ Ensure wires are securely connected (power off first). Test the wall switch with another device. |
| ไฟกะพริบ | การเชื่อมต่อสายไฟหลวม Incompatible dimmer switch (if installed). | ตรวจสอบการเชื่อมต่อสายไฟ (ปิดเครื่องก่อน) Ensure no dimmer switch is used, as this fixture is not dimmable. |
| แสงสว่างไม่สว่างเพียงพอ | Room size exceeds recommended illumination area. Dust accumulation on the diffuser. | Consider additional lighting for larger areas. Clean the diffuser (power off first). |
8. การรับประกันและการสนับสนุน
This Lepro LED Flush Mount Ceiling Light comes with a รับประกัน 3 ปี ตั้งแต่วันที่ซื้อสินค้า
For warranty claims, technical support, or any questions regarding your product, please contact Lepro customer service through the retailer where you purchased the product or visit the official Lepro webเว็บไซต์สำหรับข้อมูลการติดต่อ
โปรดเก็บหลักฐานการซื้อไว้เพื่อใช้ยืนยันการรับประกัน