
Intermatic ST01
Intermatic ST01 7-Day Heavy-Duty Programmable Timer
คู่มือการใช้งาน
1. สินค้าหมดview
The Intermatic ST01 is a versatile 7-day heavy-duty programmable timer designed for a wide range of applications. It allows users to set precise ON/OFF schedules for electrical loads, offering convenience and energy savings. This timer is suitable for 120-277 VAC systems and can handle up to 15A, making it ideal for controlling lighting, fans, pumps, and other heavy-duty electrical equipment.
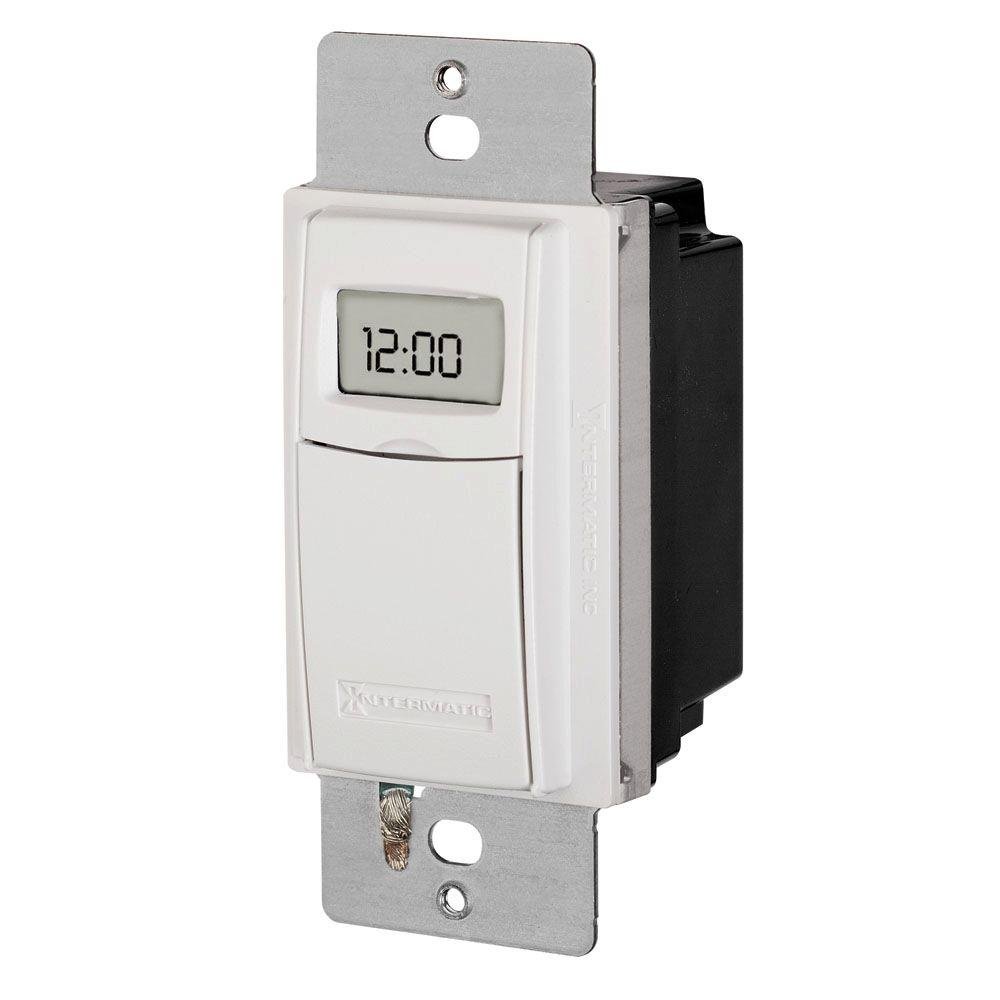
รูปที่ 1 : ด้านหน้า view of the Intermatic ST01 Programmable Timer, showing its digital display and white finish.
2. คำแนะนำด้านความปลอดภัยที่สำคัญ
โปรดอ่านและทำความเข้าใจคำแนะนำทั้งหมดก่อนติดตั้งหรือใช้งานตัวตั้งเวลา การไม่ปฏิบัติตามคำแนะนำเหล่านี้อาจส่งผลให้เกิดไฟฟ้าช็อต ไฟไหม้ หรือการบาดเจ็บร้ายแรงได้
- ตัดการเชื่อมต่อไฟฟ้า: ควรปิดสวิตช์ไฟที่เบรกเกอร์หรือกล่องฟิวส์ทุกครั้งก่อนติดตั้งหรือซ่อมบำรุงตัวตั้งเวลา
- ช่างไฟฟ้าที่มีคุณสมบัติ: Installation should be performed by a qualified electrician or trained personnel in accordance with all national and local electrical codes.
- สำหรับใช้ภายในอาคารเท่านั้น: This device is intended for indoor use in dry locations only. Do not expose to rain or moisture.
- การเดินสายไฟที่ถูกต้อง: Ensure all wiring connections are secure and correctly matched to the terminal markings. A neutral wire is required for operation.
- ความจุในการรับน้ำหนัก: Do not exceed the maximum electrical ratings of the timer (15A, 120-277 VAC).
- การต่อลงดิน: ตรวจสอบให้แน่ใจว่าตัวตั้งเวลาต่อสายดินอย่างถูกต้อง
3. เนื้อหาบรรจุภัณฑ์
ตรวจสอบว่าส่วนประกอบทั้งหมดมีอยู่ก่อนเริ่มการติดตั้ง:
- Intermatic ST01 7-Day Heavy-Duty Programmable Timer
- คู่มือการใช้งาน
- Mounting Screws (typically included with wall plate, not explicitly listed in product data)
4. คุณสมบัติหลัก
- สามารถตั้งโปรแกรมได้ 7 วัน: Allows for different schedules on each day of the week.
- Heavy-Duty Rating: Capable of controlling loads up to 15 Ampเอเรส
- ฉบับกว้างtagอี ช่วง: Operates on 120-277 VAC.
- จอแสดงผลดิจิตอล: Clear and easy-to-read digital time and program display.
- การแทนที่ด้วยตนเอง: Provides temporary or permanent manual control over programmed settings.
- Automatic Daylight Saving Time Adjustment: Simplifies time changes.
- แบตเตอรี่สำรอง: รักษาการตั้งค่าโปรแกรมไว้แม้ไฟดับtagใช่
5. ข้อมูลจำเพาะทางเทคนิค
| ข้อมูลจำเพาะ | ค่า |
|---|---|
| หมายเลขรุ่น | ST01 |
| เล่มที่tage | 120-277 VAC |
| คะแนนปัจจุบัน | 15 Ampเอเรส |
| ขนาดสินค้า | 2.3 x 4.9 x 3 นิ้ว |
| น้ำหนักสินค้า | 0.01 ออนซ์ |
| สี | สีขาว |
| วัสดุ | พลาสติก |
| จำนวนการตั้งค่า | 3 (This refers to modes, not programs) |
6. คู่มือการติดตั้ง
This section provides general guidelines for installing the Intermatic ST01 timer. For detailed wiring diagrams and specific instructions, refer to the diagram included with your product packaging or consult a qualified electrician.
6.1. การเตรียมพร้อม
- Turn off power to the circuit at the main service panel (breaker or fuse box).
- ตรวจสอบให้แน่ใจว่าได้ปิดไฟแล้วโดยการทดสอบวงจรด้วยโวลต์มิเตอร์tagอีผู้ทดสอบ
- Remove the existing wall switch or cover plate.
6.2. การเดินสาย
The ST01 timer requires a neutral wire for operation. Identify the Line (hot), Load, and Neutral wires in your electrical box. The timer typically has corresponding colored wires or marked terminals.
- เชื่อมต่อ ไลน์ (ฮอต) wire from the electrical box to the designated Line terminal/wire on the timer.
- เชื่อมต่อ โหลด wire (to the light/appliance) from the electrical box to the designated Load terminal/wire on the timer.
- เชื่อมต่อ เป็นกลาง wire from the electrical box to the designated Neutral terminal/wire on the timer.
- เชื่อมต่อ พื้น wire from the electrical box to the ground screw on the timer or electrical box.
- ใช้น็อตลวดเพื่อยึดการเชื่อมต่อทั้งหมด
6.3. การติดตั้ง
- Carefully push the wired timer into the wall box.
- Secure the timer to the wall box using the provided mounting screws.
- ติดแผ่นปิดผนังตกแต่ง (ไม่รวมอยู่ในชุด) ไว้เหนือตัวตั้งเวลา
- เรียกคืนพลังงานที่เบรกเกอร์
7. คู่มือการใช้งาน
Once installed and powered, the timer's display will activate. Follow these steps for initial setup and programming.
7.1. Initial Setup: Setting Current Time and Date
- กดปุ่ม "CLOCK" ปุ่ม. ตัวเลขชั่วโมงจะกะพริบ
- ใช้ "ชั่วโมง" และ "นาที" buttons to set the current hour and minute.
- กดปุ่ม "วัน" ปุ่มเพื่อตั้งค่าวันปัจจุบันของสัปดาห์
- กด "CLOCK" อีกครั้งเพื่อบันทึกและออก
7.2. การตั้งโปรแกรมตารางเวลาเปิด/ปิด
The ST01 allows for multiple ON/OFF programs per day. Refer to the specific button layout on your device for exact programming steps, as these can vary slightly.
- กดปุ่ม "PROG" กดปุ่ม หน้าจอจะแสดง "1 ON"
- ใช้ "ชั่วโมง" และ "นาที" buttons to set the desired ON time for program 1.
- กด "วัน" to select the days of the week for this program (e.g., Mon-Fri, Sat-Sun, or individual days).
- กด "PROG" อีกครั้ง หน้าจอจะแสดง "1 OFF"
- ตั้งค่าเวลาปิดที่ต้องการสำหรับโปรแกรมที่ 1 โดยใช้ "ชั่วโมง" และ "นาที" ปุ่ม
- Repeat steps 3-5 for additional programs (2 ON/OFF, 3 ON/OFF, etc.).
- กดปุ่ม "CLOCK" button to exit programming mode and return to normal operation.
7.3. คู่มือการแทนที่
The timer typically features a manual override button (often labeled "MANUAL" or "ON/OFF").
- การแทนที่ชั่วคราว: Pressing the manual button usually toggles the current state (ON to OFF, or OFF to ON) until the next programmed event.
- Permanent Override: Some models allow holding the button or pressing it multiple times to enter a permanent ON or OFF state, overriding all programs until manually changed again. Consult your device's specific instructions for this feature.
8. การบำรุงรักษา
The Intermatic ST01 timer is designed for long-term, maintenance-free operation. However, a few simple steps can ensure its longevity:
- การทำความสะอาด: เช็ดพื้นผิวด้วยผ้านุ่มและแห้ง ห้ามใช้น้ำยาทำความสะอาดที่มีฤทธิ์กัดกร่อนหรือตัวทำละลาย
- แบตเตอรี่สำรอง: The timer contains an internal battery for program retention during power outages. This battery is typically long-lasting and not user-replaceable. If the display goes blank or programs are lost frequently during power interruptions, the unit may need servicing or replacement.
- การตรวจสอบ: ตรวจสอบความแน่นของการเชื่อมต่อสายไฟและร่องรอยการสึกหรอเป็นระยะ
9 การแก้ไขปัญหา
If you experience issues with your Intermatic ST01 timer, refer to the table below for common problems and solutions.
| ปัญหา | สาเหตุที่เป็นไปได้ | สารละลาย |
|---|---|---|
| หน้าจอแสดงผลของตัวจับเวลาว่างเปล่า | No power to the timer; incorrect wiring; internal battery depleted. | Check circuit breaker. Verify wiring connections (Line, Neutral). If power is present and wiring is correct, the unit may require replacement. |
| ตัวตั้งเวลาไม่เปิด/ปิดตามเวลาที่ตั้งโปรแกรมไว้ | Incorrect programming; manual override engaged; incorrect current time/day. | Review and re-enter program settings. Check if manual override is active. Verify current time and day are set correctly. |
| Load (light/appliance) does not turn ON/OFF. | Load wire not connected; load device faulty; timer faulty. | Ensure load wire is securely connected. Test the load device directly (e.g., plug into a working outlet). If the load works directly, the timer may be faulty. |
| โปรแกรมจะหายไปหลังจากไฟฟ้าดับtage. | Internal battery backup is depleted or faulty. | The internal battery is not user-replaceable. The unit may need replacement if this issue persists. |
10. ข้อมูลการรับประกัน
Intermatic products are manufactured to the highest quality standards. This product is covered by a limited warranty against defects in material and workmanship. The specific terms and duration of the warranty are typically provided with the product packaging or can be found on the official Intermatic webไซต์ โปรดเก็บหลักฐานการซื้อไว้เพื่อใช้ในการเรียกร้องการรับประกัน
11. การสนับสนุนลูกค้า
For technical assistance, troubleshooting beyond this manual, or warranty inquiries, please contact Intermatic Customer Support. Have your product model number (ST01) and purchase information ready when contacting support.
You can typically find contact information (phone number, email, or support portal) on the official Intermatic webเว็บไซต์: www.intermatic.com
Ask a question about this manual
Ask about setup, troubleshooting, compatibility, parts, safety, or missing instructions. Manuals+ will review the question and use this page’s manual context to help answer it.