
1. บทนำ
This manual provides instructions for setting up, operating, and maintaining your D-Link Wi-Fi AC750 Dual Band Router (DIR-813). The DIR-813 is designed to deliver high-speed wireless connectivity for your home network, supporting both 2.4 GHz and 5 GHz bands for optimal performance.
คุณสมบัติที่สำคัญ ได้แก่:
- Wireless AC750 Technology: Optimized performance for HD video streaming, fast file transfers, and lag-free video chatting.
- ประสิทธิภาพการทำงานแบบดูอัลแบนด์: Up to 300Mbps (2.4GHz) + 433Mbps (5GHz) for fast wireless speeds and reduced interference.
- ความเข้ากันได้แบบย้อนกลับ: Works with older 802.11a/b/g/n devices.
- การเชื่อมต่อแบบมีสาย: Four Fast Ethernet ports for connecting wired devices.
- High-Performance Antennas: Three external antennas for maximum range.
2. เนื้อหาบรรจุภัณฑ์
ตรวจสอบว่าแพ็คเกจของคุณมีรายการต่อไปนี้:
- D-Link Wi-Fi AC750 Dual Band Router (DIR-813)
- อะแดปเตอร์แปลงไฟ
- สายเคเบิลอีเทอร์เน็ต
- Quick Installation Guide (not included in this digital manual)
If any of the above items are missing or damaged, please contact your local D-Link reseller.
3. ฮาร์ดแวร์โอเวอร์view
3.1 แผงด้านหน้า
The front panel of the DIR-813 router features LED indicators that provide status information.
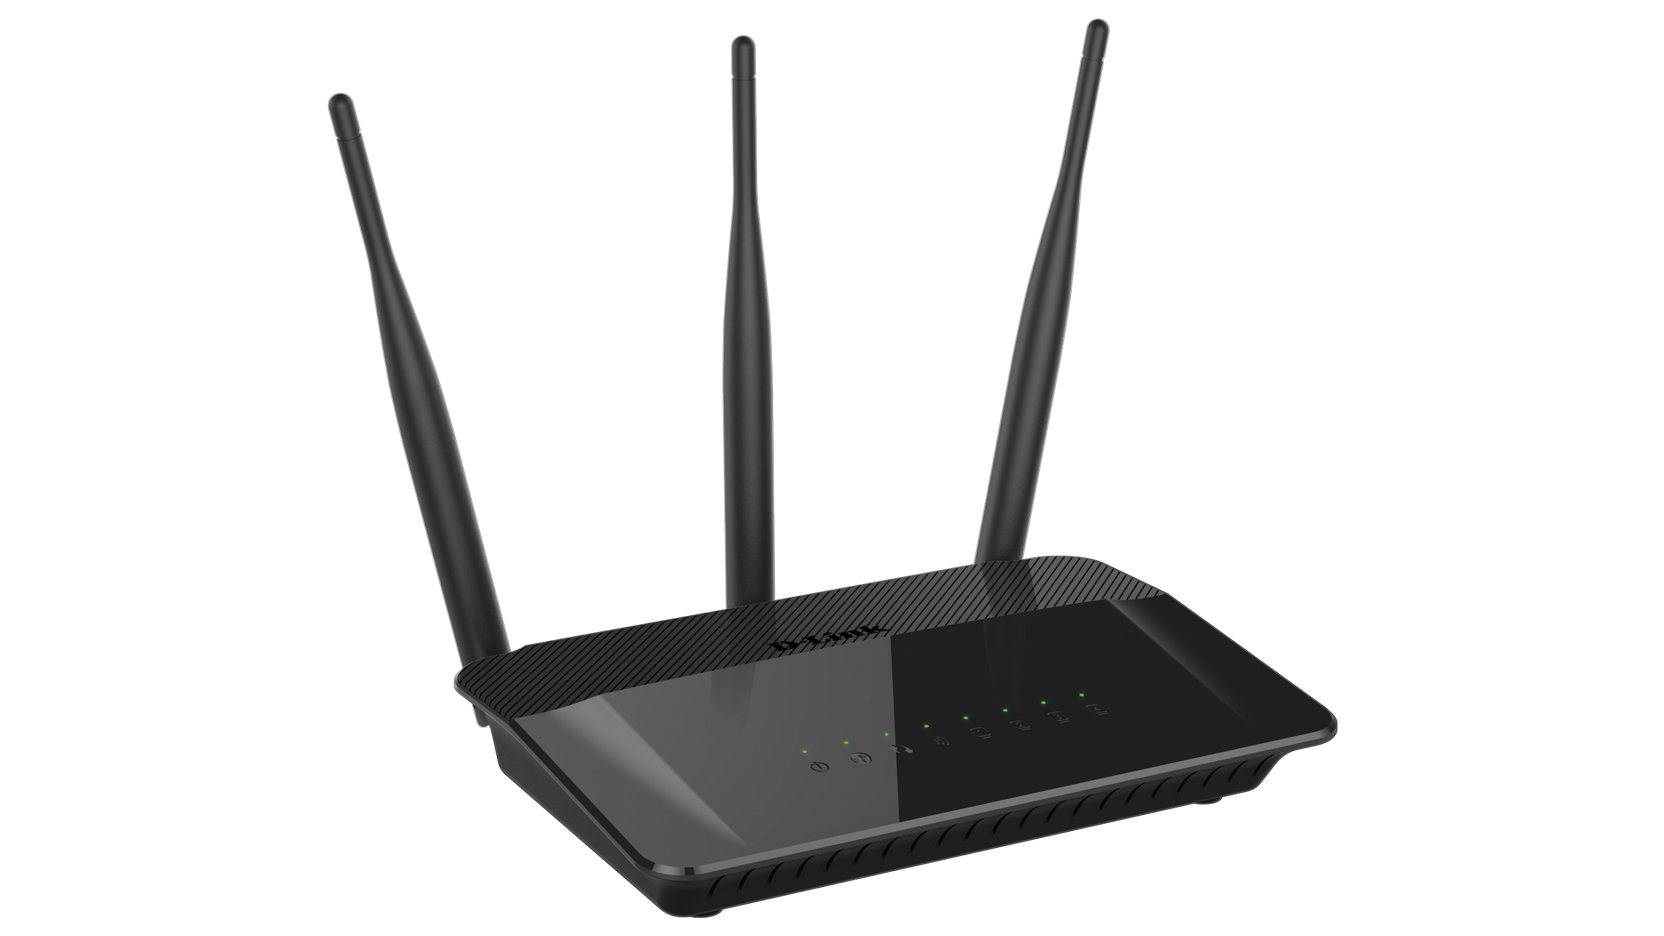
รูปที่ 1: ด้านหน้า view of the D-Link DIR-813 router. This image shows the router's top surface with three external antennas and a row of LED indicators for power, internet, and wireless status.
- กำลังไฟ LED: บ่งชี้สถานะพลังงาน
- ไฟ LED อินเทอร์เน็ต: บ่งบอกสถานะการเชื่อมต่ออินเตอร์เน็ต
- WLAN LEDs (2.4GHz/5GHz): Indicate wireless activity for each band.
- ไฟ LED LAN: แสดงสถานะการทำงานบนพอร์ตอีเธอร์เน็ตแบบใช้สาย
3.2 แผงด้านหลัง
The rear panel contains all the physical connection ports and buttons.
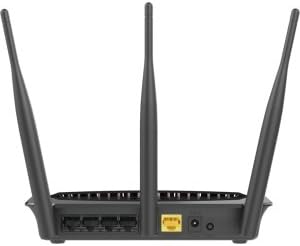
รูปที่ 2: หลัง view of the D-Link DIR-813 router. This image displays the back of the router, showing the power input, WAN port (yellow), four LAN ports, and a WPS/Reset button.
- ตัวเชื่อมต่อกระแสไฟ: เชื่อมต่ออะแดปเตอร์ไฟที่ให้มาด้วยที่นี่
- พอร์ต WAN (สีเหลือง): เชื่อมต่อโมเด็มของคุณเข้ากับพอร์ตนี้โดยใช้สายอีเทอร์เน็ต
- พอร์ตแลน (1-4): เชื่อมต่ออุปกรณ์แบบมีสายของคุณ (คอมพิวเตอร์, คอนโซลเกม ฯลฯ) เข้ากับพอร์ตเหล่านี้
- ปุ่ม WPS/รีเซ็ต:
- Press and hold for 2 seconds to activate WPS (Wi-Fi Protected Setup).
- กดค้างไว้ 10 วินาทีเพื่อทำการรีเซ็ตเป็นค่าจากโรงงาน
4. การตั้งค่า
4.1 ก่อนที่คุณจะเริ่มต้น
Ensure you have an active internet connection from your Internet Service Provider (ISP) and a modem (if required by your ISP).
4.2 การติดตั้งฮาร์ดแวร์
- หมดแรง: Disconnect the power from your modem and router (if replacing an old router).
- เชื่อมต่อโมเด็ม: Connect an Ethernet cable from your modem's Ethernet port to the yellow วัน port on the back of your DIR-813 router.
- เชื่อมต่อพลังงาน: Connect the included power adapter to the power connector on the router and then plug it into a power outlet.
- เปิดเครื่อง: Power on your modem first, wait for it to fully boot up (usually indicated by stable internet lights). Then, power on your DIR-813 router.
- ตรวจสอบไฟ LED: Wait for the Power LED and Internet LED on the router's front panel to turn solid.
4.3 การกำหนดค่าเริ่มต้น (Web-based Setup)
คุณสามารถตั้งค่าเราเตอร์ของคุณได้โดยใช้ web เบราว์เซอร์
- เชื่อมต่อกับเราเตอร์:
- มีสาย: เชื่อมต่อสายเคเบิลอีเทอร์เน็ตจากพอร์ต LAN ของเราเตอร์หนึ่งพอร์ตเข้ากับพอร์ตอีเทอร์เน็ตของคอมพิวเตอร์ของคุณ
- ไร้สาย: Connect to the default Wi-Fi network name (SSID) printed on the label at the bottom of your router. The default Wi-Fi password (WPA Key) is also on this label.
- เปิด Web เบราว์เซอร์: เปิด web เบราว์เซอร์ (เช่น Chrome, Firefox, Edge) และพิมพ์
http://dlinkrouter.localor192.168.0.1ลงในแถบที่อยู่ - เข้าสู่ระบบ: ชื่อผู้ใช้เริ่มต้นคือ
admin. Leave the password field blank. Click เข้าสู่ระบบ. - เรียกใช้ตัวช่วยการตั้งค่า: Follow the on-screen instructions of the D-Link Setup Wizard to configure your internet connection and wireless settings. It is recommended to change the default Wi-Fi name (SSID) and password for security.
- บันทึกการตั้งค่า: After completing the wizard, save your settings.
4.4 การเชื่อมต่ออุปกรณ์
Once the router is configured, you can connect your devices.
- อุปกรณ์แบบมีสาย: Connect computers, gaming consoles, or other network devices to the available LAN ports using Ethernet cables.
- อุปกรณ์ไร้สาย: Connect smartphones, tablets, laptops, and other Wi-Fi enabled devices to your new Wi-Fi network using the SSID and password you configured.
5. การใช้งานเราเตอร์ของคุณ
เข้าถึงเราเตอร์ webอินเทอร์เฟซแบบ - (http://dlinkrouter.local or 192.168.0.1) to manage its settings.
5.1 การตั้งค่าไร้สาย
You can modify the Wi-Fi network name (SSID), password, and security type for both 2.4 GHz and 5 GHz bands.
- นำทางไปที่ การตั้งค่า > ไร้สาย ใน web อินเทอร์เฟซ
- Select the 2.4 GHz or 5 GHz band to modify its settings.
- เปลี่ยนแปลง ชื่อ Wi-Fi (SSID) และ รหัสผ่าน WiFi ตามที่ต้องการ.
- ทำให้มั่นใจ WPA2-PSK or WPA2/WPA3 Mixed Mode is selected for optimal security.
- คลิก บันทึก เพื่อใช้การเปลี่ยนแปลง
5.2 Wi-Fi สำหรับแขก
Create a separate Wi-Fi network for guests to provide internet access without giving them access to your main network.
- ไปที่ Settings > Guest Wi-Fi.
- Enable the Guest Wi-Fi network.
- Set a unique SSID and password for the guest network.
- Configure access restrictions if needed (e.g., internet only).
- คลิก บันทึก.
5.3 การตั้งค่าความปลอดภัย
Manage firewall rules, VPN passthrough, and other security features.
- เข้าถึง Features > Firewall to configure firewall rules.
- Review Advanced > Port Forwarding if you need to open specific ports for applications or gaming.
5.4 การควบคุมโดยผู้ปกครอง
Control internet access for specific devices or users on your network.
- นำทางไปที่ Features > Parental Control.
- Set up schedules for internet access or block specific websites for selected devices.
- คลิก บันทึก after making changes.
6. การบำรุงรักษา
6.1 อัพเดตเฟิร์มแวร์
Keeping your router's firmware up to date ensures optimal performance and security.
- Download the latest firmware for your DIR-813 model from the official D-Link support webเว็บไซต์.
- เข้าสู่ระบบเราเตอร์ web อินเทอร์เฟซ
- ไปที่ Management > Firmware Update.
- เรียกดูเฟิร์มแวร์ที่ดาวน์โหลดมา file and follow the on-screen instructions to upload and update.
- Do not power off the router during the firmware update process.
6.2 การกำหนดค่าการสำรองและกู้คืน
Save your router's configuration settings to a file, which can be restored later if needed.
- เข้าสู่ระบบเราเตอร์ web อินเทอร์เฟซ
- นำทางไปที่ Management > System > Configuration Backup and Restore.
- คลิก การสำรองข้อมูล to save the current configuration to your computer.
- To restore, click ค้นหา, select your saved configuration fileและคลิก คืนค่า.
6.3 รีเซ็ตเป็นค่าโรงงาน
A factory reset restores the router to its original default settings. This will erase all custom configurations.
- การรีเซ็ตซอฟต์แวร์: เข้าสู่ระบบเราเตอร์ web อินเทอร์เฟซไปที่ Management > System > Restore to Factory Defaultsและยืนยัน
- รีเซ็ตฮาร์ดแวร์: With the router powered on, use a paperclip to press and hold the WPS/รีเซ็ต button on the rear panel for 10 seconds. Release the button when the Power LED starts blinking. The router will restart with factory defaults.
7 การแก้ไขปัญหา
7.1 ไม่มีการเชื่อมต่ออินเทอร์เน็ต
- ตรวจสอบว่า อินเทอร์เน็ต LED on the router is solid green. If not, ensure the Ethernet cable from your modem is securely connected to the router's yellow วัน ท่าเรือ.
- รีสตาร์ทโมเด็มของคุณ จากนั้นรีสตาร์ทเราเตอร์ของคุณ
- ตรวจสอบว่าการเชื่อมต่ออินเทอร์เน็ตของคุณใช้งานได้อยู่หรือไม่
- เข้าสู่ระบบเราเตอร์ web interface and check the internet connection status. Run the setup wizard again if necessary.
7.2 ไม่สามารถเชื่อมต่อกับ Wi-Fi ได้
- Ensure the router's WLAN LEDs อยู่บน.
- Verify you are using the correct Wi-Fi network name (SSID) and password. These are case-sensitive.
- Try restarting your wireless device and the router.
- If you recently changed Wi-Fi settings, ensure your device has forgotten the old network and is trying to connect to the new one.
7.3 ความเร็วไร้สายช้า
- Ensure your devices are connected to the appropriate band (5 GHz for faster speeds, 2.4 GHz for better range).
- Reduce interference by moving the router away from other electronic devices (cordless phones, microwaves).
- ลองเปลี่ยนช่องสัญญาณไร้สายในการตั้งค่าเราเตอร์ไปเป็นช่องสัญญาณที่มีการใช้งานน้อยกว่า
- Ensure your device's wireless adapter supports 802.11ac for optimal performance.
7.4 ลืมรหัสผ่านเข้าสู่ระบบเราเตอร์
If you forgot the password for the router's web interface, you will need to perform a factory reset. Refer to section 6.3 for instructions. After a factory reset, the username will be admin and the password field will be blank.
8. ข้อมูลจำเพาะ
| คุณสมบัติ | คำอธิบาย |
|---|---|
| ยี่ห้อ | ดีลิงค์ |
| ชื่อรุ่น | DIR-813 |
| ไร้มาตรฐาน | 802.11ac (backward compatible with a/b/g/n) |
| ระดับย่านความถี่ | ดูอัลแบนด์ (2.4 GHz และ 5 GHz) |
| ความเร็วไร้สาย | Up to 300Mbps (2.4GHz) + 433Mbps (5GHz) = AC750 |
| พอร์ตอีเทอร์เน็ต | พอร์ต LAN Fast Ethernet 4 ช่อง, พอร์ต WAN Fast Ethernet 1 ช่อง |
| เสาอากาศ | 3 x External High-Performance Antennas |
| คุณสมบัติพิเศษ | WPS (การตั้งค่าการป้องกัน Wi-Fi) |
| เทคโนโลยีการเชื่อมต่อ | WiFi, แบบใช้สาย |
| สี | สีดำ |
| น้ำหนักสินค้า | 0.5 ปอนด์ |
| ข้อแนะนำการใช้ | บ้าน |
9. การรับประกันและการสนับสนุน
For detailed warranty information, please refer to the warranty card included with your product or visit the official D-Link webเว็บไซต์.
For technical support, product registration, or to download the latest firmware and documentation, please visit the D-Link support portal:
When contacting support, please have your router's model number (DIR-813) and serial number ready.