
สินค้าเกินview
This document provides essential instructions for the installation, operation, and maintenance of your Konica Minolta BizHub C35 Black OEM Drum Unit. This drum unit is specifically designed for the Konica Minolta BizHub C35 Color Laser Printer to ensure optimal print quality and performance.
The drum unit is a critical component in the laser printing process, responsible for transferring toner to the paper. This black drum unit has an estimated page yield of 30,000 pages. Actual page yield may vary based on factors such as paper size, printer settings, and the content density of printed pages.
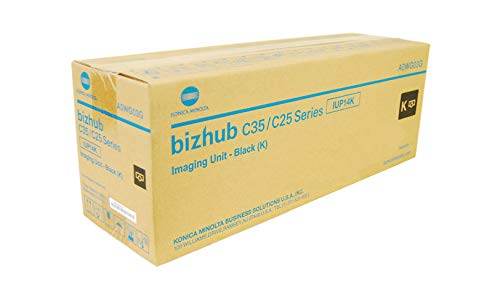
Image of the Konica BizHub C35 Black OEM Drum unit, showing its cylindrical shape and packaging.
คำแนะนำในการติดตั้ง
Follow these steps carefully to install the new drum unit into your Konica Minolta BizHub C35 printer. Always ensure the printer is powered off before beginning the installation process.
- ปิดเครื่องพิมพ์: Turn off the main power switch of your Konica Minolta BizHub C35 printer and unplug the power cord from the wall outlet.
- เปิดหน้าปก: Carefully open the front cover of the printer to access the internal components.
- Locate the Drum Unit: Identify the black drum unit. It is typically located behind the toner cartridge.
- Remove the Old Drum Unit: Grasp the handle of the old drum unit and gently pull it straight out of the printer. Place the used drum unit in a protective bag or box for proper disposal.
- แกะกล่องดรัมใหม่: Remove the new Konica Minolta BizHub C35 Black OEM Drum Unit from its packaging. Handle it by its designated areas to avoid touching the sensitive drum surface.
- Insert the New Drum Unit: Align the new drum unit with the guides inside the printer and push it firmly until it clicks into place. Ensure it is securely seated.
- ปิดฝาครอบด้านหน้า: Close the front cover of the printer until it latches securely.
- เปิดเครื่องพิมพ์: Plug the power cord back into the wall outlet and turn on the printer's main power switch. The printer may perform a calibration cycle.
สำคัญ: Do not expose the drum unit to direct sunlight or strong indoor lighting for extended periods, as this can damage the photosensitive surface.
การดำเนินการ
Once installed, the drum unit operates automatically as part of the printing process. It works in conjunction with the toner cartridge to create images and text on paper. The printer's display panel will typically indicate when the drum unit is nearing the end of its life or requires replacement.
- ผลผลิตหน้า: The estimated page yield of 30,000 pages is a guideline. Factors such as the type of documents printed (e.g., text-heavy vs. graphics-heavy), print density settings, and environmental conditions can influence the actual lifespan.
- คุณภาพการพิมพ์: A new OEM drum unit ensures optimal print quality, producing sharp text and vibrant colors. Degradation in print quality (e.g., streaks, faded prints) can be an indicator that the drum unit is nearing replacement.
การดูแลและการจัดการ
Proper care and handling of the drum unit can help maintain its performance and extend its life within its rated yield.
- พื้นที่จัดเก็บ: Store new drum units in their original, unopened packaging in a cool, dry place away from direct sunlight and extreme temperatures.
- การจัดการ: When handling the drum unit, always hold it by its designated handles or edges. Avoid touching the green photosensitive drum surface, as oils from your skin can cause print quality issues.
- การทำความสะอาด: Do not attempt to clean the drum unit with alcohol or other solvents, as this can cause irreversible damage. If necessary, gently wipe non-sensitive plastic parts with a dry, lint-free cloth.
- การกำจัด: Dispose of used drum units according to local environmental regulations. Many manufacturers and retailers offer recycling programs for imaging consumables.
การแก้ไขปัญหา
If you experience print quality issues after installing a new drum unit, consider the following common troubleshooting steps:
- Faded Prints or Streaks:
- Ensure the drum unit is correctly seated.
- Check the toner cartridge level; low toner can also cause faded prints.
- Perform a printer calibration or cleaning cycle through the printer's control panel.
- ข้อความแสดงข้อผิดพลาด:
- If the printer displays a
Ask a question about this manual
Ask about setup, troubleshooting, compatibility, parts, safety, or missing instructions. Manuals+ will review the question and use this page’s manual context to help answer it.
- If the printer displays a