
1. บทนำ
This manual provides comprehensive instructions for the installation, operation, and maintenance of your Hertz HDP4 4-Channel 1000W Max D-Class Ampเครื่องขยายเสียง โปรดอ่านคู่มือนี้อย่างละเอียดก่อนทำการติดตั้งหรือใช้งาน เพื่อให้มั่นใจได้ถึงการทำงานที่ถูกต้องและความปลอดภัย
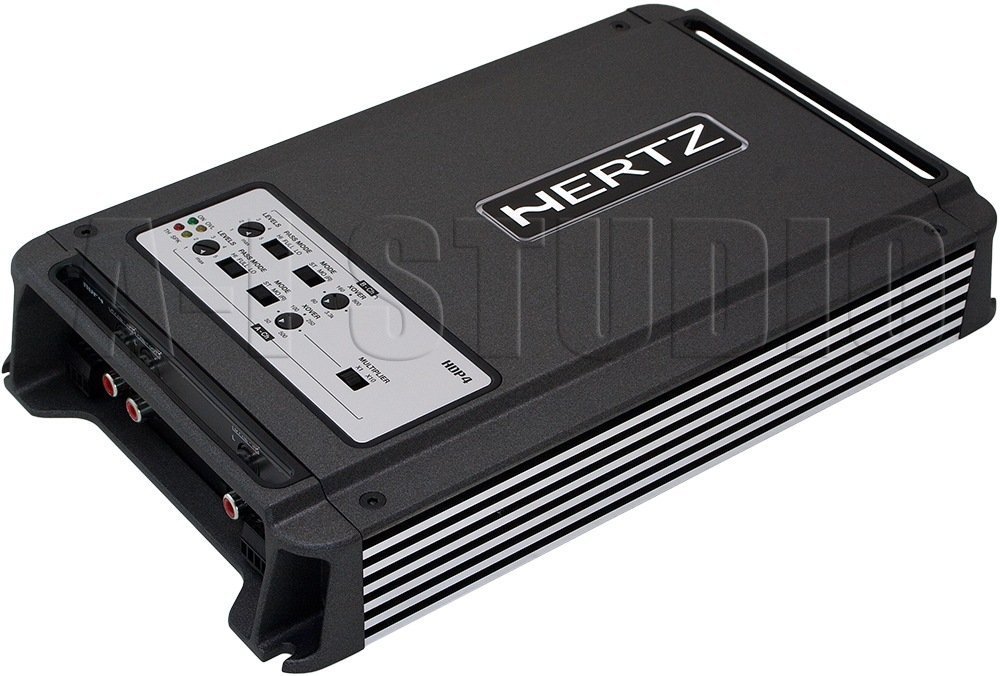
รูปที่ 1.1: มุมมองจากด้านบน view of the Hertz HDP4 ampเครื่องแสดงasinจี มันกะทัดรัดสีดำ casing and control panel on the top surface. The Hertz logo is visible on the main body.
2. ข้อมูลด้านความปลอดภัย
ปฏิบัติตามข้อควรระวังเพื่อความปลอดภัยต่อไปนี้เสมอ:
- Disconnect the vehicle's battery before any installation or wiring.
- ตรวจสอบให้แน่ใจว่าสายไฟทั้งหมดได้รับการหุ้มฉนวนอย่างถูกต้องเพื่อป้องกันไฟฟ้าลัดวงจร
- ติดตั้ง amplifier securely in a well-ventilated area, away from moisture and direct heat.
- ใช้สายไฟขนาดที่เหมาะสมสำหรับการเชื่อมต่อไฟฟ้าและกราวด์ตามที่ระบุไว้ในส่วนการติดตั้ง
- ปรึกษาผู้ติดตั้งมืออาชีพหากคุณไม่แน่ใจเกี่ยวกับส่วนใดส่วนหนึ่งของกระบวนการติดตั้ง
3. เนื้อหาบรรจุภัณฑ์
ตรวจสอบว่ามีรายการทั้งหมดอยู่ในแพ็คเกจ:
- Hertz HDP4 Ampหน่วย liifier
- ฮาร์ดแวร์สำหรับติดตั้ง (สกรู, ขายึด)
- คู่มือการใช้งาน (เอกสารนี้)
4. การตั้งค่าและการติดตั้ง
4.1 การติดตั้ง Ampชีวิต
เลือกตำแหน่งที่เหมาะสมสำหรับการติดตั้ง amplifier. It should be a dry, well-ventilated area, protected from direct sunlight and excessive vibration. Ensure there is sufficient space around the ampเครื่องเพิ่มการไหลเวียนของอากาศ

รูปที่ 4.1: ด้านบน view of the Hertz HDP4 amplifier, illustrating its compact design and potential mounting points. The amplifier features a textured black finish with the Hertz logo prominently displayed.
- วาง amplifier in the desired mounting location and mark the screw holes.
- Drill pilot holes if necessary, ensuring not to damage any vehicle components.
- การรักษาความปลอดภัย ampติดตั้งเครื่องขยายเสียงโดยใช้สกรูยึดที่ให้มา
4.2 การเชื่อมต่อสายไฟ
Proper wiring is critical for performance and safety. Refer to the diagram below for power, ground, remote, and speaker connections.

Figure 4.2: Rear panel of the Hertz HDP4 amplifier, detailing the power input (BATT), ground (GND), remote turn-on (REM) terminals, and speaker output terminals (L/R mono for channels A and B). Two 40A fuses are also visible.
- พลังงาน (แบตเตอรี่): Connect a fused power cable (minimum 8 AWG recommended) directly from the vehicle's positive battery terminal to the BATT terminal on the ampชีวิต.
- กราวด์ (GND): Connect a ground cable of the same gauge as the power cable from the GND terminal to a clean, unpainted metal point on the vehicle chassis.
- ระยะไกล (REM): Connect a remote turn-on wire from your head unit's remote output to the REM terminal.
- เอาต์พุตลำโพง: Connect your speakers to the appropriate L (left) and R (right) terminals for each channel (A and B). Ensure correct polarity. The amplifier supports mono bridging for increased power output to a single speaker or subwoofer.
- ฟิวส์: การ amplifier is equipped with two 40A fuses. Replace only with fuses of the same type and rating.
4.3 Input Connections and Controls
การ amplifier offers both RCA (low-level) and High-Level inputs, along with various crossover and gain controls.

Figure 4.3: Input and control panel of the Hertz HDP4 amplifier. This panel includes RCA pre-inputs (A PRE-IN, B PRE-IN), high-level inputs (A HI-IN, B HI-IN), and various adjustment knobs for levels, pass mode, and crossover settings. A switch for HI-IN AUTO TURN-ON is also present.
- RCA Pre-Inputs (A PRE-IN, B PRE-IN): Connect your head unit's RCA outputs to these inputs for low-level signal.
- High-Level Inputs (A HI-IN, B HI-IN): If your head unit does not have RCA outputs, connect speaker-level signals directly to these inputs. The amplifier features an auto turn-on function for high-level inputs.
- ระดับ: Adjust the input sensitivity (gain) to match the output of your head unit. Start with the gain at minimum and slowly increase until desired volume is achieved without distortion.
- โหมดผ่าน: Select the desired crossover mode (e.g., Full, HPF, LPF) for each channel pair.
- Crossover Frequency (XOVER): Adjust the frequency point for the selected crossover mode.
- ตัวคูณ: Use this switch to multiply the crossover frequency setting by 1 or 10, depending on your system requirements.
5. คู่มือการใช้งาน
5.1 การเพิ่มพลังเริ่มต้น
- After all connections are made and verified, reconnect the vehicle's battery.
- เปิดเครื่องหลักของคุณ amplifier should power on automatically (if remote wire is connected or HI-IN AUTO TURN-ON is active).
- Start with the head unit volume low and gradually increase it, listening for clear audio.
5.2 การปรับการตั้งค่าเสียง
ปรับจูน amplifier's settings for optimal sound quality:
- การจับคู่กำไร: ปรับแต่ง amplifier's gain controls (LEVELS) to match the output voltage of your head unit. This is crucial to prevent distortion.
- การตั้งค่าครอสโอเวอร์: Set the crossover frequencies (XOVER) and pass modes (PASS MODE) according to the specifications of your speakers. For full-range speakers, a high-pass filter (HPF) is often used to protect them from low bass frequencies. For subwoofers, a low-pass filter (LPF) is used.
6. การบำรุงรักษา
To ensure the longevity and optimal performance of your Hertz HDP4 ampเครื่องขยายสัญญาณ ให้ปฏิบัติตามคำแนะนำการบำรุงรักษาดังต่อไปนี้:
- การทำความสะอาด: ทำความสะอาด .เป็นระยะ ampเช็ดทำความสะอาดภายนอกของเครื่องฉายรังสีด้วยผ้านุ่มและแห้ง ห้ามใช้สารเคมีรุนแรงหรือน้ำยาทำความสะอาดที่มีฤทธิ์กัดกร่อน
- การระบายอากาศ : ให้แน่ใจว่า amplifier's cooling fins are free from dust and obstructions to maintain proper heat dissipation.
- การเชื่อมต่อ: ตรวจสอบความแน่นหนาและการกัดกร่อนของการเชื่อมต่อสายไฟทั้งหมดอย่างสม่ำเสมอ การเชื่อมต่อที่หลวมอาจทำให้ประสิทธิภาพการทำงานลดลงหรือเกิดความเสียหายได้
- ฟิวส์: If a fuse blows, replace it only with a fuse of the exact same type and rating (2 x 40A). Using an incorrect fuse can cause severe damage to the amplifier or vehicle electrical system.

Figure 6.1: Bottom panel of the Hertz HDP4 amplifier, displaying the serial number label and important caution notes regarding insulated screws. This area should be kept clean and free from obstructions.
7 การแก้ไขปัญหา
หากคุณประสบปัญหาเกี่ยวกับ ampหากต้องการใช้เครื่องขยายเสียง โปรดดูตารางต่อไปนี้ก่อนติดต่อฝ่ายสนับสนุน:
| ปัญหา | สาเหตุที่เป็นไปได้ | สารละลาย |
|---|---|---|
| ไม่มีไฟฟ้า / Amplifier ไม่เปิด | Blown fuse, loose power/ground/remote wire, faulty head unit remote output. | Check and replace fuses. Verify all power, ground, and remote connections are secure. Test remote wire for 12V signal. |
| ไม่มีเสียง | สาย RCA/สายลำโพงหลวม, เลือกช่องสัญญาณเข้าไม่ถูกต้อง amplifier in protection mode, faulty speakers. | Check all signal and speaker connections. Ensure correct input mode is selected. Check for protection light. Test speakers. |
| เสียงผิดเพี้ยน | Gain set too high, incorrect crossover settings, poor quality audio source, damaged speakers. | Reduce gain. Adjust crossover settings. Test with a different audio source. Inspect speakers for damage. |
| Ampเครื่องทำความร้อนร้อนเกินไป | Insufficient ventilation, impedance mismatch, prolonged high-power operation. | ให้แน่ใจว่ามีการไหลเวียนของอากาศที่เหมาะสมรอบๆ ampเครื่องขยายเสียง ตรวจสอบให้แน่ใจว่าค่าความต้านทานของลำโพงตรงกัน amplifier's capabilities. Reduce volume or operating time. |
8. ข้อมูลจำเพาะ
Technical specifications for the Hertz HDP4 4-Channel 1000W Max D-Class Ampเครื่องฟอก:
- แบบอย่าง: HDP4
- ยี่ห้อ: เฮิรตซ์
- พิมพ์: 4-Channel D-Class Ampชีวิต
- พลังสูงสุด: 1000W (as per product title, specific RMS not provided in data)
- ขนาดสินค้า (กว้าง x ยาว x สูง) : 11.18 x 6.73 x 1.83 นิ้ว
- น้ำหนัก: 6.35 ปอนด์
- เล่มที่tage: 14.4 โวลต์ (ขณะทำงาน)
- ประเภทการติดตั้ง: การติดตั้งบนพื้นผิว
- ฟิวส์: 2x40เอ
- ASIN: B00AWBU1FQ
9. ข้อมูลการรับประกัน
Hertz products are designed and manufactured to the highest quality standards. For specific warranty terms and conditions, please refer to the warranty card included with your product or visit the official Hertz webไซต์ โปรดเก็บใบเสร็จรับเงินไว้เป็นหลักฐานการซื้อสำหรับการเรียกร้องการรับประกัน
10. การสนับสนุน
For technical assistance, troubleshooting beyond this manual, or warranty inquiries, please contact Hertz customer support through their official website or authorized dealer. Ensure you have your product model (HDP4) and serial number ready when contacting support.
Official Hertz Webเว็บไซต์: www.hertzaudiovideo.com