
1. บทนำ
This manual provides detailed instructions for the proper setup, operation, and maintenance of your AmScope ME1400T Inverted Trinocular Metallurgical Microscope. This instrument is designed for observing opaque or metallic specimens, or larger specimens that cannot be viewed on a standard microscope stage, utilizing reflected light.
The ME1400T features 40X-400X magnification, WF10x eyepieces with a reticle, Kohler condenser, 30W halogen illumination with rheostat, and a double-layer mechanical stage. Please read this manual thoroughly before using the microscope to ensure safe and optimal performance.
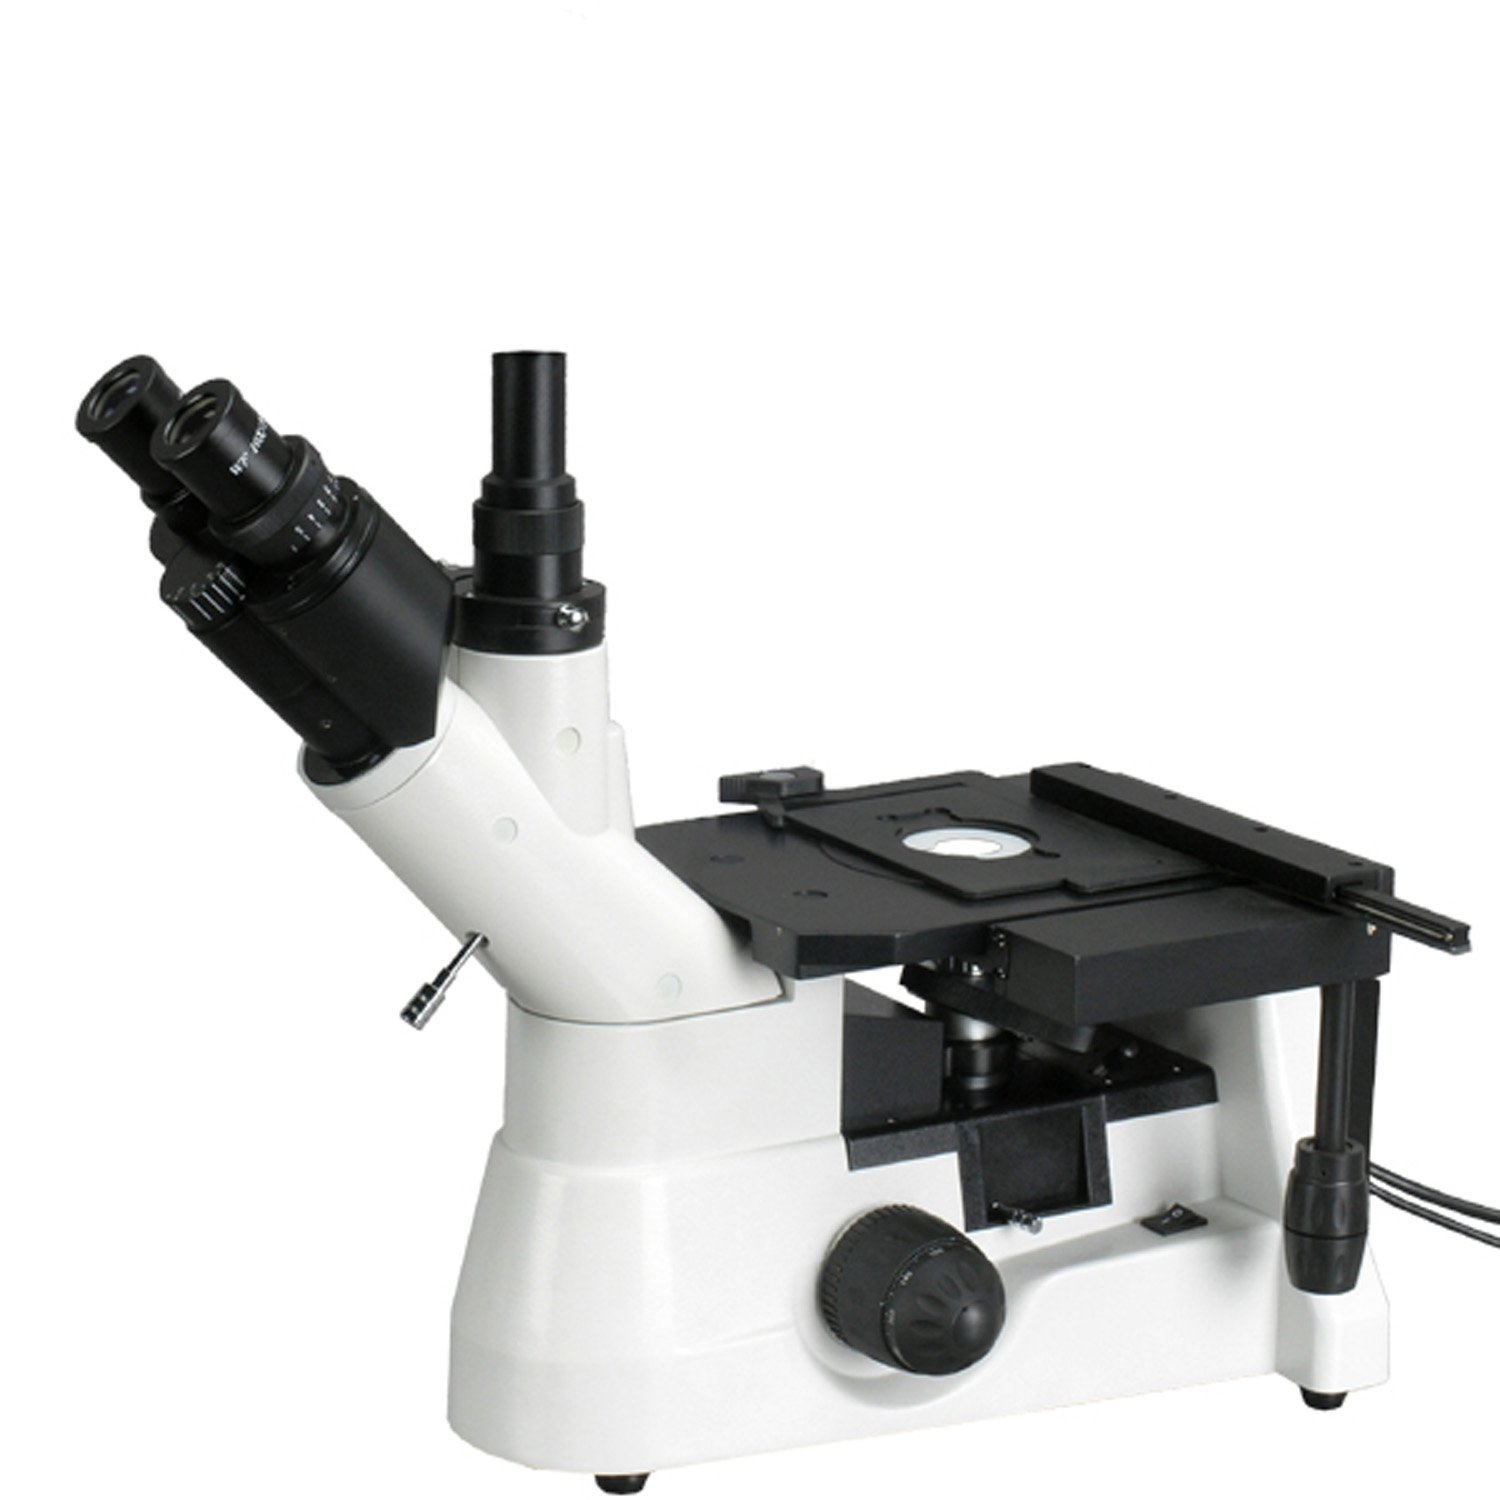
Figure 1: AmScope ME1400T Inverted Trinocular Metallurgical Microscope
2. ข้อมูลด้านความปลอดภัย
- ควรใช้งานกล้องจุลทรรศน์ด้วยความระมัดระวังเสมอ หลีกเลี่ยงการเคลื่อนไหวหรือการกระแทกอย่างกะทันหัน
- ตรวจสอบให้แน่ใจว่าได้วางกล้องจุลทรรศน์บนพื้นผิวที่มั่นคงและเรียบเสมอกัน เพื่อป้องกันการพลิคว่ำ
- Connect the power cord only to a grounded electrical outlet with the correct voltagอี (85-230V)
- Do not expose the microscope to direct sunlight, high temperatures, dust, or high humidity.
- ถอดปลั๊กไฟก่อนทำความสะอาดหรือบำรุงรักษาใดๆ
- Never touch optical surfaces with bare hands. Use a soft, lint-free cloth or lens paper for cleaning.
- Keep small parts and accessories away from children.
- If the halogen bulb needs replacement, ensure the microscope is unplugged and the bulb has cooled down to prevent burns.
3. ส่วนประกอบมากกว่าview
Familiarize yourself with the main components of your ME1400T microscope:
- Trinocular Head: Allows for simultaneous viewing through eyepieces and connection of a camera to the vertical port. Features a Siedentopf design for interpupillary distance adjustment and 45-degree inclination for comfortable viewการไอเอ็นจี
- เลนส์สายตา: Includes a pair of 10x20mm high-eyepoint super-widefield eyepieces and one 10x measuring eyepiece with a built-in reticle and micrometer (0.1mm graduations).
- จมูก: Forward-facing quintuple nosepiece holding the objective lenses.
- เลนส์วัตถุ: Four DIN metallurgical objectives (4x, 10x, 20x, 40x) providing color correction and improved focus.
- เครื่องกล Stage: Double-layer mechanical stage with a removable stage plate and stage stop to protect specimens and objectives.
- ปุ่มปรับโฟกัส: Graduated coarse and fine focus knobs with tension control.
- ระบบส่องสว่าง: Episcopic reflected and Brightfield illumination with a 30W halogen light source and rheostat for intensity control. Includes a polarizing condenser.

Figure 2: WF10x Eyepieces with Diopter Adjustment

Figure 3: Quintuple Nosepiece with Metallurgical Objectives
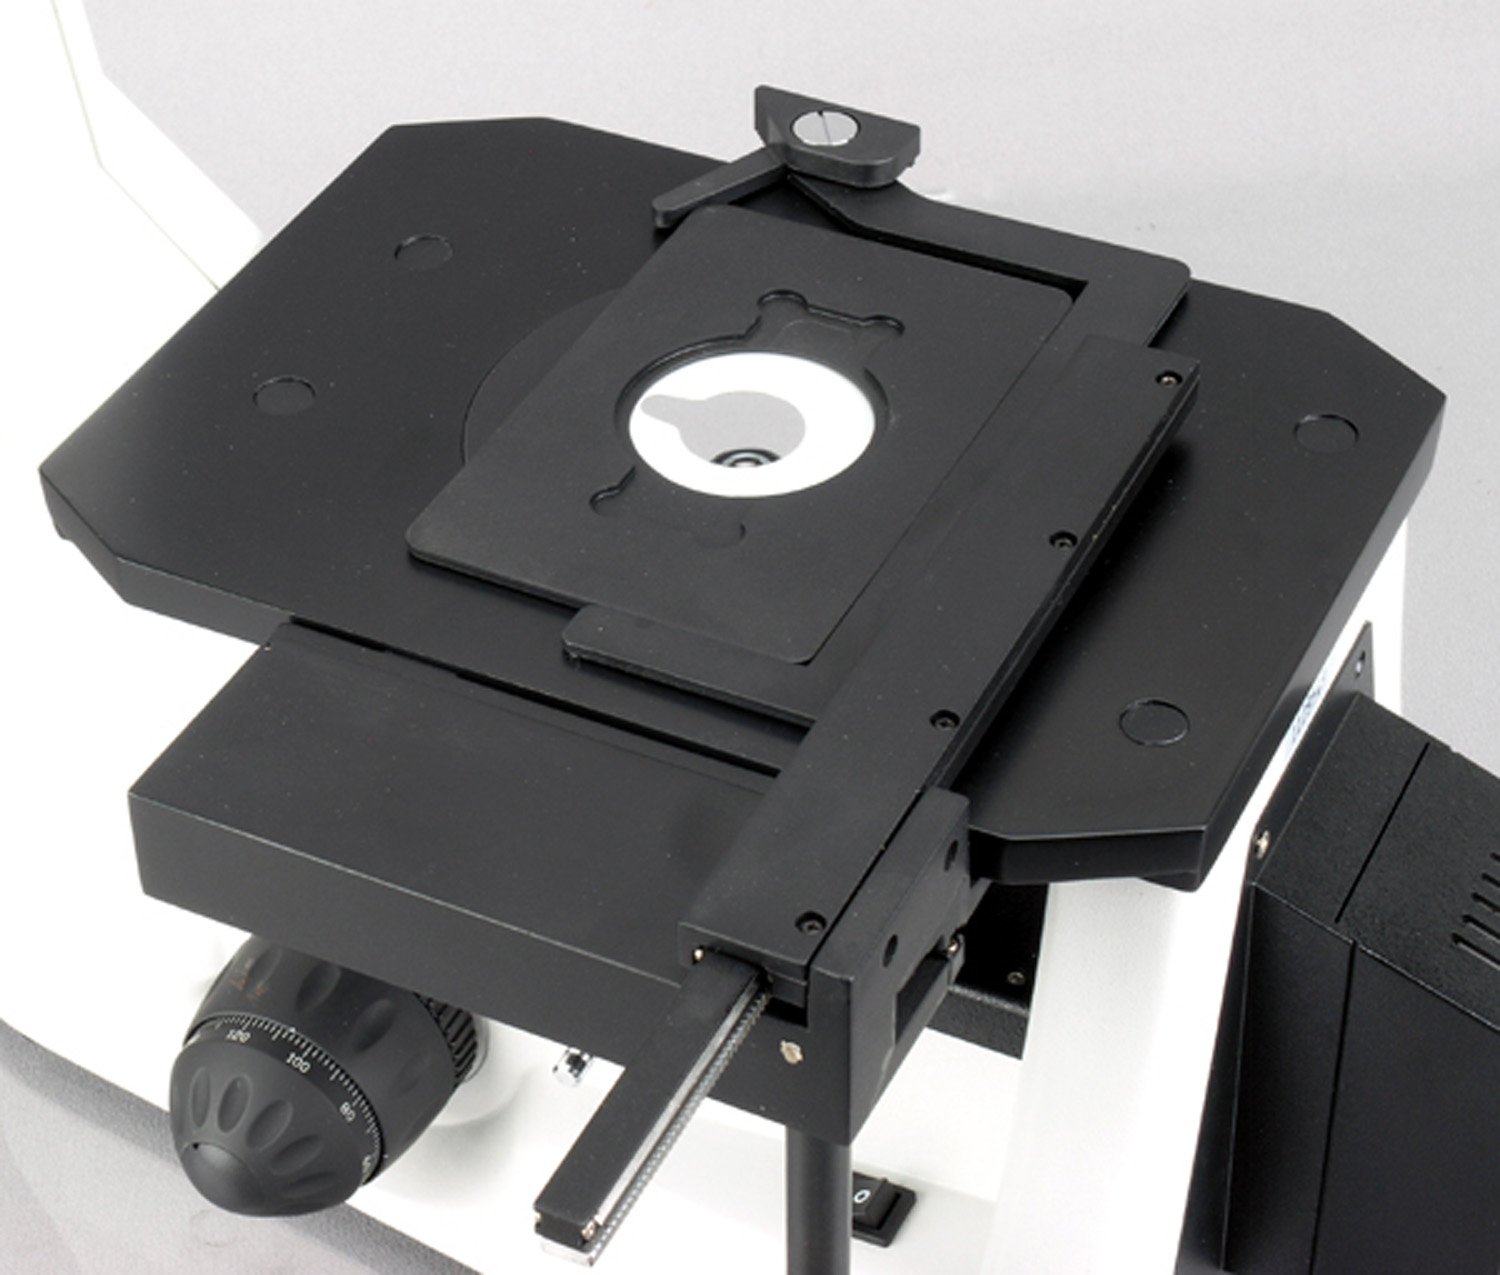
Figure 4: Double-Layer Mechanical Stage
4. การตั้งค่า
- การแกะกล่อง: นำส่วนประกอบทั้งหมดออกจากบรรจุภัณฑ์อย่างระมัดระวัง เก็บรักษาบรรจุภัณฑ์เดิมไว้สำหรับการขนส่งหรือจัดเก็บในอนาคต
- การจัดวาง: Place the microscope on a sturdy, level, and vibration-free surface. Ensure adequate space around the instrument for operation and ventilation.
- Attach Trinocular Head: Gently insert the trinocular head into the top port of the microscope body. Secure it by tightening the set screw.
- ใส่เลนส์ใกล้ตา: Insert the pair of WF10x20mm eyepieces into the binocular tubes. If using the measuring eyepiece, replace one of the WF10x20mm eyepieces with it.
- เชื่อมต่อพลังงาน: Plug the power cord into the microscope's power input, then into a grounded electrical outlet.
- การปรับเปลี่ยนเบื้องต้น:
- ระยะทางระหว่างตา: ขณะมองผ่านเลนส์ใกล้ตา ให้ปรับระยะห่างระหว่างท่อเลนส์ใกล้ตาทั้งสองจนกว่าจะได้ภาพวงกลมที่ชัดเจนเพียงภาพเดียว view ได้ถูกสังเกต
- การปรับไดออปเตอร์: Focus on a specimen using the 10x objective and the right eyepiece only. Then, without touching the coarse or fine focus knobs, adjust the diopter ring on the left eyepiece until the image is sharp through the left eyepiece.
5. คู่มือการใช้งาน
- เปิดเครื่อง: Flip the main power switch to the 'ON' position. The halogen illumination should light up.
- ปรับความสว่าง: Use the rheostat knob to adjust the brightness of the halogen light source to a comfortable level.
- ตัวอย่างสถานที่: Place your specimen on the mechanical stage. ใช้ stagเพื่อใช้คลิปหนีบยึดให้แน่นหากจำเป็น
- เลือกวัตถุประสงค์: Rotate the nosepiece to select the lowest power objective (e.g., 4x) first. Ensure the objective clicks firmly into place.
- การโฟกัส:
- Using the coarse focus knob, slowly raise the stage until the specimen comes into approximate focus.
- Use the fine focus knob to achieve a sharp, clear image.
- การเปลี่ยนกำลังขยาย: Rotate the nosepiece to a higher power objective. The microscope is parfocal, meaning only minor adjustments with the fine focus knob should be needed.
- Using the Measuring Eyepiece: If installed, the measuring eyepiece allows for basic measurements. Calibrate the reticle using a stage micrometer (not included) for accurate measurements at different magnifications.
- พอร์ต Trinocular: For camera attachment, slide the light path selector (if present) to direct light to the vertical trinocular port. A camera (sold separately) can be mounted here for image capture. The port has a 100% light-splitting rate.
- Polarizing Illumination: The integrated polarizing condenser can be engaged for observing specimens under polarized light, enhancing contrast for certain materials.
- หมดแรง: After use, turn the rheostat to the lowest setting, then flip the main power switch to 'OFF'. Unplug the microscope if it will not be used for an extended period.
6. การบำรุงรักษา
- การทำความสะอาดเลนส์: Use a soft brush to remove dust, then gently wipe with lens paper moistened with lens cleaning solution. Do not use abrasive cloths or solvents.
- การทำความสะอาดทั่วไป: เช็ดตัวกล้องจุลทรรศน์ด้วยผ้าเนื้อนุ่มและแห้งamp ผ้า. หลีกเลี่ยงไม่ให้ความชื้นเข้าไปในชิ้นส่วนอิเล็กทรอนิกส์
- การเปลี่ยนหลอดไฟฮาโลเจน:
- Unplug the microscope and allow the bulb to cool completely.
- Locate the bulb housing (refer to your specific model's diagram if available).
- Carefully remove the old bulb and insert a new 30W halogen bulb, avoiding touching the glass with bare hands.
- Secure the housing and plug in the microscope.
- พื้นที่จัดเก็บ: When not in use, cover the microscope with a dust cover to protect it from dust and debris. Store in a cool, dry place.
7 การแก้ไขปัญหา
| ปัญหา | สาเหตุที่เป็นไปได้ | สารละลาย |
|---|---|---|
| ไม่มีแสงสว่าง | Power cord unplugged, power switch off, bulb burnt out. | Check power connection, turn on switch, replace bulb. |
| ภาพเบลอหรือไม่ชัด | Incorrect focus adjustment, objective not fully engaged, dirty lens. | Adjust coarse/fine focus, rotate nosepiece until objective clicks, clean lenses. |
| การส่องสว่างไม่สม่ำเสมอ | Condenser not centered, light source obstruction. | Adjust Kohler condenser, check for obstructions in light path. |
| Cannot adjust interpupillary distance | Head not properly seated or secured. | Ensure trinocular head is fully inserted and set screw is tightened. |
8. ข้อมูลจำเพาะ
| คุณสมบัติ | ข้อมูลจำเพาะ |
|---|---|
| แบบอย่าง | เอ็มอีวันที |
| กล้องจุลทรรศน์ชนิด | Inverted Trinocular Metallurgical |
| ช่วงการขยาย | 40X - 400X |
| เลนส์สายตา | WF10x20mm (pair), 10x Measuring Eyepiece (with 0.1mm reticle) |
| เลนส์วัตถุ | 4x, 10x, 20x, 40x DIN Metallurgical Achromatic |
| จมูก | Quintuple, Forward-facing |
| Viewหัว | Siedentopf Trinocular, 45-degree inclination |
| ระยะห่างระหว่างรูม่านตา | 55 - 75 มม. |
| การส่องสว่าง | Episcopic Reflected Brightfield and Polarizing, 30W Halogen with Rheostat |
| คอนเดนเซอร์ | Kohler, Polarizing |
| Stage | Double-Layer Mechanical Stagอีกับเอสtagอี สต็อป |
| การโฟกัส | Coarse and Fine Adjustment with Tension Control |
| แหล่งจ่ายไฟ | 85-230โวลต์ |
| น้ำหนักสินค้า | 27.22 กก. (60 ปอนด์) |
9. การรับประกันและการสนับสนุน
For warranty information, technical support, or service inquiries regarding your AmScope ME1400T microscope, please contact AmScope customer service directly. Refer to the official AmScope webโปรดตรวจสอบเว็บไซต์หรือเอกสารการซื้อของคุณเพื่อดูรายละเอียดการติดต่อและเงื่อนไขการรับประกันล่าสุด
ขอแนะนำให้ลงทะเบียนผลิตภัณฑ์ของคุณหลังจากซื้อ เพื่อความสะดวกในการขอรับการสนับสนุนในอนาคต