
1. บทนำ
The AmScope MU900-CK is a 9.1-megapixel USB 2.0 digital camera designed for microscopes. It enables users to capture still images, stream live video, and record video. The camera is compatible with Windows XP/Vista/7/8/10 and Mac OS X 10.6 & Up operating systems. The included software provides advanced features such as image stitching, Extended Depth of Focus (EDF), video recording, and measurement functions for Windows users. Mac users can capture still images, record video, and control color and exposure. The package includes two mounting adapters, a reduction lens, and a calibration kit for precise measurements.
2. เนื้อหาบรรจุภัณฑ์
ตรวจสอบว่ามีสินค้าทั้งหมดที่ระบุไว้ด้านล่างอยู่ในแพ็คเกจของคุณ:
- AmScope MU900-CK 9.1MP USB Digital Camera
- สายเคเบิล USB 2.0
- ซีดีการติดตั้งซอฟต์แวร์
- 23mm Mounting Adapter
- 30mm Mounting Adapter
- 30.5mm Mounting Adapter (often integrated or provided as an additional ring)
- Reduction Lens
- Calibration Kit (calibration slide)

ภาพที่ 2.1: Contents of the AmScope MU900-CK package, including the camera, USB cable, software disk, mounting adapters, and calibration slide.
3. การตั้งค่า
3.1. การติดตั้งซอฟต์แวร์
Before connecting the camera, install the provided software from the CD or download the latest version from the AmScope website. Follow the on-screen instructions for your operating system (Windows or Mac).
- ผู้ใช้ Windows: The software for Windows XP/Vista/7/8/10 offers comprehensive features including image editing, processing, stitching, EDF, and measurement functions.
- ผู้ใช้ Mac: The software for Mac OS X 10.6 & Up allows for still image capture, video recording, and basic control over color and exposure.
3.2. การติดตั้งกล้อง
- Select the appropriate mounting adapter (23mm, 30mm, 30.5mm, or C-mount) that matches your microscope's eyepiece tube or trinocular port.
- Insert the reduction lens into the camera body if required for your microscope type to achieve a wider field of view.
- Attach the selected adapter to the camera.
- Carefully insert the assembled camera into the microscope's eyepiece tube or trinocular port. Ensure a secure fit.

ภาพที่ 3.1: The AmScope MU900-CK camera installed on a stereo microscope, displaying live feed on a laptop.

ภาพที่ 3.2: The AmScope MU900-CK camera installed on a compound microscope, displaying live feed on a laptop.
3.3. การเชื่อมต่อกับคอมพิวเตอร์
Connect the USB cable from the camera to an available USB 2.0 port on your computer. The operating system should detect the camera after software installation.
4. คู่มือการใช้งาน
4.1. Launching the Software
After successful installation, launch the AmScope camera software from your desktop shortcut or applications folder.
4.2. สด View and Image Capture
Upon launching, the software will display a live feed from the microscope camera. Adjust the microscope's focus and illumination for a clear image.
- การจับภาพนิ่ง: Locate the "Capture" or "Snapshot" button within the software interface to take a still image. Images are typically saved in a designated folder.
- การบันทึกวิดีโอ: Use the "Record" function to capture live video. Video files are also saved to a specified location.
- การตั้งค่าความละเอียด: พรีview and capture resolutions can be set independently. This allows for viewing a high-speed, low-resolution live video while capturing higher-resolution images or video.
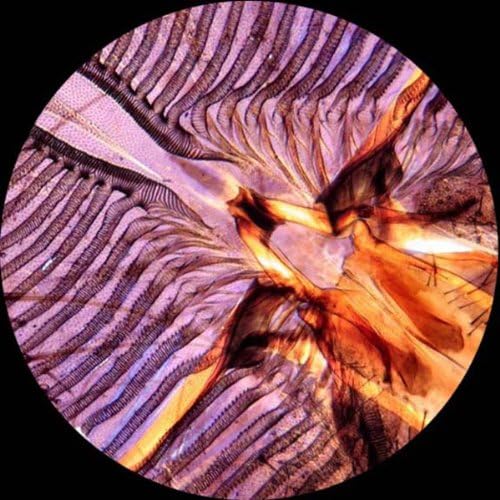
ภาพที่ 4.1: Example of a detailed microscopic image captured using the camera.
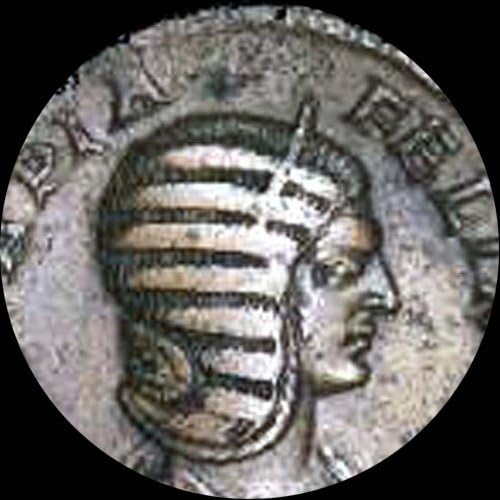
ภาพที่ 4.2: Example of a microscopic image of an ancient coin captured using the camera.
4.3. Advanced Features (Windows Software)
The Windows software includes advanced functionalities:
- การเย็บ: รวมภาพหลายภาพเข้าด้วยกันเพื่อสร้างขอบเขตที่กว้างขึ้น view.
- EDF (Extended Depth of Focus): รวมภาพที่ถ่ายจากระนาบโฟกัสที่แตกต่างกัน เพื่อสร้างภาพเดียวที่มีความชัดลึกมากขึ้น
- ฟังก์ชั่นการวัด: Perform precise measurements on captured images.
- หมายเหตุ: Add notes, shapes, and watermarks to images.
5. การสอบเทียบ
The included calibration kit is essential for accurate measurements. Refer to the software's help documentation for detailed instructions on how to perform calibration. This process typically involves capturing an image of the calibration slide and using the software to define known distances, ensuring precise measurements for future observations.

ภาพที่ 5.1: The calibration slide, showing a scale for precise measurement setup.
6 การแก้ไขปัญหา
- ไม่พบกล้อง:
- ตรวจสอบให้แน่ใจว่าได้เสียบสาย USB เข้ากับกล้องและคอมพิวเตอร์อย่างแน่นหนาแล้ว
- Verify that the camera drivers and software are correctly installed.
- ลองเชื่อมต่อกับพอร์ต USB อื่น
- รีสตาร์ทเครื่องคอมพิวเตอร์ของคุณ
- No Live Image:
- Check if the camera is properly mounted on the microscope.
- Ensure the microscope's light source is active and adjusted.
- Confirm that the correct camera device is selected within the software.
- คุณภาพของภาพต่ำ:
- Adjust the microscope's focus and illumination.
- Clean the camera lens and microscope optics.
- Check software settings for exposure, white balance, and resolution.
7. ข้อมูลจำเพาะ
| คุณสมบัติ | รายละเอียด |
|---|---|
| แบบอย่าง | MU900-CK |
| ความละเอียดเซนเซอร์ | 9.1 ล้านพิกเซล |
| อินเทอร์เฟซ | ยูเอสบี 2.0 |
| ความเข้ากันได้ | Windows XP/Vista/7/8/10, Mac OS X 10.6 & Up, Linux |
| Mounting Sizes | 23mm, 30mm, 30.5mm, C-mount |
| Software Features (Windows) | Stitching, EDF, Video Recording, Measurement, Annotations |
| Software Features (Mac) | Still Image Capture, Video Recording, Color/Exposure Control |
| ขนาด | 6.69 x 5.91 x 2.36 นิ้ว |
| น้ำหนัก | 1.13 ปอนด์ |
| แหล่งพลังงาน | สายไฟ (ผ่าน USB) |
8. การรับประกันและการสนับสนุน
For warranty information or technical support, please refer to the documentation included with your product or visit the official AmScope website. Contact their customer service for assistance with product operation, troubleshooting, or parts replacement.
AmScope Official Webเว็บไซต์: www.amscope.com