1. บทนำ
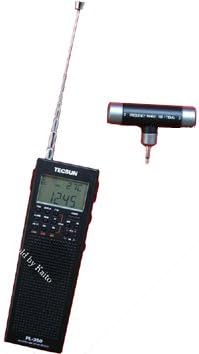
The Tecsun PL-360 is a compact, portable digital radio featuring PLL synthesized tuning and Digital Signal Processing (DSP) technology. It is designed to receive AM, FM, and Shortwave (SW) broadcasts, offering clear audio quality and a range of tuning options. This manual provides detailed instructions for the proper setup, operation, and maintenance of your PL-360 radio.
2. ข้อควรระวังเพื่อความปลอดภัย
- อย่าวางวิทยุไว้ในที่ที่มีอุณหภูมิสูงหรือต่ำเกินไป แสงแดดโดยตรง หรือความชื้นสูง
- หลีกเลี่ยงการทำวิทยุตกหรือได้รับแรงกระแทกรุนแรง
- Use only specified batteries (AA) and ensure correct polarity during installation.
- Do not attempt to disassemble or modify the radio. Refer servicing to qualified personnel.
- เก็บวิทยุให้ห่างจากสนามแม่เหล็กแรงสูง
3. เนื้อหาบรรจุภัณฑ์
ตรวจสอบว่ามีรายการทั้งหมดอยู่ในแพ็คเกจ:
- Tecsun PL-360 Radio
- หูฟังสเตอริโอ
- External AM Antenna
- Soft Antenna (for enhanced SW/FM reception)
- กระเป๋าใส่อุปกรณ์
- คู่มือการใช้งาน (ภาษาอังกฤษ)
- USB Charging Cable (Mini-USB)


4. สินค้าหมดview
Familiarize yourself with the radio's controls and features.


4.1. การควบคุมและพอร์ต
- จอแสดงผล LCD: Shows frequency, time, signal strength, temperature, and other indicators.
- ปุ่มเปิด/ปิด: เปิด/ปิดวิทยุ
- ปุ่มปรับ: สำหรับการปรับความถี่ด้วยตนเอง
- การควบคุมระดับเสียง: ปรับระดับเอาท์พุตเสียง
- Band Buttons (AM, FM, SW): Selects the desired frequency band.
- ETM Button: Activates Easy Tuning Mode for comprehensive scanning.
- ปุ่ม ATS: Initiates Automatic Tuning Storage.
- Memory (MEM) Buttons: For storing and recalling favorite stations.
- Alarm/Sleep Timer Buttons: Configures alarm and sleep functions.
- DC-IN 5V (Mini-USB) Port: For external power and charging rechargeable batteries.
- แจ็คหูฟัง: For connecting stereo earphones or external antennas.
- External AM Antenna Jack: Dedicated input for the high-sensitivity AM antenna.
5. การตั้งค่า
5.1. การติดตั้งแบตเตอรี่
The PL-360 requires three (3) AA batteries (not included). Open the battery compartment cover on the back of the radio. Insert the batteries according to the polarity markings (+/-) inside the compartment. Close the cover securely.
5.2. External Power and Charging
The radio can be powered via its 5V mini-USB DC input jack. When using rechargeable AA batteries (Ni-MH recommended), connecting the radio to a 5V USB power source (e.g., computer USB port, USB wall adapter) will charge the batteries. The radio features a built-in charging circuit for this purpose.
6. คู่มือการใช้งาน
6.1. เปิด/ปิดเครื่องและปรับระดับเสียง
- เปิดเครื่อง: กดปุ่ม พลัง ปุ่ม.
- หมดแรง: กดปุ่ม พลัง ปุ่มอีกครั้ง
- การปรับระดับเสียง: หมุน ปริมาณ knob on the side of the radio to increase or decrease the sound level.
6.2. การเลือกวงดนตรี
Press the corresponding band button to switch between frequency ranges:
- เอฟเอ็ม: For Frequency Modulation broadcasts (87-108 MHz).
- น. (MW): สำหรับ Amplitude Modulation broadcasts (520-1710 KHz).
- สว.: For Shortwave broadcasts (2300-21950 KHz).
6.3. วิธีการปรับแต่ง
The PL-360 offers several methods for tuning into stations:
6.3.1. Manual Tuning (Tuning Knob)
หมุน การปรับแต่ง knob on the side of the radio to manually scan through frequencies. The frequency displayed on the LCD will change accordingly.
6.3.2. Automatic Tuning Storage (ATS)
ATS automatically scans and stores strong stations within the current band into memory. Press and hold the เอทีเอส button to activate this function. The radio will scan and save stations, typically filling memory slots from the beginning.
6.3.3. Easy Tuning Mode (ETM)
ETM is a unique feature that performs a comprehensive scan of all receivable frequencies without occupying permanent memory spaces. This is ideal for travelers or for quickly finding active stations on Shortwave. Press the อีทีเอ็ม button to initiate an ETM scan. Once complete, you can browse the temporarily stored stations using the tuning knob or arrow buttons.
6.3.4. Memory Tuning
The radio has 450 memory presets. To store a station:
- ปรับไปยังสถานีที่ต้องการ
- กดปุ่ม เมม button. The memory location will flash.
- Use the tuning knob or arrow buttons to select a desired memory slot.
- กด เมม again to confirm storage.
ในการเรียกคืนสถานีที่จัดเก็บไว้ ให้กด VM (View Memory) button, then use the tuning knob or arrow buttons to navigate through stored stations.
6.4. คุณสมบัติขั้นสูง
- นาฬิกาปลุก: กดปุ่ม เตือน button to set the alarm time. The radio can wake you up to a set frequency.
- เวลานอน: กดปุ่ม นอน button to set a duration (e.g., 120, 90, 60, 30, 10 minutes) after which the radio will automatically turn off.
- เครื่องวัดอุณหภูมิ: The radio includes a built-in thermometer. Press the แสดง button to cycle through display modes, including temperature.
- ล็อคกุญแจ: To prevent accidental button presses, press and hold the ล็อค button (often combined with another function button). Repeat to unlock.
- จอแสดงผลแบ็คไลท์: The LCD display has a backlight for low-light conditions. It typically activates with a button press and turns off after a few seconds.
6.5. การใช้เสาอากาศ
- เสาอากาศยืดไสลด์: For optimal FM and Shortwave reception, extend the telescopic antenna fully. Adjust its angle and direction for best signal.
- External AM Antenna: For enhanced AM (MW) reception, plug the provided high-sensitivity external AM antenna into its dedicated jack. Position this antenna away from the radio and rotate it for the strongest signal.
- Soft Antenna: For improved Shortwave reception, connect the soft wire antenna to the earphone jack. Extend the wire as much as possible.
7. การบำรุงรักษา
- การทำความสะอาด: เช็ดวิทยุด้วยผ้านุ่มและแห้ง ห้ามใช้น้ำยาทำความสะอาดที่มีฤทธิ์กัดกร่อนหรือตัวทำละลาย
- พื้นที่จัดเก็บ: หากจะเก็บวิทยุไว้เป็นเวลานาน ควรนำแบตเตอรี่ออกเพื่อป้องกันการรั่วไหล เก็บไว้ในที่แห้งและเย็น
- การดูแลเสาอากาศ: Handle the telescopic antenna carefully to avoid bending or breaking.
8 การแก้ไขปัญหา
| ปัญหา | สาเหตุที่เป็นไปได้ | สารละลาย |
|---|---|---|
| ไม่มีไฟฟ้า | Dead batteries; Incorrect battery installation; Power button not pressed. | Replace batteries; Check polarity; Press POWER button. |
| รับสัญญาณไม่ดี | Weak signal; Antenna not extended/positioned correctly; Interference. | Extend/adjust antenna; Use external AM/soft antenna; Move away from electronic devices. |
| ไม่มีเสียง | Volume too low; Earphones connected; Mute activated. | Increase volume; Disconnect earphones; Check for mute function. |
| จอแสดงผลไม่ทำงาน | Low battery; Radio off. | Replace batteries; Turn radio on. |
9. ข้อมูลจำเพาะ
- พื้นที่ครอบคลุมความถี่:
- เอฟเอ็ม: 87-108 MHz
- AM (MW): 520-1710 KHz
- SW: 2300-21950 KHz
- วิธีการปรับแต่ง: Manual, ATS, ETM, Memory
- การตั้งค่าหน่วยความจำ: 450
- แหล่งพลังงาน: 3 x AA batteries (not included) or 5V DC via Mini-USB
- การชาร์จ: Built-in charger for rechargeable AA batteries
- เอาต์พุตเสียง: Stereo (via earphones)
- คุณสมบัติพิเศษ: DSP Technology, Alarm Clock, Sleep Timer, Thermometer, Key Lock
- ขนาด : Approximately 1.02"D x 2.09"W x 6.26"H (26 x 53 x 159 mm)
- น้ำหนัก: ประมาณ 4.5 ออนซ์ (128 กรัม) โดยไม่รวมแบตเตอรี่
10. การรับประกันและการสนับสนุน
The Tecsun PL-360 radio typically comes with a 1-year manufacturer's warranty from the date of purchase. Please retain your proof of purchase for warranty claims.
For technical support or warranty inquiries, please refer to the contact information provided by your retailer or the official Tecsun webเว็บไซต์.