
การแนะนำ
The Kaito KA350GY Voyager Trek is a versatile multi-powered radio designed for emergency preparedness and outdoor activities. It features AM/FM, Shortwave (SW), and NOAA Weather band reception, a 5-LED flashlight, and a USB charging port for external devices. This manual provides instructions for its setup, operation, maintenance, and troubleshooting.
คุณสมบัติหลัก
- วิทยุหลายย่านความถี่: Receives AM (530-1710KHz), FM (87-108MHz), Shortwave (SW1: 3-8 MHz, SW2: 9-18 MHz), and 7 pre-programmed NOAA Weather channels.
- แหล่งพลังงานหลายแหล่ง: Internal rechargeable Ni-MH battery (charged via hand crank, solar panel, USB, or optional AC/DC adapter), and 3 AAA batteries (not included).
- 5-LED Flashlight: Integrated super bright flashlight for illumination.
- พอร์ตชาร์จ USB: Allows charging of external devices like cell phones and MP3 players.
- การออกแบบกะทัดรัดและพกพาสะดวก: Ideal for emergencies, campการเดินทางและการท่องเที่ยว
การตั้งค่า
1. การติดตั้งแบตเตอรี่และการชาร์จครั้งแรก
The KA350GY comes with a built-in rechargeable Ni-MH battery pack. Before initial use, ensure this battery pack is properly connected. It is typically located within the AAA battery compartment. If using optional AAA batteries, insert three AAA batteries into the compartment, observing correct polarity.
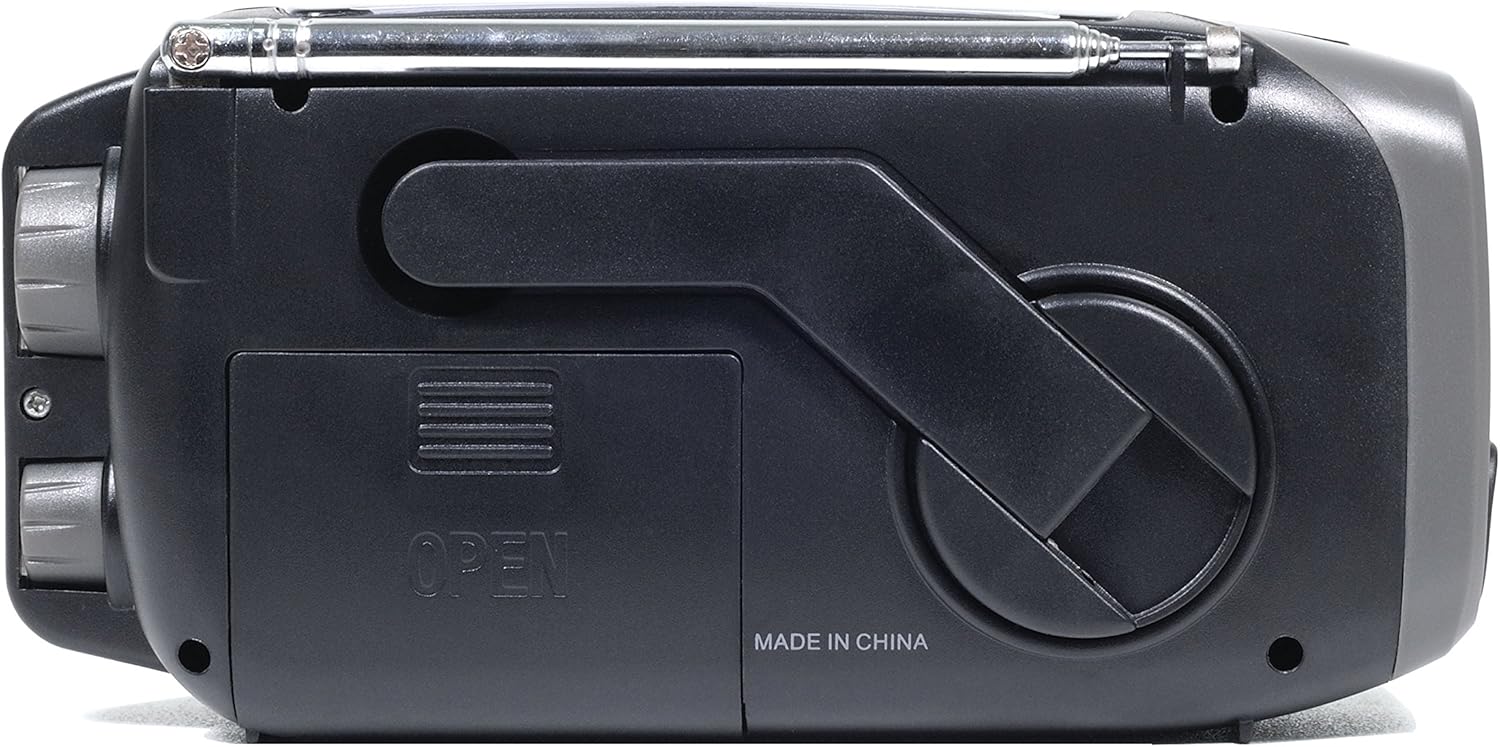
ภาพ: ด้านหลัง view of the radio, highlighting the battery compartment and hand crank.
For optimal performance, fully charge the internal Ni-MH battery before first use. Use one of the following methods:
- การชาร์จ USB: Connect the radio to a computer's USB port or a USB wall adapter (not included) using the provided USB cable.
- มือหมุน: Rotate the hand crank clockwise or counter-clockwise for several minutes. Ensure the crank is turned gently and kept properly aligned to prevent damage.
- แผงโซล่าเซลล์: Place the radio with the solar panel facing direct sunlight. Note that solar charging provides a trickle charge and is best for maintaining battery life or operating the radio without draining the battery, rather than a rapid full charge.
2. Power Source Selection
Locate the power source switch. For most operations, set it to the "Power" position to utilize the internal rechargeable battery or external power. If using AAA batteries, switch to the "Battery" position.
คำแนะนำการใช้งาน
1. การใช้งานวิทยุ
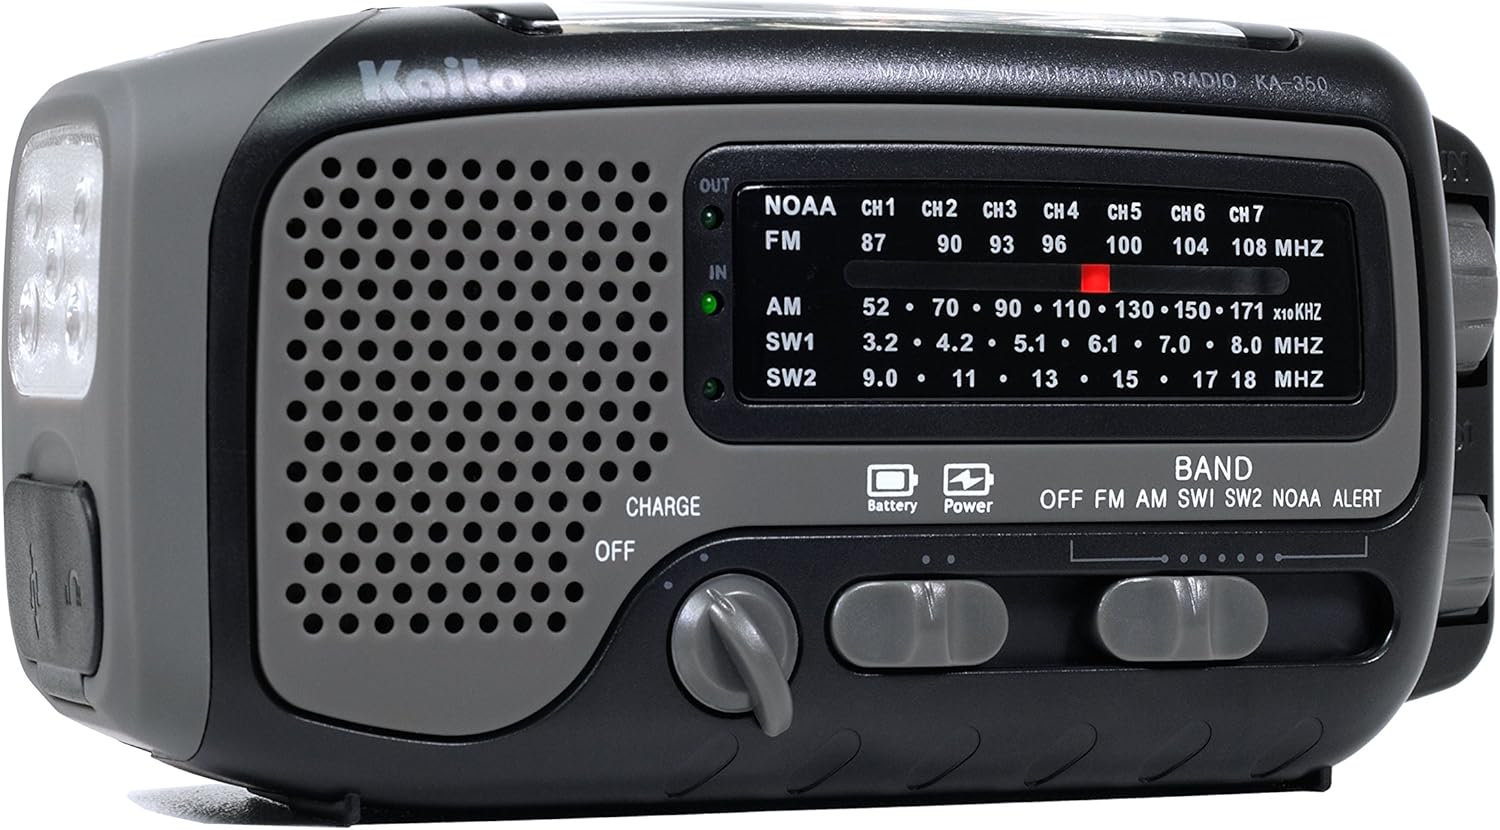
ภาพ: ด้านหน้า view of the radio, displaying the speaker, tuning dial, and band selection switches.
- เปิด: Rotate the Volume knob clockwise to turn on the radio and adjust the volume.
- เลือกแบนด์: Use the BAND switch to select between OFF, FM, AM, SW1, SW2, NOAA, or ALERT.
- สถานีจูน: Rotate the TUNING knob to find your desired station. Extend the telescopic antenna for better FM and SW reception. For AM, rotate the radio for optimal signal.
- NOAA ช่องอากาศ: The 7 NOAA channels are pre-programmed. Simply select the NOAA band, and then use the channel selector to choose between CH1-CH7.
- NOAA Alert: In ALERT mode, the radio will remain silent until a weather alert is broadcast, at which point it will sound an alarm and play the alert message.
2. การใช้งานไฟฉาย

ภาพ: มุมเอียง view of the radio, highlighting the 5-LED flashlight and the hand crank.
Press the FLASH LIGHT button located near the flashlight to turn it on or off. The flashlight uses 5 LEDs for bright illumination.
3. การชาร์จอุปกรณ์ภายนอก

ภาพ: จบ views of the radio, illustrating the USB output port for charging external devices and the micro-USB input for charging the radio itself.
The radio features a USB output port (labeled "OUT") to charge small electronic devices such as cell phones, MP3 players, or digital cameras. Connect your device's charging cable to this port. Ensure the radio has sufficient charge in its internal Ni-MH battery for effective charging.
Note: Direct charging of some high-power devices may be slow or inconsistent. For more reliable charging of such devices, consider charging an external power bank with the radio first, then using the power bank to charge your device.
การซ่อมบำรุง
- การดูแลแบตเตอรี่ If storing the radio for extended periods without use, remove any AAA batteries to prevent leakage and damage. The internal Ni-MH battery should be periodically charged to maintain its health.
- การทดสอบปกติ: To ensure readiness, operate and test all radio functions at least once a year.
- การทำความสะอาด: เช็ดภายนอกวิทยุด้วยผ้านุ่มๆamp ผ้า. หลีกเลี่ยงการใช้สารเคมีที่รุนแรงหรือน้ำยาทำความสะอาดที่มีฤทธิ์กัดกร่อน
- จัดการด้วยความระมัดระวัง: The hand crank and telescopic antenna are delicate components. Operate the hand crank gently and extend/retract the antenna with reasonable care to prevent bending or breakage.
- พื้นที่จัดเก็บ: Store the radio in a cool, dry place away from extreme temperatures and direct sunlight.
การแก้ไขปัญหา
| ปัญหา | สาเหตุที่เป็นไปได้ / วิธีแก้ไข |
|---|---|
| วิทยุไม่เปิด |
|
| Poor radio reception (AM/FM/SW). |
|
| อุปกรณ์ภายนอกไม่ชาร์จไฟ |
|
| Hand crank feels stiff or breaks. |
|
ข้อมูลจำเพาะ
- แบบอย่าง: KA350GY
- ขนาด (ยาว x กว้าง x สูง): ประมาณ 6 x 2 x 3 นิ้ว (15.24 x 5.08 x 7.62 ซม.)
- น้ำหนัก: ประมาณ 8 ออนซ์ (227 กรัม)
- วงวิทยุ:
- AM: 530 - 1710 kHz
- ความถี่วิทยุ FM: 87 - 108 เมกะเฮิร์ตซ์
- Shortwave (SW1): 3 - 8 MHz
- Shortwave (SW2): 9 - 18 MHz
- NOAA Weather: 7 pre-programmed channels
- แหล่งพลังงาน:
- Internal Rechargeable Ni-MH Battery Pack
- 3 x แบตเตอรี่ AAA (ไม่รวม)
- มือหมุนไดนาโม
- แผงโซล่าเซลล์
- USB Input (5V DC)
- ไฟฉาย: 5-LED
- เอาท์พุต: พอร์ต USB (สำหรับชาร์จอุปกรณ์ภายนอก)
- ส่วนประกอบที่รวมอยู่: Earphone, User Manual
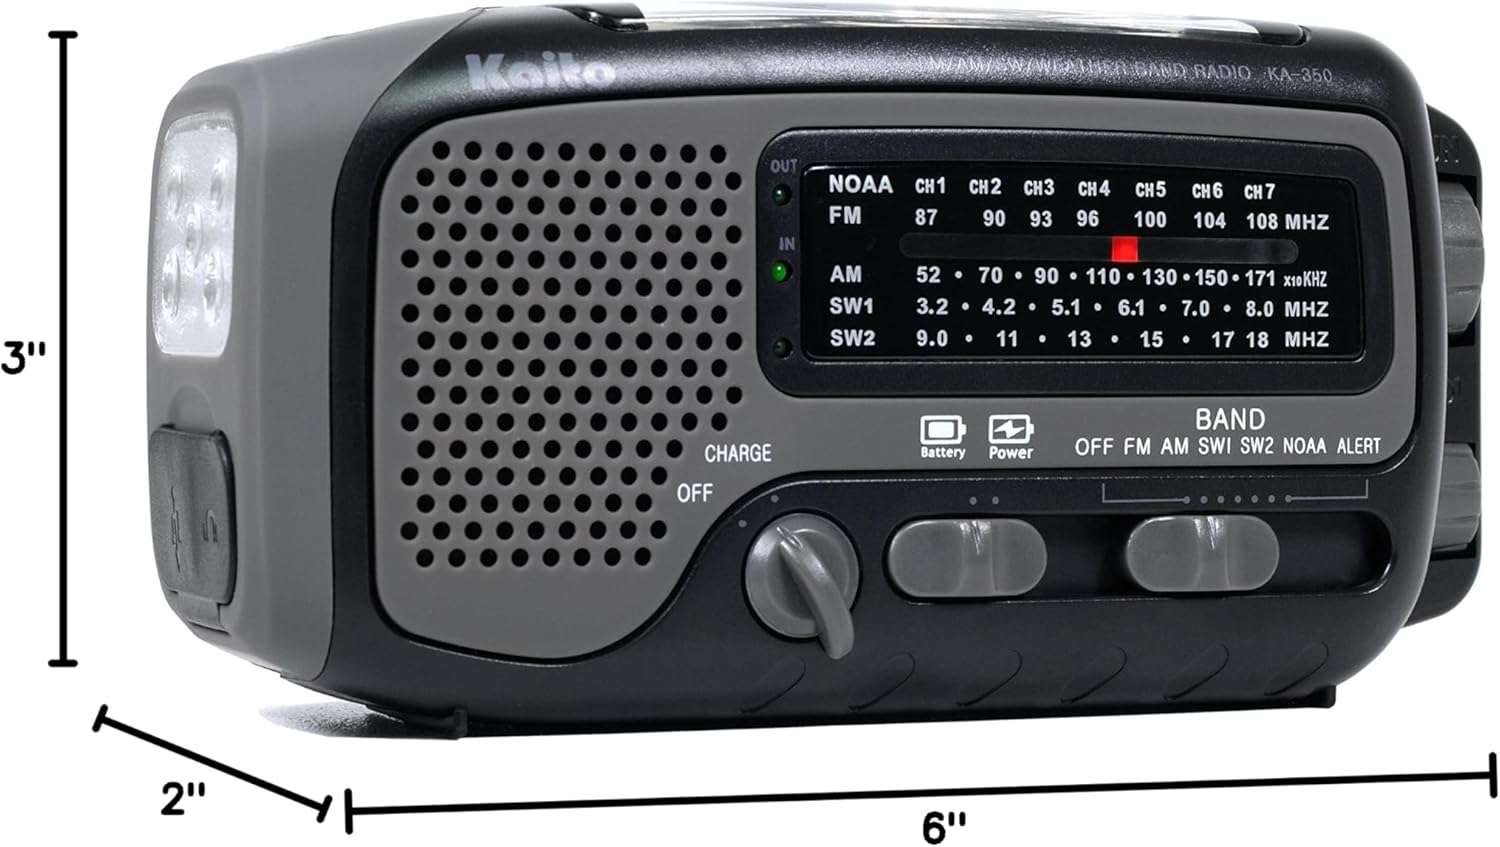
Image: Diagram illustrating the physical dimensions of the Kaito KA350GY radio.
ข้อมูลการรับประกัน
Warranty details for the Kaito KA350GY radio are typically provided with the product packaging or can be found on the official Kaito website. Please refer to these sources for specific terms and conditions regarding your product's warranty coverage.
การสนับสนุนลูกค้า
For technical assistance, troubleshooting beyond this manual, or inquiries about your Kaito KA350GY radio, please visit the official Kaito website or contact their customer support using the information provided in your product documentation.