
1. บทนำ
The D-Link DES-1210-52 is a 48-port Fast Ethernet Smart Switch designed for small to medium-sized businesses. It features 48 10/100Mbps ports, two 10/100/1000Mbps Gigabit ports, and two combo SFP Gigabit uplinks, providing flexible connectivity options. This switch offers advanced management functions, including VLANs, QoS, and security features, to enhance network performance and security. This manual provides essential information for the proper installation, configuration, and operation of your DES-1210-52 switch.
2. เนื้อหาบรรจุภัณฑ์
Verify the contents of your DES-1210-52 package. If any item is missing or damaged, please contact your local D-Link reseller for assistance.
- D-Link DES-1210-52 Smart Switch
- สายไฟ
- Rack Mount Kit (two brackets and screws)
- ขายาง (สำหรับติดตั้งบนเดสก์ท็อป)
- CD-ROM (containing documentation and utility software)
- คู่มือการติดตั้งแบบด่วน
3. คำอธิบายทางกายภาพ
The DES-1210-52 switch features a standard 1U rack-mountable design. Understanding the front and rear panel components is crucial for proper installation and operation.
3.1. แผงด้านหน้า
The front panel includes all network ports, LED indicators, and a console port for management.
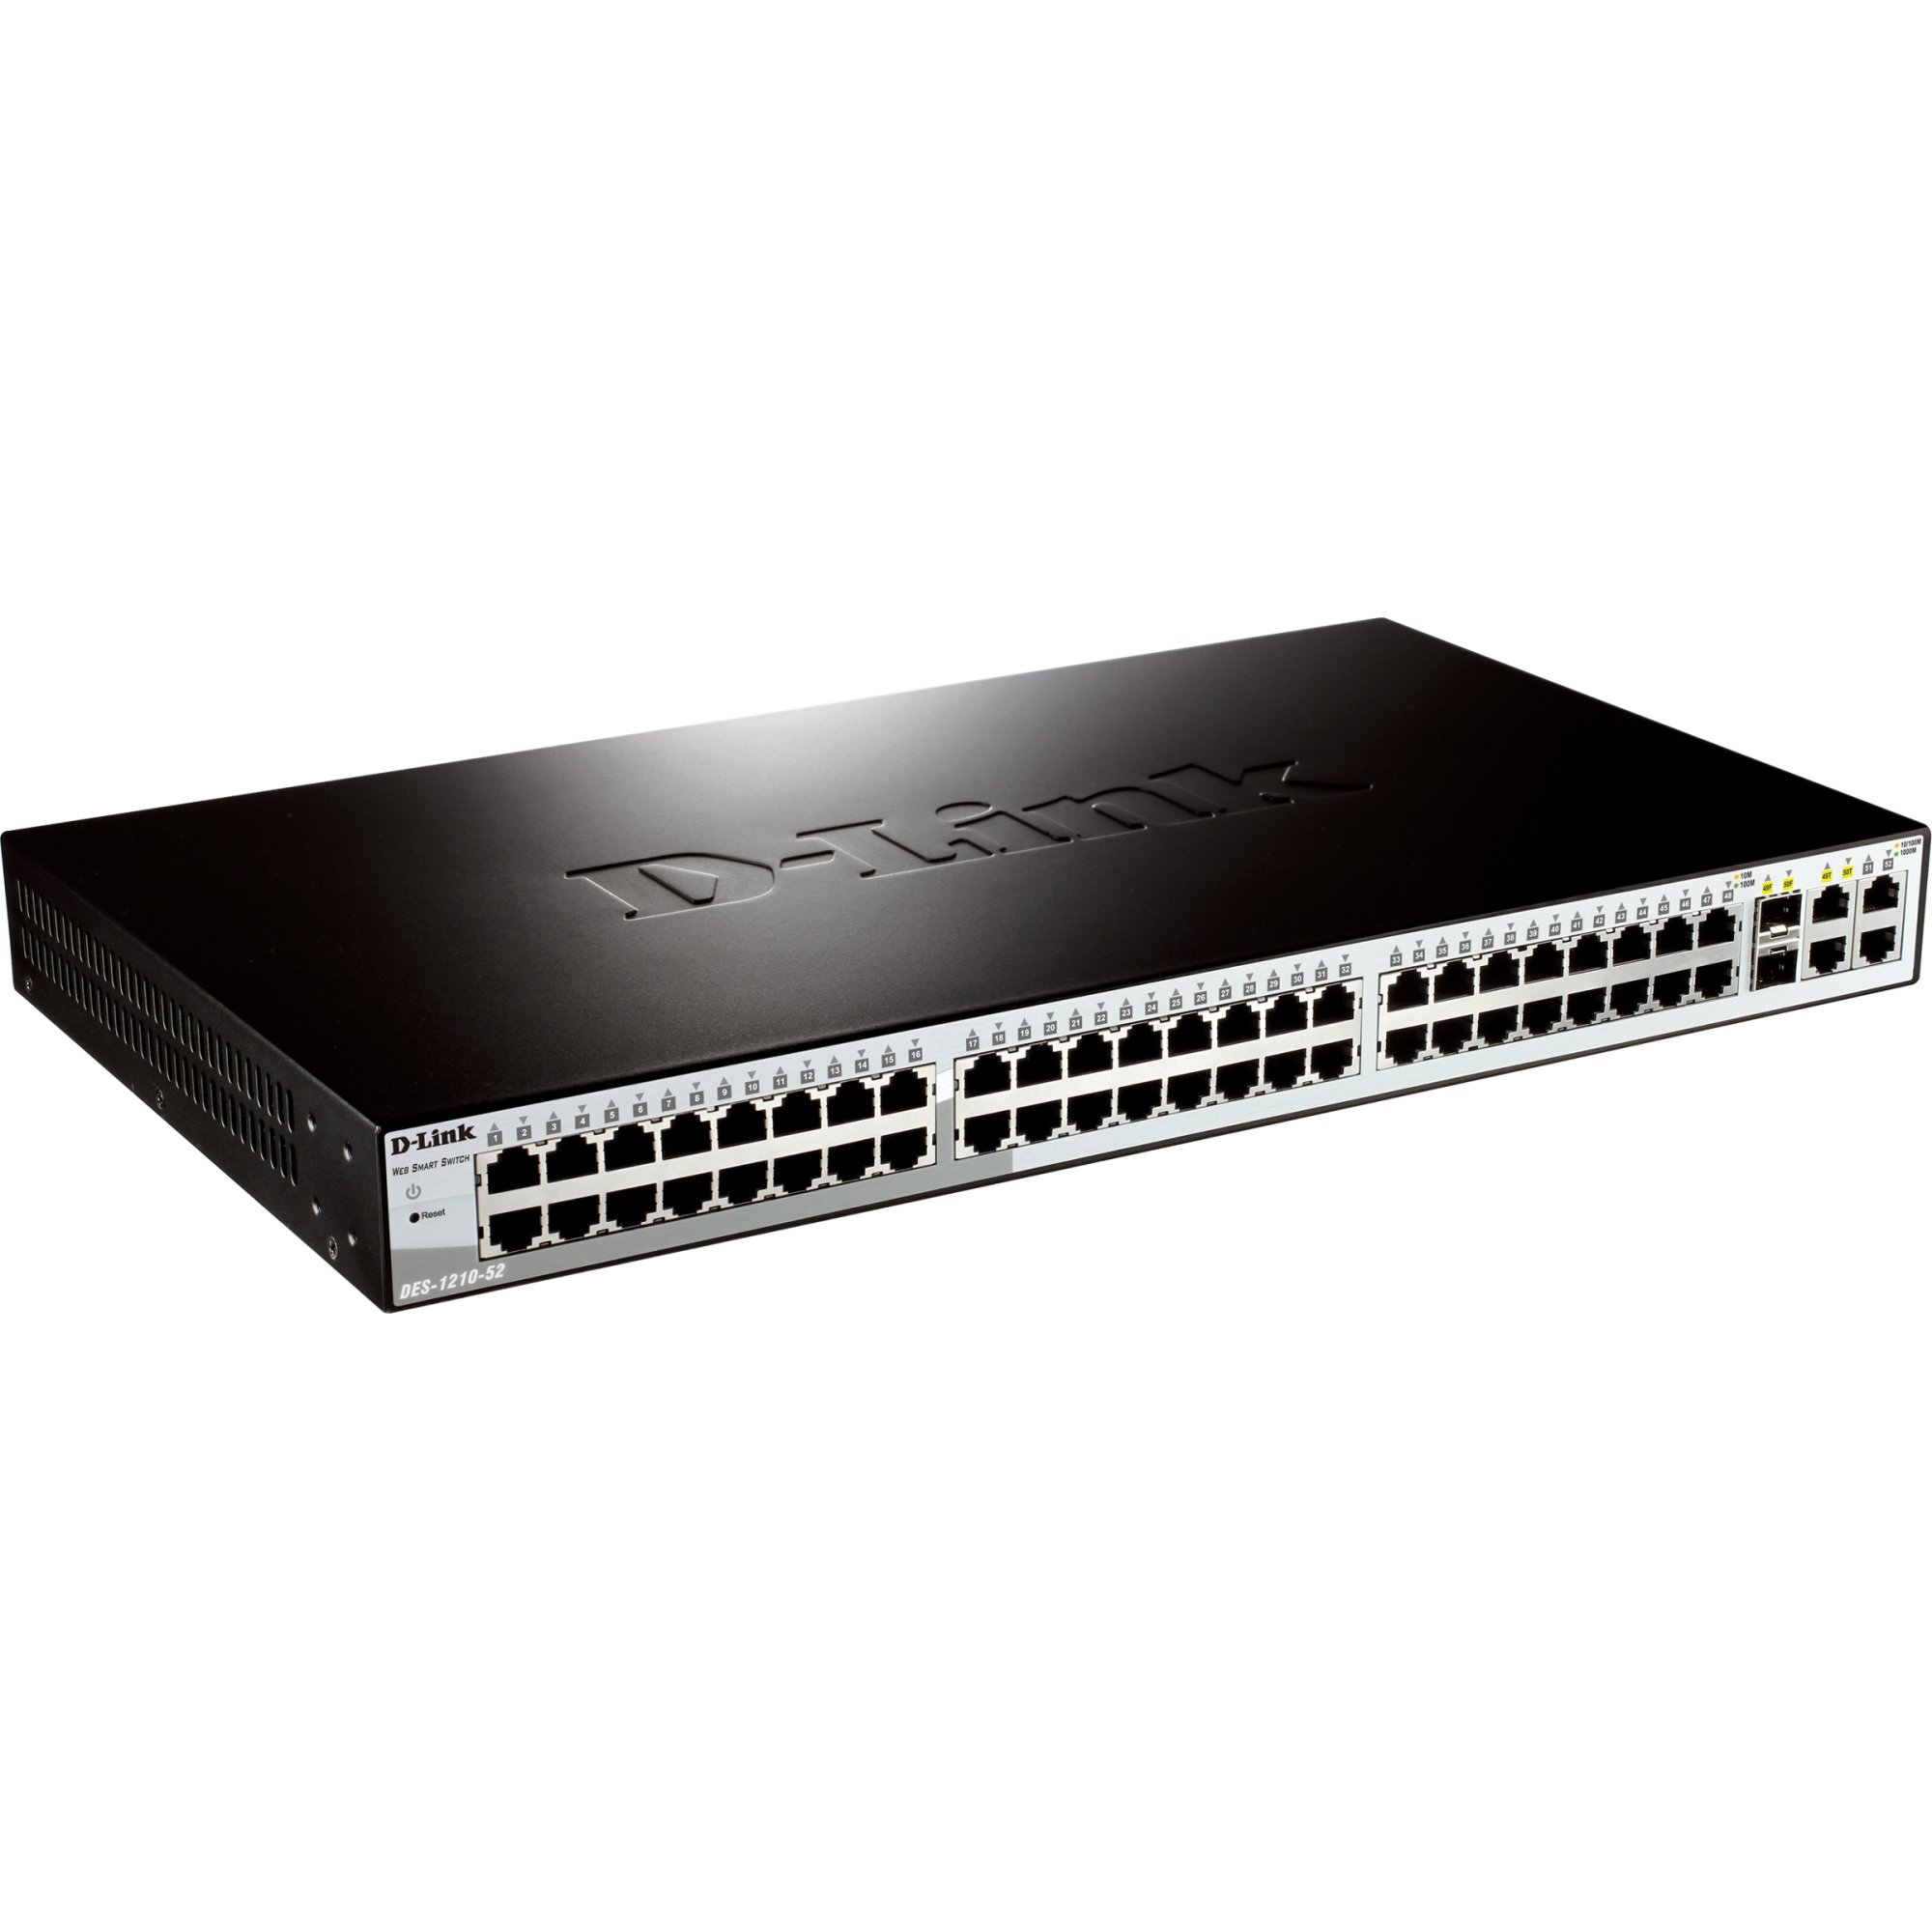
รูปที่ 1: ด้านหน้า view of the D-Link DES-1210-52 Smart Switch, showing 48 Fast Ethernet ports, 2 Gigabit Ethernet ports, and 2 SFP combo ports, along with LED indicators for power, link/activity, and speed.
- ไฟ LED แสดงสถานะ: Power, Link/Act (per port), Speed (per port).
- 10/100BASE-TX Ports (1-48): RJ-45 ports for Fast Ethernet connections.
- 10/100/1000BASE-T Ports (49-50): RJ-45 ports for Gigabit Ethernet connections.
- Combo SFP Ports (51-52): SFP slots that share bandwidth with Gigabit ports 49-50. When an SFP module is inserted, the corresponding Gigabit RJ-45 port is disabled.
- พอร์ตคอนโซล: RJ-45 port for command-line interface (CLI) access.
3.2. แผงด้านหลัง
The rear panel contains the power input and grounding screw.
- เต้ารับไฟฟ้ากระแสสลับ: Connects to the provided AC power cord.
- สกรูดิน: Provides an optional connection for grounding the device.
4. การตั้งค่า
This section outlines the steps for physically installing and connecting your D-Link DES-1210-52 Smart Switch.
4.1. การเตรียมสถานที่
- Ensure the installation site is well-ventilated and within the recommended operating temperature and humidity ranges.
- Place the switch on a sturdy, level surface or in a standard 19-inch equipment rack.
- ตรวจสอบให้แน่ใจว่ามีแหล่งจ่ายไฟที่เสถียรพร้อมใช้งาน
4.2. การติดตั้งเดสก์ท็อป
For desktop use, attach the included rubber feet to the bottom of the switch to prevent scratching and provide stability.
4.3. การติดตั้งชั้นวาง
To install the switch in a standard 19-inch equipment rack:
- Attach the two rack-mounting brackets to the sides of the switch using the provided screws.
- Secure the switch in the rack using the screws provided with the rack.
4.4. การเชื่อมต่อพลังงาน
Connect the supplied AC power cord to the power receptacle on the rear panel of the switch and then to a suitable power outlet. The Power LED on the front panel will illuminate.
4.5 การเชื่อมต่ออุปกรณ์เครือข่าย
Connect network devices (e.g., computers, servers, other switches) to the 10/100BASE-TX or 10/100/1000BASE-T ports using standard Ethernet cables. For fiber optic connections, insert compatible SFP transceivers into the SFP slots and connect fiber optic cables.
5. ปฏิบัติการ
The DES-1210-52 is a Smart Switch, offering various management options for configuration and monitoring.
5.1. การเข้าถึงเบื้องต้น
สามารถจัดการสวิตช์ได้ผ่านทาง Web-based GUI, a Command Line Interface (CLI) through the console port, or SNMP.
- Web- การจัดการตาม: By default, the switch obtains an IP address via DHCP. If no DHCP server is present, it will use a default IP address (refer to the Quick Installation Guide or CD-ROM documentation for the specific default IP). Connect a computer to any switch port and configure its IP address to be in the same subnet as the switch. Open a web เบราว์เซอร์และป้อนที่อยู่ IP ของสวิตช์
- การจัดการ CLI: Connect a console cable (RJ-45 to DB-9) from the switch's console port to a serial port on a computer. Use a terminal emulation program (e.g., PuTTY, Tera Term) with appropriate settings (e.g., 115200 baud, 8 data bits, no parity, 1 stop bit, no flow control).
5.2. การกำหนดค่าพื้นฐาน
After initial access, it is recommended to:
- เปลี่ยนรหัสผ่านผู้ดูแลระบบเริ่มต้น
- Configure a static IP address for the switch if a DHCP server is not consistently available or preferred.
- ตั้งเวลาและวันที่ของระบบ
- Save the configuration to prevent loss upon reboot.
6. การบำรุงรักษา
Regular maintenance ensures optimal performance and longevity of your D-Link DES-1210-52 Smart Switch.
- อัพเดตเฟิร์มแวร์: Periodically check the D-Link support website for the latest firmware versions. Updating firmware can provide new features, performance improvements, and security patches. Follow the instructions provided with the firmware update package carefully.
- การทำความสะอาด: Keep the switch free from dust and debris. Use a soft, dry cloth to clean the exterior. Ensure ventilation openings are clear. Do not use liquid or aerosol cleaners directly on the switch.
- การสำรองข้อมูลการกำหนดค่า: Regularly back up your switch configuration to an external device. This allows for quick restoration in case of a device failure or misconfiguration.
- การติดตามตรวจสอบสิ่งแวดล้อม: Ensure the operating environment remains within specified temperature and humidity limits to prevent overheating or moisture damage.
7 การแก้ไขปัญหา
This section provides solutions to common issues you might encounter with your DES-1210-52 Smart Switch.
7.1. Power LED is Off
- ตรวจสอบให้แน่ใจว่าสายไฟเชื่อมต่อกับสวิตช์และเต้ารับไฟฟ้าที่ใช้งานได้แน่นหนา
- Verify the power outlet is supplying power by testing it with another device.
7.2. No Link/Activity LED on a Connected Port
- Check that the Ethernet cable is properly connected at both ends.
- ตรวจสอบให้แน่ใจว่าอุปกรณ์ที่เชื่อมต่อเปิดอยู่และทำงานอย่างถูกต้อง
- ลองใช้สายเคเบิลอีเทอร์เน็ตอื่น
- Verify that the port on the connected device is active.
7.3. ไม่สามารถเข้าถึงได้ Web- อินเทอร์เฟซการจัดการตาม
- ตรวจสอบให้แน่ใจว่าที่อยู่ IP ของคอมพิวเตอร์ของคุณอยู่ในซับเน็ตเดียวกันกับที่อยู่ IP ของสวิตช์
- Verify the switch's IP address. If unknown, you may need to reset the switch to factory defaults (refer to the full manual for instructions, as this will erase all configurations).
- ปิดใช้งานไฟร์วอลล์หรือโปรแกรมป้องกันไวรัสใดๆ บนคอมพิวเตอร์ของคุณชั่วคราว เพื่อป้องกันการรบกวน
- ลองเข้าใช้งานอินเทอร์เฟซจากอุปกรณ์อื่นดู web browser or computer.
8. ข้อมูลจำเพาะ
| คุณสมบัติ | คำอธิบาย |
|---|---|
| หมายเลขรุ่น | ดีเอส-1210-52 |
| ยี่ห้อ | ดีลิงค์ |
| จำนวนพอร์ต | 48 (10/100Mbps) + 2 (10/100/1000Mbps) + 2 (Combo SFP) |
| ประเภทอินเทอร์เฟซ | RJ-45, SFP |
| อัตราการถ่ายโอนข้อมูล | 10/100 Mbps (Fast Ethernet), 1 Gbps (Gigabit Ethernet) |
| น้ำหนักสินค้า | 4.08 กิโลกรัม |
| อุปกรณ์ที่รองรับ | เดสก์ท็อป (และอุปกรณ์เครือข่ายอื่น ๆ ) |
| แพลตฟอร์ม | ไม่เฉพาะเจาะจงกับเครื่องจักร |
9. การรับประกันและการสนับสนุน
D-Link provides a limited warranty for its products. The specific terms and conditions of the warranty may vary by region. Please refer to the warranty information included with your product or visit the official D-Link website for detailed warranty statements.
For technical support, product documentation, firmware updates, and FAQs, please visit the D-Link support portal. You can typically find support resources by searching for your product model (DES-1210-52) on the D-Link webเว็บไซต์.
การสนับสนุน D-Link Webเว็บไซต์: www.dlink.com/support