1. บทนำ
This manual provides detailed instructions for the safe installation, operation, and maintenance of your Emerald P401TSW 6-inch Recessed Ceiling Light Fixture Kit. Please read all instructions carefully before beginning installation and retain this manual for future reference. Proper installation is crucial for safety and optimal performance.
2. ข้อมูลด้านความปลอดภัย
WARNING: RISK OF ELECTRIC SHOCK. Disconnect power at the circuit breaker or fuse box before installation or servicing. Failure to do so may result in serious injury or death.
- การเชื่อมต่อทางไฟฟ้าทั้งหมดต้องเป็นไปตามข้อกำหนดของท้องถิ่น กฎหมาย และมาตรฐานไฟฟ้าแห่งชาติ (National Electric Code - NEC)
- หากไม่แน่ใจเกี่ยวกับขั้นตอนการเดินสายไฟ ควรปรึกษาช่างไฟฟ้าที่มีคุณสมบัติเหมาะสม
- สวมแว่นตาและถุงมือเพื่อความปลอดภัยในระหว่างการติดตั้ง
- ตรวจสอบให้แน่ใจว่าอุปกรณ์ต่อลงดินถูกต้อง
- Do not install insulation within 3 inches of the fixture housing.
- โคมไฟนี้ออกแบบมาสำหรับใช้ภายในอาคารในที่แห้งหรือชื้นamp สถานที่เท่านั้น
3. เนื้อหาบรรจุภัณฑ์
ตรวจสอบว่าส่วนประกอบทั้งหมดมีอยู่ก่อนเริ่มการติดตั้ง:
- Recessed Housing (1)
- White Trim Ring (1)
- Frosted Glass Diffuser (1)
- อุปกรณ์สำหรับติดตั้ง (สกรู, ตัวเชื่อมสายไฟ)
- คู่มือการใช้งาน (เอกสารนี้)
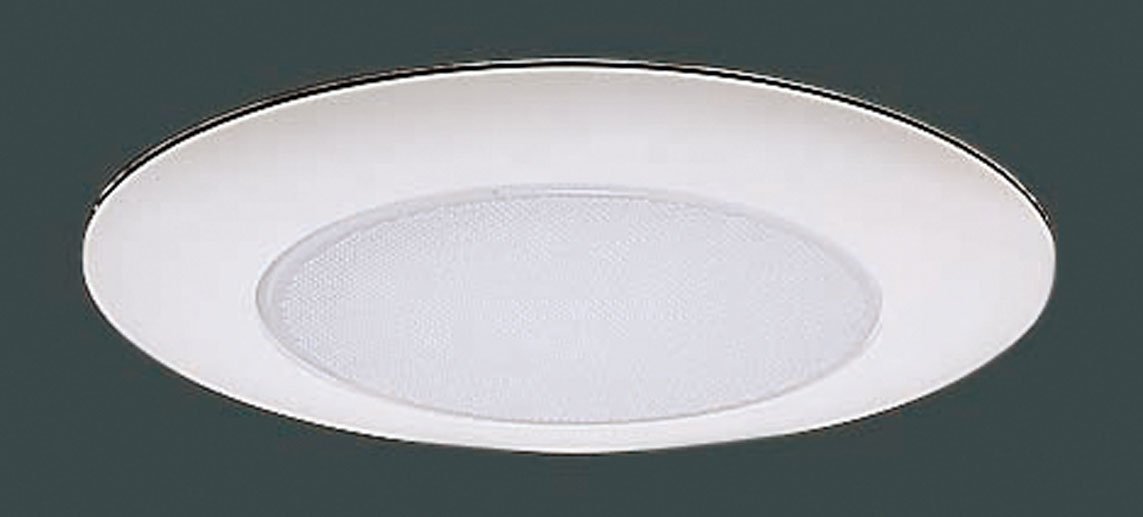
Image: Components of the Emerald P401TSW recessed light kit, showing the housing, white trim, and frosted glass diffuser.
4. เครื่องมือที่จำเป็น
โดยทั่วไปแล้ว เครื่องมือต่อไปนี้จำเป็นสำหรับการติดตั้ง:
- ไขควงหัวแฉก
- ไขควงหัวแบน
- คีมปอกสายไฟ
- สายวัด
- ดินสอ
- Drill with Hole Saw (6-1/4 inch recommended for a snug fit)
- Utility Knife (optional, for drywall)
- แว่นตานิรภัย
5. คำแนะนำในการติดตั้ง
Follow these steps carefully to install your recessed light fixture. This kit is designed for both new construction and remodel applications.
ขั้นตอนที่ 1: เตรียมพร้อมสำหรับการติดตั้ง
- ปิดไฟ: Locate the circuit breaker or fuse box controlling the area where you will install the fixture and turn off the power. Verify power is off using a voltagอีผู้ทดสอบ
- กำหนดตำแหน่ง: Choose a suitable location on the ceiling, ensuring there are no obstructions (joists, pipes, wires) behind the drywall.
- Mark and cut hole: Using a measuring tape and pencil, mark the center of your desired fixture location. Use a 6-1/4 inch hole saw to cut a circular opening in the drywall. Note: A slightly larger hole (e.g., 6-3/8 inch) may be necessary for easier installation and to prevent drywall damage, as reported by some users. Test fit before final wiring.
ขั้นตอนที่ 2: การเดินสายไฟโคมไฟ
- เปิดกล่องรวมสายไฟ: Open the access plate on the fixture's junction box.
- เชื่อมต่อสายไฟ: Feed the electrical supply wires through the knockout hole into the junction box. Using wire nuts, connect the wires as follows:
- เชื่อมต่อ สีดำ (hot) wire from the supply to the สีดำ สายไฟของอุปกรณ์ติดตั้ง
- เชื่อมต่อ สีขาว (neutral) wire from the supply to the สีขาว สายไฟของอุปกรณ์ติดตั้ง
- เชื่อมต่อ ทองแดงเปล่า or สีเขียว (ground) wire from the supply to the สีเขียว ground screw or wire in the junction box.
- Secure wiring: Ensure all connections are secure. Carefully tuck all wires and wire nuts into the junction box and close the access plate.
Step 3: Installing the Housing
- Insert housing: Carefully push the recessed housing up into the ceiling opening.
- Secure housing: The housing features spring clips or tension clips. Push these clips outwards and upwards to secure the housing firmly against the ceiling drywall. Ensure the housing is flush and level with the ceiling surface. If the housing does not sit level, it may require minor adjustment or shimming before proceeding.
Step 4: Installing the Trim and Glass
- ติดตั้งหลอดไฟ: Screw in the appropriate bulb (not included) into the socket. Refer to the specifications section for bulb type and wattage.
- Attach glass diffuser: Place the frosted glass diffuser into the trim ring.
- ติดตั้งตัดแต่ง: Align the trim ring with the housing. The trim typically has torsion springs or clips that attach to brackets inside the housing. Gently push the trim upwards until it snaps securely into place, flush with the ceiling.
ขั้นตอนที่ 5: ขั้นตอนสุดท้าย
- คืนพลังงาน: เปิดไฟกลับที่เบรกเกอร์หรือกล่องฟิวส์
- อุปกรณ์ทดสอบ: เปิดสวิตช์ไฟเพื่อตรวจสอบว่าโคมไฟทำงานอย่างถูกต้องหรือไม่
6. คู่มือการใช้งาน
Once installed, the Emerald P401TSW recessed light fixture operates like any standard ceiling light. Control it using a wall switch connected to the circuit. To replace the bulb, ensure power is off, allow the bulb to cool, then unscrew the old bulb and screw in a new one of the correct type and wattage.
7. การบำรุงรักษา
- การทำความสะอาด: Disconnect power before cleaning. Wipe the trim and glass diffuser with a soft, damp ผ้า ห้ามใช้น้ำยาทำความสะอาดที่มีฤทธิ์กัดกร่อนหรือตัวทำละลาย เพราะอาจทำให้พื้นผิวเสียหายได้
- การเปลี่ยนหลอดไฟ: Always turn off power before replacing a bulb. Allow the bulb to cool completely. Use only bulbs that meet the specifications listed in this manual.
- การตรวจสอบ: ตรวจสอบอุปกรณ์เป็นระยะๆ เพื่อหาร่องรอยความเสียหายหรือการเชื่อมต่อที่หลวม หากพบปัญหาใดๆ ให้ตัดการเชื่อมต่อไฟฟ้าและปรึกษาช่างไฟฟ้าผู้เชี่ยวชาญ
8 การแก้ไขปัญหา
| ปัญหา | สาเหตุที่เป็นไปได้ | สารละลาย |
|---|---|---|
| ไฟไม่ติด | ไม่มีแรงยึดติด การต่อสายหลวม หลอดไฟผิดพลาด | ตรวจสอบเบรกเกอร์/ฟิวส์ ตรวจสอบให้แน่ใจว่าสายไฟทั้งหมดเชื่อมต่อแน่นดีแล้ว (ปิดเครื่องก่อน) เปลี่ยนหลอดไฟ |
| ไฟกระพริบ | การต่อสายหลวม ประเภทหลอดไฟไม่ถูกต้อง ความเข้ากันไม่ได้ของไฟหรี่ | ตรวจสอบการเชื่อมต่อสายไฟ (ปิดเครื่อง) ตรวจสอบให้แน่ใจว่าหลอดไฟชนิดและวัตต์ถูกต้องtage Verify dimmer is compatible with bulb type |
| Fixture is not flush with ceiling | Improperly seated clips Hole cut too small | Re-seat spring clips firmly Carefully enlarge hole slightly if necessary (power off) |
9. ข้อมูลจำเพาะ
- แบบอย่าง: P401TSW
- ประเภทการแข่งขัน: Recessed Ceiling Light Kit
- ขนาด: 6-inch (nominal opening)
- ตัดแต่งเสร็จสิ้น: สีขาว
- กระจก: ดิฟฟิวเซอร์ฝ้า
- เล่มที่tage: 120V AC, 60Hz,
- ประเภทหลอดไฟ: Incandescent, LED, or CFL compatible (bulb not included)
- แม็กซ์ วัตtage: 60W (or equivalent LED/CFL)
- คะแนนสถานที่: แห้งหรือ Damp
10. ข้อมูลการรับประกัน
This Emerald product is covered by a limited warranty against defects in materials and workmanship. Please refer to the warranty card included with your purchase or visit the manufacturer's website for specific terms and conditions. Keep your proof of purchase for warranty claims.
11. การสนับสนุนลูกค้า
For technical assistance, missing parts, or warranty inquiries, please contact Emerald customer support. Refer to the packaging or the manufacturer's official website for current contact information (phone number, email, or support portal).